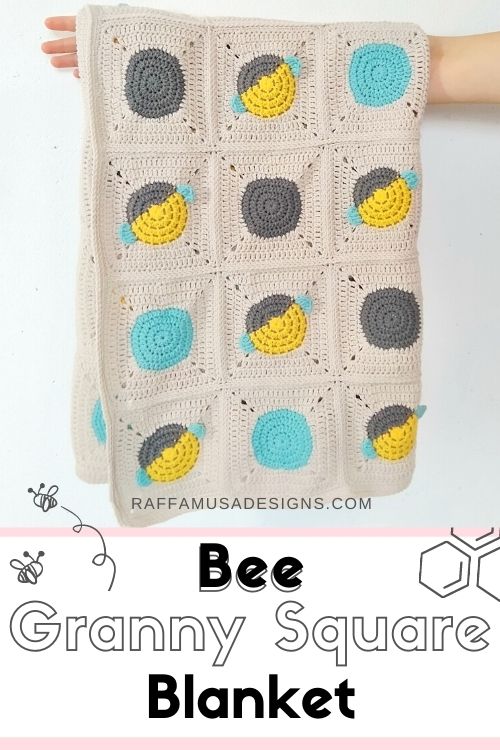
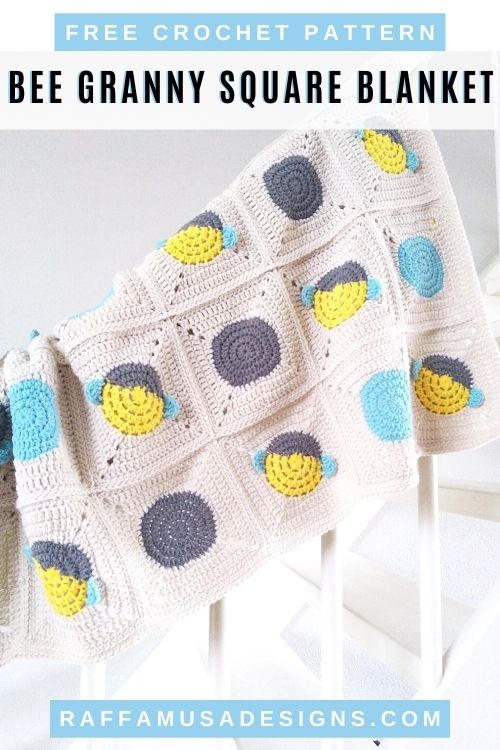
When a good old granny square meets a bee, the result is this sweet Bumble Bee Baby Blanket!
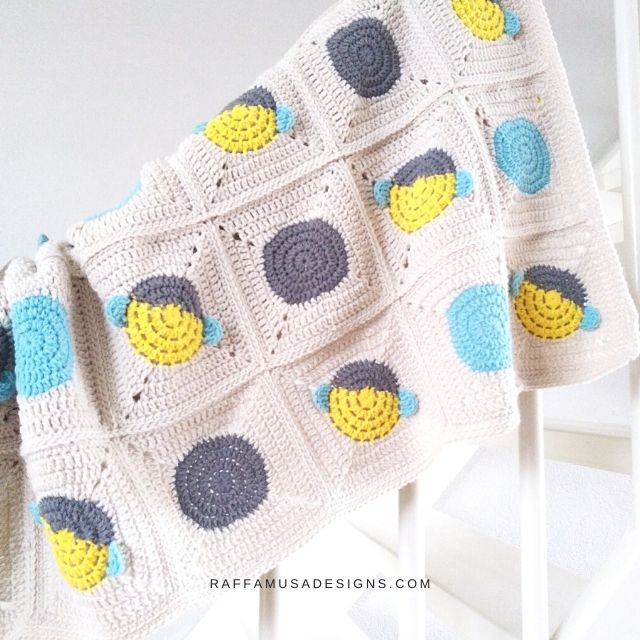
These crochet bees are definitely up to some serious honey-making, and they are happily buzzing all around!
To make this soft blanket, you’ll only need to crochet bumble bee granny squares and simple circle granny squares in your favorite. You could also add some flowers to the picture by making a few 3D simple flower granny squares!
You can easily customize this pattern, and make it as big or small as you want by adding a few more rows or columns of granny squares.
Find more crochet blanket ideas here on the blog…
Add this pattern to your Ravelry queue HERE and favorite it (– thank you!). Or save it for later by pinning it to your favorite crochet board on Pinterest using this pin!
Note: this post contains affiliate links. If you purchase something through the links on my blog, I might earn a commission. This will not have any effect on the price you pay. For more info, please, see my Privacy Policy.
PDF Printable Pattern
Download the pattern of the Bumble Bee Baby Blanket as a print-friendly PDF file on Ravelry, LoveCrafts, and Etsy!
What’s the Best Yarn for Baby Blankets?
The best yarn for baby blankets is for sure any baby Merino or baby acrylic yarn that is soft and delicate.
Avoid yarn that is too rough and itchy because that can be a problem in contact with the very sensitive skin of babies.
Of course, 100% baby merino wool would be ideal. However, keep in mind that baby blankets need to be washed often, so it’s best to choose a yarn that you can easily machine-wash!
My choice for my bee baby blanket was Paintbox Yarns Baby DK. The huge amount of available colors made it an easy choice! But besides the beautiful color options, this yarn is also very soft and affordable. So, I’ll consider it again for any future projects!
If you would like to use a different kind of yarn, make sure to check your gauge or simply take into account that the final size of your blanket might differ from the ones in the pattern!
Materials
- 4-mm (G/6 USA, 8 UK) Crochet Hook
- Paintbox Yarns Baby DK
- Tapestry Needle
Yarn – Colors and Yardage
| Abbreviation | Color | Yardage |
| Color A (CA) | Buttercup Yellow (722) | 112 m/122 yds |
| Color B (CB) | Slate Grey (705) | 270 m/287 yds |
| Color C (CC) | Vanilla Cream (706) | 1116 m/1223 yds |
| Color D (CD) | Washed Teal (128) | 160 m/175 yds |
Abbreviations (US Terms)
BLO – Back Loop Only
Ch – Chain
Dc – Double Crochet
Hdc – Half Double Crochet
Inc – Increase
MC – Magic Circle
Sc – Single Crochet
Sl St – Slip Stitch
St – Stitch
Tr – Treble Crochet
Yo – Yarn over
Special Stitches
Back Loop Only (BLO)
Learn how to crochet in the back loop HERE.
Increase (Inc)
One increase consists of 2 sts crocheted into the same indicated st.
Magic Circle (MC)
To learn how to crochet the magic circle, please, check out this step-by-step tutorial.
Pattern Notes
- If the pattern says “hdc 2”, it means that you have to crochet 1 hdc into each of the next 2 sts.
- (…) – Repeat the instruction within brackets for the indicated times.
- Join each round with a sl st between the last and first st of the round (not on top of the initial chains!).
- The stitch count is indicated within brackets at the end of each round’s instructions.
- The initial chains are not included in the stitch count.
- [CA] and [CB] indicate that you have to crochet the next series of sts using either color A or B.
- [CA/CB] indicates a hdc increase crocheted using CA for the first st and CB for the second st. Similarly, [CB/CA] indicates a hdc inc in which the first st is crocheted with CB and the second with CA.
- Scroll to the end of this page for how to change colors!!!
Granny Squares and Blanket Size
- Each granny square measures 5.5” (14 cm).
- The blanket is 33” (48 cm) by 39” (99 cm).
Gauge
Using your 4-mm crochet hook, make a MC.
Round 1. Ch 2, hdc 11 in the MC. Join the round with a sl st into the first hdc. (11 sts)
Round 2. Ch 1, hdc inc 11. Sl st to join. (22 sts)
Round 3. Ch 1, (hdc inc 1, hdc 1) 11 times. Sl st to join. (33 sts)
Your 3 rounds should measure 2.25″ (5.5. cm).
Construction
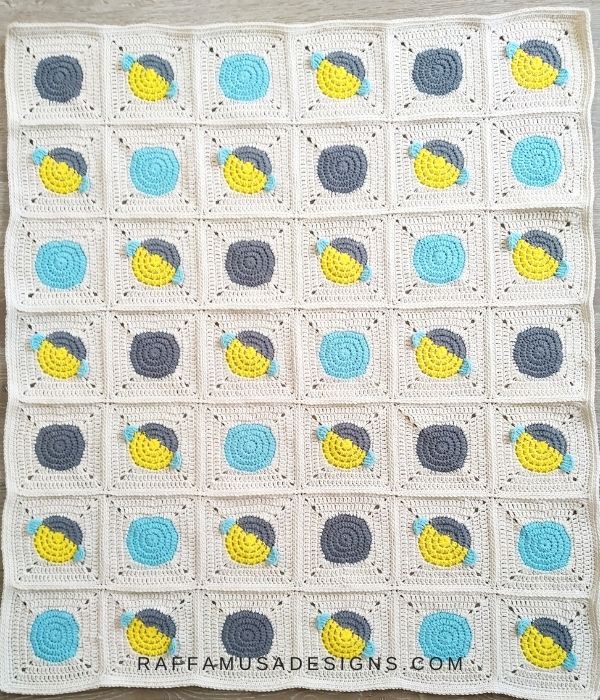
The blanket, as it is shown in the pictures, requires 21 Bee Granny Squares, and 21 Simple Circle Granny Squares, of which 10 are made in CB and 11 in CD.
Feel free to personalize your blanket by changing the bees/circles granny squares’ position. Also, you can make a smaller or larger blanket by adding or removing squares.
However, keep in mind that the yardage indicated in the “Yarn – Colors and Yardage” section refers to a blanket made with 21 bees, 10 CB simple circles, and 11 CD simple circles.
Granny Squares – Mix and Match
If you would like to add a few different granny squares to your blanket, you can take a look at these squares. They are all the same size and can be easily matched with your Bee Granny Squares!
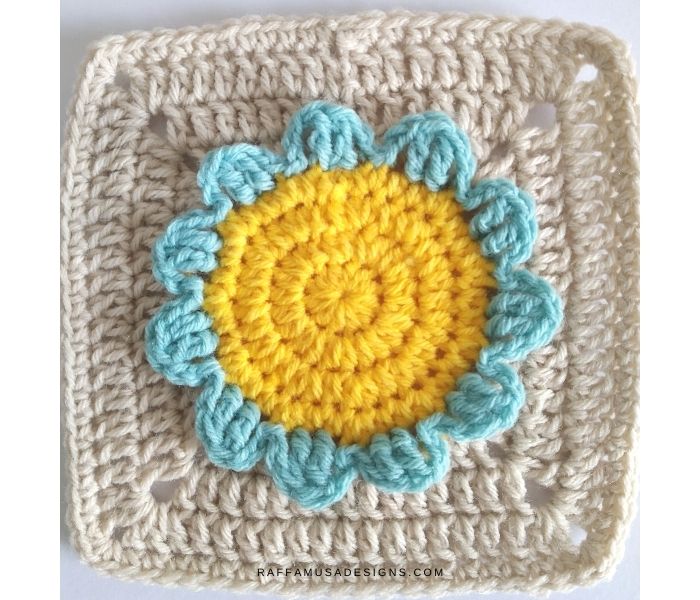
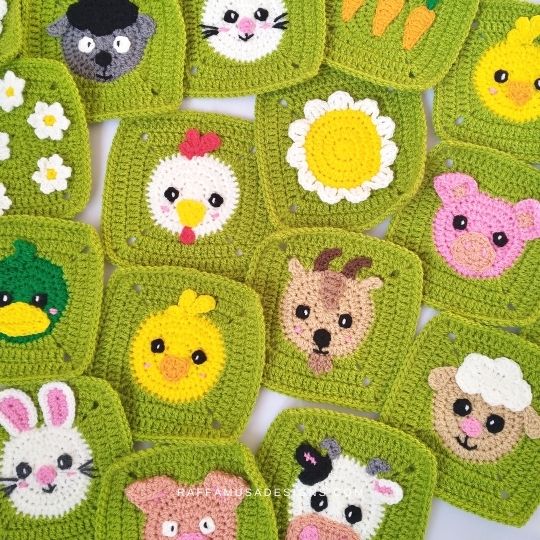
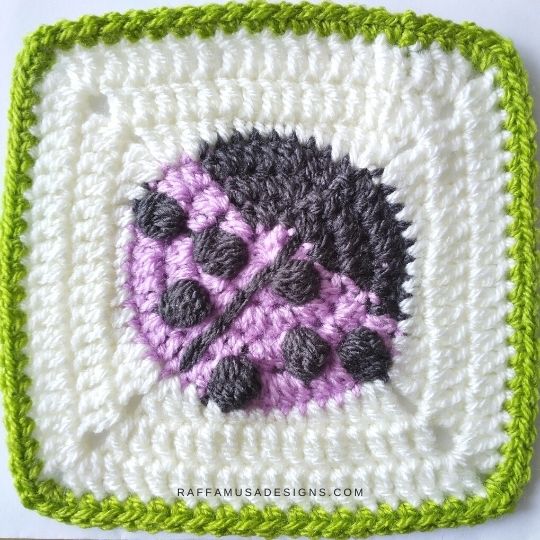
Simple Circle Granny Squares
You can find the free pattern of the Simple Circle Granny Square in this blog post.
- Make 10 simple circle granny squares with the following color scheme:
Rounds 1-4. Use CB;
Rounds 5-8. Use CC.
- Make 11 simple circle granny squares with the following color scheme:
Rounds 1-4. Use CD;
Rounds 5-8. Use CC.
Bumble Bee Granny Square Pattern
Using your 4-mm crochet hook and CA, make a MC.
Round 1. Ch 2, hdc 11 in the MC. Close the last st with CB. Join the round with a sl st into the first hdc. (11 sts)
Round 2. [CB] Ch 1, hdc inc 1, [CB/CA] hdc inc 1, [CA] hdc inc 7, [CB] hdc inc 2. Sl st to join. (22 sts)
Round 3. [CB] Ch 1, (hdc inc 1, hdc 1) twice, [CA] (hdc inc 1, hdc 1) 7 times, [CB] (hdc inc 1, hdc 1) twice. Sl st to join. (33 sts)
Round 4. [CB] Ch 1, (hdc 2, hdc inc 1) twice, hdc 1. [CA] hdc 1, (hdc inc 1, hdc 2) 6 times. [CA/CB] hdc inc 1. [CB] (hdc 2, hdc inc 1) twice. Close the last st with CC. Sl st to join. Cut CA and CB. (44 sts)
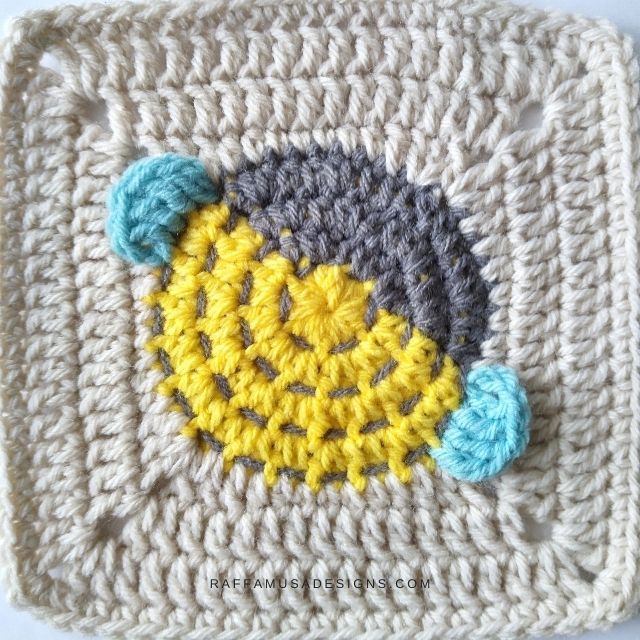
Round 5. [CC] Ch 2, dc 1 in the first st, (dc 1, hdc 2, sc 3, hdc 2, dc 1, dc inc 1, ch 2, dc inc 1) three times. Dc 1, hdc 2, sc 3, hdc 2, dc 1, dc inc 1, ch 2, dc 1 into the beginning st. Sl st to join. It will be a bit difficult to fit because there are already the starting ch-2 and the first dc. (13 sts on each side and ch-2 at the corners)
Round 6. [CC] Ch 2, dc 12. (In the ch-2 corner, [dc 1, ch 2, dc 1]. On the next side, dc 13) three times. [dc 1, ch 2, dc 1] into the last corner, dc 1. Sl st to join. (15 sts on each side and ch-2 at the corners)
Round 7. [CC] Ch 2, dc 13. (In the ch-2 corner, [dc 2, ch 1, dc 2]. On the next side, 15 dc) three times. [Dc 2, ch 1, dc 2] into the last corner, dc 2. Join the round with a sl st into the first dc. (19 sts on each side and ch-1 at the corners)
Round 8. [CC] Ch 1, sc 15. (In the ch-1 corner, [sc 1, ch 1, sc 1]. On the next side, sc 19) three times. [Sc 1, ch 1, sc 1] into the last corner, sc 4. Join the round with a sl st into the first sc. (21 sts on each side and ch-1 at the corners).
Fasten off and weave in your ends.
Bumble Bee Stripes
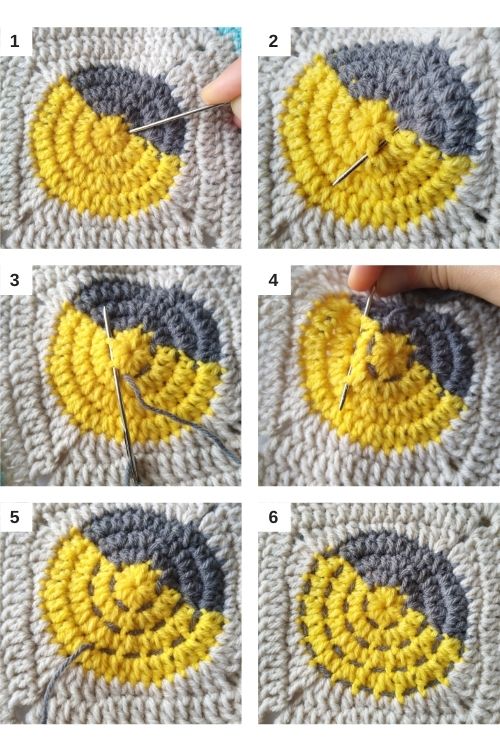
Cut a length of CB of approximately 23.5″ (60 cm).
(Right side facing). Using your tapestry needle, draw yarn through the stitches following the lines between rounds 1 and 2, rounds 2 and 3, rounds 3 and 4, and rounds 4 and 5.
See the images below for a better visual understanding.
Fasten off and weave in all your ends.
bee Wings
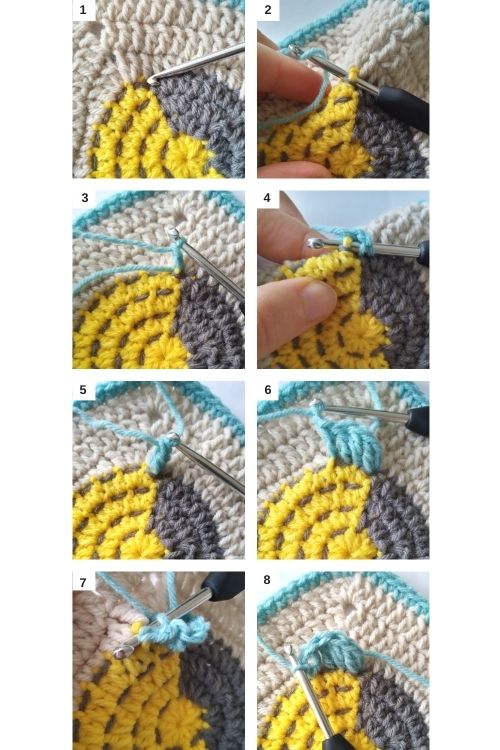
- Work on the right side of your square with the point where you joined all your rounds on top.
Wing 1. Join CD around the post of the first stitch in CA of round 4. Ch 2 and dc around the post of the same st. Tr around the posts of the next 2 sts. Dc 1 around the post of the next st, ch 2, and sl st around the same st post by inserting the hook behind (and not in front of!) your dc.
Fasten off and weave in your ends.
Wing 2. Join CD around the post of the 23rd stitch in CA of round 4. Ch 2 and dc around the post of the same st. Tr around the posts of the next 2 sts. Dc 1 around the post of the next st, ch 2, and sl st around the same st post by inserting the hook behind (and not in front of!) your dc.
Fasten off and weave in all your ends.
Joining the Squares
With CC, join your squares using your favorite method for joining. I used the zipper (or flat sl st) join, but you can sc or use the mattress st.
To join the squares, I found it convenient to start from the two bottom-left squares and move up from there (vertically).
Then, I joined all the other columns.
In the end, I joined the rows (horizontally).
Find HERE a few easy ways to join granny squares!
Little Tip
If you are using the zipper join, I suggest you go up one or two hook sizes so that the join is not too tight!
I used a 5.5 m (I/9 US, 5 UK) hook for joining my squares.
Blanket Border
(Right side facing) Using your 4-mm crochet hook, join CC in any of the sc sts of the outside of your blanket.
Round 1. Sc all around. At the corners, (sc, ch 1, sc) all in the ch-1 space. Join with a sl st into the first sc.
Note
If you joined your squares using sc or the zipper st, make 1 sc in correspondence to the join.
Round 2. [CC] Ch 1. Sc in the BLO all around your blanket At the corners, (sc, ch 1, sc) all in the ch-1 space. Join with a sl st into the first sc.
Fasten off and weave in all your ends.
Your crochet Bumble Bee Granny Square Blanket is ready!
I hope you liked this pattern and I’d love to see your version of it! Please, share it on Facebook or Instagram using the hashtag #raffamusadesigns
Looking for more crochet ideas for babies? Take a look at these…




3 thoughts on “Bumble Bee Baby Blanket – using Granny Squares!”