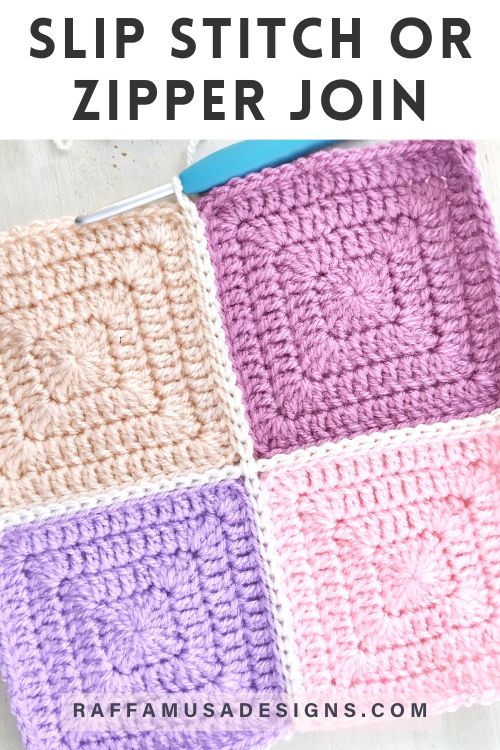
The flat slip stitch join or zipper joining is a granny square joining method using your crochet hook. It makes a flat and very beautiful join that reminds the look of a zipper.
Note: This post contains affiliate links. If you purchase something through the links on my blog, I might earn a commission. This will not have any effect on the price you pay. For more info, please, see my Privacy Policy.
Among all the granny square joining methods, the flat slip stitch or zipper join is one of my favorites.
Here’s quickly why:
- It is flat;
- No bulk;
- Done with a crochet hook!
Alright, let’s see all these points in more detail.
Pros of the Slip Stitch Join
What I like the most about the zipper joining is that it is really flat and unlike the single crochet or whip stitch joining methods, it does not add any bulk to the final project.
So, if you are joining some squares for a blanket, the squares will lay nice and flat next to each other!
Moreover, the slip stitch join is done with a crochet hook! No need to seam pieces together or make estimates of how much yarn you’ll need. You can simply join your yarn directly from your skein and keep going until you’re done!
Here are a few examples of projects where I used the slip stitch or zipper join…
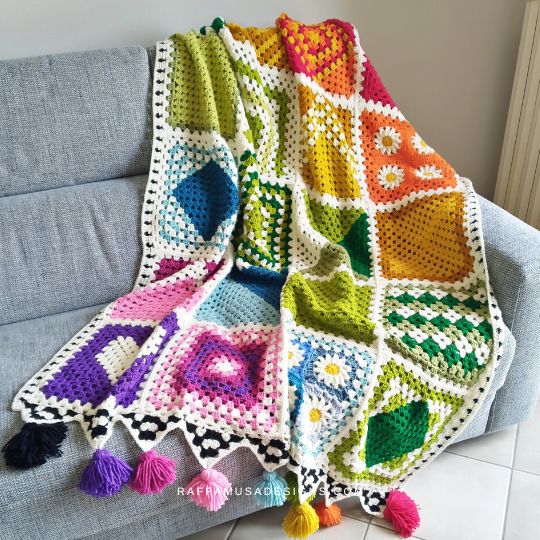
- Rainbow Granny Blanket
- Bee Granny Square Baby Blanket
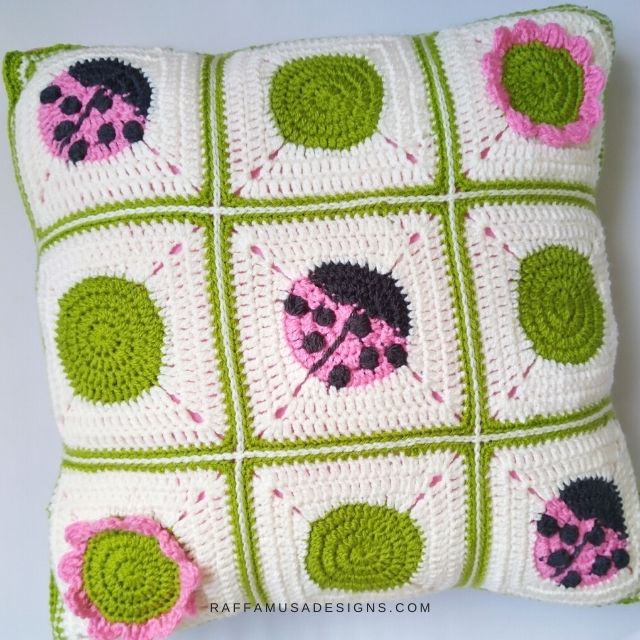
- Ladybug Pillow
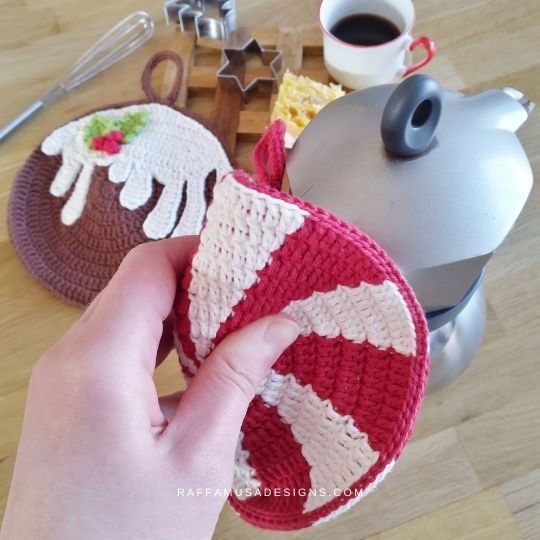
- or to join the layers of the Peppermint Potholder and the other round Christmas potholders!
Cons of the Zipper Joining
It can take some practice to get confident with the slip stitch joining method.
The main issue is that you’ll only work slip stitches through the back loops, and at first, it might get confusing and slow you down.
Another thing that takes some getting used to is that, unlike many other methods where you place your squares on top of each other, for the zipper join, you’ll lay your squares next to each other.
This is, of course, way easier if you get to work on a table or a flat surface.
How to Join Granny Squares with the Flat Slip Stitch Join
In this video tutorial, you can see how to join classic granny squares using the slip stitch zipper method.
Materials
- Yarn – Same yarn as the one you used for your crochet squares;
- Hook – One hook size bigger than the hook you used for your squares.
For example, if you use a 4.0-mm (G/6 US, 8 UK) hook for your squares, I suggest you use a 4.5-mm (7 US, 7 UK) hook to join.
The reason why I suggest a bigger hook is very simple.
The zipper join consists of slip stitches, and you know that slip stitches can get a bit tighter than other stitches. So, it is easier to keep the same tension by using a bigger crochet hook than the one used for the squares.
How to Join Crochet with the Flat Slip Stitch or Zipper Join Method
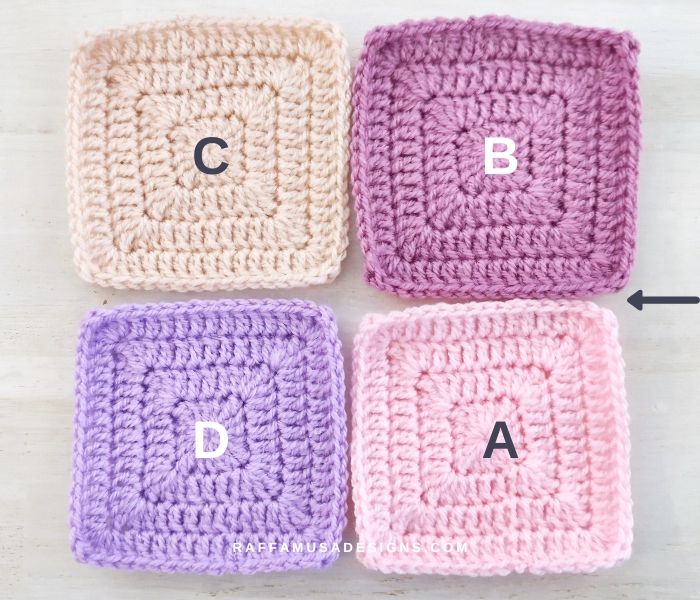
In this tutorial, I will show you how to join 4 solid granny squares, but of course, you can use this method to join any kind of granny square or any crochet piece.
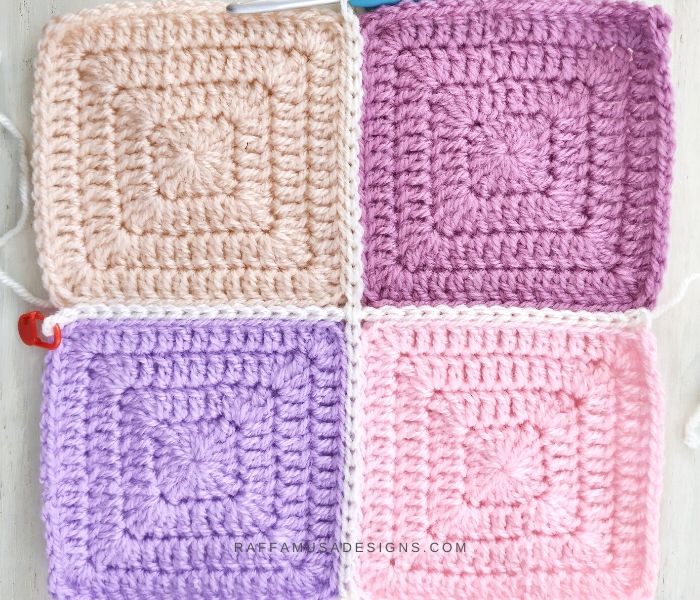
For clarity, let’s label the squares as A, B, C, and D, as shown in the photo below, and let’s start joining A and B in the direction indicated by the arrow.
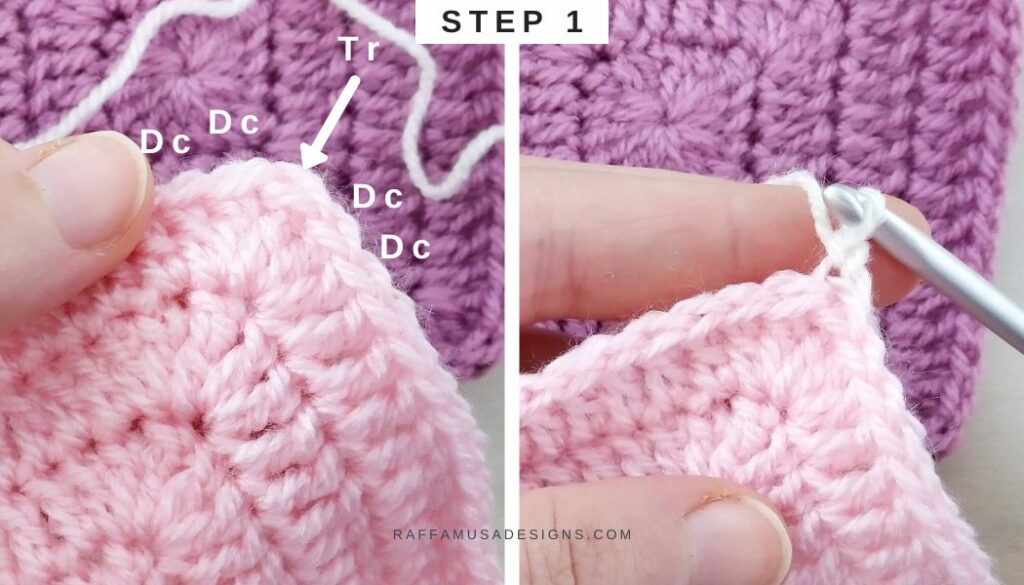
Step 1
Join the yarn in the top right corner (or top left corner if you are left-handed) of square A going through the chain space at the corner or through the back loop only (BLO) of the corner stitch.
In the case of a solid granny square, the corner consists of 2 dc, 1 tr, and 2 dc, so I’ll be joining my yarn in the BLO of the middle tr st.
Step 2
Holding the working yarn under your squares, insert your hook into the bottom right (or bottom left if you are left-handed) corner of square B with a movement from the right side to the wrong side. Then, yarn over, and pull the yarn through all the loops on your hook.
So, in this case, I’ll insert my hook through the BLO of the treble stitch at the corner of square B.
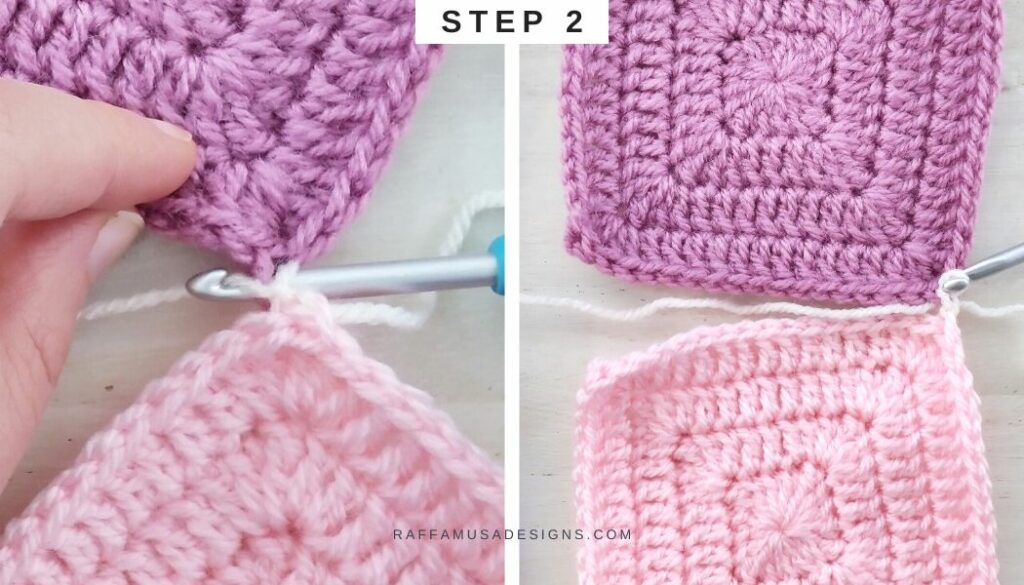
And your first slip stitch join is done!
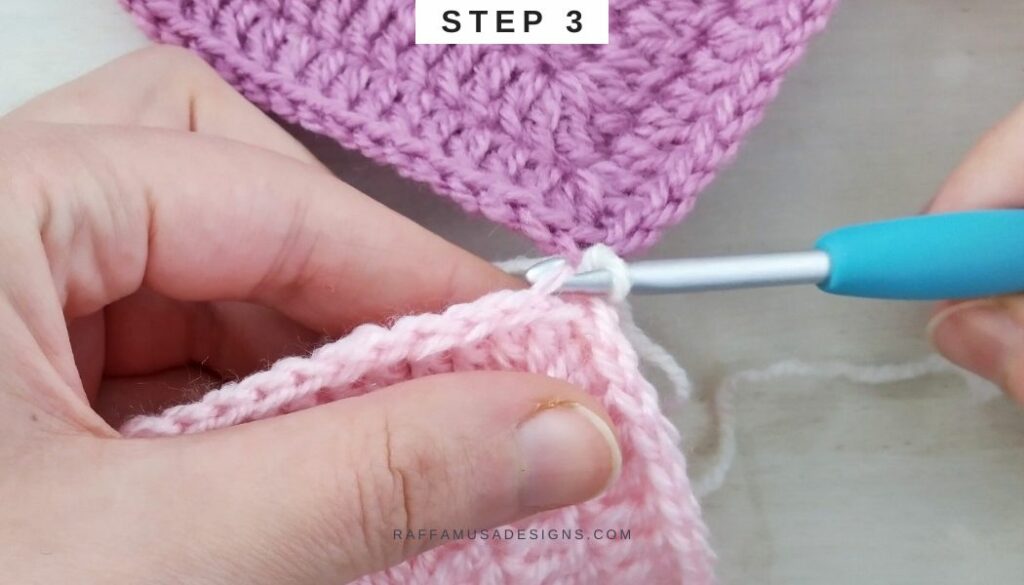
Step 3
Now, keeping your working yarn under the squares, go into the BLO on the next stitch on square A inserting your hook from the right side to the wrong side of the square.
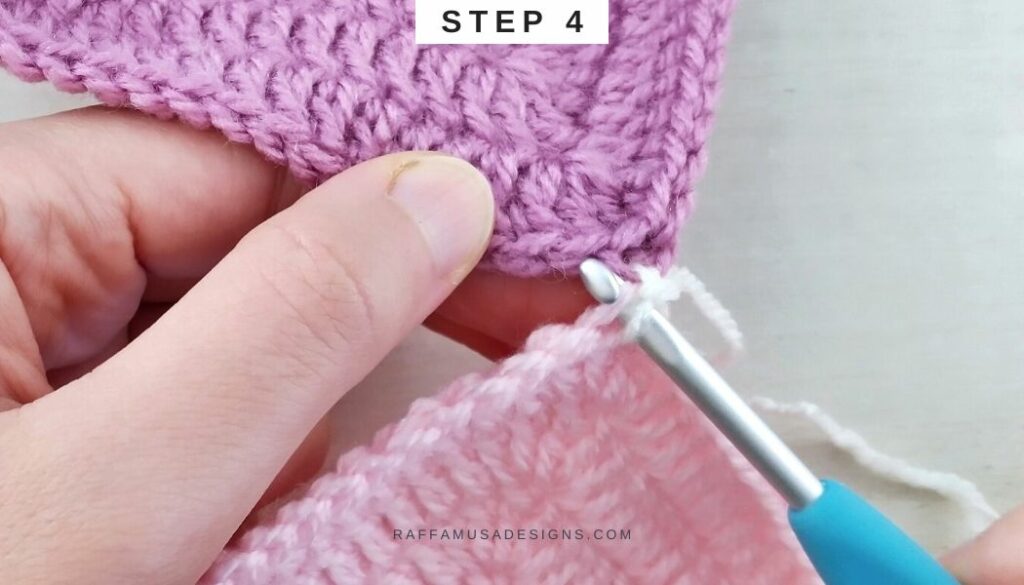
Step 4
Identify the corresponding stitch on square B, and insert your hook through the BLO.
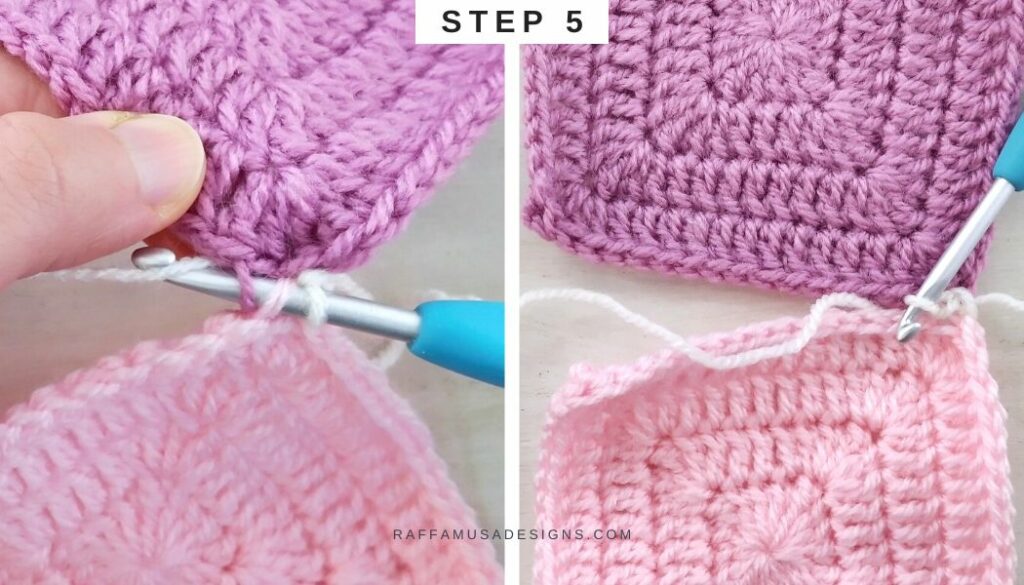
Step 5
Yarn over with your working yarn, and pull through all 3 loops on your hook.
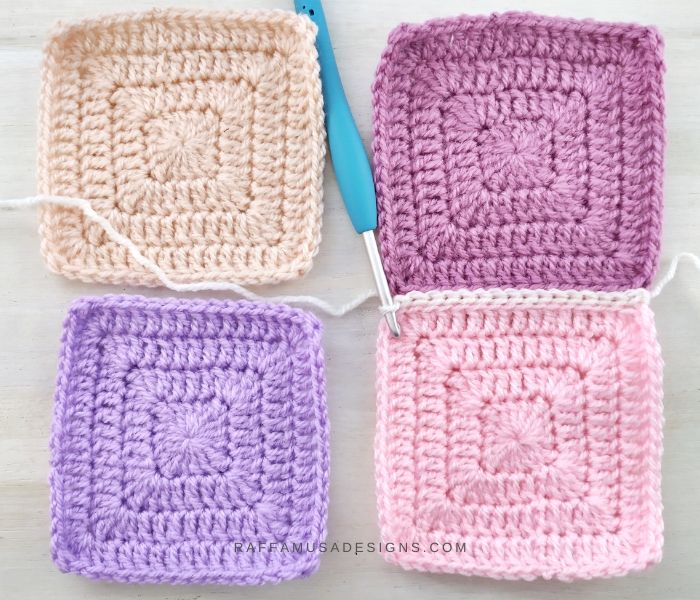
Repeat steps 3 to 5 until you reach the next corners of squares A and B, as shown in the photo below.
Step 6
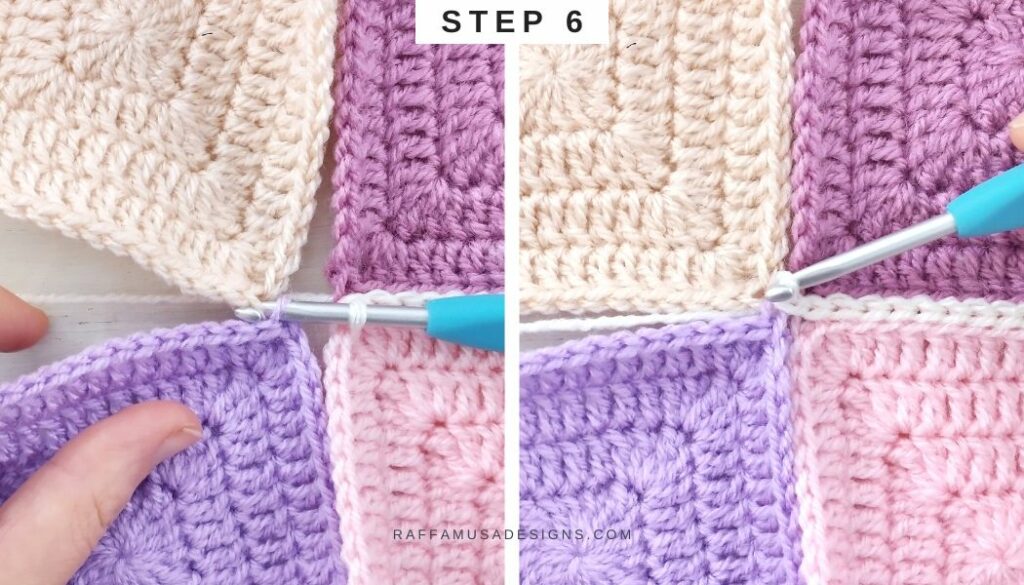
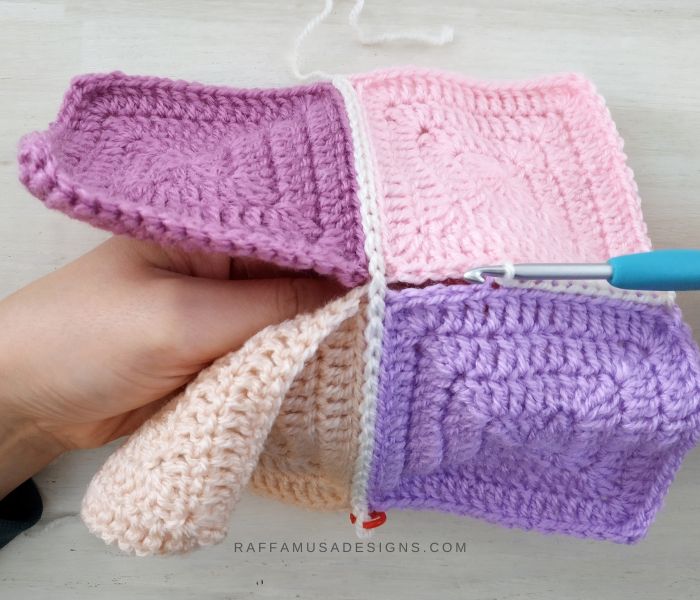
At this point, you simply need to continue with the same method and join the next two squares, which are squares C and D.
Always pay attention to keeping the yarn under your squares, as you can see in the photo below (step 6)!
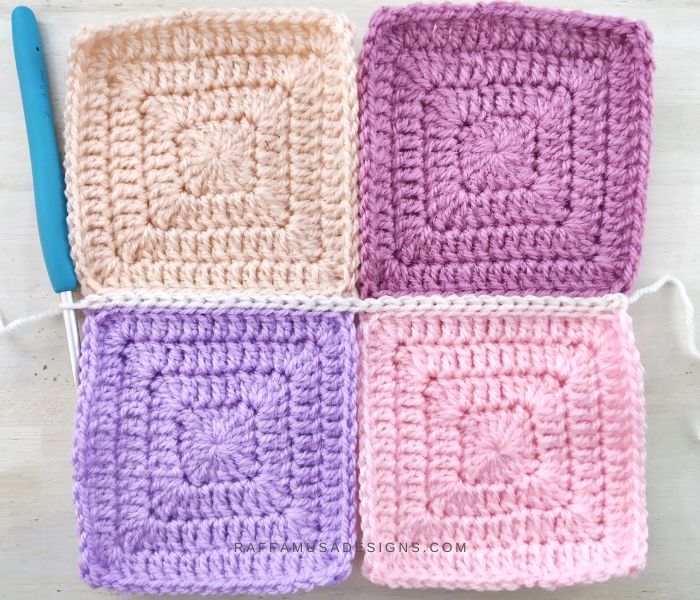
Continue joining the corresponding stitches on the two squares until you get to the opposite corners.
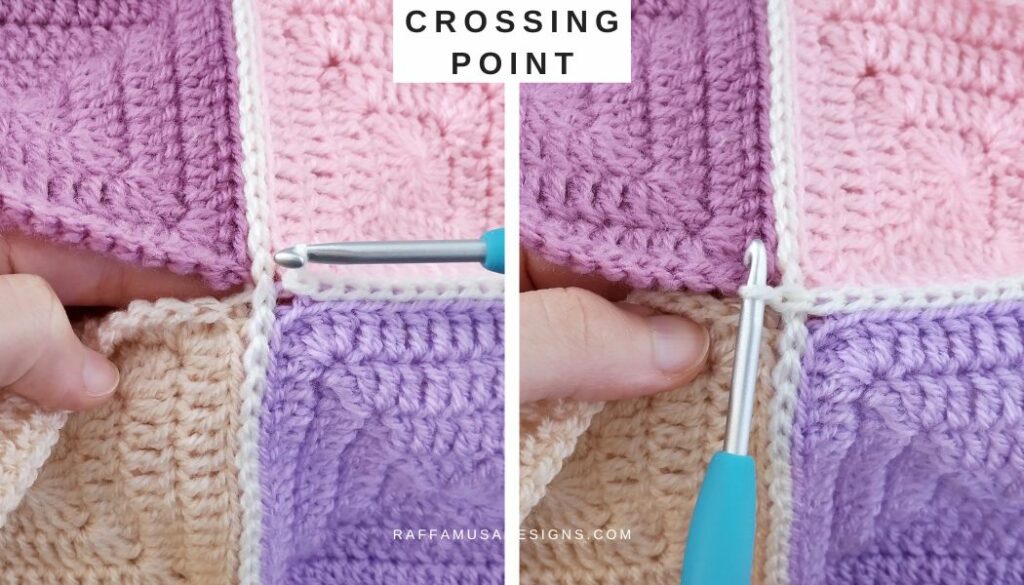
Once your squares are joined in one direction, you can start joining them in the opposite direction, i.e. joining A and D first, and then C and B.
The steps are the same as the ones we saw so far.
Before you attach your yarn at the corner of D, make sure to put your work over your strand of yarn! This way, you’ll be sure that your working yarn is always under your work (see photo below)!
When you reach the slip stitch joining you did in the other direction, simply go over it.
To do so, insert your hook into the first 2 stitches of squares C and B and continue to join.
And your slip stitch join is done!
I hope that you enjoyed this free crochet tutorial on the slip stitch or zipper join method!
Find more crochet techniques and free tutorials here on the blog…