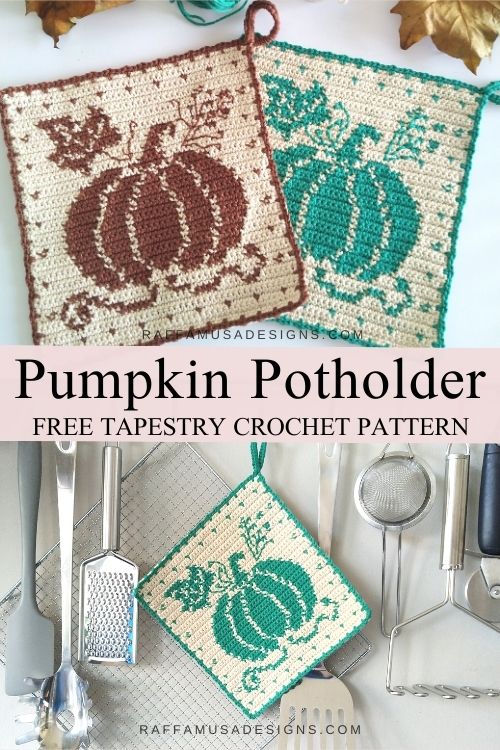
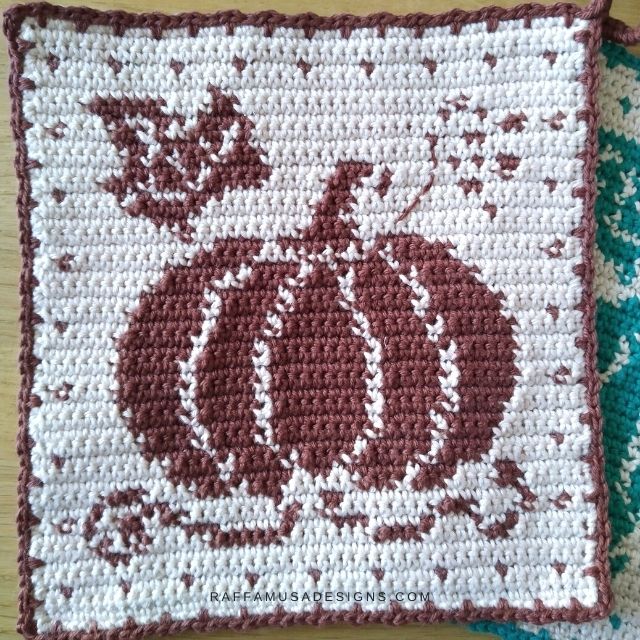
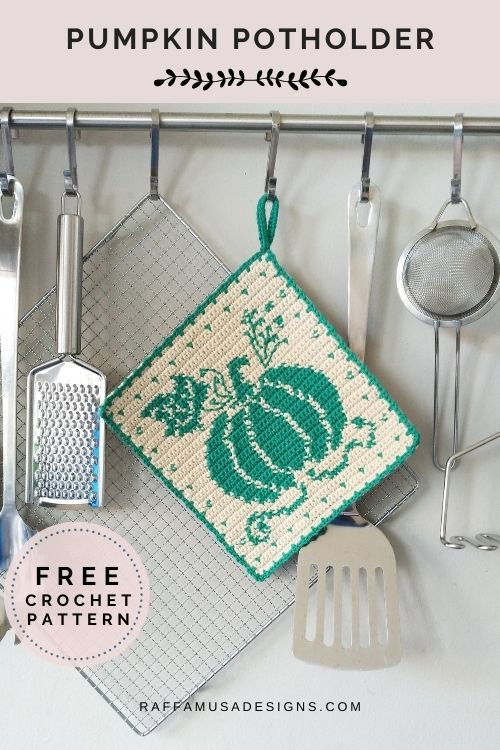
Pumpkin season has officially started and I couldn’t resist adding one more potholder to my Farmhouse Collection. I am happy to share with you my Tapestry Crochet Pumpkin Potholder!

There is definitely something between pumpkins and crocheters.
Somehow, as Fall arrives, we all start crafting pumpkins as if we forgot that we might actually need a new scarf, for real! It’s is getting cold… But pumpkins, they’re so cute!
The neck will wait for when we have a full pumpkin patch in our craft room and maybe a cold! Lol
How do you like crochet pumpkins? Would you like to try out my tapestry crochet one?
Sure, that scarf is still waiting, but a tapestry crochet pumpkin potholder will sure upgrade your kitchen decor and bring some cozy autumn vibes into your home!
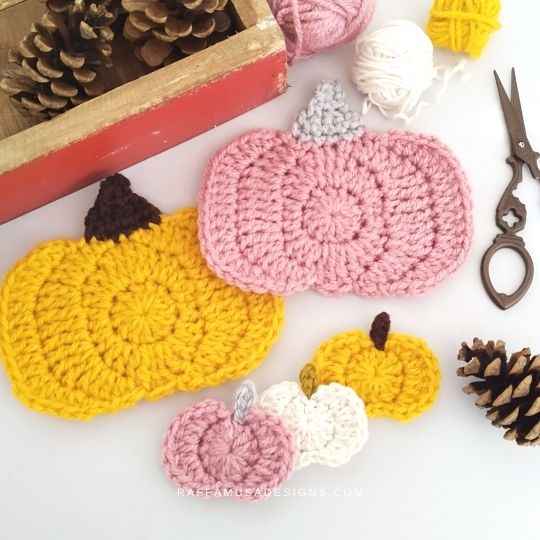
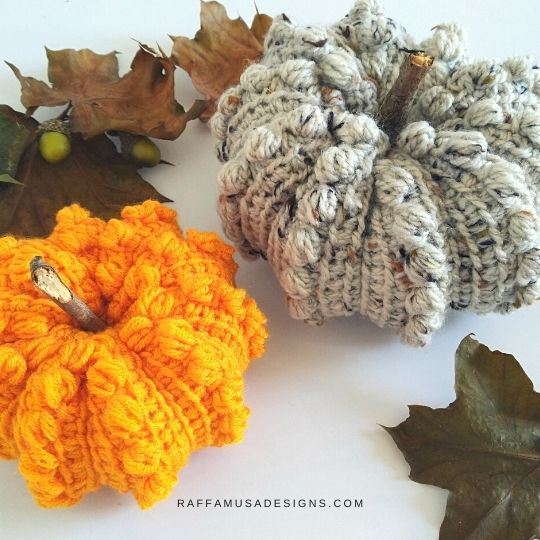
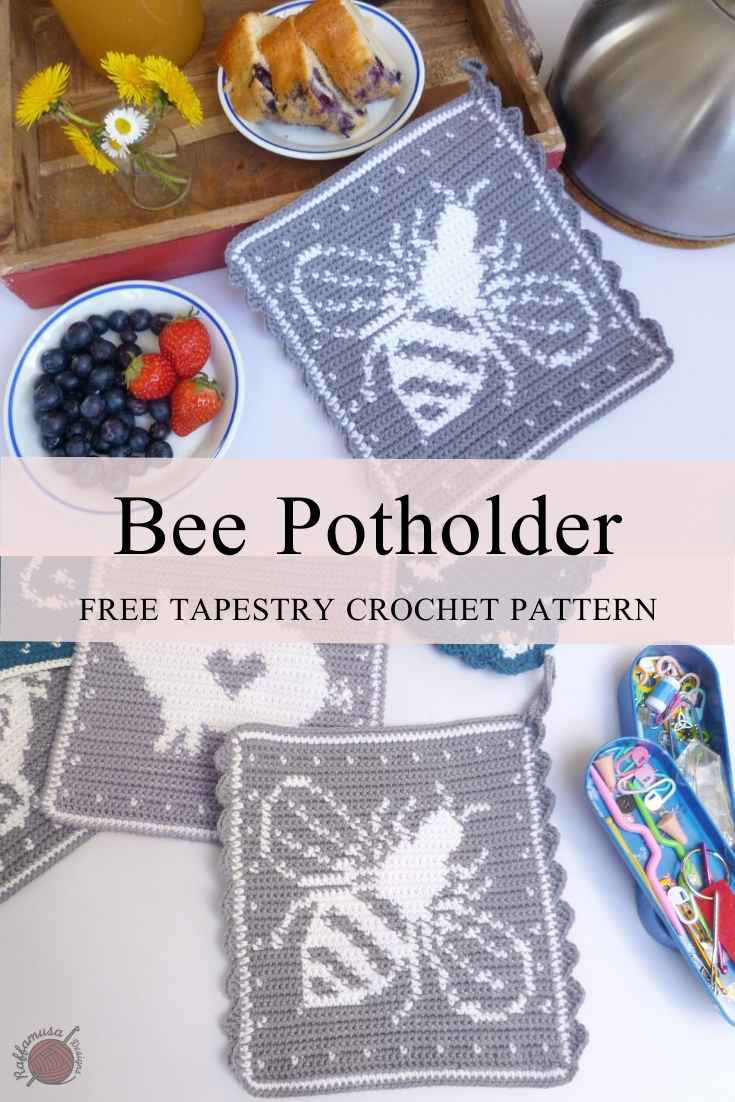
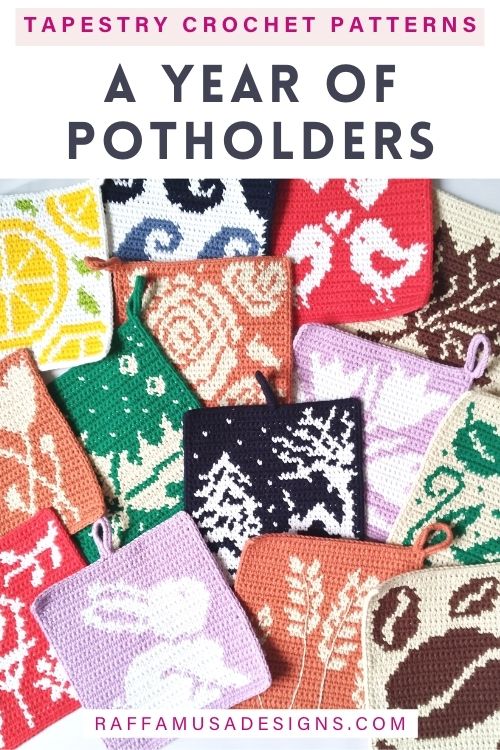
Find more pumpkins and ideas for your Fall decor…
Add the pattern of the Tapestry Crochet Pumpkin Potholder to your Ravelry queue HERE or save it for later by pinning this pin to your best crochet board on Pinterest!
Note: this post contains affiliate links. This means that if you purchase something through the links on my blog, I might earn a commission. This will not have any effect on the price you pay. For more info, please, see my Privacy Policy.
Printable PDF Pattern
The pattern of the Pumpkin Potholder is available as an ad-free PDF file on Ravelry, LoveCrafts, and Etsy! The PDF pattern also comes with a color chart!


Materials
- 3.0-mm (D-3 USA, 11 UK) Crochet Hook
- Paintbox Yarns Cotton DK in two contrasting colors. I will refer to them as color A (A) and color B (B).
- Tapestry Needle
Yardage
- A: 56.25 m/61.7 yds
- B: 35m/38.4 yds
Size
The finished potholder measures 6.7” (17 cm) by 7.3” (18.5 cm)
Crochet Abbreviations (US Terms)
Ch – Chain
Drop St – Drop Stitch
Hdc – Half Double Crochet
RS – Right Side
Sc – Single Crochet
Sk – Skip
Sl St – Slip Stitch
St – Stitch
WS – Wrong Side
Yo – Yarn Over
Special Stitches
Backstitch
Pull the needle and yarn up, make one straight st forward. From the WS, space your needle out the length of one st and pull the needle up to the RS. Insert the needle back into the end of the first st.
Drop Stitch (Drop St)
Insert your hook into the corresponding st 2 rows below, yo, and draw up a loop. Bring the loop up to the level of your work, yo, and draw yarn through both loops on your hook.
learn Tapestry Crochet – Free Tutorials
This potholder is crocheted using the tapestry crochet technique.
- Read all about tapestry crochet HERE;
- Learn the best way to change colors invisibly HERE.
- Or watch this video tutorial on my YouTube channel!
Gauge
28 sc for 26 rows in 4” (10 cm) worked in tapestry crochet.
Pattern Notes
- (…) – Repeat the instruction within brackets for the indicated number of times.
- If the pattern says “sc 5”, it means that you have to make one single crochet in each of the next 5 stitches.
- At the end of each row, you turn your work to crochet the next series of sts.
- The starting ch 1 DOES count as your first stitch and is always made with the main color.
- The right side (RS) is determined after row 3, which is crocheted on the right side.
- All uneven rows are crocheted with the right side up, while the even-numbered rows are crocheted on the wrong side.
- Throughout the pattern except for the border, the stitch count is always 45 sts.
- The pattern is written in three sections. The Potholder is worked in rows, then the Border is worked in rounds. The Finishing details are embroidered.
Potholder
(A) Ch 46.
← Row 1 [RS]. (A) Sc in the second ch from hook and in each ch across. (45 sts)
→ Row 2 [WS]. (A) 45.
← Row 3 [RS]. (A) 2, (B) 1, ((A) 4, (B) 1) 8 times, (A) 2.
→ Row 4 [WS]. (A) 45.
← Row 5 [RS]. (A) 37, (B) 2, (A) 6.
→ Row 6 [WS]. (A) 4, (B) 2, (A) 2, (B) 1, (A) 5, (B) 6, (A) 6, (B) 5, (A) 5, (B) 2, (A) 7.
← Row 7 [RS]. (A) 6, (B) 1, (A) 2, (B) 1, (A) 3, (B) 1, (A) 4, (B) 3, (A) 3, (B) 1, (A) 5, (B) 3, (A) 3, (B) 2, (A) 2, (B) 1, (A) 4.
→ Row 8 [WS]. (A) 2, (B) 1, (A) 1, (B) 1, (A) 2, (B) 2, (A) 1, (B) 2, (A) 8, (B) 1, (A) 2, (B) 1, (A) 8, (B) 3, (A) 4, (B) 1, (A) 2, (B) 1, (A) 2.
← Row 9 [RS]. (A) 5, (B) 1, (A) 14, (B) 2, (A) 3, (B) 1, (A) 8, (B) 2, (A) 3, (B) 1, (A) 5.
→ Row 10 [WS]. (A) 6, (B) 3, (A) 4, (B) 3, (A) 1, (B) 3, (A) 6, (B) 3, (A) 1, (B) 3, (A) 4, (B) 2, (A) 6.
← Row 11 [RS]. (A) 6, (B) 2, (A) 3, (B) 3, (A) 1, (B) 5, (A) 1, (B) 2, (A) 1, (B) 5, (A) 1, (B) 4, (A) 11.
→ Row 12 [WS]. (A) 11, (B) 4, (A) 1, (B) 4, (A) 1, (B) 4, (A) 1, (B) 5, (A) 1, (B) 4, (A) 9.
← Row 13 [RS]. (A) 2, (B) 1, (A) 5, (B) 4, (A) 1, (B) 5, (A) 1, (B) 6, (A) 1, (B) 4, (A) 1, (B) 5, (A) 6, (B) 1, (A) 2.
→ Row 14 [WS]. (A) 9, (B) 4, (A) 1, (B) 4, (A) 1, (B) 8, (A) 1, (B) 4, (A) 1, (B) 4, (A) 8.
← Row 15 [RS]. (A) 7, (B) 5, (A) 1, (B) 4, (A) 1, (B) 8, (A) 1, (B) 4, (A) 1, (B) 5, (A) 8.
→ Row 16 [WS]. (A) 8, (B) 4, (A) 1, (B) 5, (A) 1, (B) 8, (A) 1, (B) 5, (A) 1, (B) 4, (A) 7.
← Row 17 [RS]. (A) 6, (B) 5, (A) 1, (B) 5, (A) 1, (B) 8, (A) 1, (B) 5, (A) 1, (B) 5, (A) 7.
→ Row 18 [WS]. (A) 2, (B) 1, (A) 4, (B) 5, (A) 1, (B) 5, (A) 1, (B) 8, (A) 1, (B) 5, (A) 1, (B) 5, (A) 3, (B) 1, (A) 2.
← Row 19 [RS]. (A) 6, (B) 5, (A) 1, (B) 5, (A) 1, (B) 8, (A) 1, (B) 5, (A) 1, (B) 5, (A) 7.
→ Row 20 [WS]. (A) 7, (B) 5, (A) 1, (B) 5, (A) 1, (B) 8, (A) 1, (B) 5, (A) 1, (B) 5, (A) 6.
← Row 21 [RS]. (A) 6, (B) 6, (A) 1, (B) 4, (A) 1, (B) 8, (A) 1, (B) 4, (A) 1, (B) 6, (A) 7.
→ Row 22 [WS]. (A) 7, (B) 6, (A) 1, (B) 5, (A) 1, (B) 6, (A) 1, (B) 5, (A) 1, (B) 6, (A) 6.
← Row 23 [RS]. (A) 2, (B) 1, (A) 4, (B) 6, (A) 1, (B) 4, (A) 1, (B) 6, (A) 1, (B) 4, (A) 1, (B) 6, (A) 5, (B) 1, (A) 2.
→ Row 24 [WS]. (A) 8, (B) 6, (A) 1, (B) 5, (A) 1, (B) 4, (A) 1, (B) 5, (A) 1, (B) 6, (A) 7.
← Row 25 [RS]. (A) 8, (B) 5, (A) 1, (B) 5, (A) 1, (B) 4, (A) 1, (B) 5, (A) 1, (B) 5, (A) 9.
→ Row 26 [WS]. (A) 10, (B) 5, (A) 2, (B) 4, (A) 1, (B) 3, (A) 1, (B) 4, (A) 1, (B) 5, (A) 9.
← Row 27 [RS]. (A) 10, (B) 5, (A) 1, (B) 4, (A) 1, (B) 1, (A) 1, (B) 4, (A) 1, (B) 6, (A) 11.
→ Row 28 [WS]. (A) 2, (B) 1, (A) 10, (B) 5, (A) 4, (B) 1, (A) 1, (B) 1, (A) 2, (B) 1, (A) 1, (B) 5, (A) 8, (B) 1, (A) 2.
← Row 29 [RS]. (A) 13, (B) 4, (A) 1, (B) 7, (A) 1, (B) 4, (A) 15.
→ Row 30 [WS]. (A) 12, (B) 1, (A) 9, (B) 4, (A) 19.
← Row 31 [RS]. (A) 20, (B) 2, (A) 10, (B) 3, (A) 10.
→ Row 32 [WS]. (A) 8, (B) 6, (A) 9, (B) 3, (A) 19.
← Row 33 [RS]. (A) 2, (B) 1, (A) 5, (B) 2, (A) 6, (B) 1, (A) 2, (B) 2, (A) 8, (B) 3, (A) 3, (B) 1, (A) 1, (B) 1, (A) 4, (B) 1, (A) 2.
→ Row 34 [WS]. (A) 6, (B) 3, (A) 1, (B) 3, (A) 1, (B) 4, (A) 6, (B) 5, (A) 9, (B) 1, (A) 6.
← Row 35 [RS]. (A) 5, (B) 2, (A) 1, (B) 1, (A) 1, (B) 1, (A) 6, (B) 3, (A) 5, (B) 5, (A) 1, (B) 1, (A) 1, (B) 4, (A) 8.
→ Row 36 [WS]. (A) 8, (B) 1, (A) 1, (B) 1, (A) 1, (B) 3, (A) 1, (B) 3, (A) 26.
← Row 37 [RS]. (A) 8, (B) 2, (A) 2, (B) 1, (A) 14, (B) 1, (A) 1, (B) 1, (A) 1, (B) 3, (A) 1, (B) 3, (A) 7.
→ Row 38 [WS]. (A) 2, (B) 1, (A) 4, (B) 2, (A) 1, (B) 1, (A) 1, (B) 4, (A) 1, (B) 1, (A) 20, (B) 2, (A) 2, (B) 1, (A) 2.
← Row 39 [RS]. (A) 8, (B) 1, (A) 2, (B) 1, (A) 15, (B) 4, (A) 1, (B) 3, (A) 2, (B) 2, (A) 6.
→ Row 40 [WS]. (A) 5, (B) 6, (A) 4, (B) 2, (A) 17, (B) 1, (A) 10.
← Row 41 [RS]. (A) 29, (B) 1, (A) 15.
→ Row 42 [WS]. (A) 45.
← Row 43 [RS]. (A) 2, (B) 1, ((A) 4, (B) 1) 8 times, (A) 2.
Row 44-45. (A) 45.
Do not fasten off but move to the border.
Border
Round 1 (RS). With A, RS facing, place 45 sc on each side of the potholder. At the corners, sc 1 in the last st of the current side, ch 1, and sc in the first st on the next side. Join the round with a sl st into first st. (45 sts on each side and 1 ch at the corners).
Round 2 (RS). With B, work the sl st/drop st border as follows: sl st 1, drop st 1, [sl st 2, drop st 1] 14 times, sl st 1.
At the corner, [sc 1, ch 1, sc 1] in ch-1 space. Repeat from the beginning on the bottom side of the potholder.
Repeat the sl st/drop st border on the right side.
At the top, right corner, sl st into the ch-1 space, ch 20, sl st back into the same ch. Turn, sc 25 inside the loop you just created. Sl st back into the same ch-1 space, and turn your work.
Repeat the sl st/drop st border on the top side.
At the corner, [sc 1, ch 1, sc 1] in the ch-1 space. Join the round with a sl st into the first sl st.
Fasten off, and weave in ends.
Finishing
With a length of B, embroider the stem of the leaf and flowers by using the backstitch.
Your Tapestry Crochet Pumpkin Potholder is ready!
I hope you liked this pattern and I’d love to see your version of it! Please, share it on Facebook or Instagram using the hashtag #raffamusadesigns
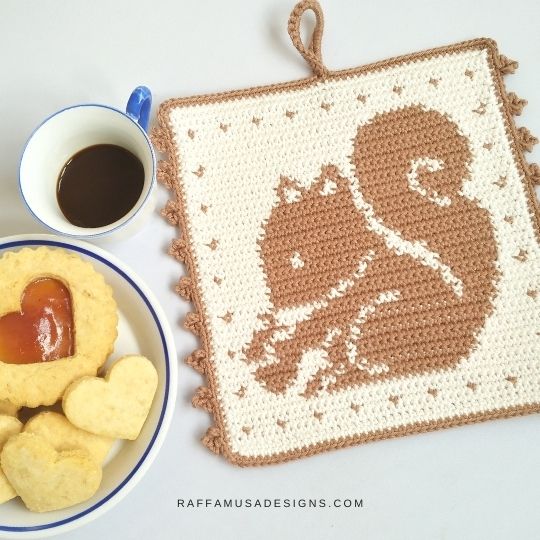
Find more crochet potholders here on the blog…
Super cute! I see some happy me time crocheting these ahead! Thank you for sharing this pattern!
I was unable todownload the PDF. Disappointing.
Hi Debra, sorry to hear about that. Did you try to purchase it on Ravelry or LoveCrafts?
No I tried to download from the link you have posted above
Hi Debra, the two links that are in the e-mail are for Ravelry and LoveCrafts. There is no other link to PDF files. Unfortunately, the PDF is not free.
I don’t understand what it means to count the ch 1 as a stitch in single crochet.
Hi Gregory,
Sorry that it took me a while to get back to you.
In single crochet, if you count the initial ch-1 as a st, it means that on that row, you need to skip the very first st, and on the next row, you’ll have to remember to place a sc in that 1 ch!
So, in the case of this potholder, the stitch count is 45 sts. On each row, you’ll ch 1, skip the first st, and crochet in the next 44 sts. Then, on the next row, you do the same: ch 1, skip first st, crochet in next 43 sc, and make one last sc in the ch-1 from the previous row.
Doing this will give you smoother edges than not counting the first ch as a st.
I hope this makes sense 🙂
Best,
Raffaella
Just finished mine. I LOVE it. Thank you for sharing. Although, your stitches were miscounted the first few rows. I adjusted to make it work. Again, thank you.
Hi Kathy,
I’m glad you loved the pattern 🙂 I just double-checked the stitch count of the first 10 rows or so and everything seems fine to me. If you remember which rows you had problems with, could you, please, let me know so that I can correct them? Thank you so much in advance.
Raffaella
Just came across it! It’s row 8, it only has 42 stitches listed plus the chain making 43 not 45.
Hi Sarah, I just checked again and I counted 45 sts on row 8. Is it possible that you missed the square brackets that say to repeat the instructions twice?
Very late to the conversation, but Sarah was right. I made and re-made the first five rows three times, counted and checked, but the lines of the vines just don’t add up. I’m actually in the comment section to see if anyone has a fix or whether I have to count for myself. 🙂 In row 8 the lines end up making a ‘,’-shape instead of spreading out in both directions. I’m pretty sure there’s a fault in the first ten stitch counts, but I haven’t found it yet.
Hi Anna,
I checked the instructions for row 8 once more and they seem to be correct to me.
Would you mind sending me a pic of your work so that I can help you better? My e-mail address is raffaella(at)raffamusadesigns.com
Best,
Raffaella
Is there a video for this?
Hi,
unfortunately, there is no video for now, but I’ll make one soon 🙂
In the meantime, feel free to send me an e-mail if you need any help!
Best,
Raffaella
So of course I could not wait for my yarn to arrive and made one using fingering weight cotton yarn, so it’s too thin to really use as a potholder. BUT, I ordered my yarn today and will impatiently wait until I can make all of these adorable patterns! It was my first time trying tapestry and it’s a bit messy, but still cute! Thank you for sharing these!
Would be easier to follow a graph, is there one available? Thanks
Hi,
there is a graph in the paid PDF 🙂
You can find that on Ravelry, LoveCrafts, and Etsy (all inks are in the blog post)
Is the pattern the same for left handed? Would RS and WS be same rows?
Hi, if you are left-handed, the right and wrong sides stay the same. You’ll just get a mirror image of the pumpkin, but that’s ok, I guess 🙂
Unfortunately, I was unable to get this down to a potholder size, even using a size e hook. It is more of a large trivet or small placemat. In retrospect I would have left the bottom vines out of the pattern and embroidered them on afterwards… mine came out muddled looking. Beautiful pattern but too large for me to keep track of
Hi,
an E (3.5 mm) hook is definitely too large for this potholder.
You’d have to use a D (3.0/3.25 mm) hook max, but even better a C (2.75 mm)!
Best,
Raffaella