Learn how to crochet the granny diamond stitch with this free pattern tutorial.
The granny diamond stitch uses the same stitch pattern as the granny stripe stitch without any chain spaces between the groups of 3 double crochet stitches, which you can find HERE.
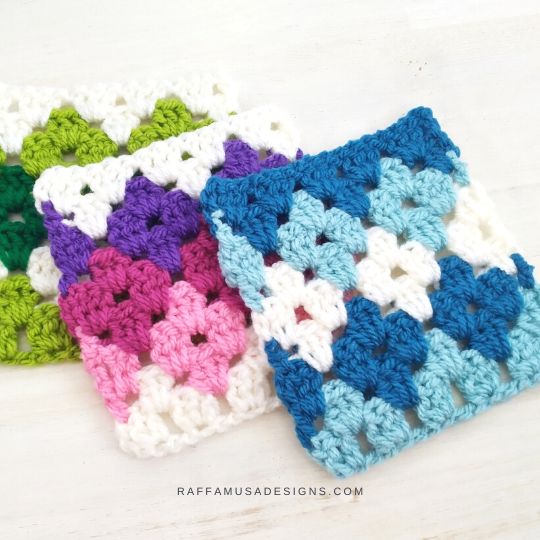
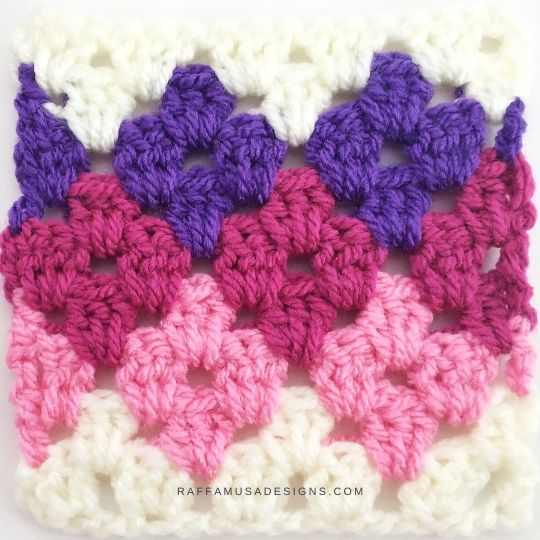
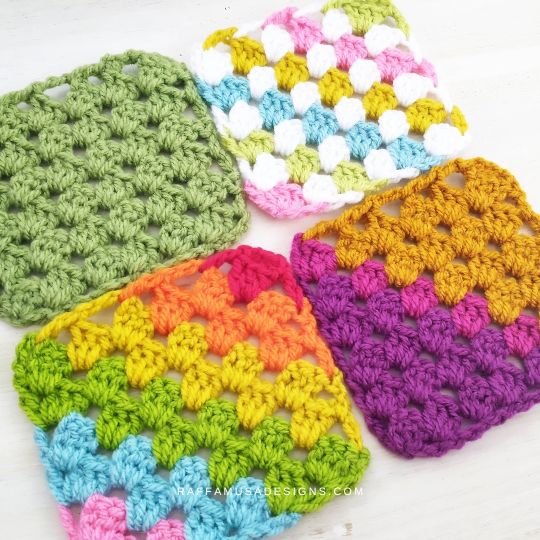
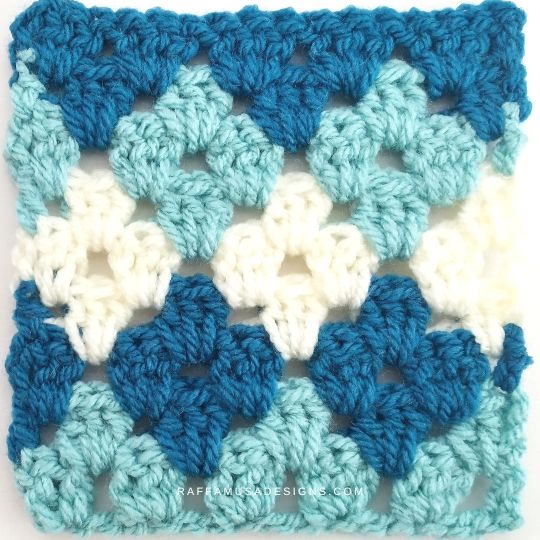
What makes the diamond granny stitch special is the unique colorwork. With a few color changes, row after row, you’ll see some beautiful diamonds appearing on your crocheted piece.
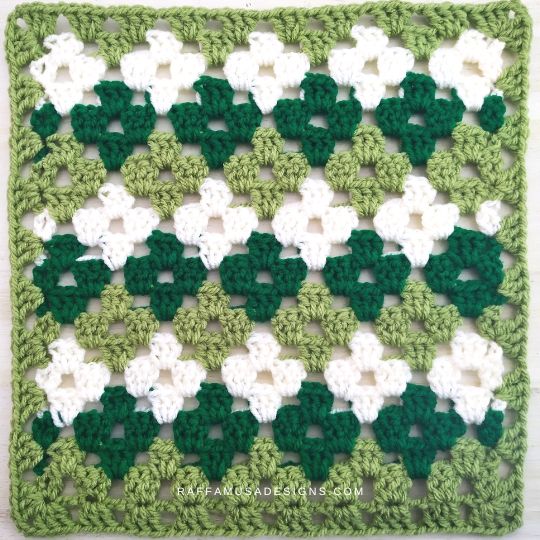
The granny diamond stitch can add a unique touch to your granny stitch blankets, pillowcases, market bags, and any other projects using the granny stripe stitch.
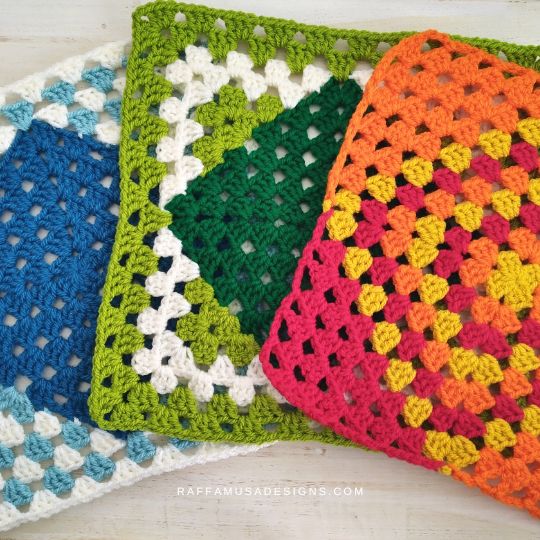
If you prefer the granny stripe stitch pattern with the chain spaces between double crochet groups, you can still use the same color changes that we’ll see in this tutorial, and you’ll get the same granny diamond effect.
However, with a more open fabric, you’ll have more trouble hiding the loose loops derived from the color changes, as you can see in the photo below.
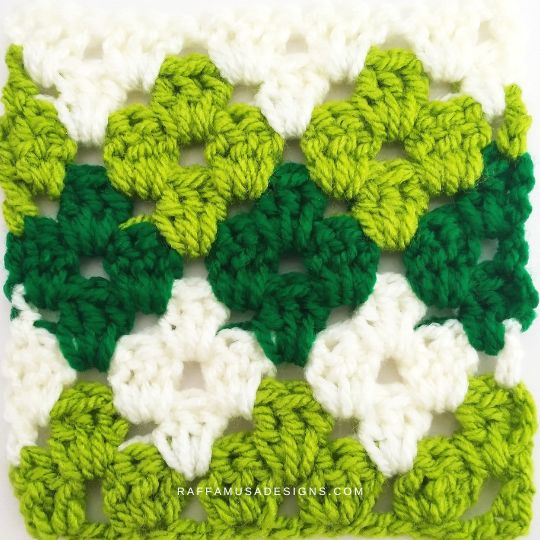
Actually, in all the swatches that I crocheted here, you can see the loose loops in a contrasting color peeking on the right side of the fabric on the rows with color changes.
To avoid those loops, you can use this simple trick HERE on each row without color changes!
Find more granny square tutorials here on the blog…

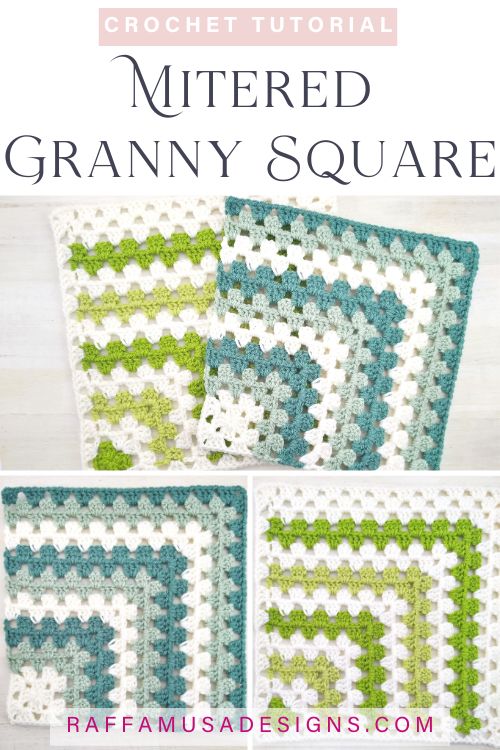
Save this tutorial for later by pinning it to your best crochet board using this pin.

Note: This post contains affiliate links. If you purchase something through the links on my blog, I might earn a commission. This will not have any effect on the price you pay. For more info, please, see my Privacy Policy.
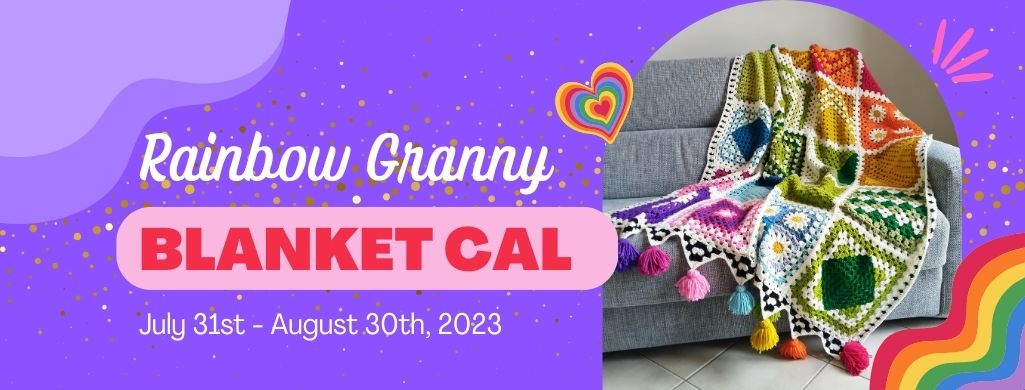
RAINBOW GRANNY BLANKET CAL
The granny diamond stitch is one of the stitches in the Rainbow Granny Blanket CAL.

You can find all the details about the Rainbow Blanket CAL HERE, and get the free PDF of the Granny Diamond Stitch Square HERE or by clicking the button below!
MATERIALS
You can use any yarn with the appropriate hook. I used:
- 5.5-mm (I/9 USA, 5 UK) Hook
- Aran-Weight (4) Yarn such as Paintbox Yarns Simply Aran in at least two colors, but I used 3 indicated as A, B, and C.
- Tapestry Needle
ABBREVIATIONS (US TERMS)
Ch – Chain
Dc – Double Crochet
MC – Magic Circle
RS – Right Side
Sk – Skip
Sl St – Slip Stitch
Sp – Space
St – Stitch
Yo – Yarn over
WS – Wrong Side
PATTERN NOTES
- If the pattern says “dc 2”, you need to crochet 1 dc in each of the next 2 sts.
- (…) – Repeat the instructions within brackets for the indicated number of times.
- […] – Crochet the instructions within brackets in the same indicated st or sp.
- [A], [B], or [C] – Indicate the yarn color to use.
- Always change color with the last yo of a st.
- There is going to be a RS and a WS.
- Always make color changes on the same side of your work, which will be your WS.
Crochet Granny Diamond Stitch – Pattern Chart

Granny Diamond Stitch – Crochet Tutorial
With A, ch a multiple of 3 + 1.
For this tutorial, I made a chain of 19.
Row 1 (WS)
[A] [Dc 2] in the fourth ch from your hook (see arrow in photo 1), *sk 2, [dc 3] in the next ch. Repeat from * until you have 3 sts remaining (photos 2 and 3).
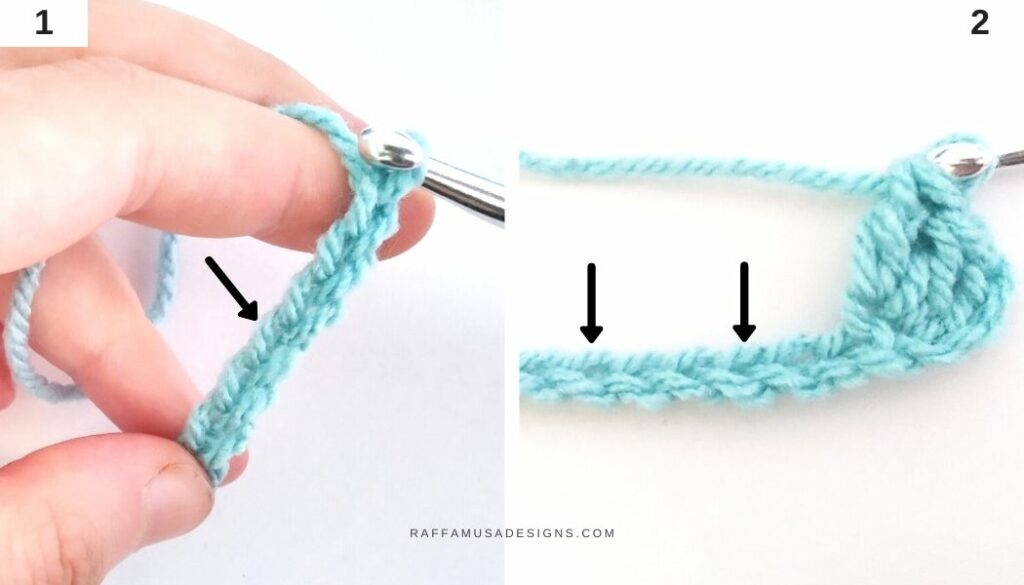
Sk 2, dc 1 in the last ch (indicated by the arrow in photo 3).
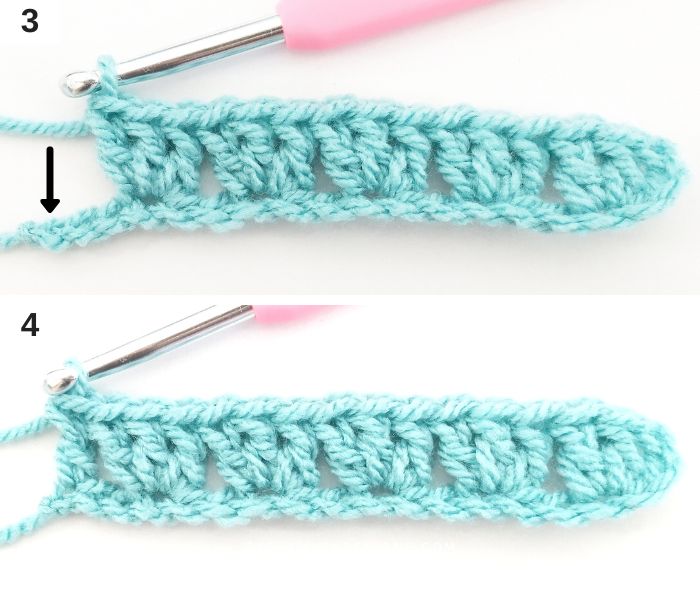
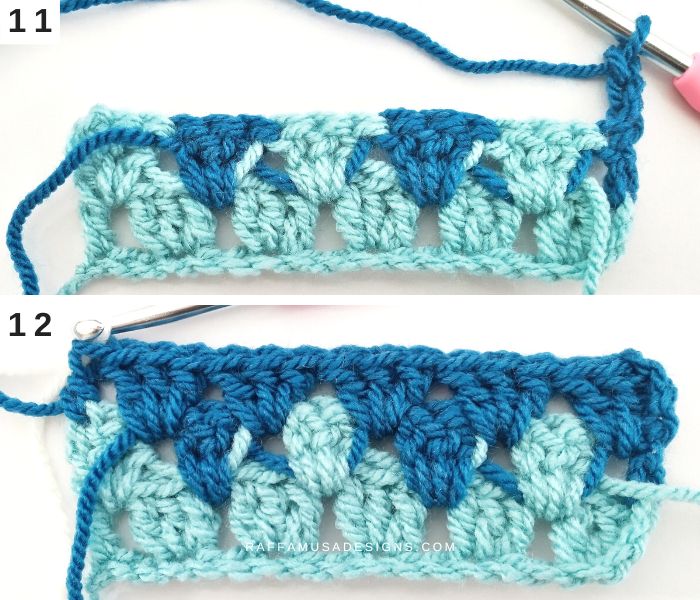
Row 2 (RS)
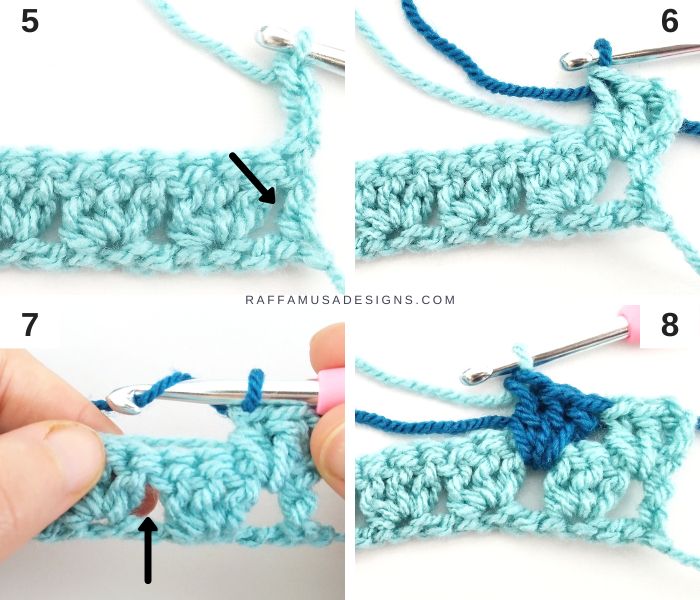
[A] Ch 3 (counts as a dc here and throughout), turn. [Dc 2] in sp between the first two sts from the previous row (indicated by the arrow in photo 5) closing the last st with B (photo 6).
Do not fasten off A but carry it inside your sts!
[B] Sk 3, crocheting over yarn A, [dc 3] in the sp between the last skipped st and the next (see arrow in photo 7) closing the last st with A. [A] Sk 3, crocheting over yarn B, [dc 3] in the sp between the last skipped st and the next closing the last st with B.
Keep crocheting a set of [dc 3] with B and one with A until you have 3 sts left (photo 9). Finally, sk 2 and dc 1 in the last st making sure to close it with B (photo 10).
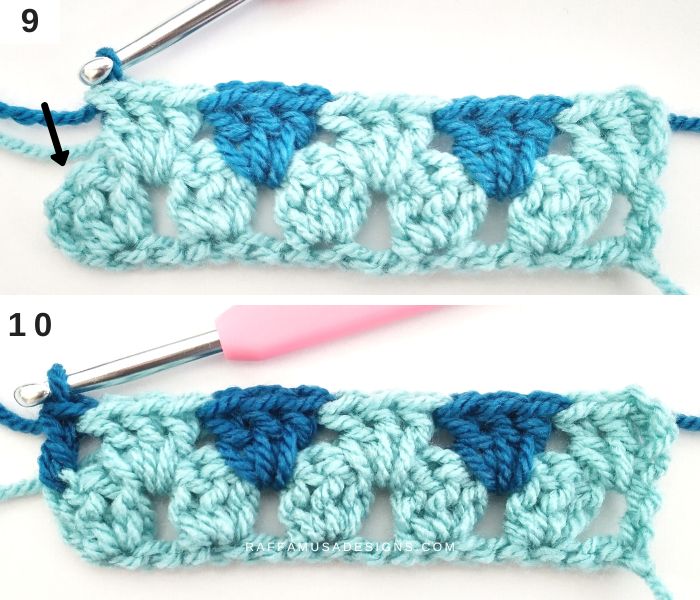
Fasten off A and continue to crochet with B.
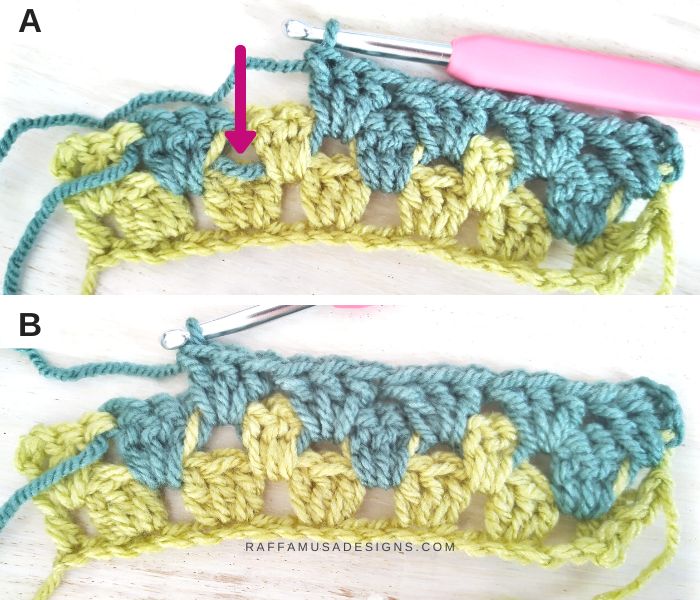
Tip for Hiding yarn Loose loops
You might have noticed that after row 2 or any other row with color changes, you can see the loops of the contrasting color yarn (yarn B in the case of row 2) on the RS of your work.
To hide those loose loops, you can use a very easy trick.
- On the rows with color changes, make sure to leave a sort of loose loop on the back of your work (see the loop indicated by the pink arrow in photo A below).
- On the next row, which will be in one solid color (for row 3, that’s color B), make sure to crochet each group of 3 double crochets over the loose loop that you left in the previous row!
Row 3
[B] Ch 3, turn (photo 11). [Dc 2] in sp between the first two sts from the previous row. *Sk 3, [dc 3] in the sp between the last skipped st and the next. Repeat from * until you have 3 sts left, sk 2, dc 1 in the last st closing it with C (photo 12).
Do not fasten off B but carry it inside your sts!
Row 4
[C] Ch 3, turn. Crocheting over yarn B, [dc 2] in sp between the first two sts from the previous row (photo 13) closing the last st with B (photo 14). [B] Sk 3, crocheting over yarn C, [dc 3] in the sp between the last skipped st and the next closing the last st with C.
Keep crocheting a set of [dc 3] with C and one with B until you have 3 sts left. Sk 2 and dc 1 in the last st making sure to close it with C (photo 15).
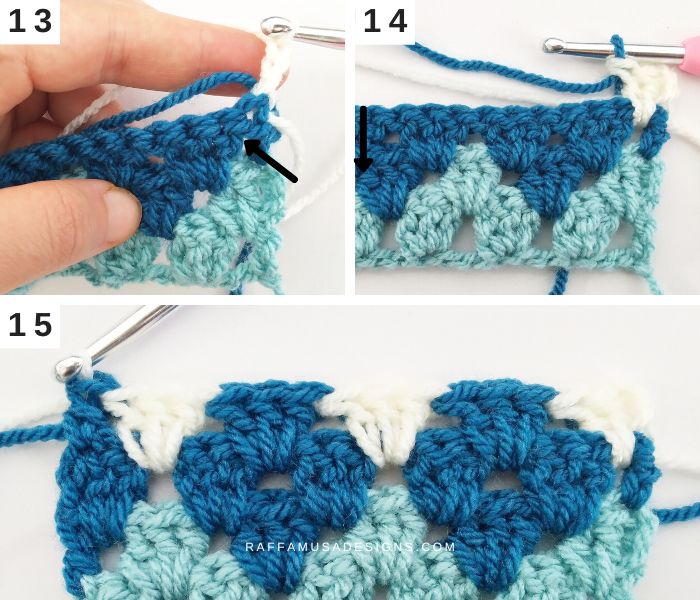
Fasten off B and continue to crochet with C.
Row 5
[C] Ch 3, turn. [Dc 2] in sp between the first two sts from the previous row. *Sk 3, [dc 3] in the sp between the last skipped st and the next. Repeat from * until you have 3 sts left, sk 2, dc 1.
Row 6
[C] Ch 3, turn. [Dc 2] in sp between the first two sts from the previous row closing the last st with A. Do not fasten off C but carry it inside your sts!
[A] Sk 3, crocheting over yarn C, [dc 3] in the sp between the last skipped st and the next closing the last st with C. [C] Sk 3, crocheting over yarn A, [dc 3] in the sp between the last skipped st and the next closing the last st with A.
Keep crocheting a set of [dc 3] with A and one with C until you have 3 sts left. Sk 2 and dc 1 in the last st making sure to close it with A.
Row 7
[A] Ch 3, turn. [Dc 2] in sp between the first two sts from the previous row. *Sk 3, [dc 3] in the sp between the last skipped st and the next. Repeat from * until you have 3 sts left, sk 2, dc 1 closing this last st with B.
Do not fasten off A but carry it inside your sts!
Row 8
[B] Ch 3, turn. [Dc 2] in sp between the first two sts from the previous row closing the last st with A. Do not fasten off B but carry it inside your sts!
[A] Sk 3, crocheting over yarn B, [dc 3] in the sp between the last skipped st and the next closing the last st with B. [B] Sk 3, crocheting over yarn A, [dc 3] in the sp between the last skipped st and the next closing the last st with A.
Keep crocheting a set of [dc 3] with A and one with B until you have 3 sts left. Sk 2 and dc 1 in the last st making sure to close it with B.
Fasten off A and continue with B.
Row 9
[B] Ch 3, turn. [Dc 2] in sp between the first two sts from the previous row. *Sk 3, [dc 3] in the sp between the last skipped st and the next. Repeat from * until you have 3 sts left, sk 2, dc 1.
By now, you probably got a good hang of this stitch and how the color changes work.
Keep adding more rows to grow your Granny diamond Stitch crochet project!
I hope that you enjoyed this crochet tutorial! Please, share your projects using the granny diamond stitch on Facebook or Instagram using the hashtag #raffamusadesigns
Find more granny squares here on the blog…
Can’t wait to try this pattern! Thank you so much for sharing!