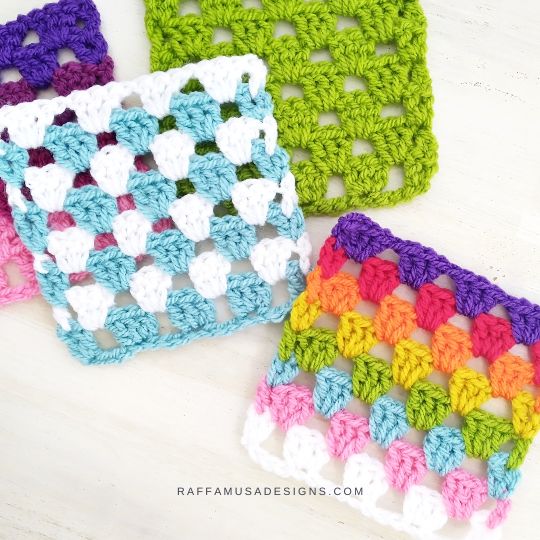
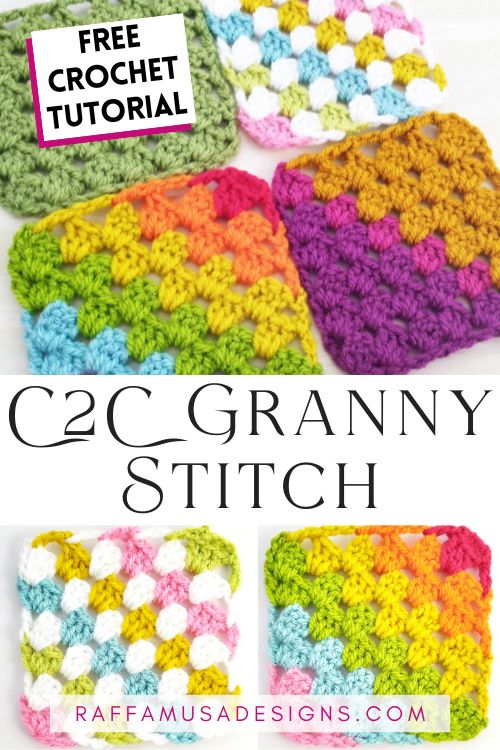
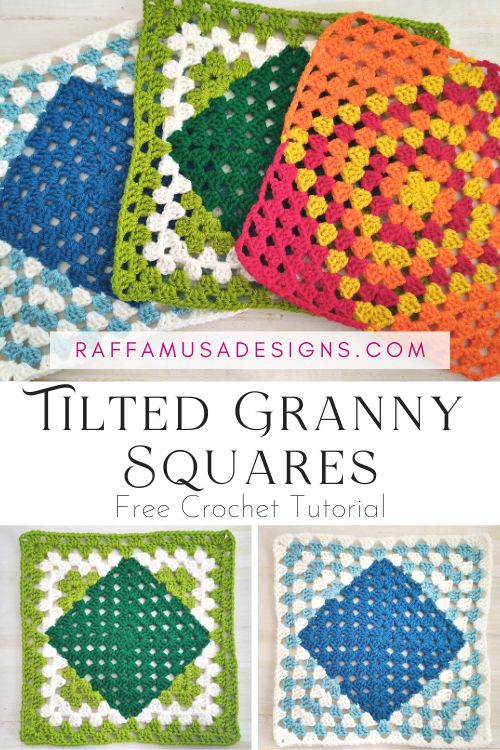
The crochet corner-to-corner (C2C) granny stitch is a very beautiful and easy stitch that works great for blankets, afghan blocks, cushions, scarves, and many other projects.
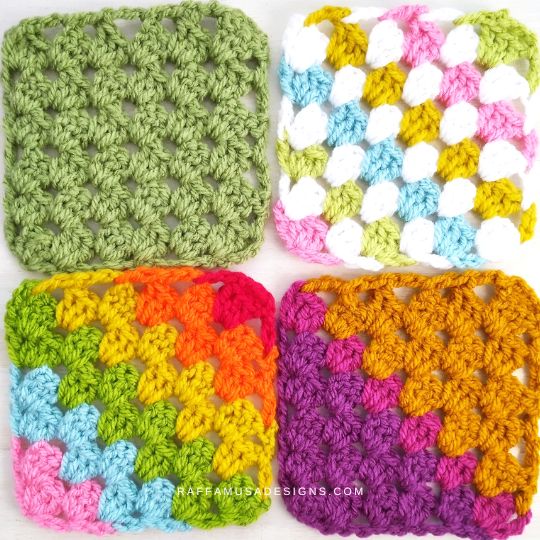
The C2C granny square is essentially the granny stripe stitch worked in a bias, or as the name suggests, from one corner to the other.
There are two shapes that you can obtain using the C2C granny stitch: a square and a rectangle.
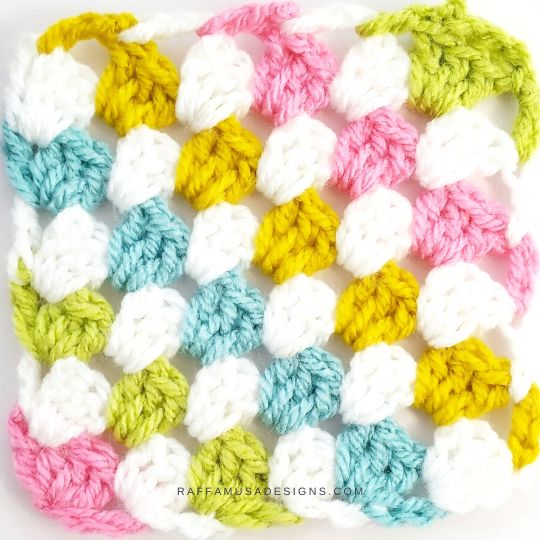
In this tutorial, we’ll see how to crochet a simple C2C granny square using one solid color but of course, once you get familiar with this stitch, you can experiment with colors and stripes!
How does the C2C Granny Stitch work?
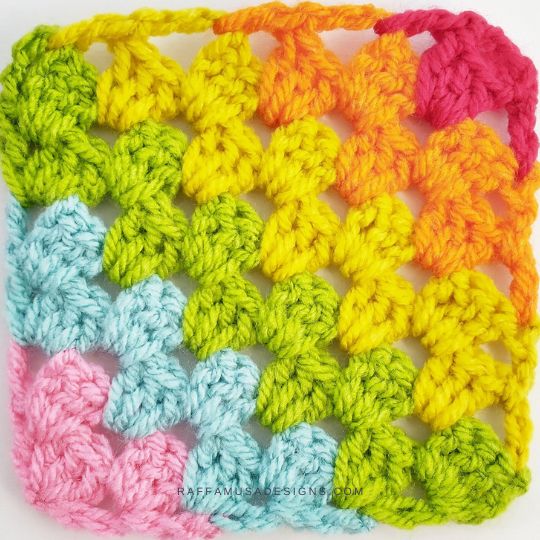
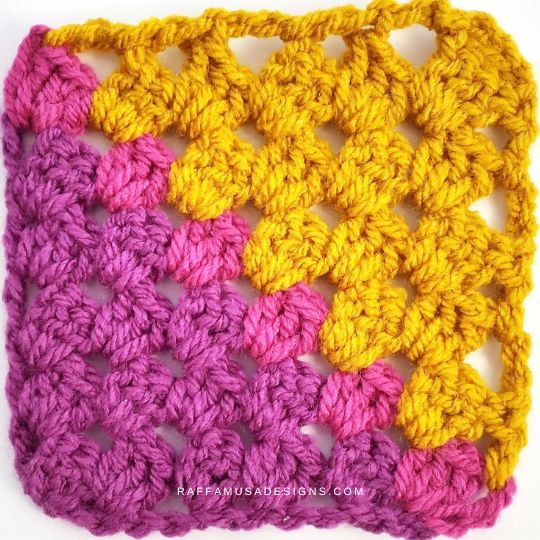
The C2C granny stitch has two main halves or sections:
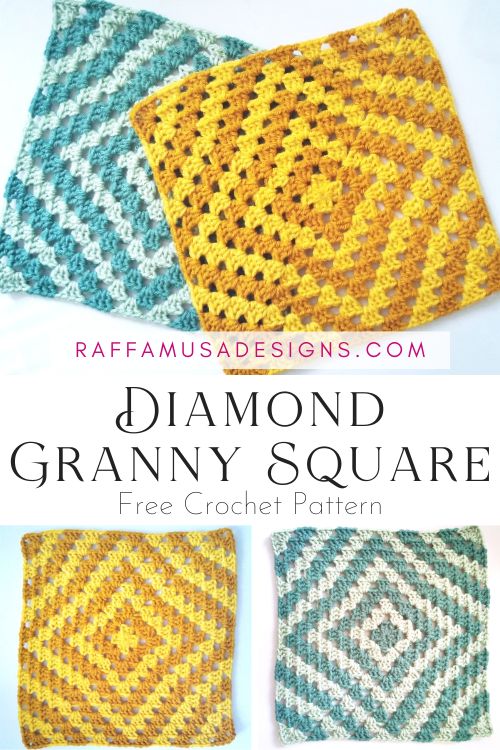
- An increasing part – which is the one that I crocheted with purple and fuchsia yarn in the square below;
- And a decreasing part – in gold in the square below.
Find more granny square tutorials here on the blog…
Save this tutorial for later by pinning it to your best crochet board using this pin.
Note: this post contains affiliate links. If you purchase something through the links on my blog, I might earn a commission. This will not have any effect on the price you pay. For more info, please, see my Privacy Policy.
How to Crochet the C2C Granny Stitch – Video Tutorial
RAINBOW GRANNY BLANKET CAL
The pattern of the C2C Granny Square is part of the Rainbow Granny Blanket CAL.
If you’re taking part in the CAL, crochet a C2C granny square as explained below. Keep increasing until row 14, and then decrease!
When your C2C granny square is done, add a granny stitch border all around so that you have 30 dc sts and 9 ch-1 on each side, and 1 ch-2 sp at each corner.

MATERIALS
You can use any yarn with the appropriate hook. I used:
- 5.5-mm (I/9 USA, 5 UK) Hook
- Aran-Weight (4) Yarn in 4 colors. I used Paintbox Yarns Simply Aran.
- Tapestry Needle
ABBREVIATIONS (US TERMS)
Ch – Chain
Dc – Double Crochet
Sl St – Slip Stitch
Sp – Space
St – Stitch
Yo – Yarn over
PATTERN NOTES
- If the pattern says “dc 2”, you need to crochet 1 dc in each of the next 2 sts.
- *… – Repeat the instructions from * for the indicated number of times.
- […] – Crochet the instructions within brackets in the same indicated st.
How to Crochet the Corner-to-Corner (C2C) Granny Stitch
Increasing
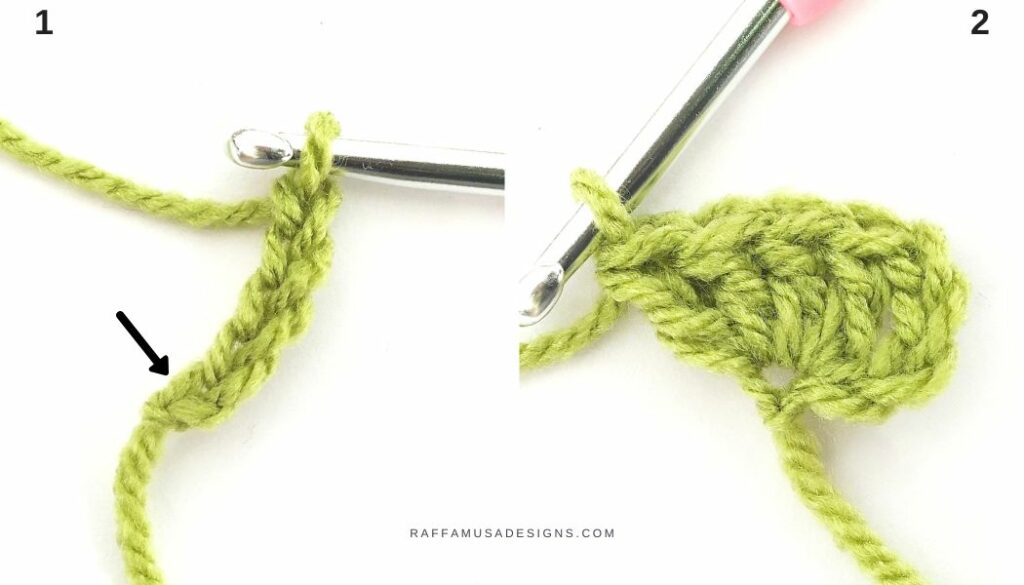
Ch 5 (counts as an initial ring, a dc, and a ch-1 sp).
Row 1. [Dc 4] in first-made ch (indicated by the arrow in photo 1). (5 dc, 1 ch-1 sp, photo 2)
Row 2. Ch 4 (counts as a dc and a ch-1 sp here and throughout), turn. [Dc 3] in sp between the first 2 sts (indicated by the arrow in photo 3), sk 3, [dc 4] in the last ch-1 sp (photo 5). (8 dc, 1 ch-1 sp)
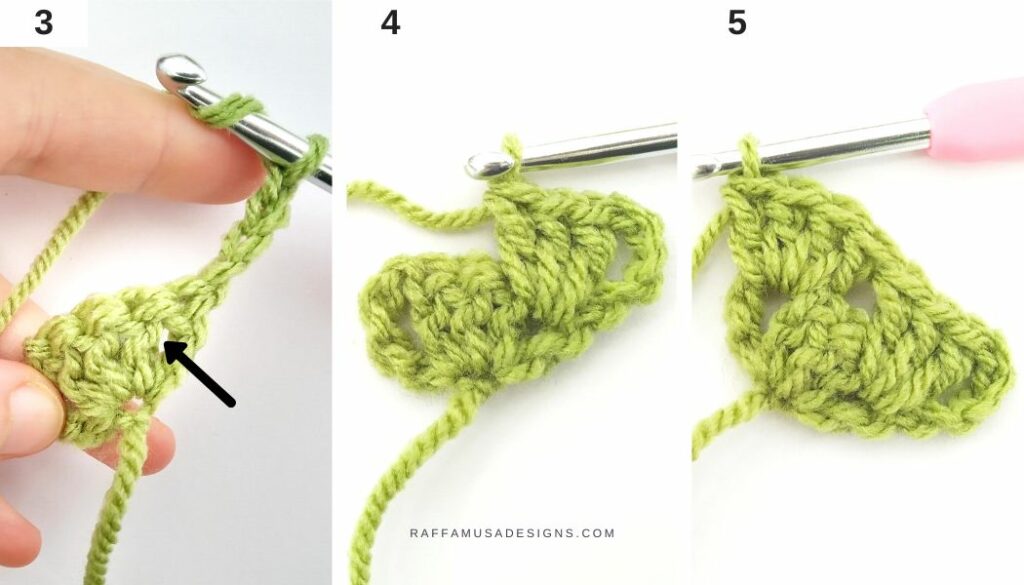
Row 3. Ch 4, turn. [Dc 3] in the sp between the first 2 sts (photo 6), sk 3, [dc 3] in sp between the third skipped st and the next, sk 3, [dc 4] in the last ch-1 sp (photo 7). (11 dc, 1 ch-1 sp)

Row 4. Ch 4, turn. [Dc 3] in space between the first 2 sts, *sk 3, [dc 3] in sp between the third skipped st and the next. Repeat from * until you have 4 sts left. Sk 3, [dc 4] in last ch-1 sp. (14 dc, 1 ch-1 sp)
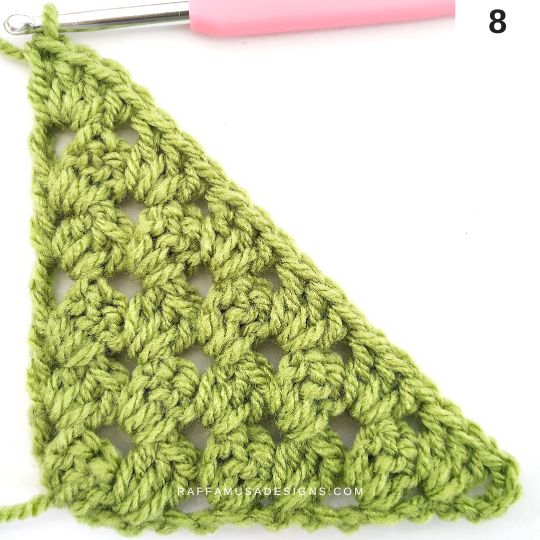
Keep repeating row 4 until you reach your desired size for the square. For this tutorial, I kept increasing my square until row 6 (photo 8).
Decreasing
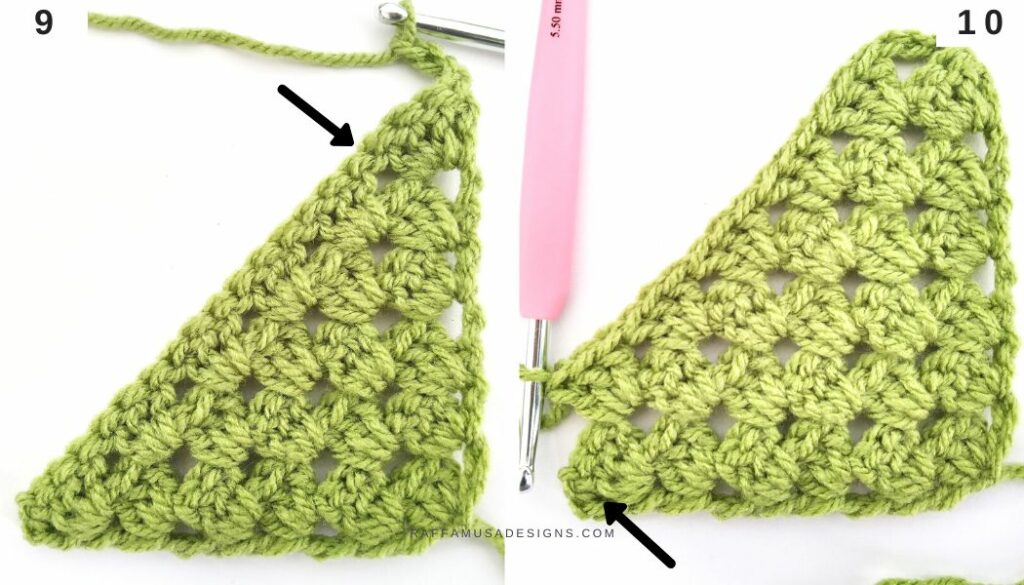
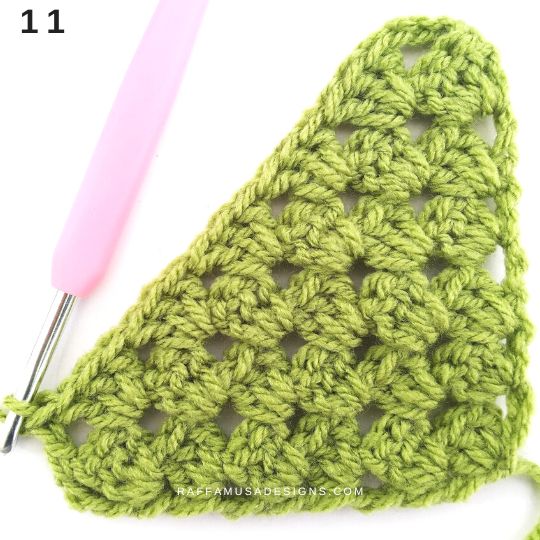
Row 7. Ch 3 (counts as a dc here and throughout), turn. Sk 4, [dc 3] in sp between the fourth and the fifth st (indicated by the arrow in photo 9), *sk 3, [dc 3] in sp between the third skipped st and the next. Repeat from * until you have 4 sts left. Sk 3, dc 1 in last ch-1 sp (see arrow in photo 10). (17 dc, photo 11)
Row 8. Ch 3, turn. Sk 4, [dc 3] in sp between the fourth and fifth st (indicated by the arrow in photo 12), *sk 3, [dc 3] in sp between the third skipped st and the next. Repeat from * until you have 4 sts left. Sk 3, dc 1 in sp between the second to last and the last st (photo 13). (14 dc)

Row 9. Keep decreasing by repeating row 8. (11 dc)
Row 10. Ch 3, turn. Sk 4, [dc 3] in sp between the fourth and the fifth st, sk 3, [dc 3] in sp between the third skipped st and the next, sk 3, dc 1 in sp between the second to last and the last st. (8 dc)
Row 11. Ch 3, turn. Sk 4, [dc 3] in sp between the fourth and the fifth st, sk 3, dc 1 in sp between the second to last and the last st (photo 14). (5 dc)
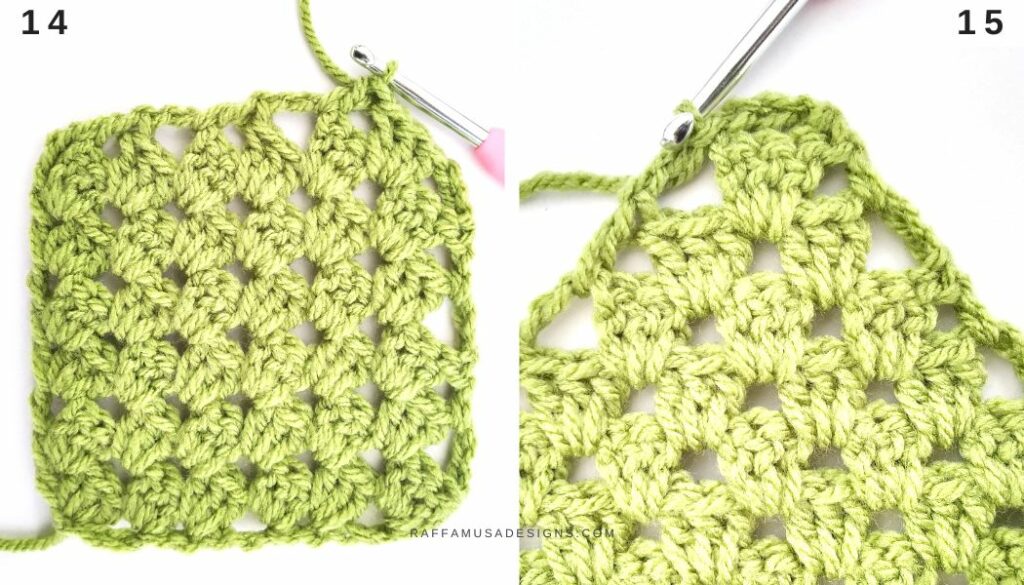
Row 12. Ch 3, turn. Sk 4, sl st 1 in sp between the second to last and the last st (photo 15). (3 chs)
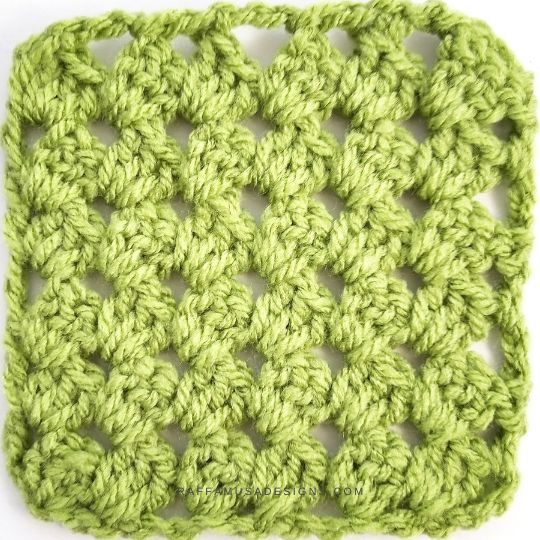
You just learned how to crochet the C2C Granny Stitch!

I hope that you enjoyed this crochet stitch tutorial! Please, share your projects using the C2C granny stitch on Facebook or Instagram using the hashtag #raffamusadesigns
Find more granny squares here on the blog…
On Row 9, you say to keep decreasing by following Row 16, but there are only 12 Rows?
Hi, thanks for letting me know. It should say like row 8. I corrected it now 🙂
I am new to this type of crochet. What are the stitches in ( ) at the end of the steps? “(8 dc, 1 ch-1 sp)”
Hi, those at the end of each row are the st counts for that row 🙂