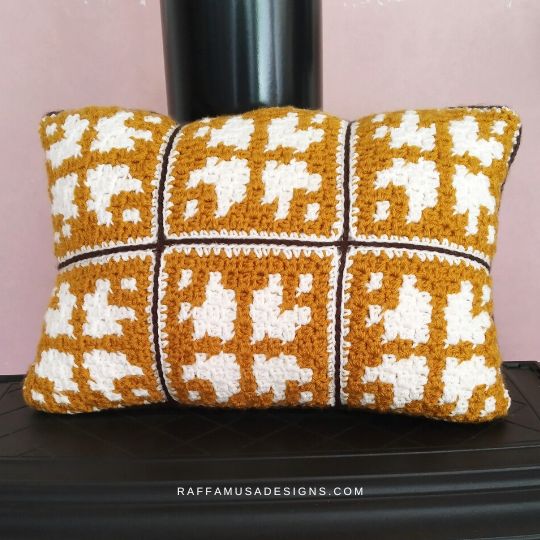
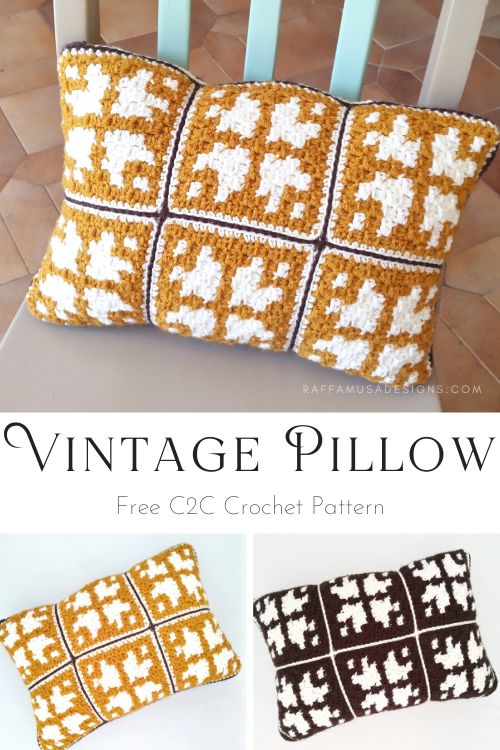
Add a cozy touch to your Fall home decor with this Mini-C2C crochet Vintage Pillow free pattern.
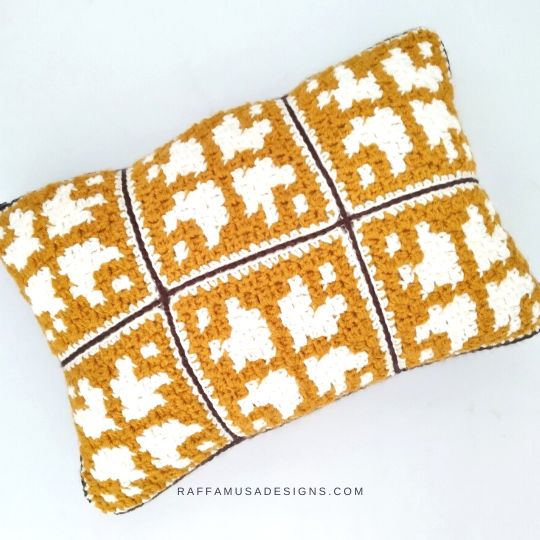
I made this pillow in small bits, a.k.a. little squares worked with the mini corner-to-corner (C2C) technique.
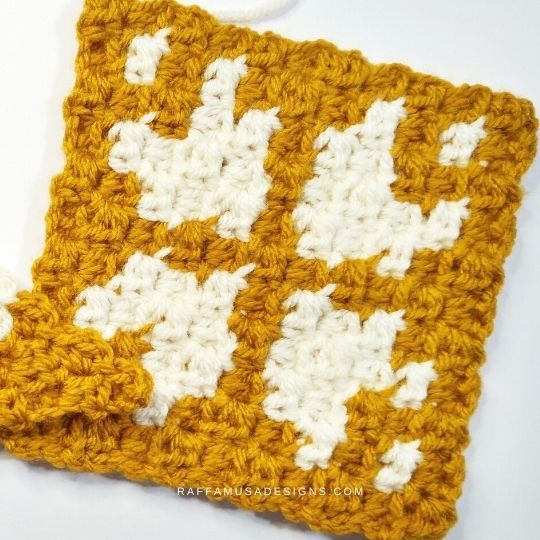
The squares are all the same and feature a Nordic-style star or flower. I guess that if you crochet this motif in red and white, or blue or green and white, they could be perfect for Christmas too.
However, I really wanted a soft and warm pillow for my rustic living room.
Rectangular or square Pillow?
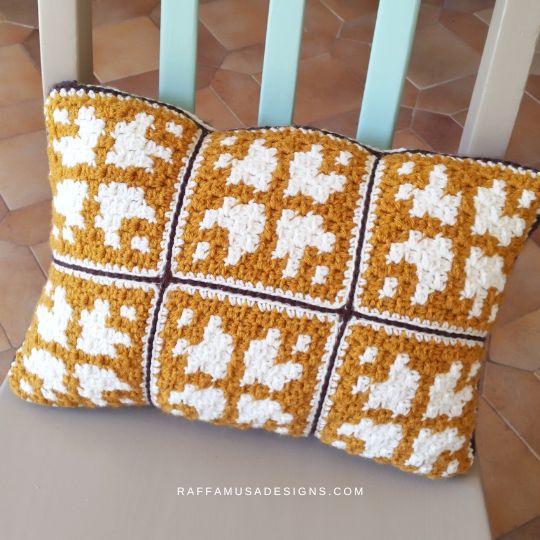
In particular, my boyfriend asked for a long and short rectangular pillow that he could put behind his back while working on his computer from the couch (he’s still doing remote work these days).
So, since all the pillows I had were squares and kind of flat, I sewed a pillow of the perfect size for filling my crochet pillowcase.
Of course, if you prefer a square pillow, you can easily join your squares accordingly and make a pillow of the size you need.
You can also feel free to experiment with different yarn weights and crochet your squares with some scrap of yarn that you already have in your stash.
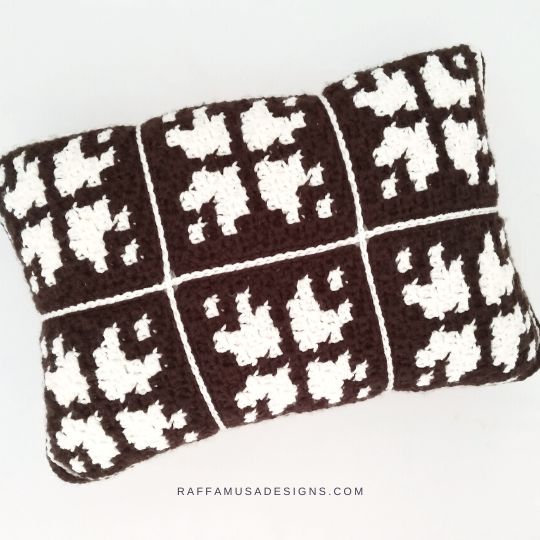
At least, that’s what I did and that’s why the back panel of my pillow is completely brown. I simply ran out of yellow yarn and didn’t feel like ordering more!
Find more crochet patterns for home decor…
- Falling Petals Potholder
- Hexagon Honeycomb Bread Basket
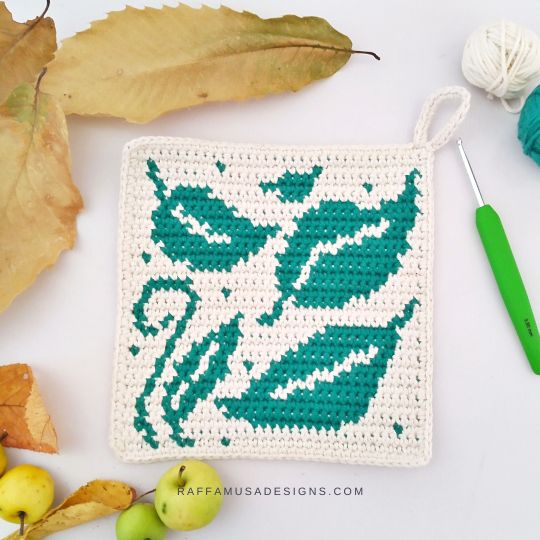
- Swirling Leaves Potholder
- Ladybug Granny Square Pillow
Add the pattern of the mini-C2C crochet Vintage Pillow to your Ravelry queue HERE and favorite it (– thank you!). Or save it for later by pinning it to your favorite crochet board on Pinterest using this pin!
Note: this post contains affiliate links. If you purchase something through the links on my blog, I might earn a commission. This will not have any effect on the price you pay. For more info, please, see my Privacy Policy.
Printer Friendly PDF PATTERN
The ad-free, printable pattern of the Mini-C2C Vintage Pillow is available in all my online shops! Grab your copy on Ravelry, LoveCrafts, or Etsy!


HOW TO MINI-C2C CROCHET
If you’re new to C2C crochet, I have a couple of tutorials with videos all about the mini-C2C crochet stitch!
- Learn the basics of how to crochet the mini-C2C stitch;
- How to change colors and carry yarn in mini-C2C;
- And how to add a single crochet border around your mini-C2C block.
MATERIALS
- 5.5-mm (I/9 US, 5 UK) Crochet Hook
- Aran (4, Medium) Weight Yarn
- Tapestry Needle
- Zipper, 16″ (40 cm)
- Stuffing or a 16.5″ by 11″ (42 cm by 28 cm) Pillow (I sewed mine)
YARN
I used Stylecraft Special Aran in the following colors:
- A – Gold (1709) – 170 yds (155 m)
- B – Cream (1005) – 208 yds (190 m)
- C – Dark Brown (1004) – 170 yds (155 m)
Feel free to use any yarn with the appropriate hook.
SIZE
16.5″ by 11″ (42 cm by 28 cm)
GAUGE
8 blocks in mini-C2C in 4″ (10 cm)
Abbreviations (US Terms)
- Ch – Chain
- Hdc – Half Double Crochet
- RS – Right Side
- Sc – Single Crochet
- Sk – Skip
- Sl St – Slip Stitch
- Sp – Space
- St – Stitch
- WS – Wrong Side
- Yo – Yarn over
SPECIAL STITCHES
Mini Corner to Corner Stitch (Mini C2C)
Learn how to crochet the mini-C2C stitch HERE.
Color Changes
Learn how to change colors and carry yarn in mini-C2C HERE.
Construction
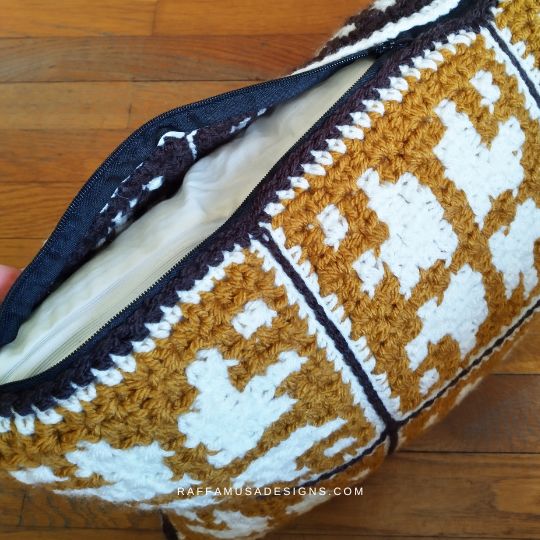
This pillow cover is made by joining two panels. Each panel is made by joining 6 mini-C2C crochet squares.
A zipper is sewn on the inside of one of the long sides of the pillow to make it easy to wash.
PATTERN NOTES
- The written instructions indicate row by row the number of blocks to work in each color.
- For example, “(A) 2, (B) 4″ means that you first need to work 2 blocks with color A and then, 4 blocks with color B.
- The total number of blocks per row is indicated within brackets at the end of each row’s instructions.
- Find the color chart of the mini-C2C square motif at the bottom of this blog post HERE.
Mini-C2C Crochet Vintage Pillow – FREE PATTERN
Mini-C2C Square
For the free color chart, see the very end of this blog post HERE.
Make 6 squares using A and B, and 6 squares using C instead of A.
↗ 1 [WS]. (A) 1. (1)
↙ Row 2 [RS]. (A) 2. (2)
↗ Row 3 [WS]. (A) 1, (B) 1, (A) 1. (3)
↙ Row 4 [RS]. (A) 4. (4)
↗ Row 5 [WS]. (A) 1, (B) 1, (A) 1, (B) 1, (A) 1. (5)
↙ Row 6 [RS]. (A) 2, (B) 2, (A) 2. (6)
↗ Row 7 [WS]. (A) 2, (B) 3, (A) 2. (7)
↙ Row 8 [RS]. (A) 3, (B) 2, (A) 3. (8)
↗ Row 9 [WS]. (A) 1, (B) 2, (A) 1, (B) 1, (A) 1, (B) 2, (A) 1. (9)
↙ Row 10 [RS]. (A) 2, (B) 2, (A) 2, (B) 2, (A) 2. (10)
↗ Row 11 [WS]. (A) 1, (B) 1, (A) 1, (B) 2, (A) 1, (B) 2, (A) 1, (B) 1, (A) 1. (11)
CORNER
↙ Row 12 [RS]. (A) 2, (B) 2, (A) 2, (B) 2, (A) 2. (10)
↗ Row 13 [WS]. (A) 1, (B) 2, (A) 1, (B) 1, (A) 1, (B) 2, (A) 1. (9)
↙ Row 14 [RS]. (A) 3, (B) 2, (A) 3. (8)
↗ Row 15 [WS]. (A) 2, (B) 3, (A) 2. (7)
↙ Row 16 [RS]. (A) 2, (B) 2, (A) 2. (6)
↗ Row 17 [WS]. (A) 1, (B) 1, (A) 1, (B) 1, (A) 1. (5)
↙ Row 18 [RS]. (A) 4. (4)
↗ Row 19 [WS]. (A) 1, (B) 1, (A) 1. (3)
↙ Row 20 [RS]. (A) 2. (2)
↗ Row 21 [WS]. (A) 1. (1)
Squares’ Border
With a color of choice, add a sc border all around each square.
Sc 1 on top of each hdc, and sc 1 on the side of each mini-C2C block. At the end of each side, ch 1, and start crocheting on the next side.
Find a video tutorial on how to add a sc border to mini-C2C HERE.
However, keep in mind that in the video, I added 2 sc on the side of each mini-C2C block, while for this pattern, I only made 1 sc on the side of each block.
Joining
Join 6 squares together (3 by 2) using the zipper join method.
Panels’ Border
With a color of choice, sc all around each panel.
Fasten off and weave in your ends.
Assembly
WS facing, place the panels on top of each other.
Measure your zipper against the top side of the panels, and mark the sts at each end of the zipper.
Join a color of choice in one of the marked sts, and using the sl st join method, join the panels all around until you get to the next marked st on the top side.
Fasten off and weave in your ends.
Finally, hand-sew the zipper on the inside of the open side of the pillowcase.
YOUR MINI-C2C CROCHET Vintage Pillow IS READY.
I hope you enjoyed this free crochet pattern. I would love to see your pillows on Facebook and Instagram. Make sure to use the hashtag #raffamusadesigns so that I don’t miss your pics!
Find more C2C crochet patterns here on the blog…