Learn how to line your crochet potholders with fabric to make them double-thick and safe to use. With or without a sewing machine!
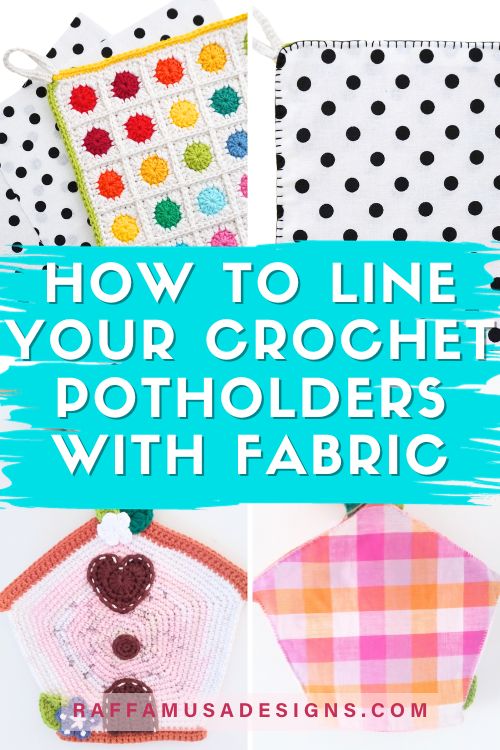
If you love crocheting potholders, you might have at least once wanted to add a double layer to make your hot pads more practical in the kitchen.
Of course, the easiest way to make your crochet potholder double-thick is to actually crochet two layers of the same size and join them together. This is something that I did for my Falling Petals Potholder, my Tunisian crochet Tresca Potholder, and my Round Christmas Potholders.
Even though this method works, seaming two crochet potholders together can add quite some bulk to your finished project and quite frankly, it takes quite a lot more crocheting!
One more elegant solution can be to line your crochet or knit potholder with one or two layers of cotton fabric.
Lining yarn potholder with fabric offers the clear advantage of making your hot pad thicker and safer for handling hot pots and pans straight from the oven or the stove.
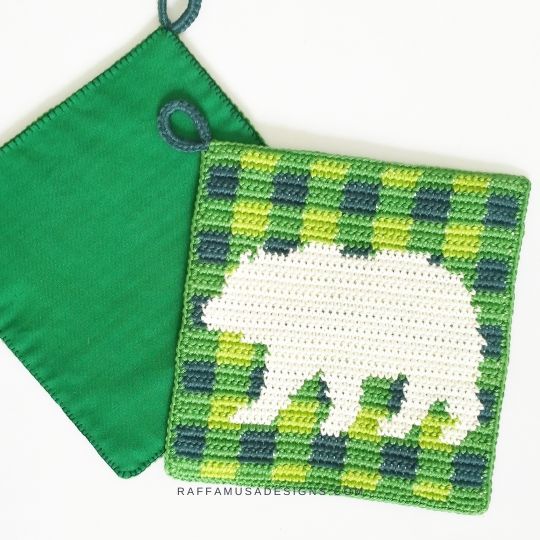
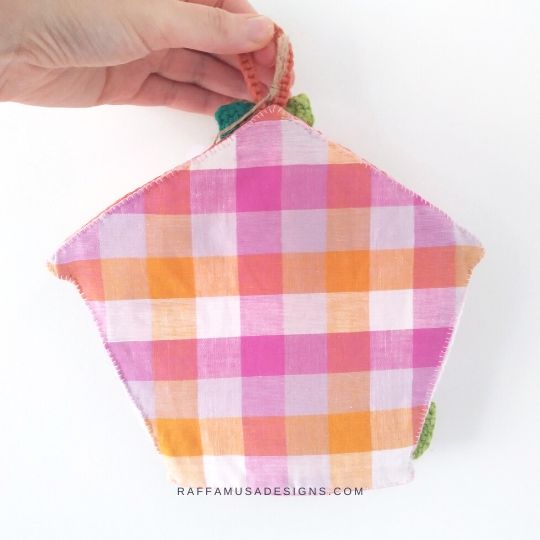
You can line any kind of potholder and of any shape, square, rectangle, or even an irregular shape, as you can see in the example below.
In this post, I’ll share with you my go-to method for adding a layer of cotton lining to your yarn potholders.
While I used a sewing machine to prepare my lining, you don’t necessarily need one, and in the tutorial, I’ll suggest alternatives for sewing everything by hand.
How to Line a Crochet Potholder – Step-by-Step Tutorial
In this tutorial, I’ll show you how to add a fabric lining to a crochet potholder using my Scrappy Dots Potholder as an example, but of course, you can use any crochet or knit potholder.
1. Cut your fabric
The first step is to cut two pieces of fabric of the same shape as your potholder but with an extra 0.5″ (1 cm) all around for seam allowance.
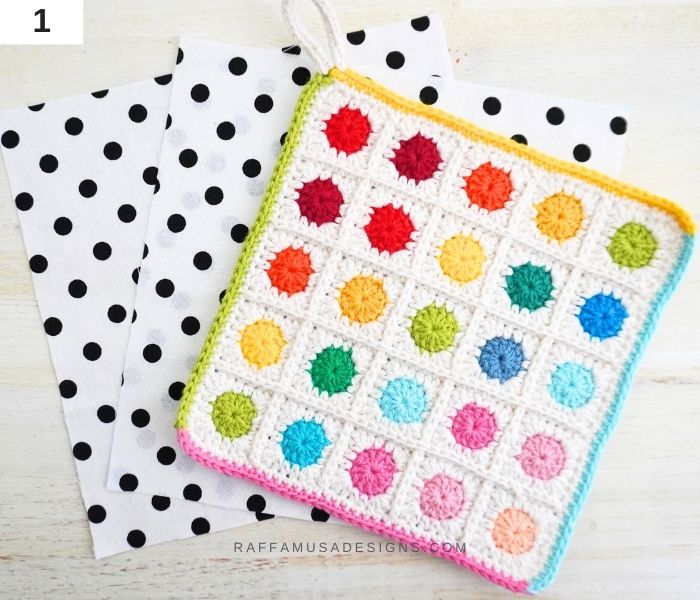
In my case, my Scrappy Dots Potholder measures 6.1″ (15.5 cm), so I cut two squares of 6.6″ (16.5 cm).
If two layers of fabric seem a bit much for your potholder, you can choose to use a single layer of fabric instead. This is particularly recommended if you don’t have a sewing machine!
In this case, press the seam allowances inside toward the wrong side of your fabric, skip the next two paragraphs, and move directly to sewing the fabric to your potholder.
2. Draw the shape of your potholder
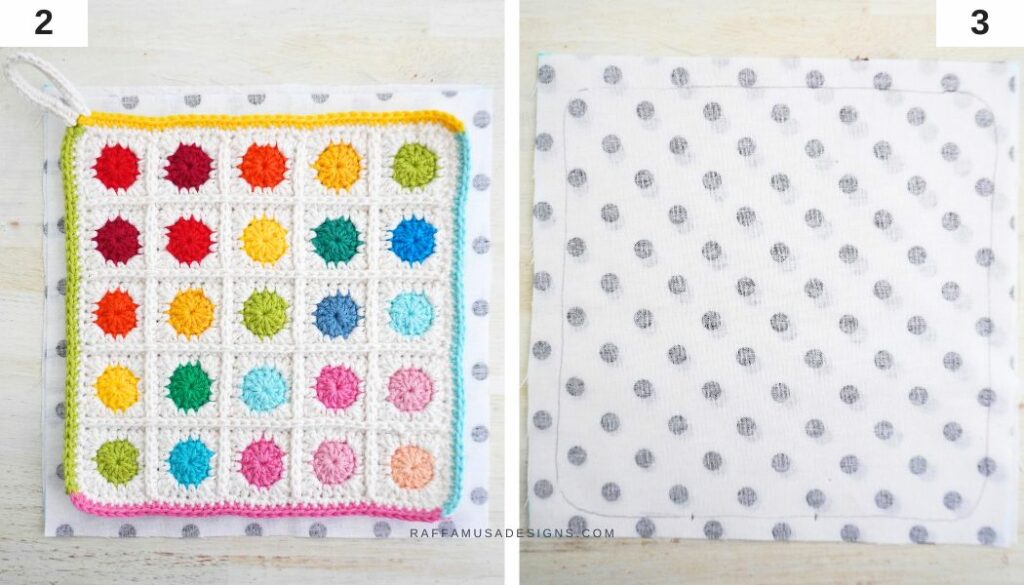
Center the crochet potholder on the wrong side (WS) of one of the two pieces of fabric (photo 2) and draw a line all around the potholder (photo 3). This line will serve as a guiding line when sewing.
3. Prepare your Lining
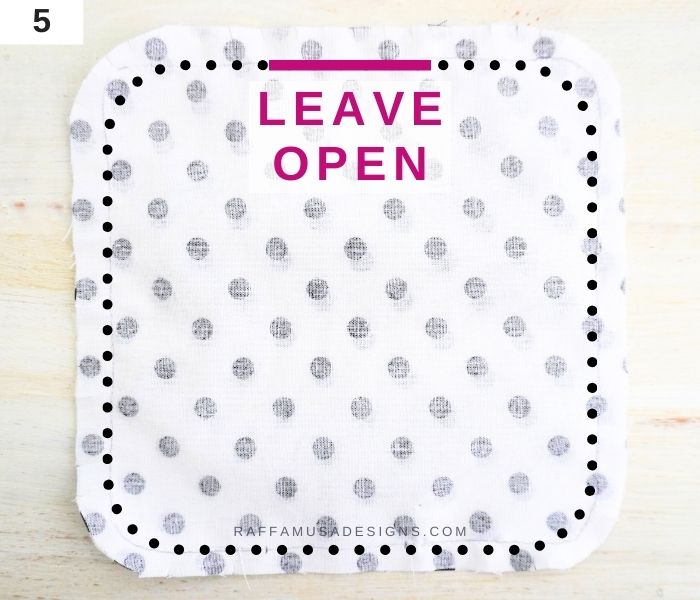
Place the two pieces of fabric on top of each other with the right sides (RS) facing. So, the WS of both are facing out (photo 4).
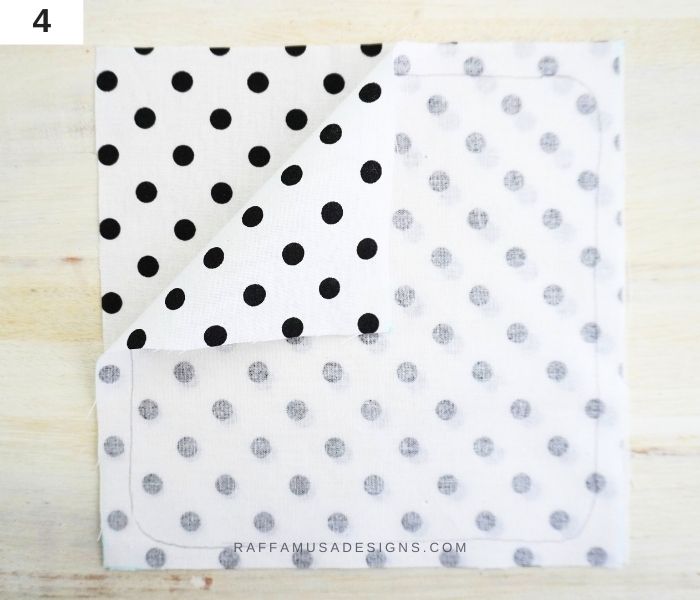
Using the guiding line you drew earlier, sew the two pieces of fabric together making sure to leave about 2″ (5 cm) open for turning the lining to the RS (photo 5).
If you don’t have a sewing machine, you can sew by hand!
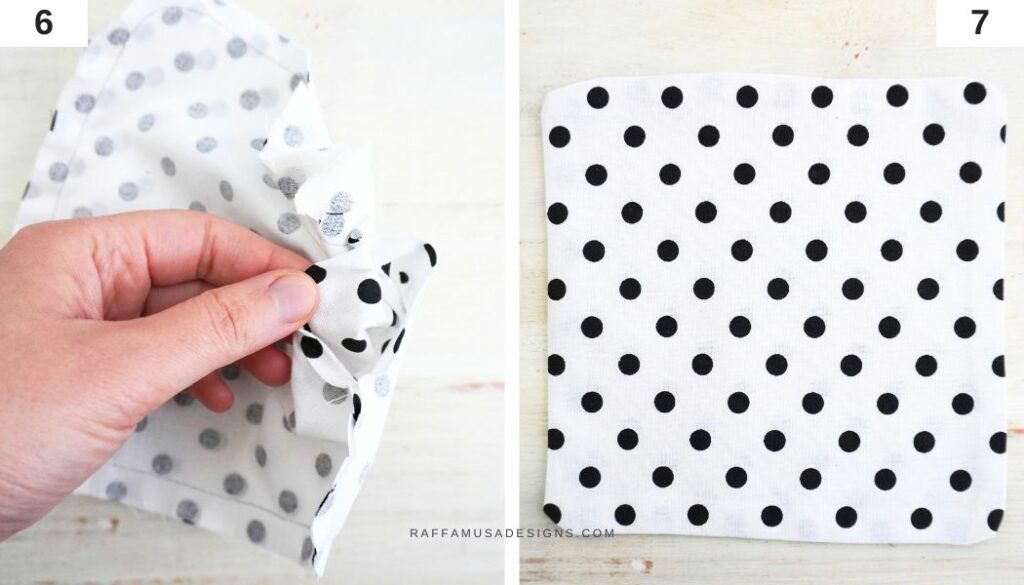
When you’re done sewing, trim the extra fabric at the corners and make little cuts all around the seaming allowance.
Then, turn the lining to the RS through the little opening in the seam, push all the corners carefully, and press your lining.
There is no need to sew the gap closed. Just make sure to fold the seam allowance inside and press it to hold it in place (photo 7).
4. Pin your lining in place
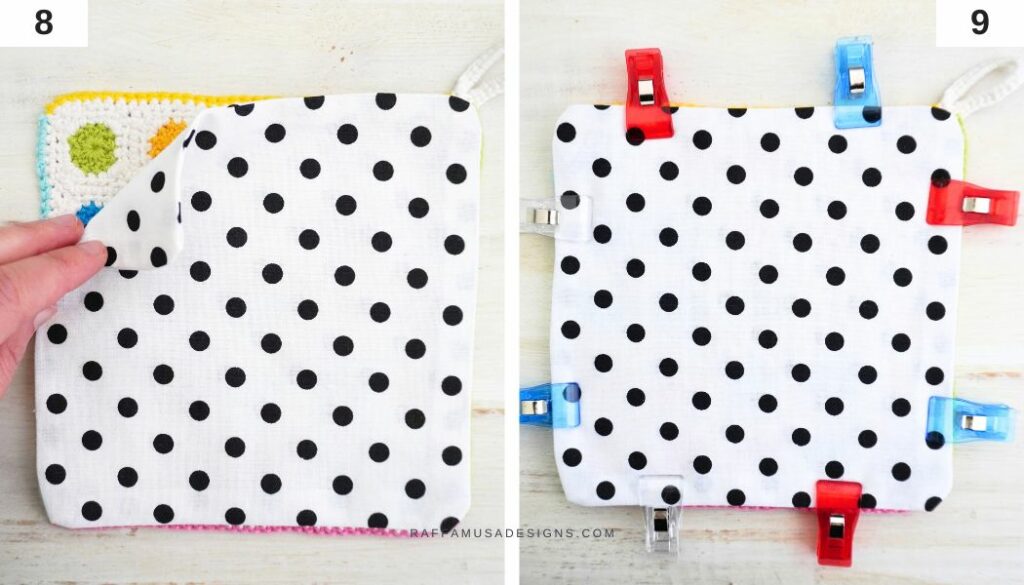
Place your lining over the WS of your potholder (photo 8) and pin or clip it in place (photo 9).
5. Sew the Lining to the Potholder
Sew the lining to the edge of the potholder. You can either use a sewing machine or sew by hand with the blanket stitch.
How to sew the Blanket Stitch
For sewing the blanket stitch by hand, start by cutting a length of sewing thread.
1. Prepare your Thread and needle
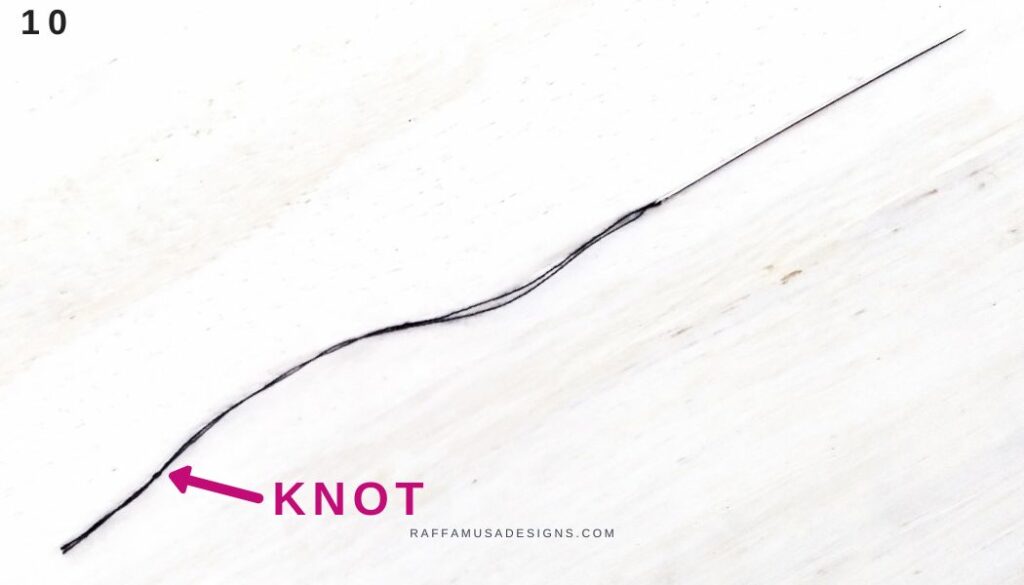
Draw your thread through a sewing needle and fold the thread in half so that both ends are at the same level. Then, tie a knot near the ends of the thread as shown in photo 10.
Notice that in photo 10, the thread is very short but you’ll want to use a much longer thread in order to avoid running out too many times.
If you do run out of thread while sewing your blanket stitch, no panic! See point 6 for securing your thread, and simply start over with a new piece of thread.
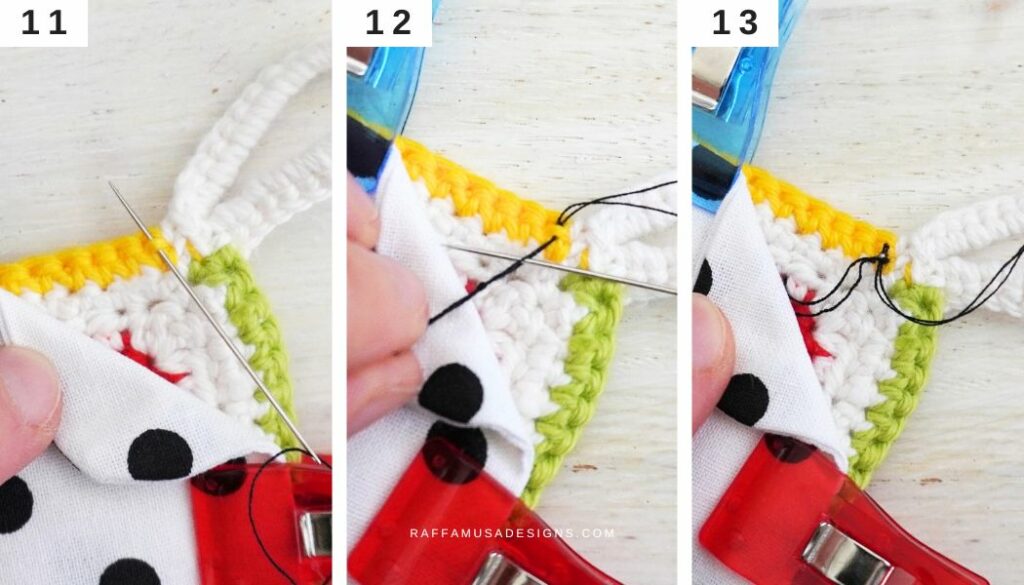
2. Join your thread to the Potholder
Attach your thread to the back of one of the stitches around the edge of your potholder.
In this example, I used the third loop of the single crochet stitches on the border of my potholder as follows:
- Draw your needle through the third loop of any single crochet at the edge of the potholder (photo 11).
- Before pulling the thread completely, make sure to draw your needle between the two strands of thread right before the knot (photo 12).
- Pull the thread completely (photo 13).
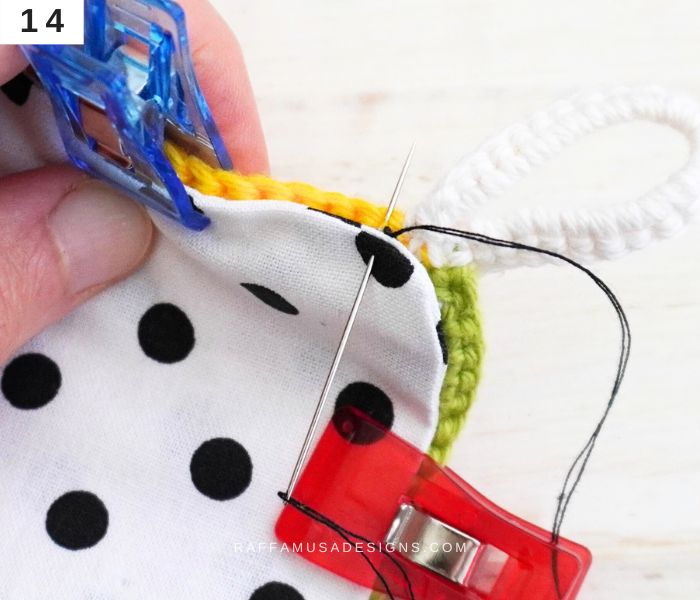
3. First blanket stitch
Now, bring your needle to the RS of the lining and at the same time, draw it through the lining and through the third loop of the same stitch when you joined your thread (photo 14).
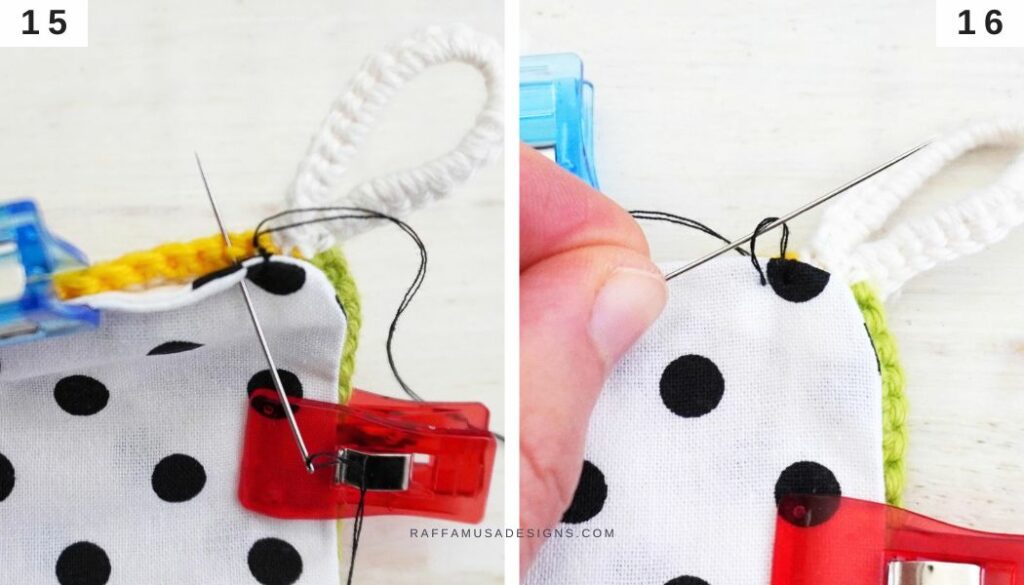
4. Blanket stitch
Again, bring your needle to the RS of the lining and insert it into the fabric in front of the next stitch on the edge of the potholder and through the third loop of the next stitch of the potholder (photo 15).
Before pulling your thread completely, draw your needle through the loop you just created with a movement from left to right, or right to left if you’re left-handed (photo 16).
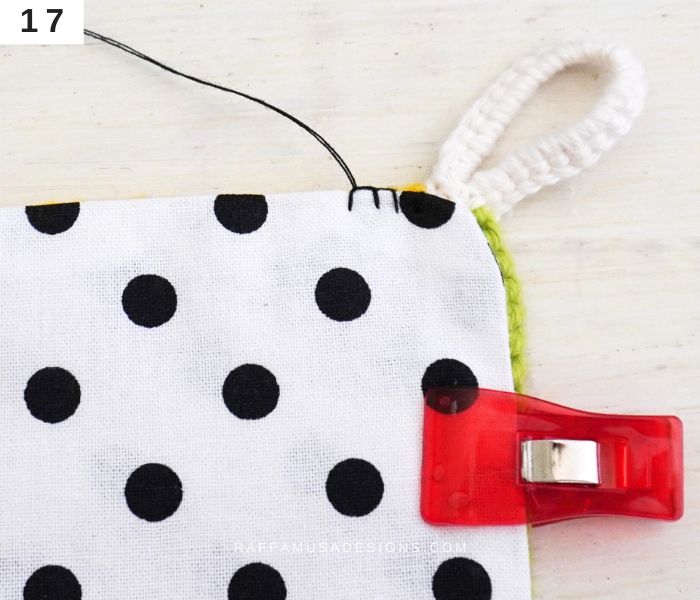
5. Repeat all around
Keep making blanket stitches all around the edge of your potholder.
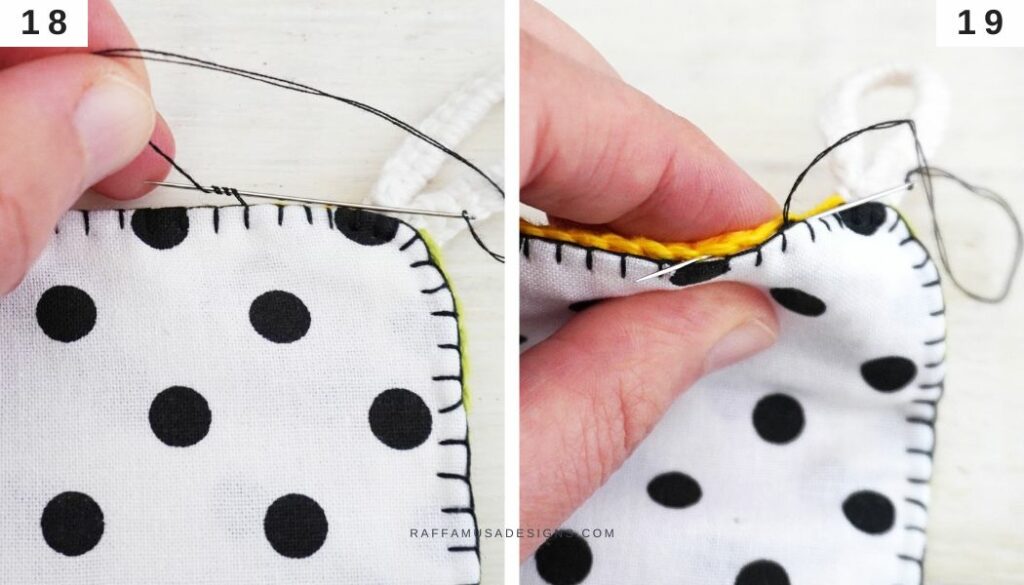
6. Secure your thread
When you’re back where you started, secure your thread by making a little knot stitch as follows:
- Wrap your thread around the needle 3 or 4 times very close to the fabric (photo 18).
- Holding the wrapped thread with your fingers, draw the needle through the back of a few stitches of the potholder or through the fabric (photo 19).
- Still holding the wrapped thread with your fingers, pull the thread. Make sure that hide the knot you just made between the fabric lining and the potholder.
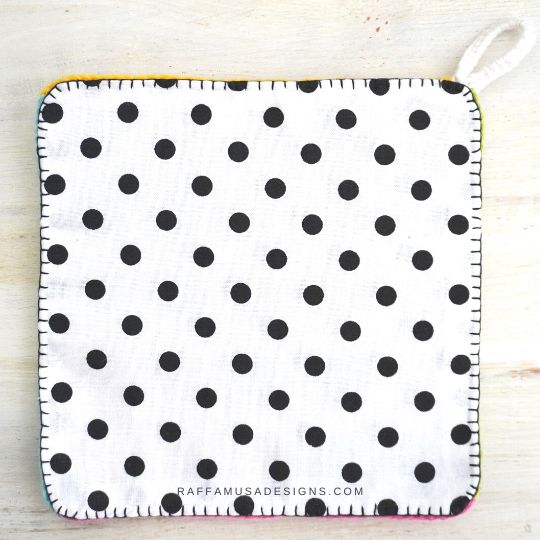
And your lined potholder is ready!
I hope that you enjoyed this tutorial! Don’t forget to show me your lined potholders on Facebook and Instagram using the hashtag #raffamusadesigns
Find more lining tutorials here on the blog…