Here are 10 ways to join granny squares or any crochet pieces!
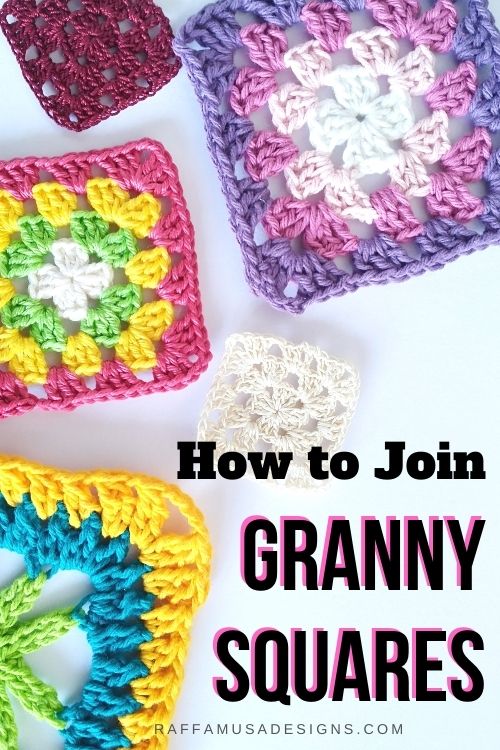
Crocheting granny squares is one of the most relaxing and fun things in the world! They are relatively small so you can carry them with you on the train, or while waiting for a doctor’s appointment, at your kid’s sports…really everywhere!
And you pile them up at the speed of light! Beautiful and colorful!
But that moment always arrives – How on earth am I supposed to put them together?
I get you, I’ve been there! That’s why I would like to share with you my 10 favorite ways to join granny squares!
To make it easier for you to navigate through the post, I’ll quickly introduce the different methods to you so that you can go directly to your favorite one!
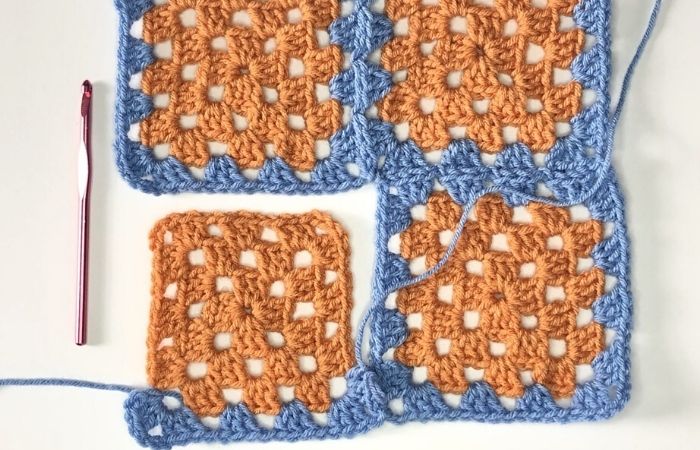
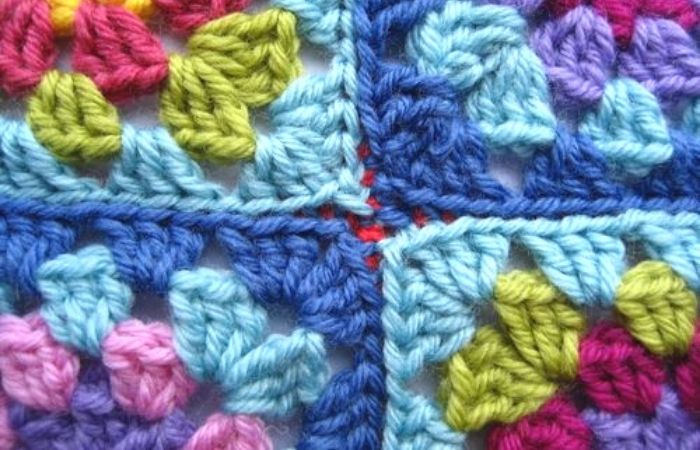
- Join as You Go – You will not have to join your squares after making them. Instead, you just crochet as you go. It works best for classical granny squares.
- Seaming – Drop your crochet hook and grab a tapestry needle!
- Slip Stitch – Easy and flat, just like a slip stitch can be. I found three different methods here!
- Single Crochet – A ribbed join that works for many kinds of granny squares, especially solid ones!
- More Elaborate Methods – There are so many beautiful ways to join granny squares! Really, take a look!
Join as You Go (JAYG)
If you are crocheting classical granny squares, the easiest way to join them is to crochet them together as you go.
This is exactly as it sounds! You attach them together on the last round of the current square.
1. Join as You Go Tutorial
To learn how to join your granny squares with the Join as you Go method, take a look at this beautiful tutorial by Madame Stitch.
Seaming Methods
The seaming methods for joining granny squares are normally pretty invisible.
There are several ways in which you can seam your granny squares together, and frankly, learning these methods will turn out useful for many other things, like seaming garments, amigurumi, etc.
2. Whip Stitch Seaming Tutorial
The whip stitch seaming might be the least invisible of the seaming techniques.
However, this is the case only if you are using squares of different colors or joining them with yarn of a contrasting color.
Enjoy this whip stitch tutorial HERE.
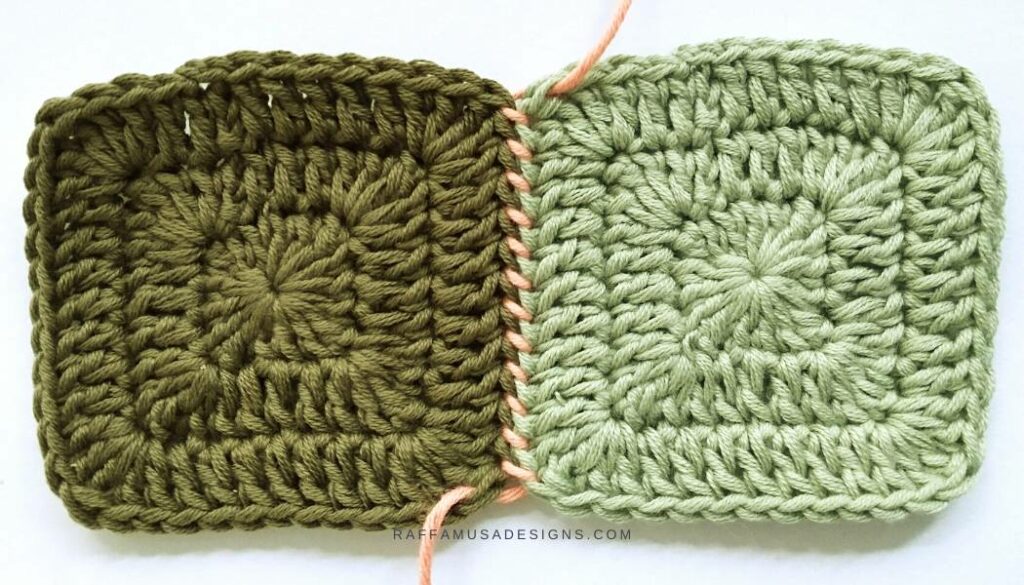
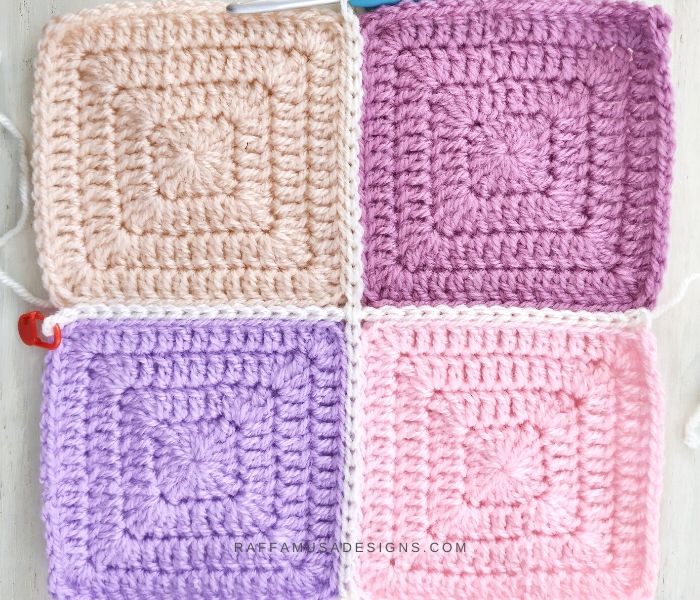
3. Mattress Stitch Seaming Here on the blog
The mattress stitch is one of my favorite ways to glue together many crocheted things. It is flat, invisible, and very easy to make!
Learn how to make it with this tutorial here on the blog.
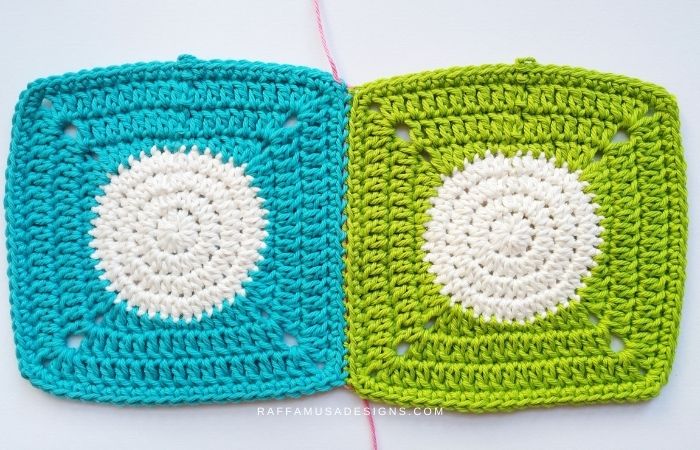
4. Invisible Seaming
The invisible seaming is very similar to the mattress stitch. As the name suggests, this seam is totally invisible and easy to make!
Learn how to make it with this invisible seam tutorial on Wilmade.
Slip Stitch Methods
Joining your granny squares using the slip stitch is the way to go when you really don’t feel like seaming but want a delicate join.
5. Slip Stitch on the Back
If you really don’t like seaming but would like to join your squares in an invisible way, then, this slip stitch on the back method is right for you.
I have to admit that I never tried this method but I really loved it when I saw it on Attic24.
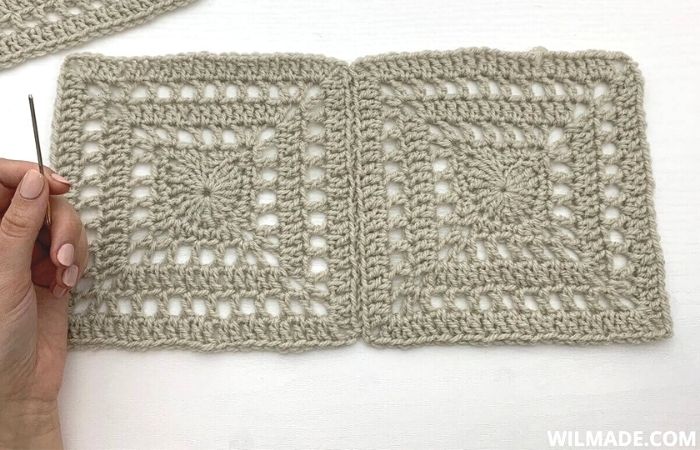
6. Flat Slip Stitch Join
The flat slip stitch or zipper join is one of my favorite ways to join granny squares! I used it both for my Ladybug Pillow and my Bee Baby Blanket.
As the name suggests, this method leaves a very flat join that somehow looks like a zipper. Learn how to crochet it with this flat slip stitch join tutorial here on the blog.
7. Zig Zag Slip Stitch Join
Want to add some fun details to your granny square project?
Then, you definitely have to try this zig-zag slip stitch join method by Bella Coco Crochet.
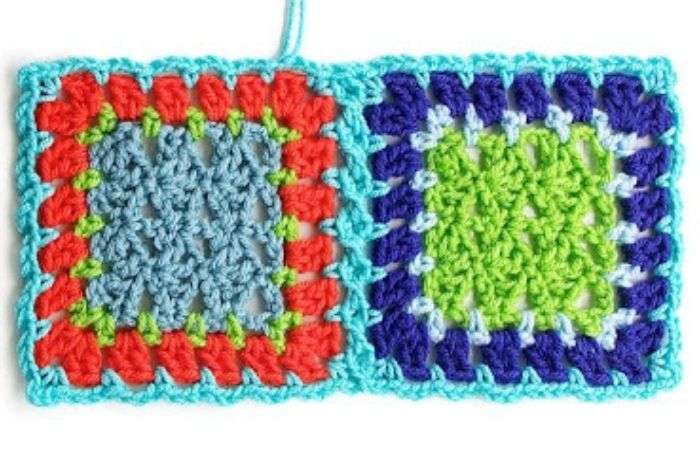
Single Crochet Method
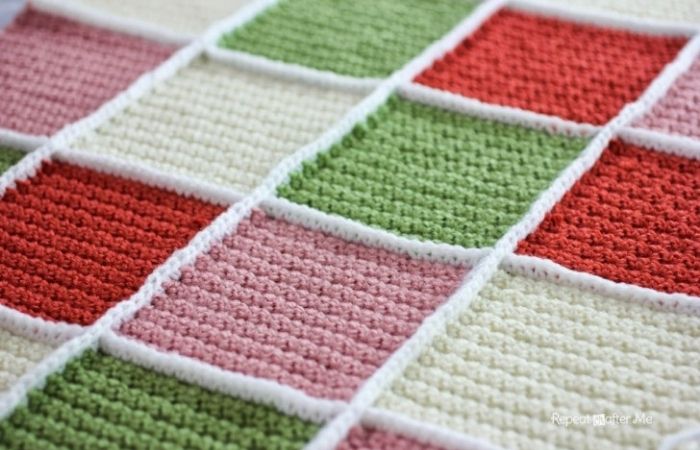
The slip stitch is not for you? No problem, try to single crochet your granny squares!
8. Single Crochet Join
The single crochet joining method is very easy and perfect for beginners. It does leave a bulkier look but it still looks very beautiful!
Learn how to join your crochet blocks with the single crochet method with this tutorial by Repeat Crafter Me.
More Elaborate Methods
So far, we only saw joining methods that are invisible or do not add too much detail to your project.
But joining granny squares can really be a true craft with some stunning results!
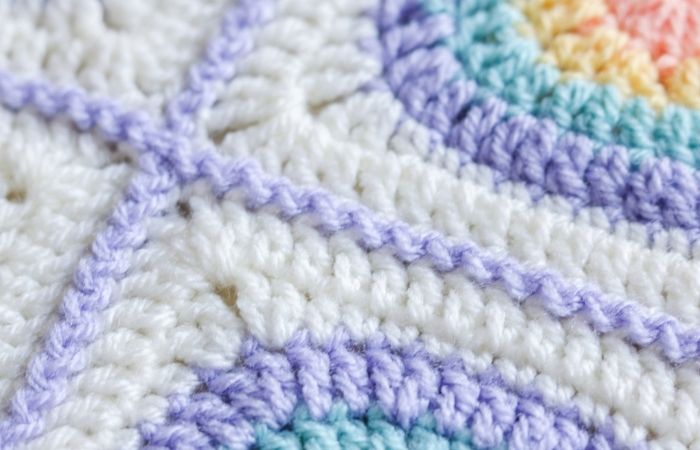
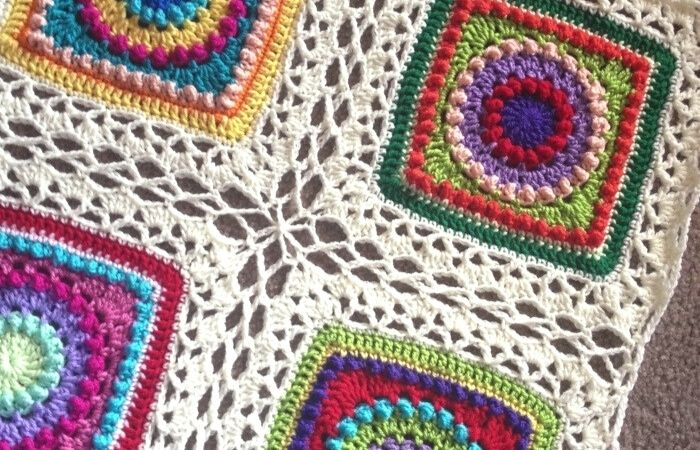
9. Celtic Lace Join
Rachele from Cypress Textiles is a real genius when it comes to joining squares. Her blankets always have the most beautiful details and she does a great job at teaching how to do the same.
The Celtic lace join is definitely my favorite method among the ones that she uses. You can learn all about it in this tutorial.
10. Flat Braid Join
This flat braid join was shared by Gourmet Crochet and I find it simply divine! Learn how to crochet it with this free tutorial!
Here we are at the end of this awesome collection of ways to join granny squares!
I hope that you found your favorite method to join granny squares!
I’d love to know which one you chose! Feel free to share it with me in the comments or on Facebook and Instagram. On Instagram, you can also share your work with me by using the hashtag #raffamusadesigns
Find some more inspiration for your next granny square project!