In this step-by-step tutorial, I would like to share with you my go-to method to crochet around wooden beads.
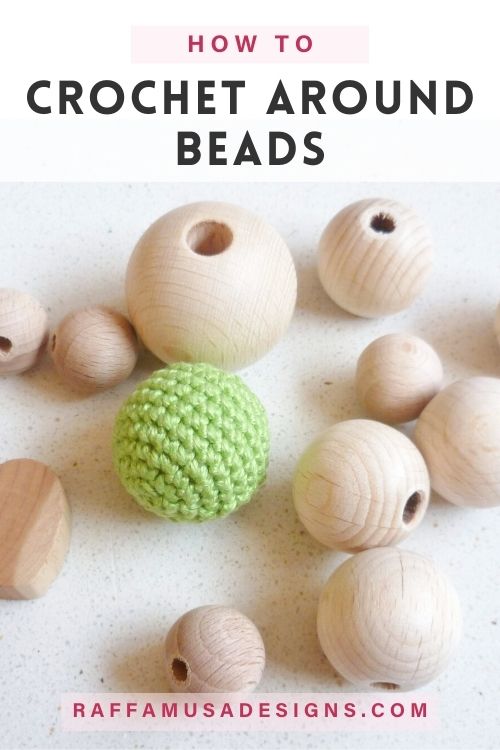
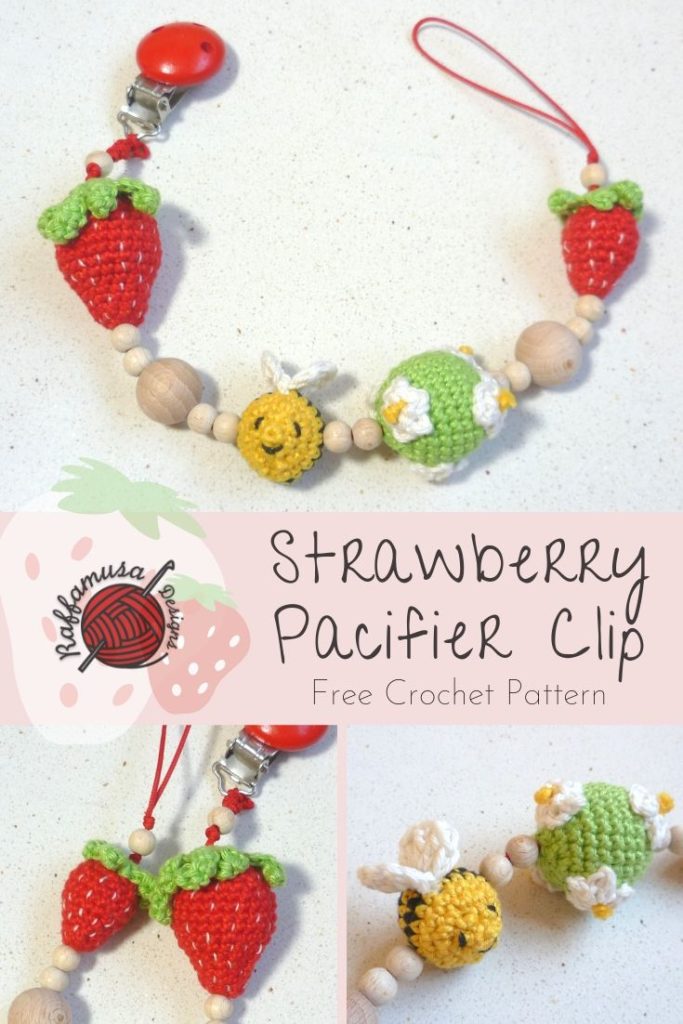
Crocheted beads are useful when you want to make jewelry or baby toys, for example, pacifier chains or baby teething toys.
The patterns that I will share with you are for beads with a diameter of 1″ (2.5 cm) and 0.8″ (2.0 cm). However, you’ll see that once you get the hang of it, it’s going to be extra easy to adapt the pattern for any other bead size!
Of course, you can also avoid using the wooden bead inside and just fill your crochet bead with some fiberfill or other stuffing material.
If you’ve never tried it before, crocheting around a wooden bead might seem way too complicated. Instead, it is way easier than you think!
There are two basic techniques that you need to master if you want to learn how to crochet around a bead. These are:
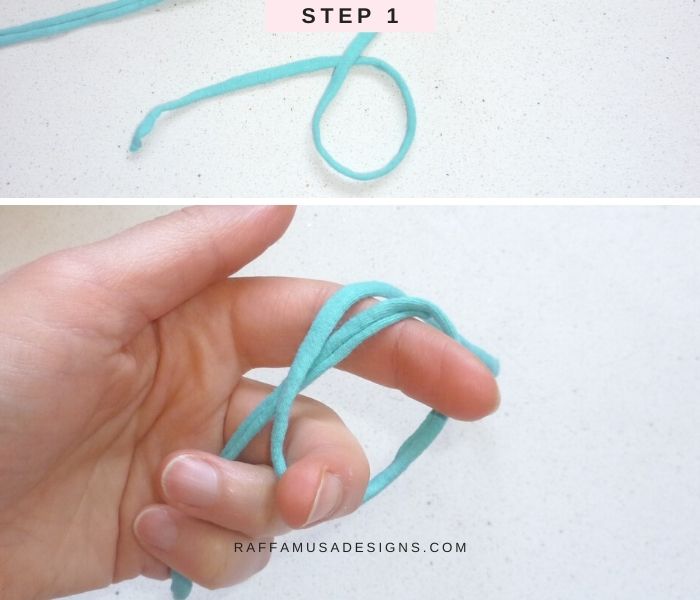
- The magic circle or adjustable ring
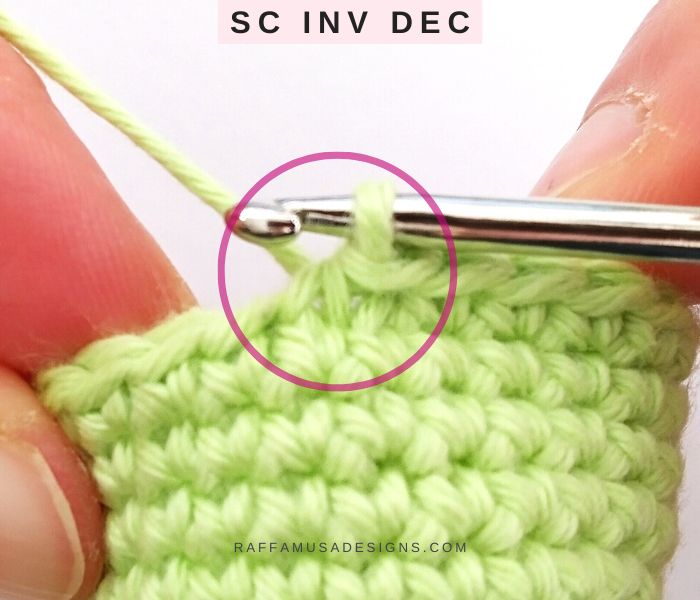
- and the invisible decrease
Follow me in this photo tutorial on how to crochet around beads and learn all the tips and tricks for the best result!
Find more interesting tutorials here on the blog…
- How to Crochet the Perfect Amigurumi Sphere
- Crochet Pentagon Ball
- How to Close the Top Hole of Amigurumi with the Ultimate Finish
Note: this post contains affiliate links. This means that if you purchase something through the links on my blog, I might earn a commission. This will not have any effect on the price you pay. For more info, please, see my Privacy Policy.
Materials
- 3.0-mm (C USA, 11 UK) Hook
- Sport (2, Fine) Weight Yarn, such as Schachenmayr Catania.
- Round Wooden Beads with a diameter of 1″ (2.5 cm) and 0.8″ (2.0 cm)
- Tapestry Needle
Crochet Abbreviations (US Terms)
Ch – Chain
Inc – Increase
Inv Dec – Invisible Decrease
MC – Magic Circle
Sc – Single Crochet
Sl St – Slip Stitch
St – Stitch
Pattern Notes
- (…) – Repeat the instruction within brackets for the indicated number of times.
- If the pattern says “sc 5”, it means that you have to make one single crochet in each of the next 5 stitches.
- You can either join each round with a sl st into the first sc, or continue to work in the round!
Special Stitches
Increase (Inc)
Throughout the pattern, an increase consists of 2 sc made into the same indicated st.
Invisible Decrease (Inv Dec)
Learn how to make an invisible decrease in this step-by-step tutorial.
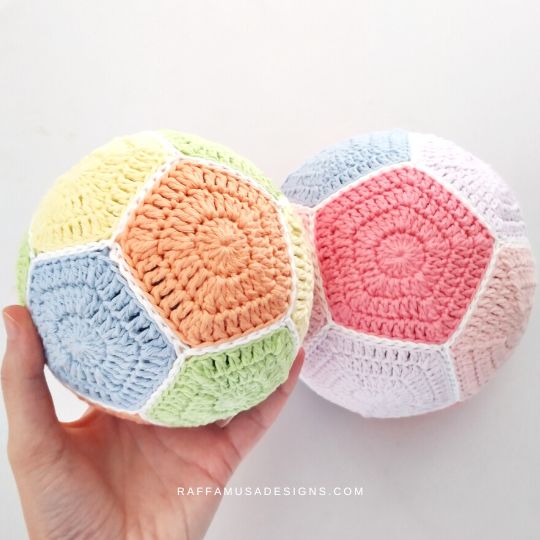
Magic Circle (MC)
For a free tutorial on how to make a magic circle, check out this blog post.
Size
This pattern is written for wooden beads with a diameter of 1″ (2.5 cm) and 0.8″ (2.0 cm).
Gauge
This pattern is too small to accurately determine the gauge.
Crochet 1″ (2.5-cm) Bead
Step 1
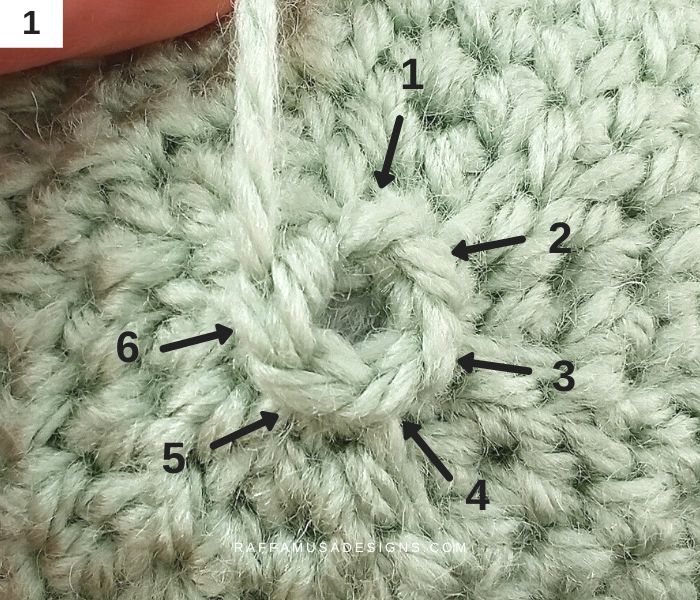
Make a MC.
Round 1. Ch 1, sc 6 in the MC. (6 sts)
In the next three rows, we will increase our circle until it has the same diameter as the bead. So, in our case, that is 1″ (2.5 cm).
Round 2. Ch 1, sc inc 6. (12 sts)
Round 3. Ch 1, (sc inc 1, sc 1) 6 times. (18 sts)
Round 4. Ch 1, (sc 2, sc inc 1) 6 times. (24 sts)
Make sure that the diameter of your work is the same as the one of the bead. You can easily check that with a ruler.
This is important to ensure that the crochet part will fit around your bead.
- If your crochet bead is too tight, it probably won’t fit around your wooden bead.
- On the other hand, if your crochet piece is too large, your bead will not look neat!
Pro Tip!
If you cannot meet the right diameter for your bead with the yarn and hook you’re using, try to go down 1 hook size!
Step 2
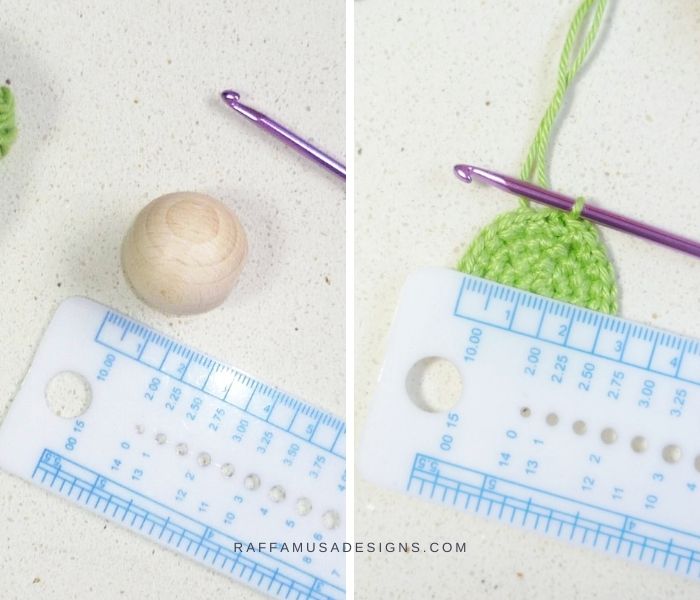
Once we have the right diameter, we will keep the same number of stitches. This way, the work will curl and make a sort of hat for our bead.
Round 5-9. Ch 1, sc 24. (24 sts)
Step 3
We will now start decreasing in order to close our work and transform our hat into a proper sphere!
Round 10. Ch 1, (sc 2, inv dec 1) 6 times. (18 sts)
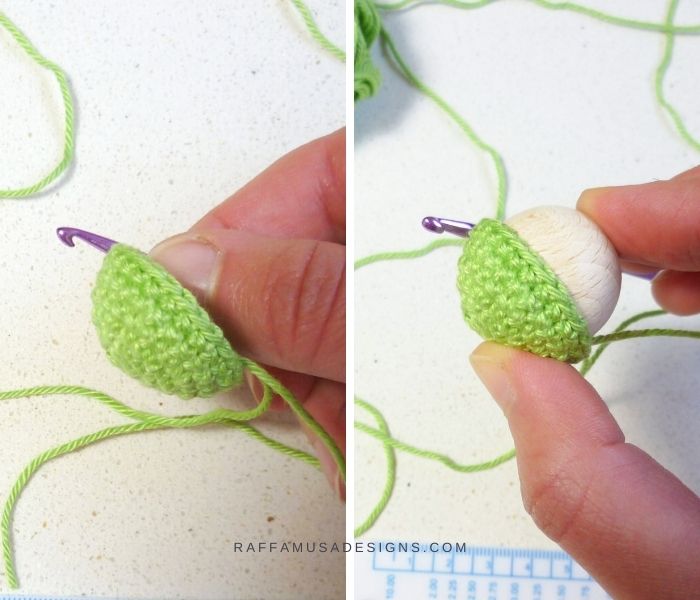
This is the moment when you want to fit your wooden bead into the crocheted one. You will have to push it a bit because we already worked some decreases but just use some force and it will fit!
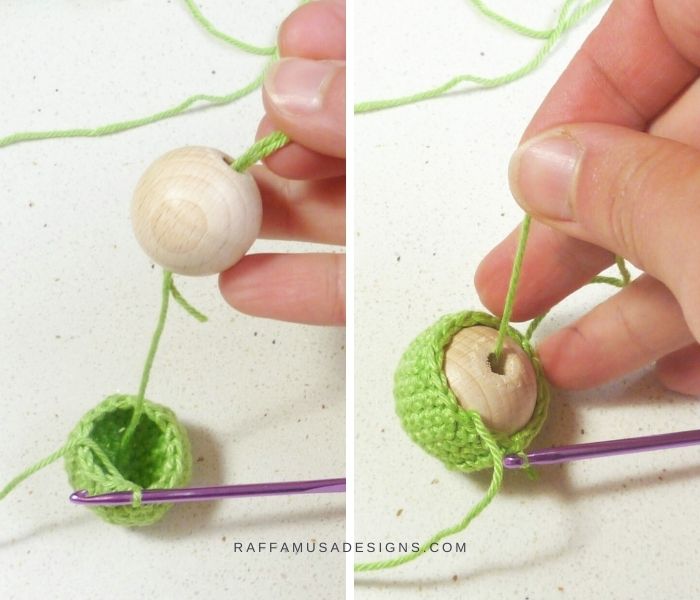
As you can see in the picture, I like to draw the tail of the MC through the hole of the bead. This way, the hole of the bead is aligned with the hole of the MC, which makes it easier to thread the beads in my final project!
Step 4
Now, for the most uncomfortable part! We will have to crochet the last two rounds with a bead in the middle of the way. It can be quite annoying at first but with a little practice, it becomes more natural.
Round 11. Ch 1, (inv dec 1, sc 1) 6 times. (12 sts)
Round 12. Ch 1, inv dec 6. (6 sts)
Tie off leaving a long tail for sewing the bead close.
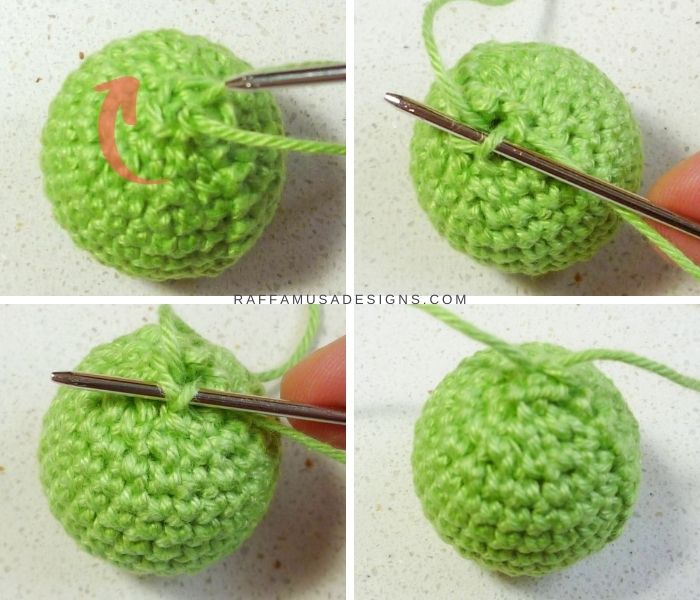
Sewing the Aperture of the Crochet Bead
Using a tapestry needle, draw the yarn through the outer loops of the 6 sts from round 12.
- Start by drawing the needle through the first loop going from the outside to the inside and then through the next loop from the inside to the outside.
- Keep alternating until you do not have any loops left.
- Pull the yarn firmly and weave it to close it.
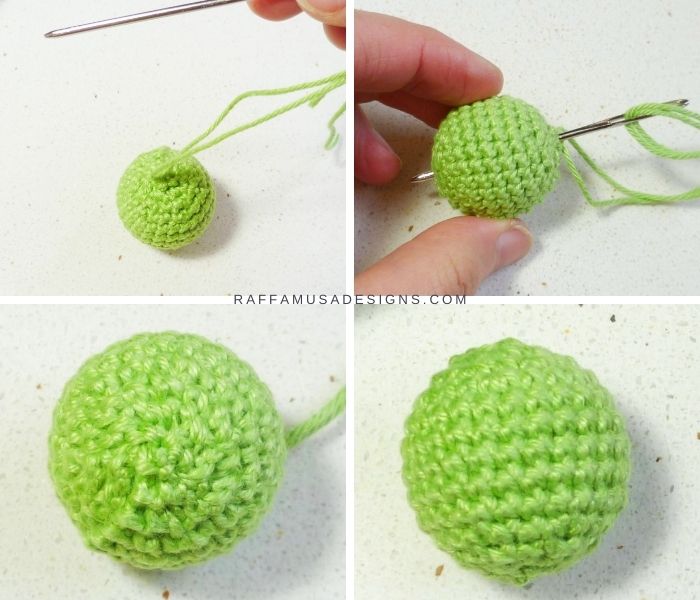
If you want to avoid a big bump on the top of the bead, you can draw the yarn through the bead and all the way to the other end. This way, you will kind of squeeze the bump towards the inside of the bead.
Crochet 0.8″ (2.0-cm) Bead
Make a MC.
Round 1. Ch 1, sc 6 in MC. (6 sts)
Round 2. Ch 1, sc inc 6. (12 sts)
Round 3. Ch 1, (sc inc 1, sc 1) 6 times. (18 sts)
Round 4-7. Ch 1, sc in each st around. (18 sts)
Round 8. Ch 1, (sc 1, inv dec 1) 6 times. (12 sts)
Fit your bead inside the crocheted hat.
Round 9. Ch 1, inv dec 6. (6 sts)
Tie off and close the aperture of the bead as explained above.
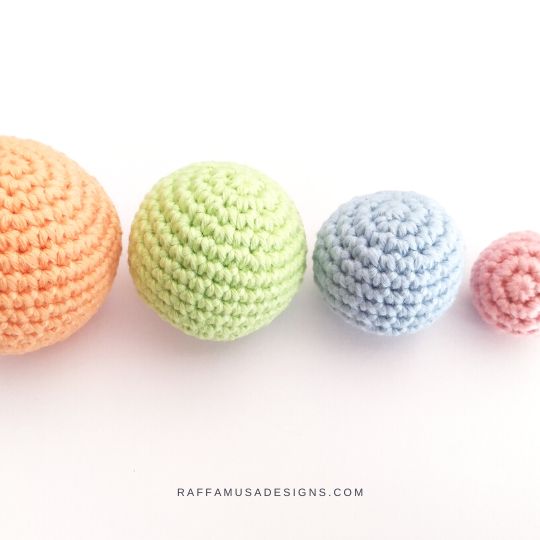
Your Crochet beads are ready!
I hope you enjoyed this photo tutorial and learned how to crochet around beads!
Leave a comment sharing your struggles with crocheted beads…or with this post 😀 I’ll be happy to answer and help you out!
Please, share your cute crochet projects with beads with me by tagging me on Facebook or Instagram, and using the hashtag #raffamusadesigns
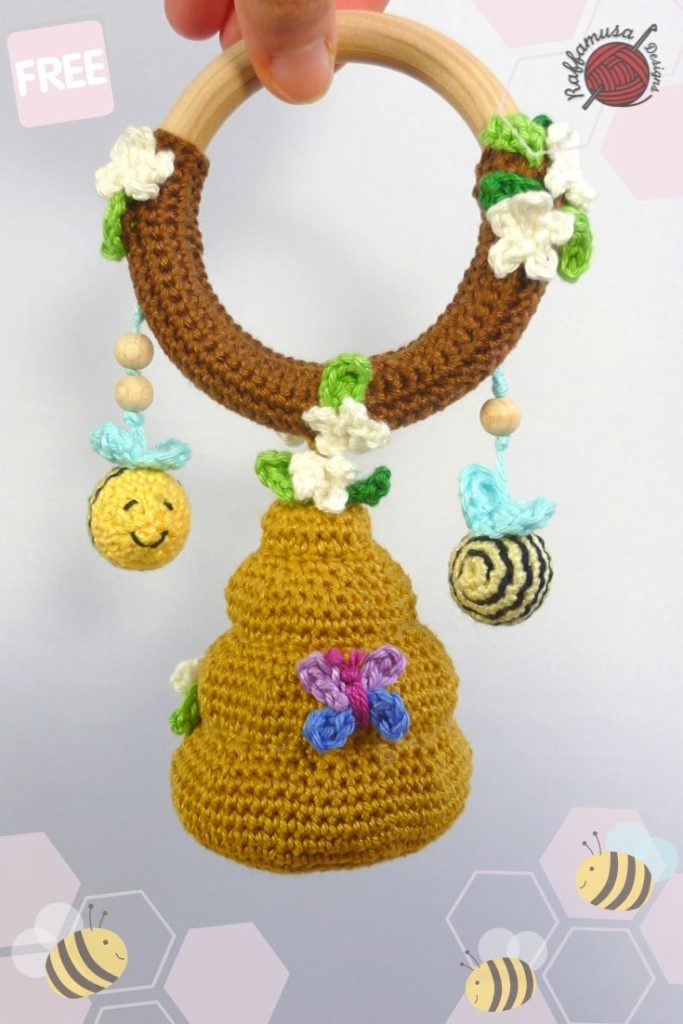
Find some ideas on how to use your crochet beads here on the blog!
Thank you for the easy tutorial. I will try this very soon for a teething ring I’m going to try.
Hi Elaine, I am so glad you found this tutorial helpful. Looking forward to seeing your teething ring 🙂
Thank you, I really look forward to trying this out, I’ve never done the decrease so let’s hope it goes well!
Hi, I am looking forward to seeing your crochet beads 🙂 They are really not that difficult to make but it might take a little practice to crochet around the bead in the second half of the pattern. Let me know if you need any help!
Thank you dear , I’m only chroching one year ago,.I always wondered how to aline the hole with the magic ring , It was so easy .
How didn’t I think of it before .
Why would you suggest beads for a baby item? It’s not safe giving items with beads to a baby, it’s a choking hazard. Use common sense.
Hi Stella, common sense is always good to use! But in case of doubt, you can always find the official ASTM guidelines on https://www.astm.org/
Merci pour ce tutoriel très bien expliqué. Je vais faire de jolis collier