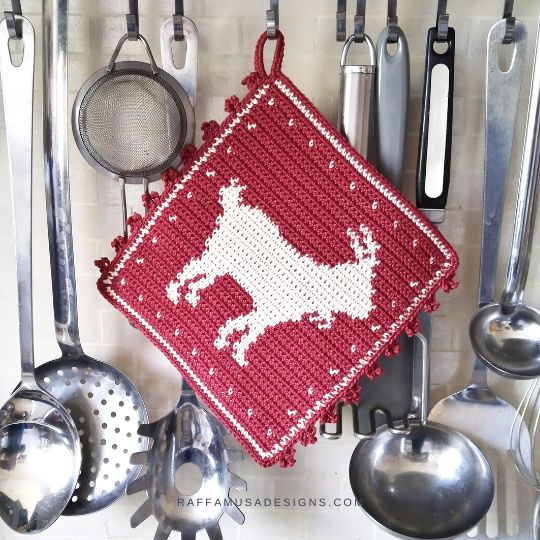
The tapestry crochet Goose Potholder is the second potholder I designed for my Farmhouse Collection. All the potholders in this collection share a similar design and have one different farmhouse animal.
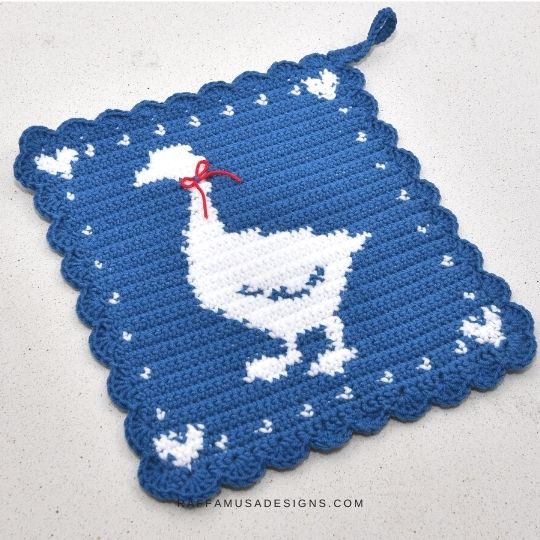
Being a fan of rustic kitchens, my aim here is to design warm and cozy-looking potholders which at the same time are something you’ll actually want to use in the kitchen.
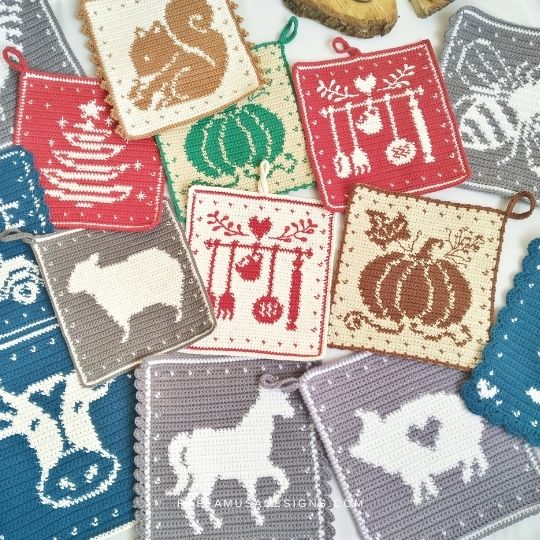
FARMHOUSE COLLECTION
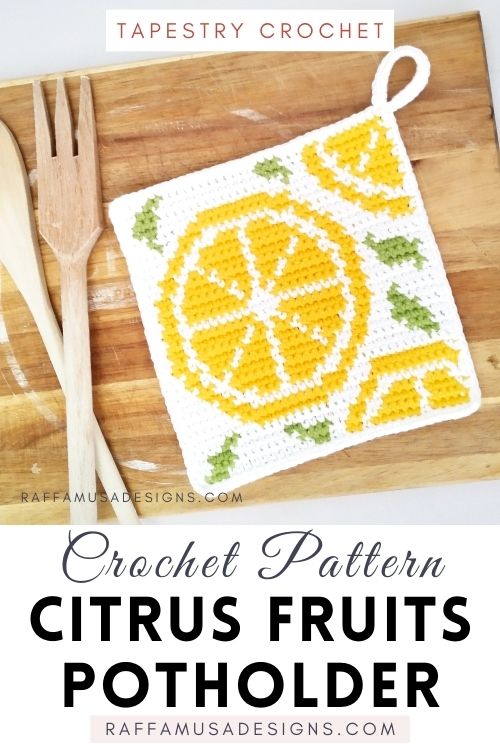
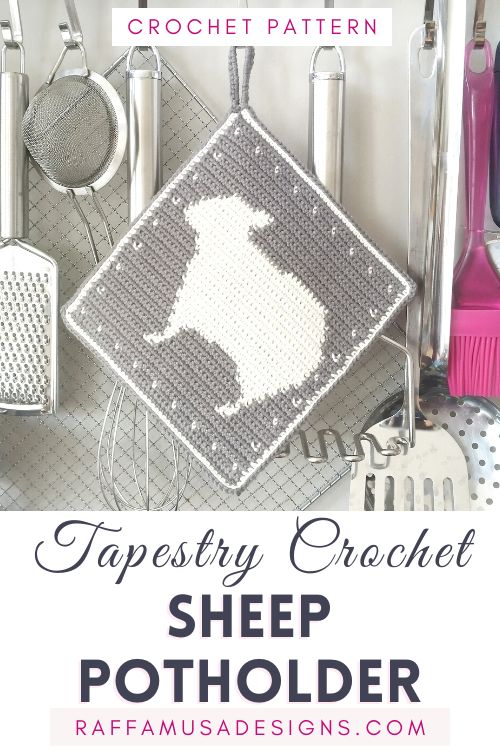
The Farmhouse Collection includes several farm animals and other cute designs for a farm-style kitchen!
Take a look at all the potholders included in the Farmhouse Collection by visiting this blog post HERE!
Or get all the patterns of the Farmhouse Collection at once by purchasing the PDF e-book on Ravelry, LoveCrafts, or Etsy!


Is my Crochet Potholder Thick Enough?
If you crochet this pattern with 100% cotton yarn, you can safely use your potholder to handle hot pans and pots straight from the oven.
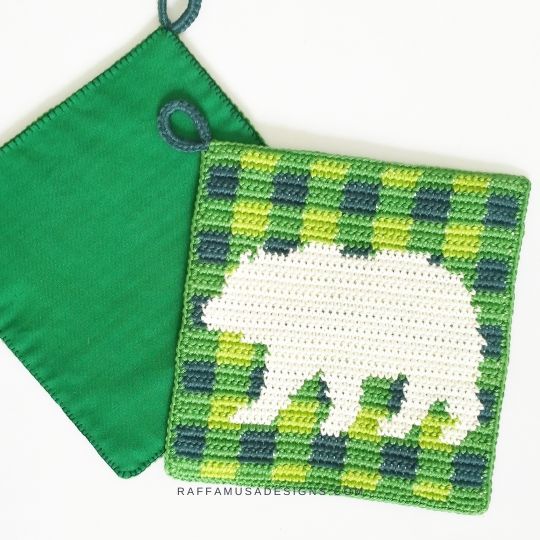
However, if you want to play safer while also hiding the less cute side of the potholder, you can line your hot pad with a double layer of fabric. You can find a step-by-step tutorial on how to line your crochet potholders HERE.
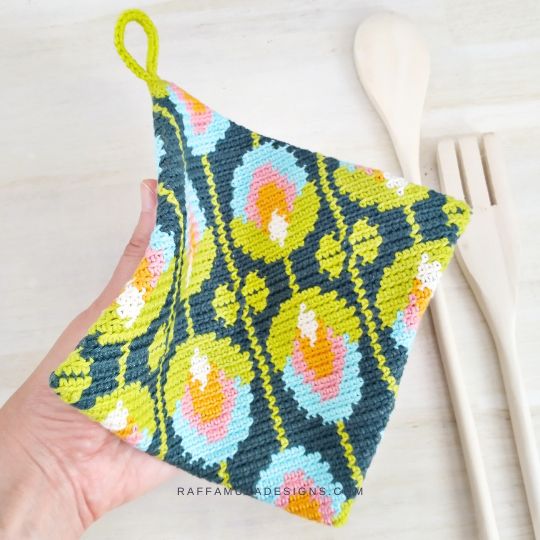
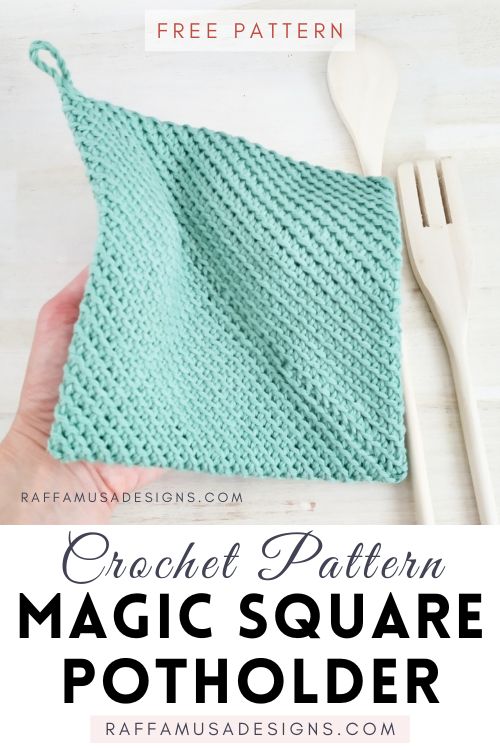
Find more crochet potholders here on the blog…
Add this pattern to your Ravelry queue HERE and favorite it (– thank you!), or save it for later by pinning it to your best crochet board on Pinterest using this Pin!

Note: this post contains affiliate links. This means that if you purchase something through the links on my blog, I might earn a commission. This will not have any effect on the price you pay. For more info, please, see my Privacy Policy.
AD-FREE DOWNLOADABLE PATTERN
I know ads are annoying… But no worries! The crochet pattern of the Goose Potholder is available as an ad-free PDF in my Ravelry, LoveCrafts, and Etsy stores!
Materials
- 3.0 mm (11 UK) Crochet Hook
- DK (3, Light) Yarn
- Tapestry Needle
Yardage
I used Paintbox Yarns Cotton DK (137 yds / 125 m per 50 g) in the following colors and amounts:
- A – Deep Sea Blue (468) – 50-55 yds / 45-50 m
- B – Champ. White (403) – 30-35 yds / 27-32 m
Size
6.7” (17 cm) by 7.3” (18.5 cm).
Gauge
28 sc for 26 rows in 4” (10 cm) worked in sc tapestry crochet.
Crochet Abbreviations (US Terms)
Ch – Chain
Dc – Double Crochet
RS – Right Side
Sc – Single Crochet
Sk – Skip
Sl St – Slip Stitch
St – Stitch
WS – Wrong Side
Yo – Yarn Over
TAPESTRY CROCHET & INVISIBLE COLOR CHANGES
- Find a guide to step-by-step guide to flat tapestry crochet HERE
- Learn how to make invisible color changes in tapestry crochet HERE.
Or watch the video tutorial on my YouTube channel HERE.
Pattern Notes
- The pattern is written in two sections. The Potholder is worked in rows, then the Border is worked in rounds.
- The potholder is worked entirely in sc.
- If the pattern says “(A) 5”, it means that with color A, you need to make one single crochet in each of the next 5 stitches.
- Turn your work at the end of each row.
- The starting ch 1 counts as your first stitch and is always made with A.
- All uneven-numbered rows are crocheted on the right side. All even-numbered rows are crocheted on the wrong side.
- (…) – Repeat the instructions within brackets for the indicated number of times.
- Except for the border, the stitch count is always 45 sts.
- The color chart of the potholder is available in the PDF pattern.
Potholder
(A) Ch 46.
← Row 1 [RS]. (A) Sc in the second ch from hook and in each ch across. (45 sts)
→ Row 2 [WS]. (A) 3, (B) 1, (A) 37, (B) 1, (A) 3.
← Row 3 [RS]. (A) 2, (B) 3, (A) 2, ((B) 1, (A) 4) 6 times, (B) 1, (A) 2, (B) 3, (A) 2.
→ Row 4 [WS]. (A) 1, (B) 5, (A) 33, (B) 5, (A) 1.
← Row 5 [RS]. ((A) 1, (B) 2) twice, (A) 33, ((B) 2, (A) 1) twice.
→ Row 6 [WS]. (A) 22, (B) 2, (A) 21.
← Row 7 [RS]. (A) 19, (B) 6, (A) 20.
→ Row 8 [WS]. (A) 2, (B) 1, (A) 12, (B) 3, (A) 4, (B) 3, (A) 17, (B) 1, (A) 2.
← Row 9 [RS]. (A) 20, (B) 1, (A) 4, (B) 7, (A) 13.
→ Row 10 [WS]. (A) 14, (B) 3, (A) 2, (B) 1, (A) 4, (B) 2, (A) 19.
← Row 11 [RS]. (A) 19, (B) 2, (A) 4, (B) 1, (A) 19.
→ Row 12 [WS]. (A) 19, (B) 7, (A) 19.
← Row 13 [RS]. (A) 2, (B) 1, (A) 15, (B) 9, (A) 15, (B) 1, (A) 2.
→ Row 14 [WS]. (A) 17, (B) 11, (A) 17.
← Row 15 [RS]. (A) 16, (B) 13, (A) 16.
→ Row 16 [WS]. (A) 15, (B) 7, (A) 3, (B) 5, (A) 15.
← Row 17 [RS]. (A) 14, (B) 4, (A) 2, (B) 3, (A) 2, (B) 6, (A) 14.
→ Row 18 [WS]. (A) 2, (B) 1, (A) 10, (B) 5, (A) 2, (B) 7, (A) 1, (B) 4, (A) 10, (B) 1, (A) 2.
← Row 19 [RS]. (A) 11, (B) 16, (A) 1, (B) 5, (A) 12.
→ Row 20 [WS]. (A) 12, (B) 24, (A) 9.
← Row 21 [RS]. (A) 12, (B) 21, (A) 12.
→ Row 22 [WS]. (A) 12, (B) 18, (A) 15.
← Row 23 [RS]. (A) 2, (B) 1, (A) 13, (B) 17, (A) 9, (B) 1, (A) 2.
→ Row 24 [WS]. (A) 13, (B) 13, (A) 19.
← Row 25 [RS]. (A) 22, (B) 10, (A) 13.
→ Row 26 [WS]. (A) 13, (B) 7, (A) 25.
← Row 27 [RS]. (A) 26, (B) 5, (A) 14.
→ Row 28 [WS]. (A) 2, (B) 1, (A) 11, (B) 5, (A) 23, (B) 1, (A) 2.
← Row 29 [RS]. (A) 26, (B) 4, (A) 15.
→ Row 30 [WS]. (A) 16, (B) 3, (A) 26.
← Row 31 [RS]. (A) 26, (B) 3, (A) 16.
→ Row 32 [WS]. (A) 17, (B) 2, (A) 26.
← Row 33 [RS]. (A) 2, (B) 1, (A) 22, (B) 3, (A) 14, (B) 1, (A) 2.
→ Row 34 [WS]. (A) 17, (B) 3, (A) 25.
← Row 35 [RS]. (A) 25, (B) 3, (A) 17.
→ Row 36 [WS]. (A) 16, (B) 5, (A) 24.
← Row 37 [RS]. (A) 24, (B) 10, (A) 11.
→ Row 38 [WS]. (A) 2, (B) 1, (A) 9, (B) 9, (A) 21, (B) 1, (A) 2.
← Row 39 [RS]. (A) 25, (B) 6, (A) 14.
→ Row 40 [WS]. (A) 15, (B) 5, (A) 25.
← Row 41 [RS]. (A) 3, (B) 1, (A) 37, (B) 1, (A) 3.
→ Row 42 [WS]. (A) 2, (B) 3, (A) 35, (B) 3, (A) 2.
← Row 43 [RS]. (A) 1, (B) 5, (A) 1, ((B) 1, (A) 4) 6 times, (B) 1, (A) 1, (B) 5, (A) 1.
→ Row 44 [WS]. ((A) 1, (B) 2) twice, (A) 33, ((B) 2, (A) 1) twice.
← Row 45 [RS]. (A) 45.
Border
After row 45, both A and B are at the left, top corner of your potholder. To crochet the edging, you are going to work one round starting on the left side of the potholder.
Remember to keep the RS facing.
Round 1 (RS). With A, work a shell border all around the potholder starting from the left side, then the bottom, right side, and top.
Shell Border: (Sk 2 sts, dc 5 in next st. Sk 1, sl st in next st) 9 times. The ninth shell should be closed in the last st of the side.
Once you are back at the top, left corner, sl st into the ch-1 space, ch 20, and sl st back into the same ch. Turn your work and sc 25 inside the loop you just created. Sl st back into the same ch-1 space, and turn your work.
Fasten off and weave in your ends.
Your tapestry crochet Goose Potholder is ready!
I hope you liked this pattern and I’d love to see your version of it! Please, share it on Facebook or Instagram using the hashtag #raffamusadesigns
Alternative Border Ideas
Alternatively, you can make a simple sc border as the one I made for the Rooster Potholder, or choose a border from one of the other Farmhouse Potholders!
Find more potholders to crochet here on the blog…
yndislegt!
Love the animal potholders!! thanks so much for sharing..
I cannot get my 45 sc to be 8 inches wide. Using the the right kind of yarn and needle. Do not know what I am doing wrong.
Hi Elaine, I recently updated the pattern because I had originally listed a wrong yarn weight, so I hope you are using the latest update of the pattern. The correct yarn to use is something around 15 wpi. Since DK, Light 3, Fingering and so on vary a lot depending on the reference you use, I think the easiest way is to actually check for yourself by wrapping it around a pen or a hook and counting the number of turns in 1 inch. I hope this makes sense. In case you have problems, feel free to contact me via e-mail at [email protected] 🙂
The Farmhouse collection is fabulous! You don’t mind if I work off the blog, do you? I buy patterns, print them and end up on the blog anyways.
GwenDaleAnn
Thank you so much!
And absolutely feel free to work from the blog, that’s why I publish the patterns here 🙂
Looking forward to seeing your farmhouse potholders!
Best,
Raffaella
Goose potholder. Row 3 totals 44 stitches not the 45 as stated each row should be! Drove me nuts
Hi Heather,
for the way the pattern is written, all rows have instructions for 44 sts. That’s because the initial chain 1 counts as the first st, as stated in the pattern notes. So, for each row, you have the first chain + 44 sts, for a total of 45 sts.
On the next row, you just need to remember to work one st in the initial ch 1 of the previous row.
The reason why I do this is that the edges are straighter this way 🙂
I hope this makes sense.
Best,
Raffaella
just a heads up that rows 4 and 5 show “(CC2) Ch 1” which confused me at first. thank you for these patterns! love them!