If you’re new to tapestry crochet, and maybe still intimidated by it, trust me, this is a technique that you really want to learn!
Once you win the fear of working with more than one strand of yarn and change colors, you’ll absolutely love all the possibilities that tapestry crochet opens up for your hook!
What is Tapestry Crochet?
Tapestry crochet is a beautiful colorwork technique that allows you to create detailed graphic patterns by using 2 or more strands of yarn of different colors. All the colors needed for your work are carried inside your stitches at all times.
Colorwork, intarsia, fair isle, or Mochilla crochet?
Sometimes, you might find other names instead of tapestry crochet.
There is who calls it intarsia crochet, who calls it fair isle, crochet colorwork, or mochila crochet. However, all these terms are quite inaccurate or too broad.
In fact, crochet colorwork is just the broadest term to indicate any crochet pattern that uses more than one color, such as tapestry, intarsia, corner to corner (C2C), etc.
On the other hand, intarsia crochet is similar to tapestry with the difference that the unused colors are not carried inside your stitches. Instead, you’ll find them visible on the back of your work. In a way, it is similar to knitting fair isle! So, the term fair isle was borrowed from knitting but it is not really accurate for crochet.
Lastly, Mochilla crochet indicates a specific style of crochet bags original of the Wayuu Tribe in Colombia.
What Stitches do you Use for tapestry crochet?
Tapestry crochet only uses basic stitches, such as single crochet, half double crochet, or double crochet. So, this technique is totally accessible to beginner crocheters.
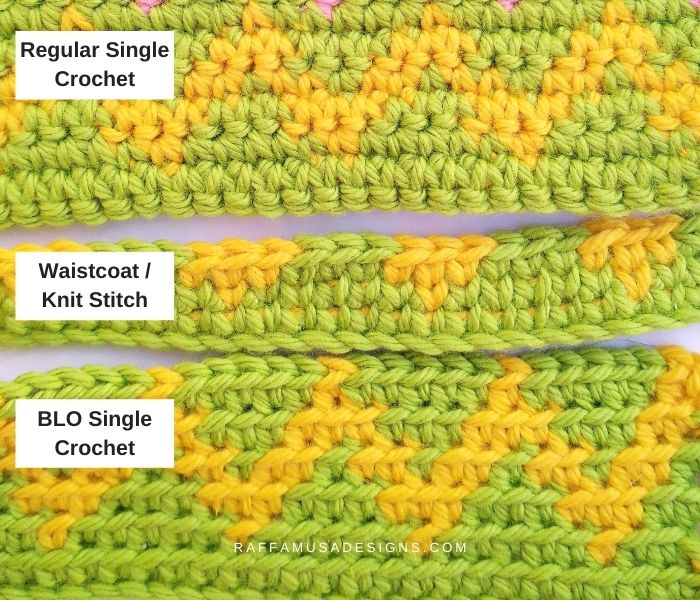
The 5 most common stitches to make a tapestry crochet pattern are:
- Regular Single Crochet (US terminology) – It’s ideal when working in rows. In the round, you’ll have to take into accound the natural slanting of crochet stitches, which will make your image slant on the side!
- Back Loop Only Single Crochet (this is the stitch used for Mochila bags) – Working in the BLO can fix the natural slanting of crochet stitches. It is ideal for both in the round and flat projects.
- Knit Stitch – The knit stitch (or waistcoat stitch) is another simple way to fix the slanting of crochet stitches. The knit stitch is a very solid stitch, so you might have to use a slightly larger hook than you would with other stitches.
- Half Double Crochet
- Double Crochet
Whatever stitch you use, the principle stays the same. You need to carry all your colors at once and hide the unused strands inside the stitches in the current color.
Since you want to hide the unused yarn, your stitches will need to be quite tight.
If you crochet loosely, the unused yarn will probably peak in between stitches. When this happens, the final look of your project will not be very neat.
One thing to keep in mind is that the height of the different crochet stitches is not the same. So, a pattern that was designed using regular single crochet does not necessarily look good with the waistcoat stitch or half double crochet!
Flat and in the Round
Tapestry crochet can be worked:
- Flat by crocheting back and forth turning your work at the end of each row;
- In the round
Working in the round is possibly the best way to get started when you’re new to this technique. The advantage of crocheting in the round is that you work all your stitches and color changes on the right side.
In other words, working in the round eliminates the problem of the stitches looking different on the right and wrong sides of your work.
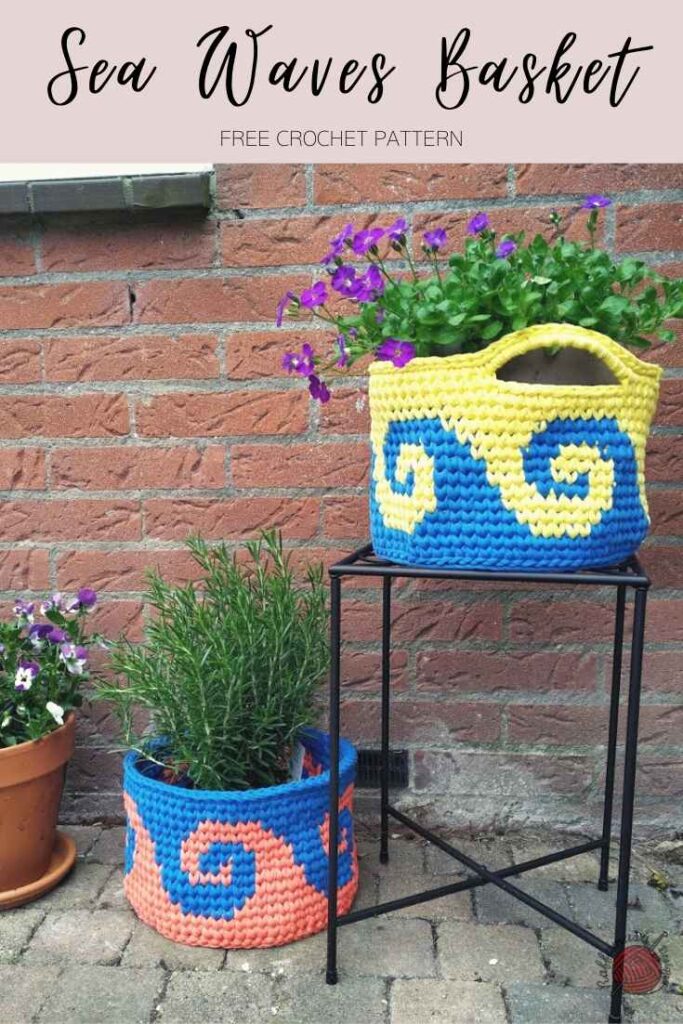
Find a few easy patterns worked in the round here…
Flat Tapestry Crochet
However, you cannot work everything in the round! Plus, flat tapestry crochet projects are beautiful and fun to make.
The orthodox way to work a flat tapestry crochet project is to crochet all rows on the same side. So, you never turn your work. Instead, you switch hands to crochet the different rows!
I am not sure how good you are at crocheting with your non-predominant hand. For me, I am right-handed, and I am amusingly terrible at crocheting with my left hand! So, if you’re anything like me, don’t worry.
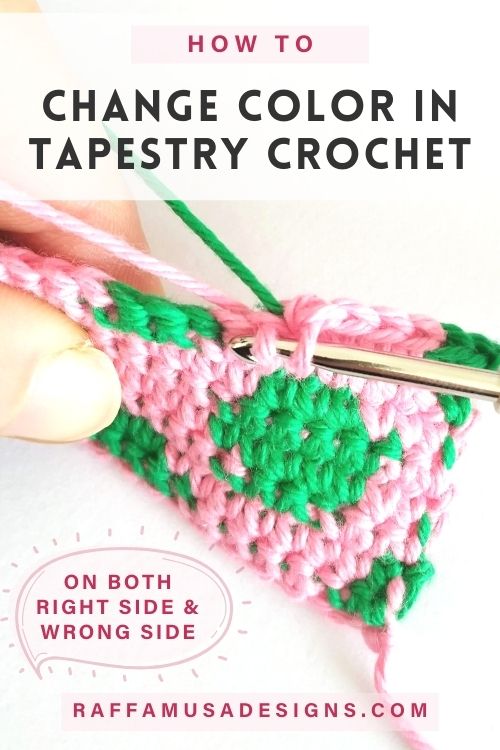
You can simply work your flat projects by turning your work at the end of each row and use some little tricks to improve your color changes on the wrong side.
So, if you are ready to give flat tapestry crochet a try, let’s take a look together at how to do it!
Note: this post contains affiliate links. This means that if you purchase something through the links on my blog, I might earn a commission. This will not have any effect on the price you pay. For more info, please, see my Privacy Policy.
Step-by-Step Guide to Flat Tapestry Crochet
In this step-by-step tutorial, I will show you how to crochet a simple pattern working tapestry crochet in rows using regular single crochet.
Once you learn basics with this guide, you’ll be able to easily follow any tapestry crochet patterns, whether it is worked in a different stitch, flat, or in the round.
For this tutorial, we can follow the color chart below.
Materials
- 3.0-mm (C USA, 11 UK) Hook
- DK (3, Light) Weight Yarn in 4 contrasting colors
- Tapestry Needle
YARN & COLORS
I used Paintbox Yarns Cotton DK in the following colors:
- CA – Lime Green (429)
- CB – Mustard Yellow (424)
- CC – Marine Blue (434)
- CD – Bubblegum Pink (451)
How to Do Tapestry Crochet
- Step 1. Make your foundation chain using the indicated primary color (CA). In this case, I chained 26. Then, hold the secondary color (CB) in between your chain and your working yarn.
- Step 2. Insert your hook in the second ch from your hook and under the CB. Then, yarn over with CA.

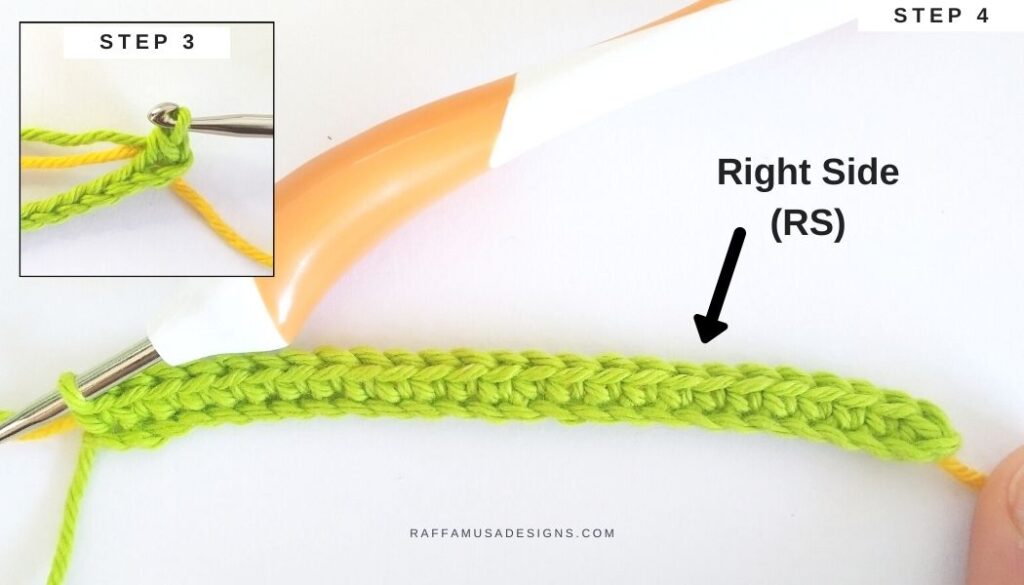
- Step 3-4. Complete your sc as you would normally do, and continue to sc across making sure that CB is always inside your sts.
This first row is the right side (RS) of your work.
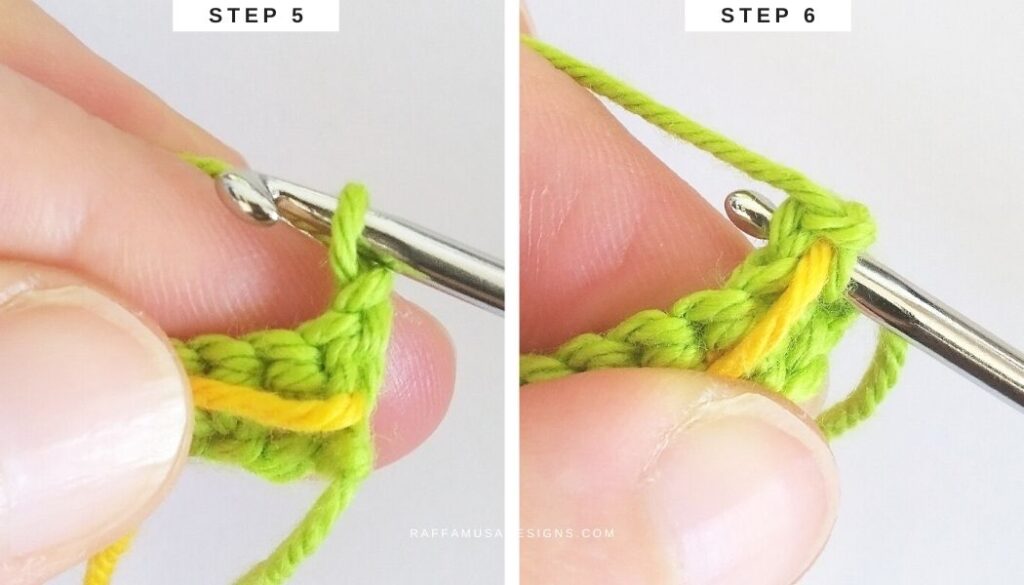
- Step 5. Ch 1, turn your project to the wrong side (WS). Bring CB to the WS (which is the same side where you are now crocheting!).
- Step 6. Draw your hook under CB and into the first st. This way CB will be inside your st!
Pay Attention. In some patterns, the initial chain counts as a stitch. In those cases, skip the first st and insert your hook into the second one!
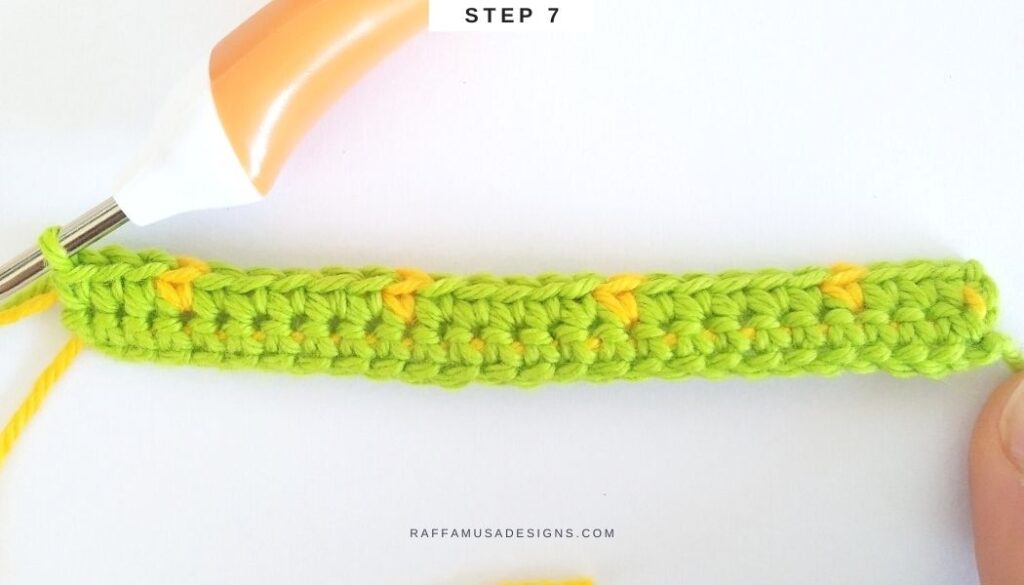
- Step 7. Continue single crocheting across as indicated by the pattern.
Always Check the Back of your Work!
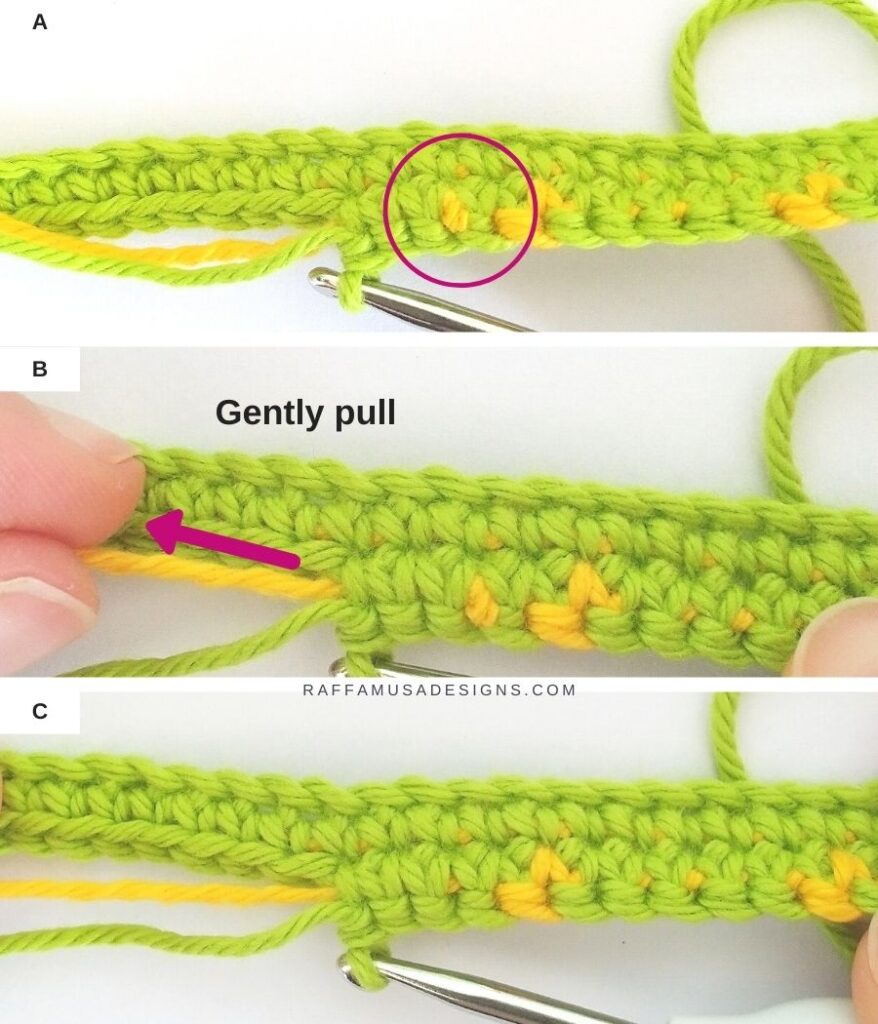
On the WS, pay extra attention to the back of your sts.
Sometimes, it can happen that your unused color is peeking through your sts (circled in photo A).
While you do not want this to happen in general, you especially do not want it when crocheting on the WS.
The reason is that the back of your sts made on the WS will actually be on the RS of your project!
To fix this, gently pull the carried yarn and flatten all the peeking loops.
However, be careful not to pull too hard otherwise you’ll squeeze your sts and you can actually have problems with keeping straight edges on your project.
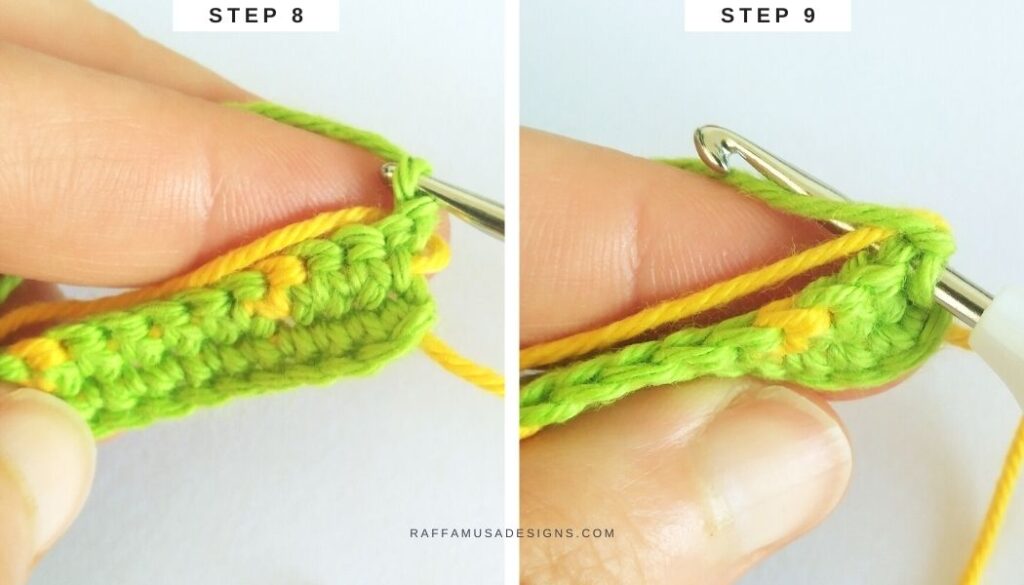
- Step 8. Ch 1, turn to the RS bringing CB to the back of your work.
- Step 9. Sc as indicated by the pattern making sure to crochet over your unused yarn.
To do this, insert your hook into the indicated st and draw it under the carried yarn. Then, complete your sc as you would normally do.
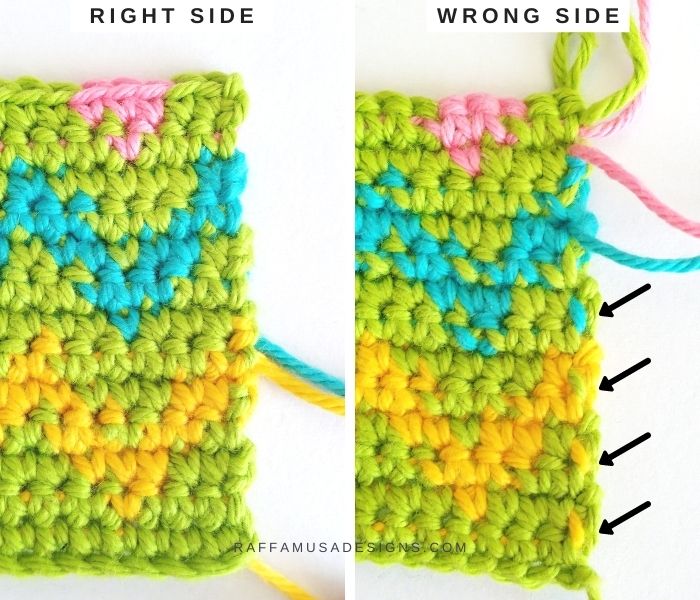
At the beginning of each row worked on the RS, it is very common to have CB bumping out on the side of the row (circled in photo D).
To avoid CB peeking on the side of the RS rows, gently pull the yarn after your first st of the row (photo E)!

To summarize, always pass the unused yarn
- to the back of your work for RS rows,
- and to the front of your work for WS rows.
This will make sure that the right side of your work will look clean!
Find HERE a detailed guide on how to make invisible color changes with single crochet.
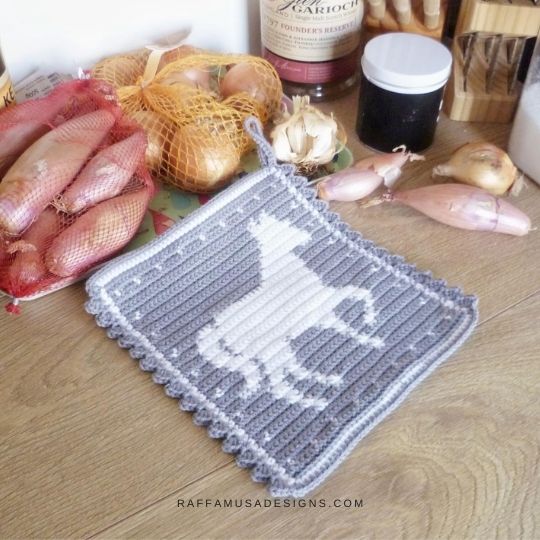
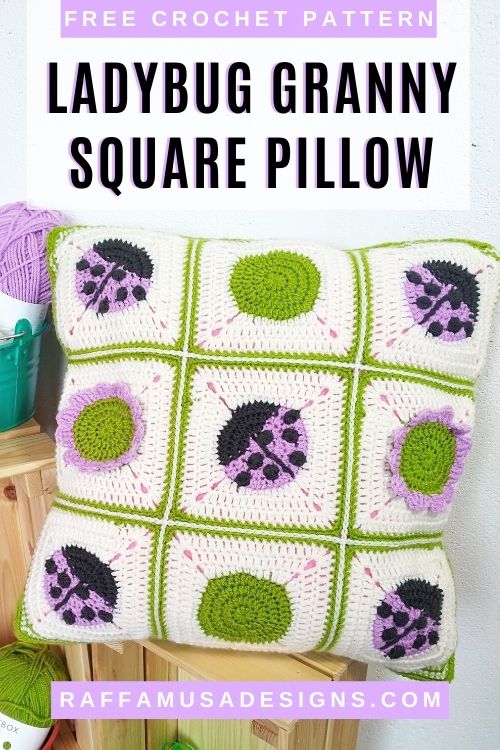
Here are a few easy flat tapestry crochet patterns to try…

How to keep yarn from tangling in tapestry crochet
Of course, with 2 or more strands and a lot of color changes, the yarn will tangle like crazy!
Especially when working with more than two colors, I recommend you check out this clever method by Atelier Sopra!
Tapestry Crochet Patterns
Usually, tapestry crochet patterns include both written instructions and color charts.
I like color charts because they are easy to follow and you always know what your picture should look like. So, if you made a mistake, you’ll notice immediately.
Following a tapestry crochet color chart is similar in a way to following cross stitch charts, where every pixel corresponds to a stitch.
Want to create your own color chart?
Tapestry crochet charts are really just pixelated pictures. There are many ways to create your own.
Here are a few ways I normally do it:
- Paper and pencil! This is my favorite method. I might be old-fashion but I like drawing on a piece of squared paper and create my color charts with my own hands. This is my go-to method for smaller patterns, but it does get tricky for larger ones.
- Stitch Fiddle
- Pixel-Stitch
Tips and Tricks for beginner tapestry crocheters
- If you are new to tapestry crochet, I suggest you use some non-stretchy yarn, preferably cotton. This way it will be easier to keep a constant tension.
- Start with some thick yarn, at least DK or Aran, so that it will be easier to see and count stitches.
- Crochet tight to make sure that the carried yarn is well hidden inside your stitches!
- Make small swatches to find the perfect hook size for the yarn and stitch you’re using.
- Choose a pattern that only uses two colors.
- Possibly, start with a project in the round!
I hope you found this article useful. Don’t hesitate to contact me with any questions or comments you may have!
Find more tapestry crochet resources and patterns here on the blog…
This is such a great tutorial! I usually need a video, but your directions, pictures, tips and tricks were very clear! I’m ALMOST ready to try! 😉
I’m excited to try tapestry crochet. I will purchase some appropriate yarn very soon so I can get started
. I have Saved this how-to guide so that I can return to it easily as soon as I get the yarn. I think I will try both one of your potholders and the granny square ladybug cushion cover.
Thank you so much for sharing this well written and illustrated guide.
Hi I am left handed and was wondering if would be able to do Tapestry Crochet? I don’t have a problem with straight patterns, they are just the opposite side of the product. I think I would be working from the back of this type of of pattern but not sure. What do you think.
Thanks in advance,
Shirley
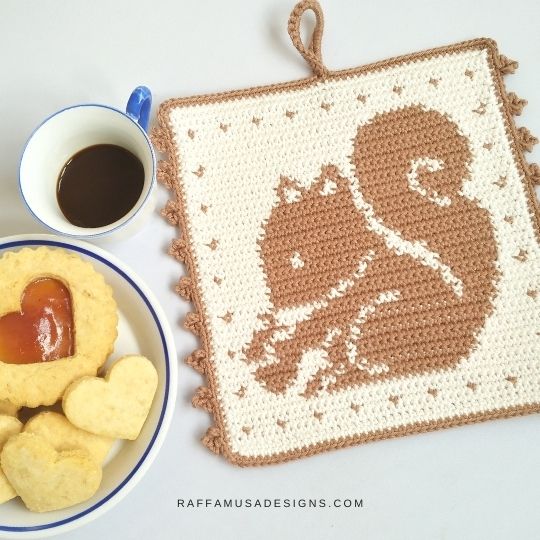
Hi Shirley, I’m right-handed so take anything I say with a pinch of salt but I think that it is more simple that it might seem. I had a left-handed tester once for one of my potholders, I think it was the squirrel potholder, so worked flat in tapestry crochet. She just followed the instructions as they were written and the potholder turned out great. The only difference was that the squirrel was facing in the opposite direction compared to what I had designed. So, I guess that mirroring patterns is the worst that is going to happen…
I hope this gives you the confidence to try! 🙂