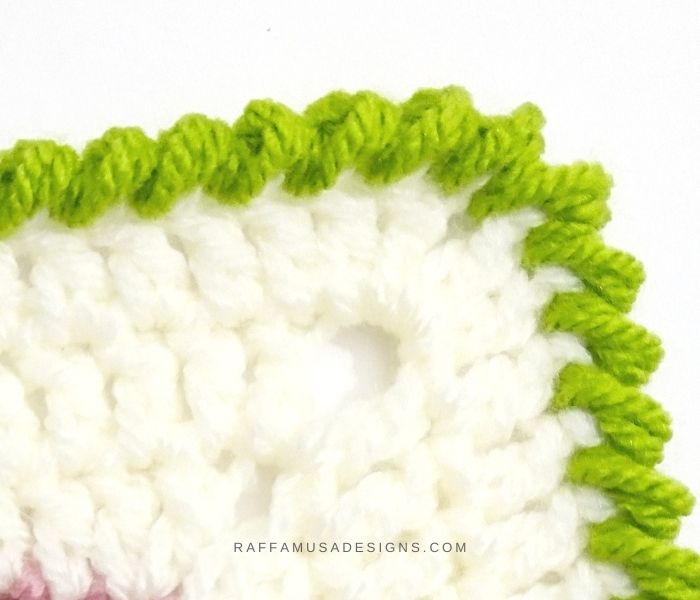
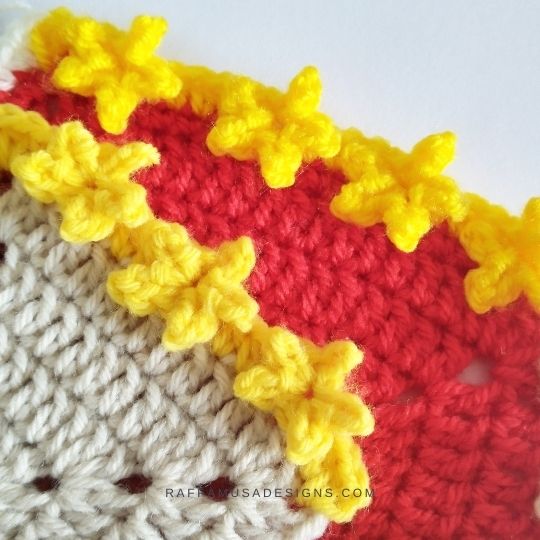
The Crab Stitch or Reverse Single Crochet makes the perfect finishing border or edging for your crochet blankets, baskets, potholders, or really any project!
Reverse Single Crochet
The reason why it is called crab stitch is that a bit like a crab, you walk/crochet backward!
Instead of crocheting from right to left (if you’re right-handed), you’re going to crab stitch from left to right.
In a similar fashion, if you’re left-handed, you’re going to invert the direction of your work from left-to-right to right-to-left.
This is the reason why the crab stitch is also called reverse single crochet (RSC) because you make single crochet stitches in the opposite direction than usual!
After a crab-stitch row or round, it’s very difficult to crochet on top of these reverse single crochet stitches. So normally, this stitch is used to give a quick and easy finishing touch to any project, be it a blanket, a scarf, a basket, etc.
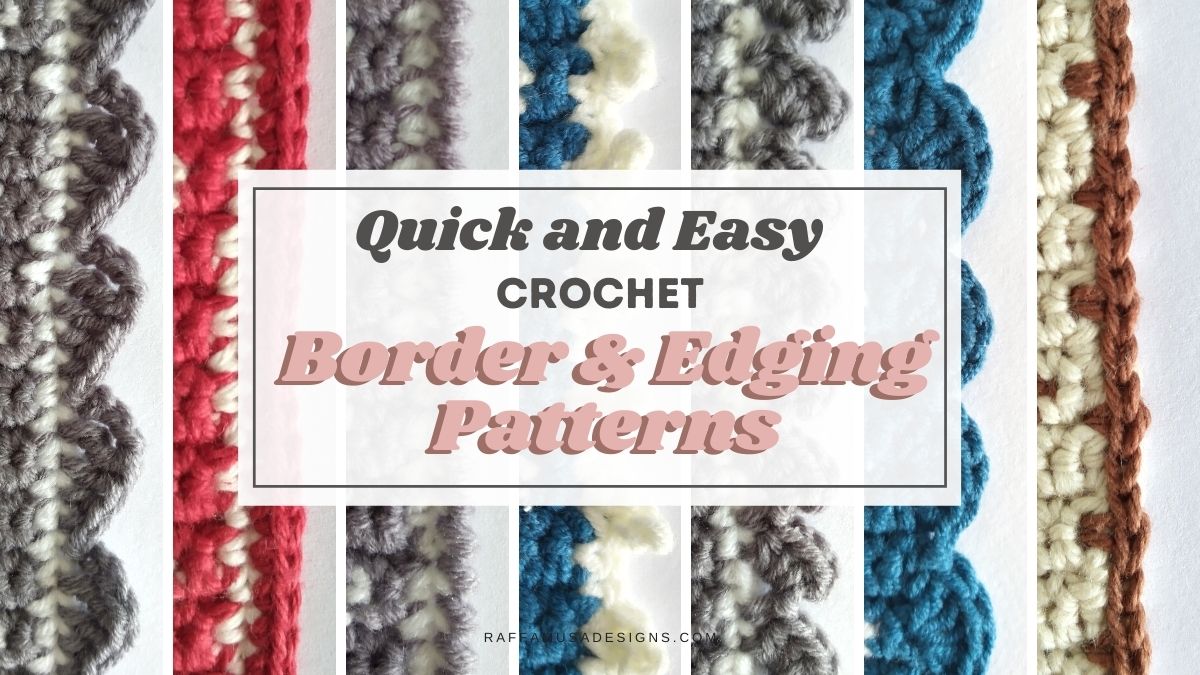
Find more border ideas here on the blog…
- Quick & Easy Borders (in just 2 rows!)
- How to Make a Single Crochet Border Around C2C
- Little Stars Border
Save this crab stitch tutorial by pinning it to your favorite crochet board on Pinterest using this pin!
Note: this post contains affiliate links. This means that if you purchase something through the links on my blog, I might earn a commission. This will not have any effect on the price you pay. For more info, please, see my Privacy Policy.
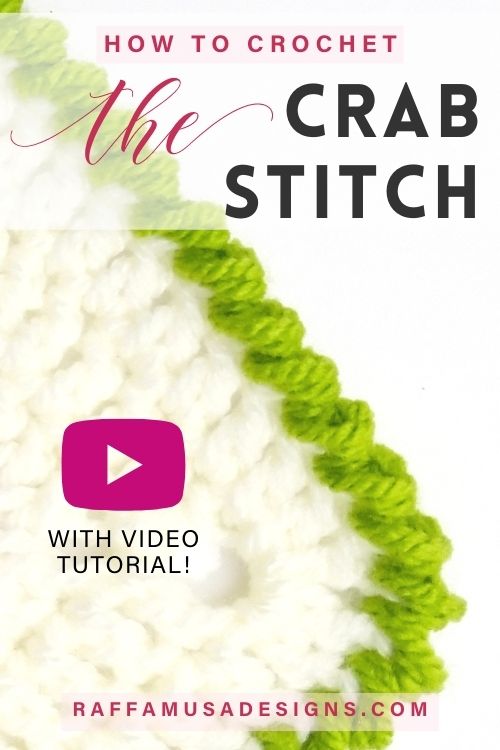
Crab Stitch (Reverse Single CROCHET) BORDER – VIDEO TUTORIAL
For both my video tutorial and the step-by-step photo tutorial, I’m going to show you how to add a crab stitch border around a simple circle granny square.
The last round of my square is all in double crochet stitches, but you can work the crab stitch border on any stitch you have!
However, if you have a lace stitch pattern, I do suggest you add a row/round of single or double crochet before working your crab stitch border.
How to Crochet the Crab Stitch – Step-by-Step TUTORIAL
- Step 1. Whether you’re joining new yarn or continuing to work with your current yarn, chain 1 to start.
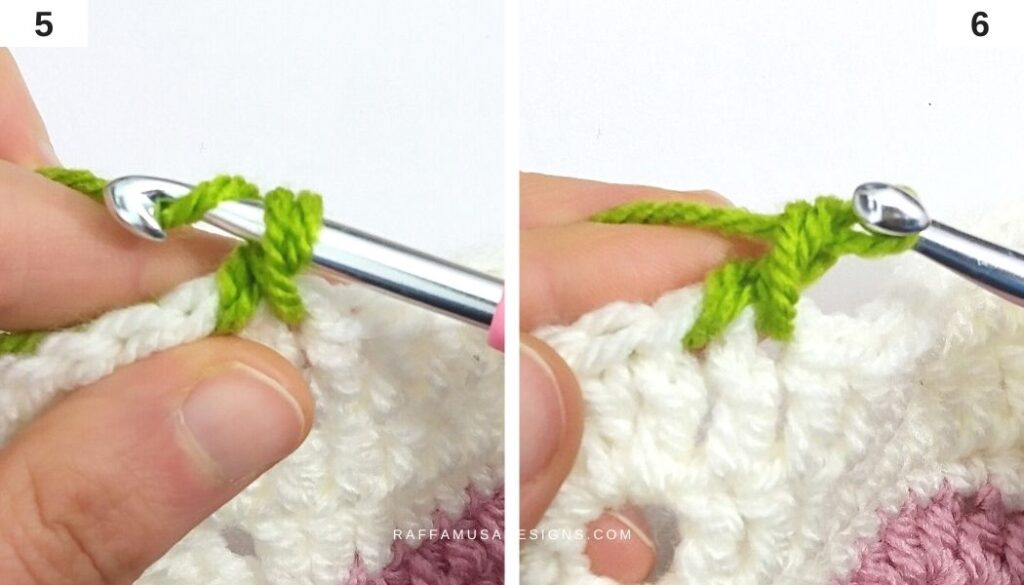
- Step 2. Twist your hook and insert it into the previous stitch.
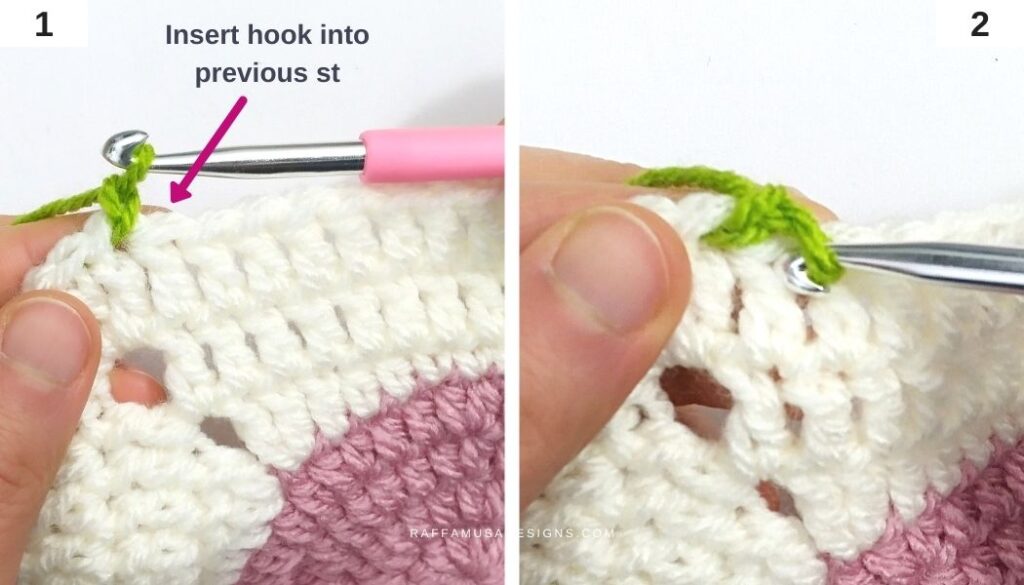
- Step 3. Grab the yarn with a “yarn under”.
- Step 4. Pull a loop up to the level of your work.
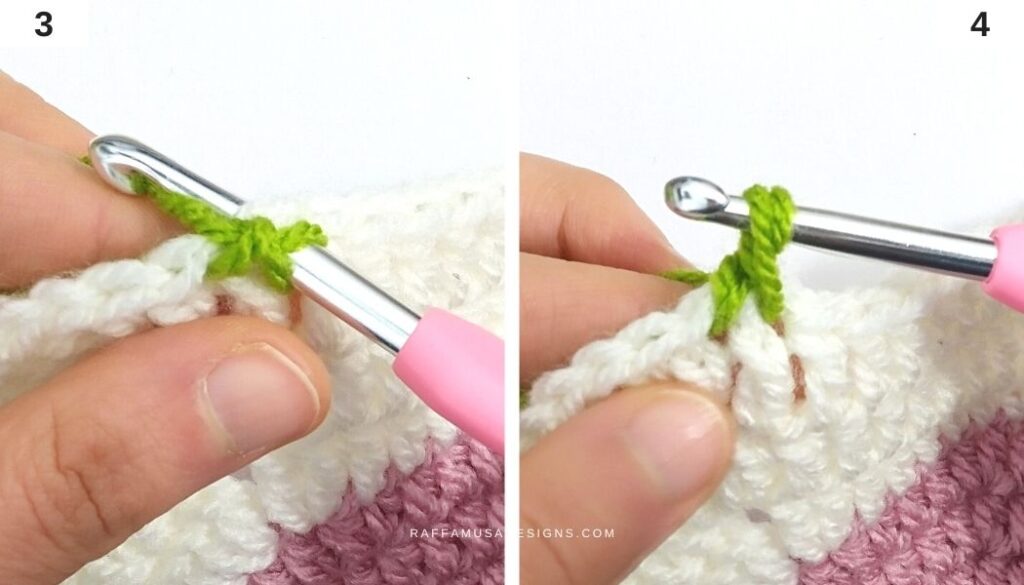
- Step 5. Yarn over.
- Step 6. Pull the yarn through both loops on your hook.
- Step 7. Repeat steps 2-6 to crochet more crab stitches.
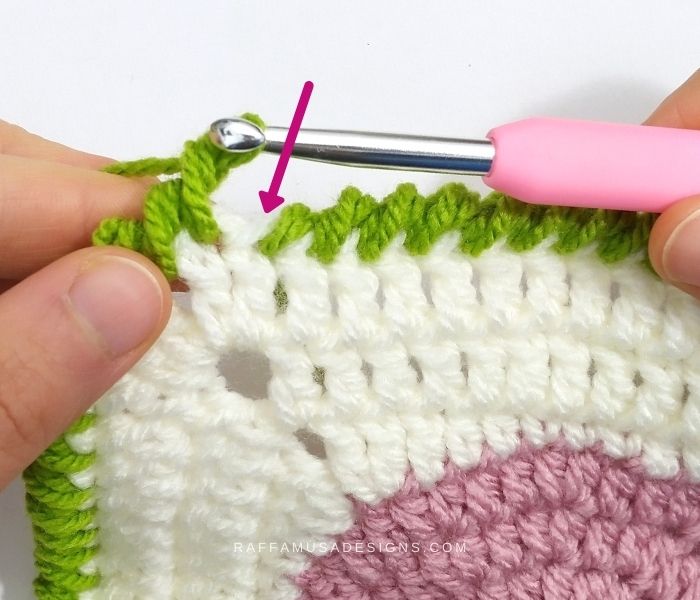
How to Crab Stitch at the Corners
At the corners, you do not need to do anything special.
Just keep crocheting crab stitches in each stitch, chain-1 or chain-2 space you have. Then, continue crab stitching on the next side!

How to Finish off the Crab Stitch Border
To finish off the crab stitch border and make the joining point as invisible and seamless as possible, make one last crab stitch in the same st where you joined the yarn.
Then, fasten off and weave in your ends.
Some people find that the joining is more subtle if you do not make that last crab stitch in the same stitch where you started.
Instead, they simply slip stitch in the initial stitch, fasten off and weave in their ends.
I don’t particularly like this method because I feel like there is always a little gap in my border.
But feel free to try both methods and choose the one you like better.
YOUR CROCHET Crab Stitch BORDER IS READY!
I hope you enjoyed this free crochet tutorial. I would love to see your creations using this stitch on Facebook or Instagram. Make sure to use the hashtag #raffamusadesigns so that I don’t miss your pics!
Find more crochet tutorials and border ideas…