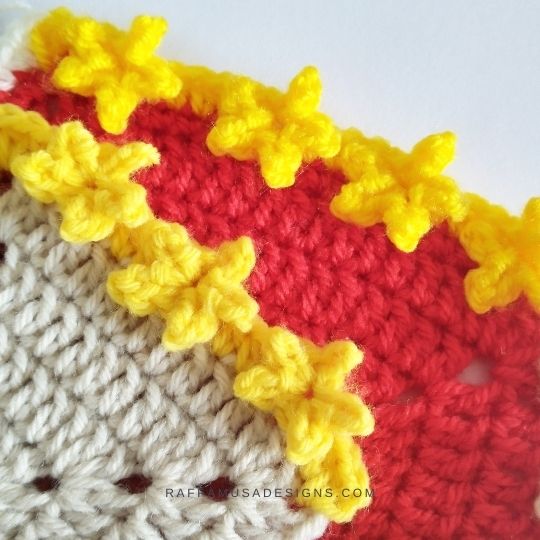
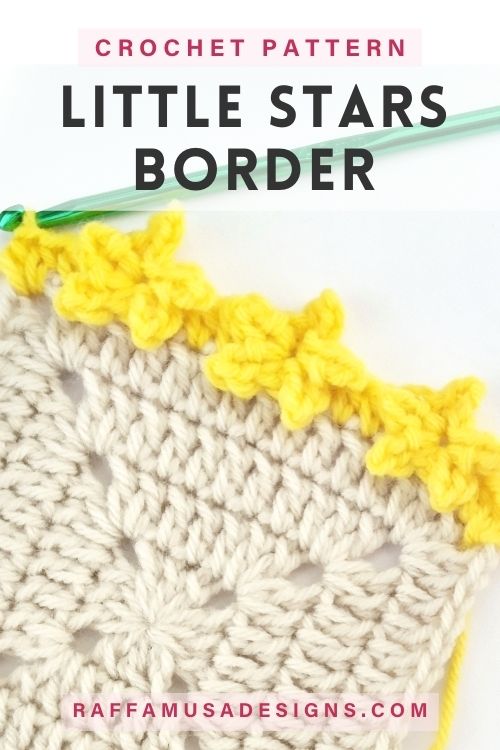
Today, I’d like to share with you this new crochet edging pattern made with many little crochet stars. This is what I called the “Little Stars” border.
I initially thought of this border when I was trying to think of a cute border for my granny square Christmas blanket. And the star border turned out very cute, but I ended up using another border for my blanket.
Moreover, I thought that this Little Stars border would look better on a baby blanket, or a 4th of July project, or some Wonderwoman and Captain America kind of projects! Lol, just kidding…
But for real, if you happen to be making something themed after some sort of flying superhero, I would definitely consider this border as the perfect finishing touch!
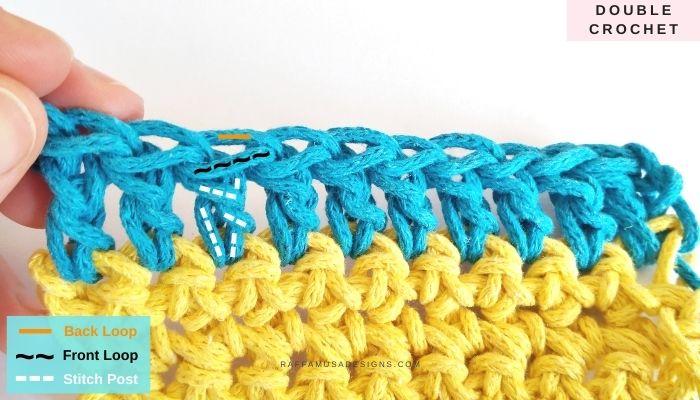
The way you crochet the Little Star border is very similar to the more known flower or heart borders.
So, we’ll be crocheting around the post of two half double crochet stitches. If you need a little refresher about the crochet stitch anatomy, take a look at this blog post HERE!
Add this pattern to your Ravelry queue HERE and favorite it (– thank you!) – or save it for later by pinning it to your favorite crochet board on Pinterest using this pin!
Note: this post contains affiliate links. This means that if you purchase something through the links on my blog, I might earn a commission. This will not have any effect on the price you pay. For more info, please, see my Privacy Policy.
Little Stars Crochet Border – Video Tutorial
MATERIALS
- Yarn of Choice
- Appropriate Hook Size
I will be using Paintbox Yarns Baby DK and a 4-mm (G/6 US, 8 UK) crochet hook.
CROCHET ABBREVIATIONS (US TERMS)
Ch – Chain
Hdc – Half Double Crochet
Inc – Increase
Picot – Picot Stitch
Sk – Skip
Sl St – Slip Stitch
St – Stitch
Yo – Yarn over
SPECIAL STITCHES
Picot Stitch (Picot)
Ch 3, sl st in the back bump of the first ch.
Increase (Inc)
One increase consists of 2 sts worked in the same indicated st.
Little Stars Border Edging – Free Crochet Pattern & Step-by-Step Tutorial
Work in multiples of 5 sts.
*Hdc 2, hdc inc 1.
Use the 2 sts of the hdc inc as a ring and work the star inside the ring.
Star. Ch 1, sl st around the post of the second hdc of the ring, (picot 1, sl st in ring) twice, sl st around the first hdc of the ring, (picot 1, sl st in ring) twice, sl st into the top of the second hdc of the ring, picot 1, sl st in same st.
Ch 1, hdc 2.
Repeat from * all around. At the corners, [hdc 2, ch 2, hdc 2].
Little Stars Border – Step-by-Step Tutorial
Here, I will show you how to crochet the Little Stars Border around a solid granny square of 4 rounds. Find the free pattern HERE.
Since I made 4 rounds of the solid granny square, I have 15 sts on each side.

I already made the first side, so we will see how to crochet the border along the next side of my small square.
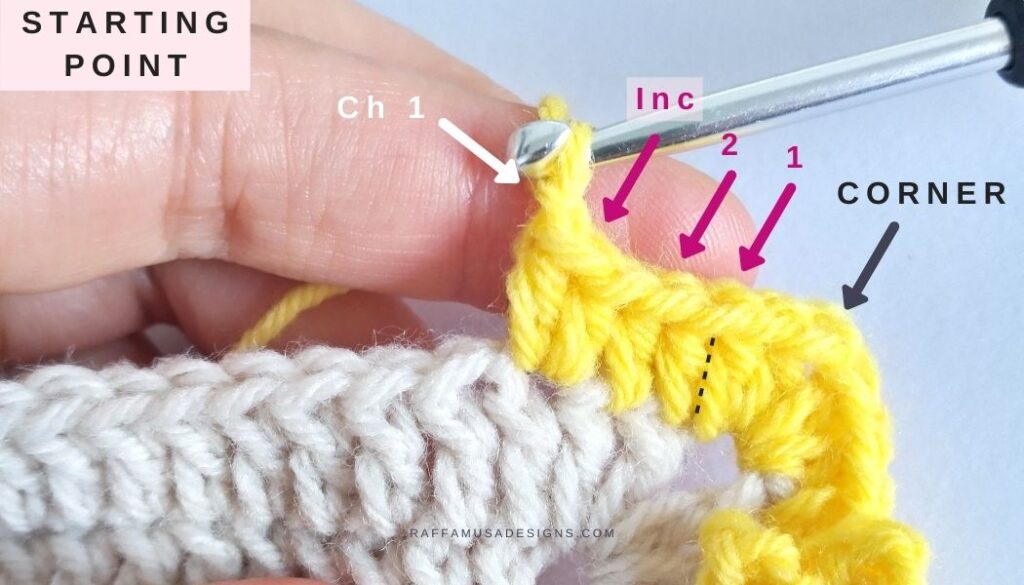
Starting Point
Hdc 2, hdc inc 1.
Star
Step 1. Ch 1, sl st around the post of the second hdc of the ring.
Step 2. Picot 1.
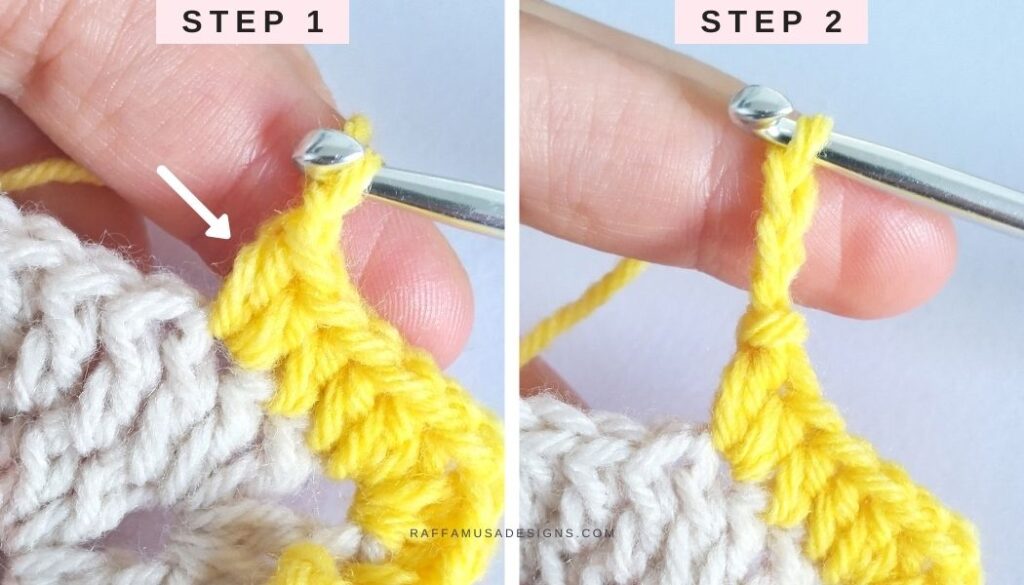
Step 3. Sl st in ring.
Step 4. Repeat steps 2 and 3.
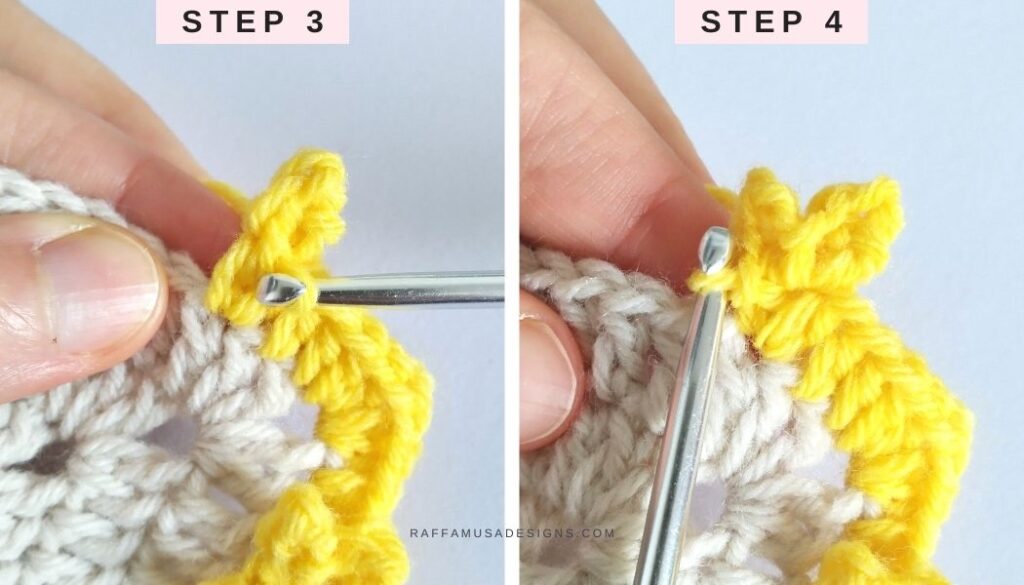
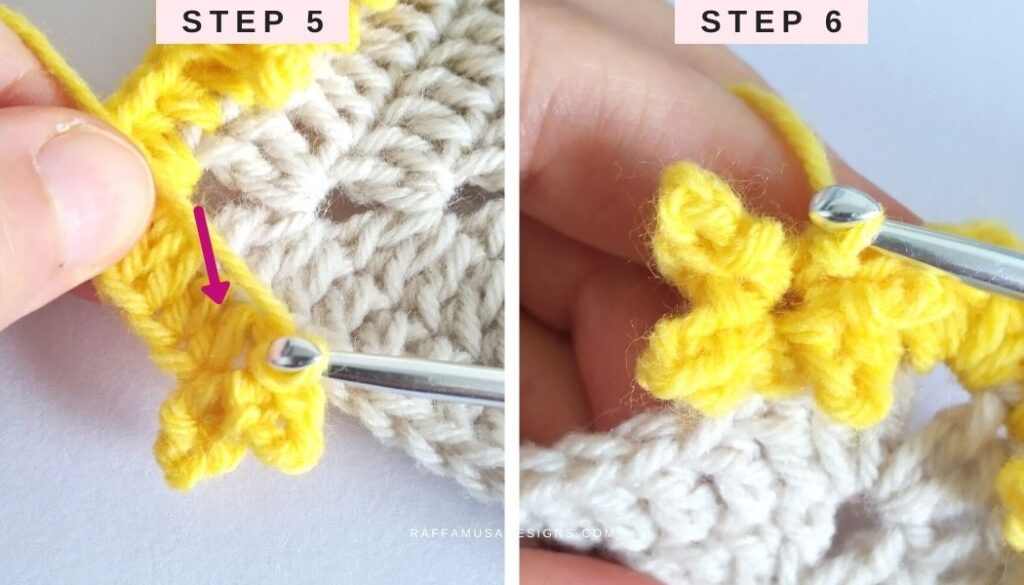
Step 5. Turn your work and sl st around the first hdc of the ring.
Step 6. (Picot 1, sl st in ring) twice
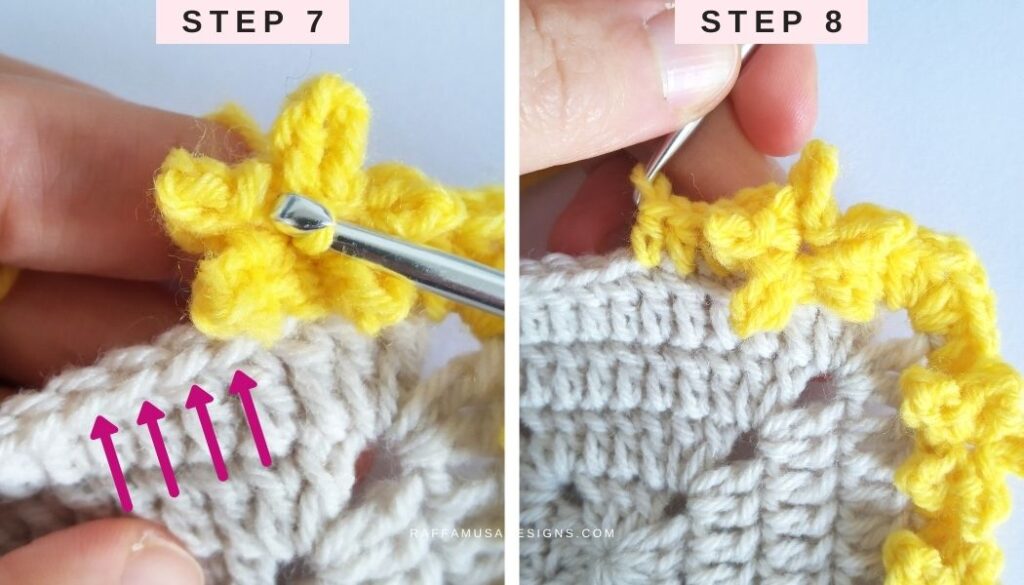
Step 7. Sl st into the top of the second hdc of the ring, picot 1, sl st in same st.
Step 8. Ch 1, hdc 4. Then, hdc inc 1 in next st and repeat a star.
YOUR CROCHET Little Stars Border IS READY!
I hope you enjoyed this free crochet edging pattern. I would love to see your creations using this border on Facebook or Instagram. Make sure to use the hashtag #raffamusadesigns so that I don’t miss your pics!
Find more crochet tutorials here on the blog…

Hi, this border looks perfect for my current project! But, is there any way to pare this down to a repeat of 3 st? My final st count will be 576, which doesn’t divide down to five, but does to three.
Hi Kit, sure.
I think that in your case, the easiest thing to do is to space the stars by 4 sts, so you would be working with a repeat of 6: 2 sts for making the stars and 4 sts in between. So, 576/6 = 96 repeats.
You could also work with repeats of 3 (2 sts for the star and 1 st for spacing) but then, the stars would be veeery close to each other, maybe that’s too crowded?
Looking forward to seeing your finished project 🙂
Best,
Raffaella