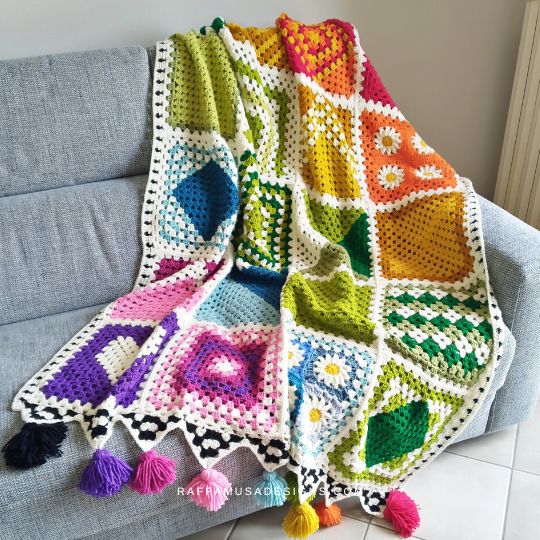
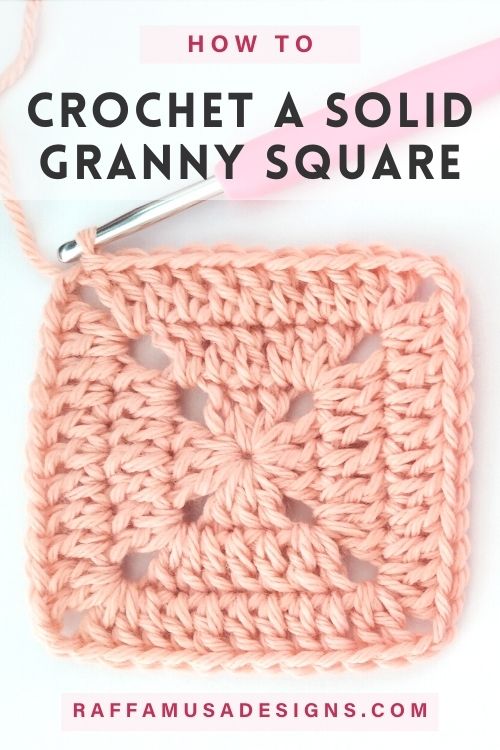
Learn how to crochet a classic granny square with this step-by-step photo and video tutorial.
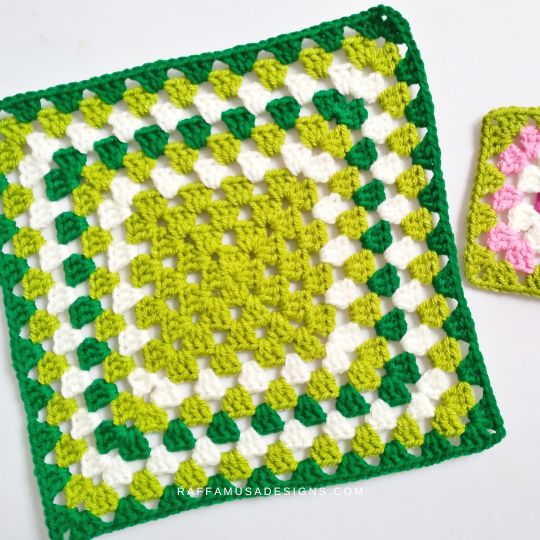
Granny squares are a classic motif, which will look great both in one color or in multiple colors.
Since they are easy and fast to make, granny squares are one of the first patterns that new crocheters learn when they’re just getting started.
PROJECT IDEAS WITH Classic GRANNY SQUARES
There are really so many things that you can make with granny squares…
- Blankets
- Pillowcases
- Potholders…
- Shawls, scarfs, and cowls
- Hats and gloves!
- And so many more…
Find out more ideas in this roundup post where I collected more than 20 awesome crochet projects using granny squares!
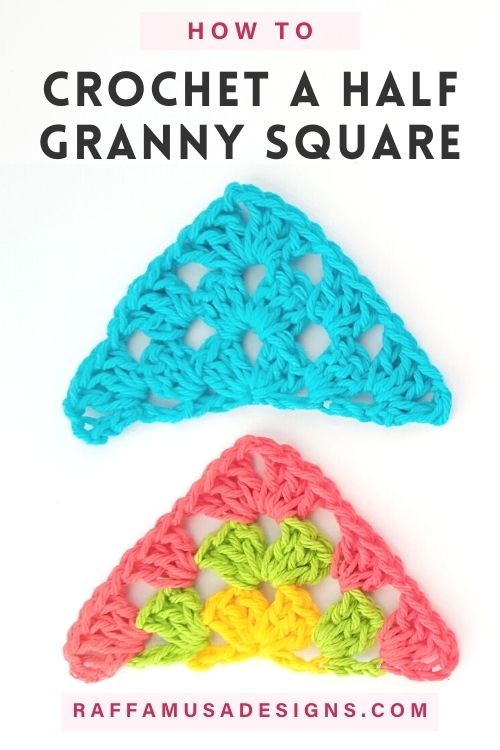
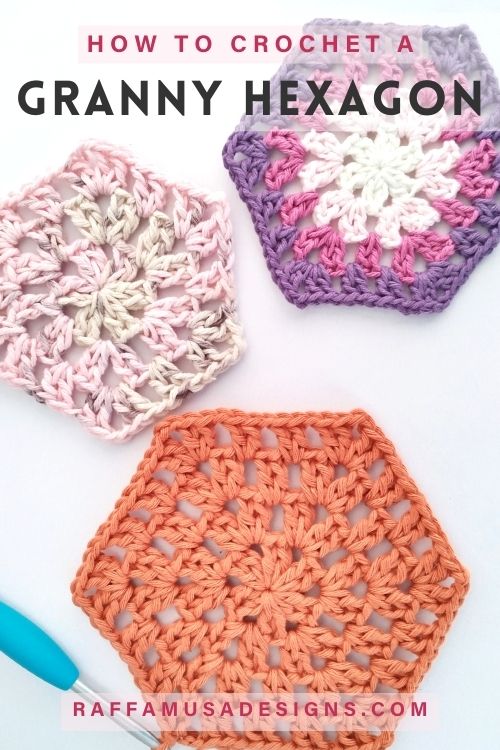
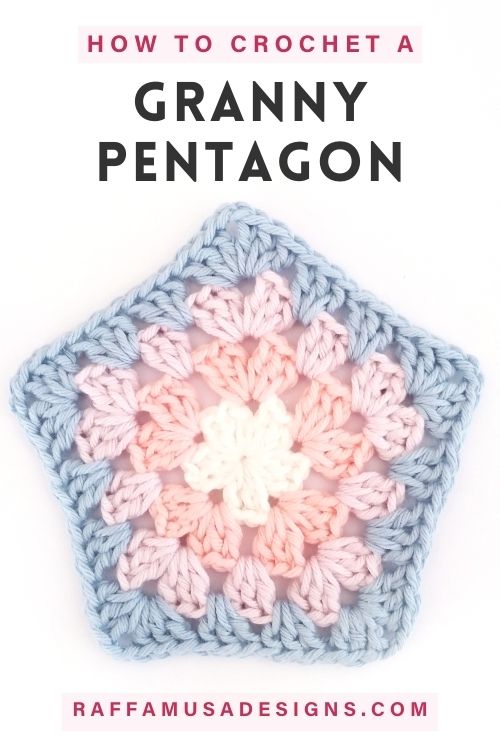
Find more granny stitch geometric shapes to crochet…
Save this tutorial for later by pinning it to your best crochet board on Pinterest using this pin!

Note: this post contains affiliate links. This means that if you purchase something through the links on my blog, I might earn a commission. This will not have any effect on the price you pay. For more info, please, see my Privacy Policy.
How to Crochet a Granny Square
I’m sorry to upset you, but there isn’t a unique or right way to crochet a granny square.
NOT ONLY ONE WAY TO CROCHET A classic GRANNY SQUARE!
Even though the end result must be the same, there are several different ways to get there.
Things that vary are mostly how you start your square – magic circle, chain 4 and form a loop, or chain 5 and crochet the first round in the first-made chain.
Then, there’s the variable of where, or at which point of the round you start the crocheting each round – do you start in the middle of the side, or maybe at the corner?
And how many chains do you make to start each round? Or do you chain 1 in between each set of double crochets?
You see that there are a lot of variables that can change.
So, how do you make a granny square? Which pattern or tutorial do you follow?
My advice is to start trying out a few different ways and see which one you like the best.
My Way of Making a Granny Square…
In this tutorial, I will show you my favorite way to crochet a granny square.
I will show you how to:
How to Crochet a Classic Granny Square – Video Tutorial
Rainbow Blanket CAL
The classic granny square is one of the patterns of my Rainbow Granny Blanket CAL!
- If you’re taking part in the CAL, you need to crochet 10 rounds of a classic granny square!
- Get all the info and list of materials HERE.
MATERIALS
- 3.5-mm (E-4 USA, 9 UK) Crochet Hook
- DK, Light-Weight (3) Yarn. I used Paintbox Yarns Cotton DK.
- Tapestry Needle
You can actually use any yarn weight with the appropriate hook size!
CROCHET ABBREVIATIONS (US TERMS)
Ch – Chain
Dc – Double Crochet
MC – Magic Circle
Sl St – Slip Stitch
St – Stitch
Yo – Yarn over
PATTERN NOTES
- If the pattern says “dc 2”, it means that you have to crochet 1 dc into each of the next 2 sts.
- (…) – Repeat the instruction within brackets for the indicated times.
- […] – Crochet the instructions within brackets into the same indicated st.
HOW TO START YOUR GRANNY SQUARE
To start crocheting my granny squares, I always make a magic circle, also known as an adjustable ring.
The reason why I like the MC is that it will close the center of the square completely, without leaving any holes in the center!
If you do not want to use a MC (by the way, I have a step-by-step tutorial on how to crochet a magic circle here), you can:
- Ch 5 and crochet all the sts of round 1 in the first-made ch;
- Ch 4, join with a sl st into the first ch, and ch 4. Then, crochet all the sts of round 1 inside the little ring you created.
With these two methods, the center of the granny square will not be as tight as with the MC, but both methods work perfectly fine!
GRANNY SQUARE – Step-by-Step Photo TUTORIAL
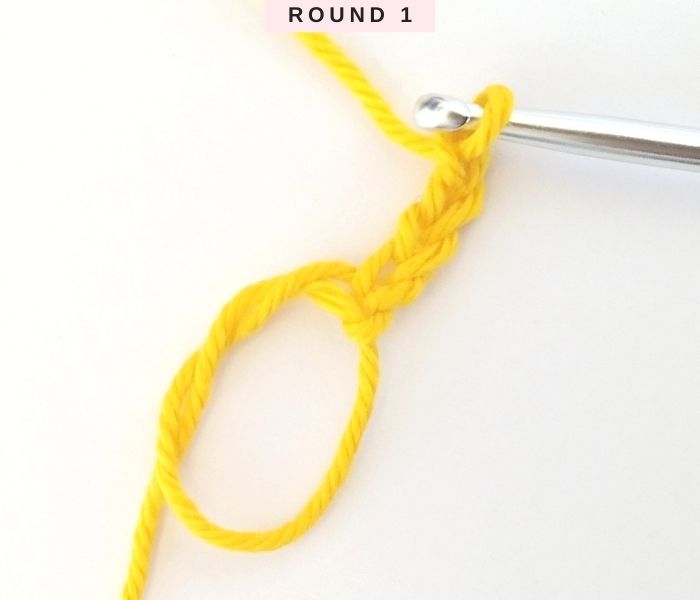
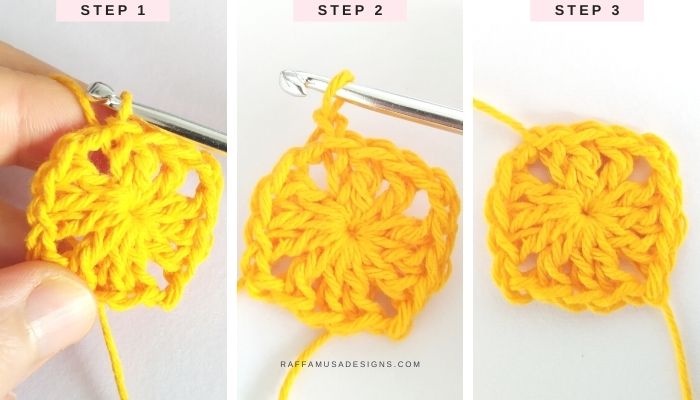
ROUND 1
Start with a magic circle (MC) and ch 4. (Dc 3, ch 2) 3 times in the MC, dc 2, join the round with a sl st into the third initial chain.
Before we go on, I just want to add a little note about the fact that this method that I am showing you here would actually call for a starting chain of 5.
However, I find that with a 5-chain, the starting corner looks bigger than the others. To fix this problem, I just make a ch 4 so that all the corners are the same!
HOW TO JOIN EACH ROUND OF THE GRANNY SQUARE
To join the rounds, I like inserting my hook under both top loops of the third-made chain. This creates a more stable joining point compared to joining only into one of the loops of the chain.
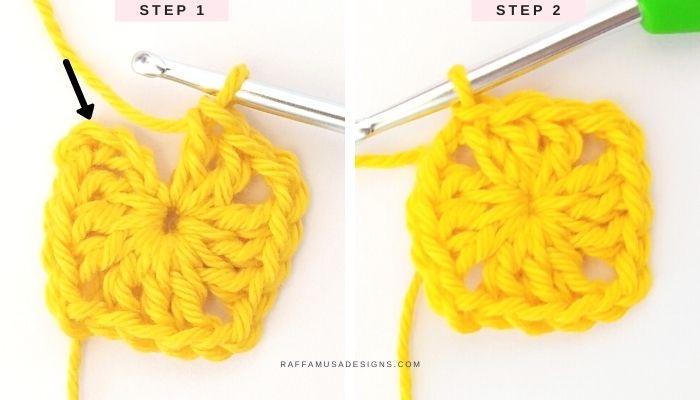
At the end of round 1, you will have 3 dc on each side, a ch-1 space in the first corner, and a ch-2 space at the other three corners.
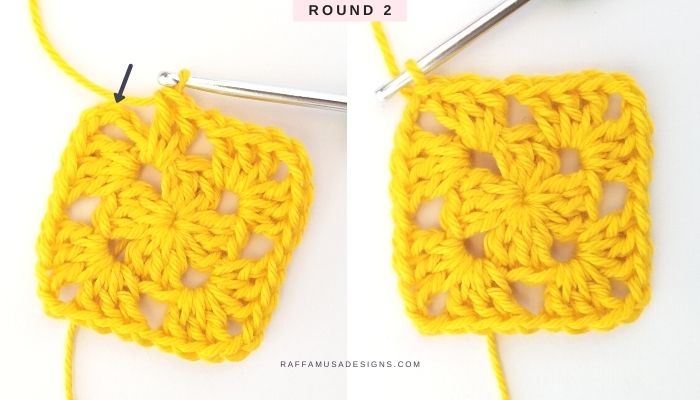
ROUND 2
To start, sl st into the ch-1 space/corner, and ch 4. Then, dc 3 in the same corner space.
*Ch 1, skip the next 3 dc from the previous round, [dc 3, ch 2, dc 3] all in the next ch-2 space. Repeat from * 3 times.
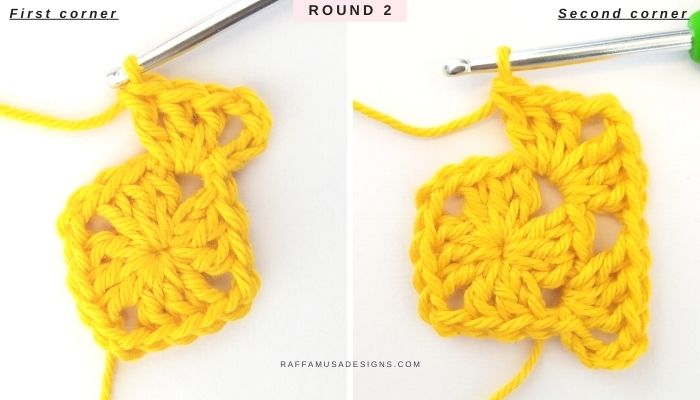
Ch 1, sk 3, [dc 2] in the initial corner space and join the round with a sl st in the third-made ch.
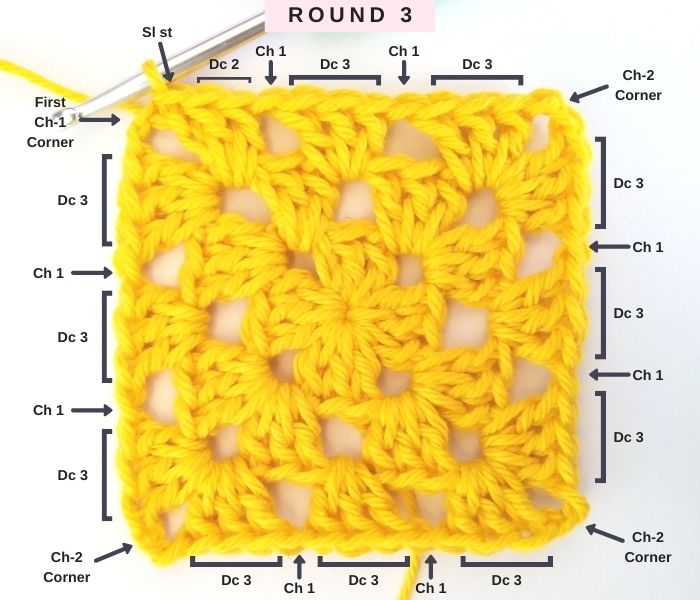
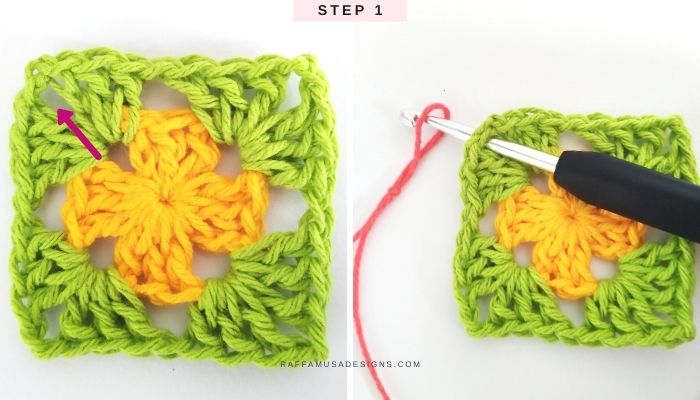
Round 3
With round 3, we are going to learn the stitch pattern that you’ll have to repeat round after round to grow your granny square.
The beginning is the same as for round 2.
Sl st in the first corner space, ch 4, and [dc 3] in the same space.
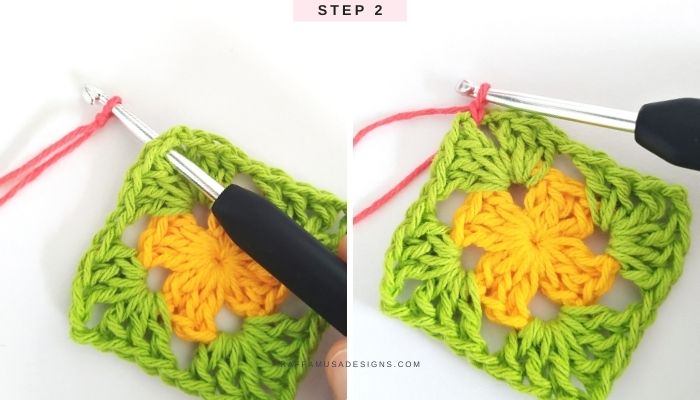
Now, *ch 1, and [dc 3] in the next ch-1 space (indicated by the arrow in the picture below). Ch 1, and work the next corner with [dc 3, ch 2, dc 3] in the next ch-2 corner space. Repeat from * 3 times.
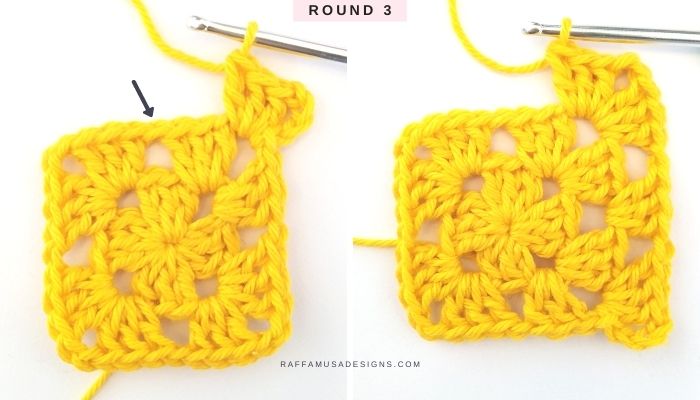
Finally, ch 1, sk 3, [dc 2] in the initial corner space, and join the round with a sl st in the third-made ch.
Apply the same logic as for round 3 to add more rounds to your classic granny square!
- To start the round, sl st into next ch-2 sp, ch 4, dc 3 in the same sp.
- On each side, (ch 1, [dc 3] in next ch-1 sp) for each ch-1 sp from the previous round.
- For the corners, ch 1, [dc 3, ch 2, dc 3] in the next ch-2 sp.
- To end the round, sl st in third-made ch.
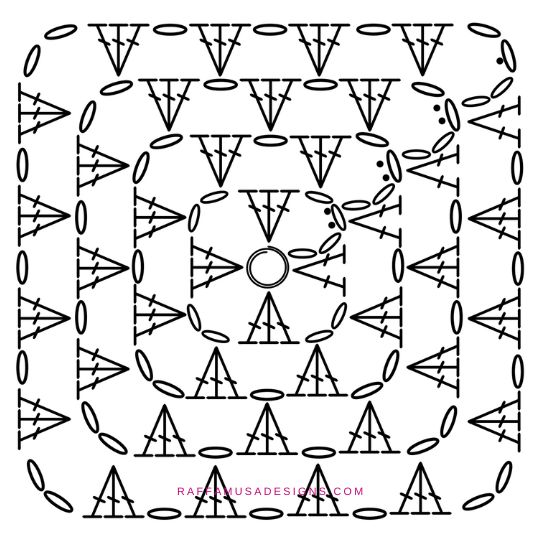
Classic Granny Square Chart Diagram
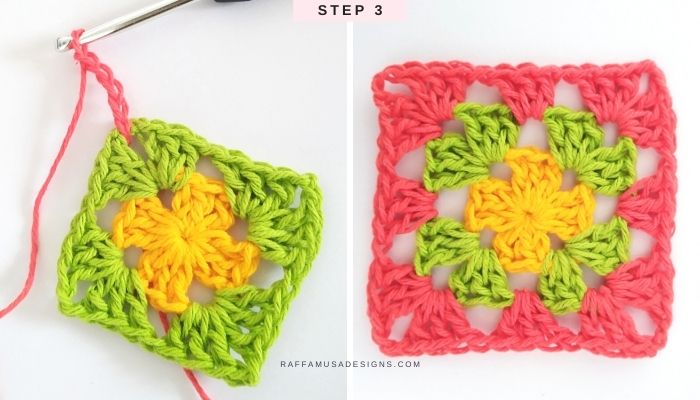
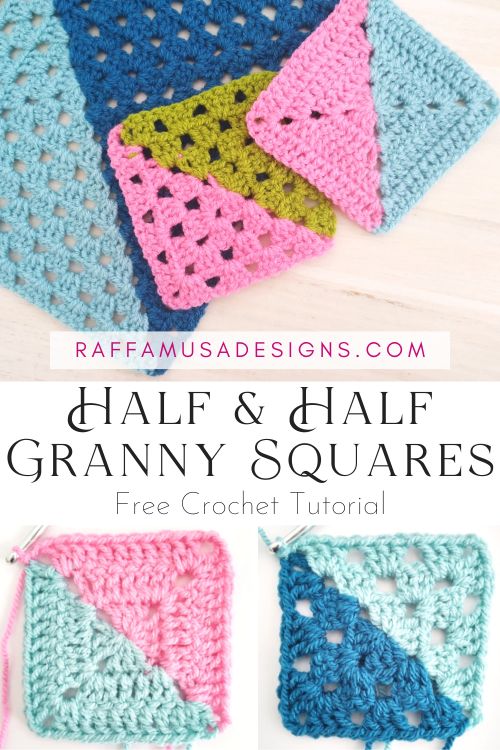
Multicolor Granny Square
While in the beginning, it is definitely easier to practice your granny square skills using one solid color, with time, it is definitely more fun to throw a few more colors in!
So, here is how you can crochet a granny square in multiple colors.
The first thing that you need to do is to fasten off the previous color and weave in your ends. Trust me, you’ll want to weave in your ends now to avoid a huge amount of ends all at the end!
How to Fasten Off Yarn
To fasten off your yarn:
- Step 1. Make the last st of the round/row. In the case of your granny square, make your last sl st to join the round.
- Step 2. Chain one.
- Step 3. Without removing the hook from the loop, cut the yarn leaving a tail of approximately 4″ (10 cm) or more. Then, slide the yarn through the loop and pull the tail tight.
Now, we are going to join the new color in one of the corners of our granny square.
How to Join a New Yarn Color
Step 1
Insert your hook into one corner of your granny square going from front to back.
Make a slip knot to your new color yarn, and insert your hook into the knot. The new color will be on the back of your granny!
Step 2
Tighten the slip knot around your hook, bring your hook close to the corner of the granny square, and chain 1.
Step 3
Ch 4 (counts as 1 dc and a corner space), and crochet your round of granny square like you normally would.
Keep making more colored rows for a multicolor classic granny square!
I hope you liked this pattern tutorial! Please, share your projects on Facebook or Instagram using the hashtag #raffamusadesigns
Here are some more crochet squares patterns and tutorials…

Really nice! Thanks, I am a very, very new beginner!
Oh, that’s exciting! If you have any questions, I’m happy to help 🙂
Love the fruit squares THANK YOU
i’m a long-time crocheter (won’t say how long smiles) but i love granny squares and i’m really looking forward to finishing this beautiful blanket. thank you so much…it’s going to be fun to crochet along
I’m a little bit confused as it said that the pattern would be available until 4th August but it’s already gone and it’s only 2nd August!