The crochet solid granny square is a very beautiful and simple variation of the classic granny square.
As the name suggests, the advantage of solid granny squares is that they are solid!
Of course not as solid as this granny square variation where there are really no gaps, not even at the corners, but it’s still more solid than a classic granny!
So, if you’re wanting to crochet something with fewer holes, or just want to alternate your classic grannies with something different, then, this solid granny square is what you’re looking for.
These crochet blocks are fun to make, for both beginners and more advanced crocheters. Plus, they work up very quickly, and are awesome for using all sorts of scrap yarn!
Explore more crochet granny tutorials…
Project Ideas with Solid Granny Squares
There are really so many things that you can make with granny squares…
- Blankets
- Pillowcases
- Potholders…
- Shawls, scarfs, and cowls
- Hats and gloves!
- And so many more…
Find out more ideas in this roundup post where I collected more than 20 awesome crochet projects using granny squares!
Pin this tutorial on how to crochet a solid granny square to your favorite crochet board on Pinterest!
Note: this post contains affiliate links. This means that if you purchase something through the links on my blog, I might earn a commission. This will not have any effect on the price you pay. For more info, please, see my Privacy Policy.
Not Only One Way to Crochet a solid granny square!
Like with many other crochet stitches and techniques, there is not just one way to crochet a solid granny square.
The three ways I know to make a solid granny square differ for the point in which you join each round of the granny:
- Joining in the middle of the side;
- Joining at the turning chain-5;
- Shifting joining point.
Each of these techniques has its own pros and cons.
| PROS | CONS | |
| Joining in the middle of the side | – All corners are the same. | – The joining seam can be a bit distracting. |
| Shifting joining point | – All corners are the same. | – The joining point is less visible but it is still there… |
| Turning 5-ch | – No visible join! | – The joining corner tends to be larger than the others. |
| My Method: Turning 4-ch | – No visible join! – All corners are the same. | – I just love it, so I cannot say… |
Joining in the Middle of the Side
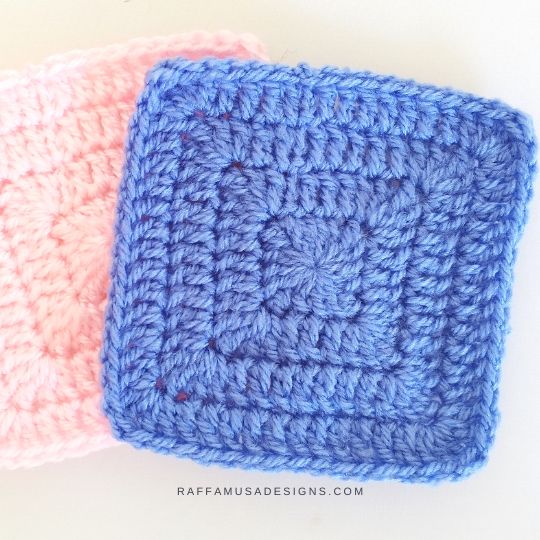
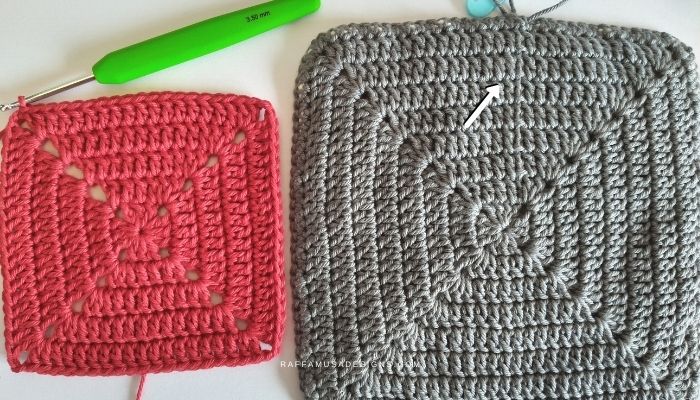
This method is very easy and it is the one that I instantly used when I started making solid granny squares.
However, I was kind of bothered by the visible seam (see the grey square in the picture below).
Shifting joining point
One way to hide the visible join is to shift the joining point at each round of the granny square.
So, the initial chain 3, which counts as your first double crochet, will always be the first double crochet of each corner. You can see what I mean on Irislace.net or on sarahmaker.com.
This method is very neat but I somehow really don’t like chains that count as a stitch in the middle of a side. My chains are always thinner and form a sort of gap, which bothers me a ton!
Turning chain-5
In the “turning chain-5” technique, the joining point of each round of the granny square is in the first ch-5 corner, where the 5 chains count as one double crochet and one chain-2 space.
This method is great because you will not any visible join at all. However, there is one very annoying thing with this method, which is that the joining corner will always be larger than the others.
That’s a bummer…
My Method: Turning chain-4
The technique that I’ll show you today is a slight modification of the “turning chain-5” technique.
For me, this is the best technique because first of all, I don’t like using chains instead of stitches in the middle of my work, and second of all, I love, love, love an invisible seam.
But how to solve the problem of the larger corner?
Well, how about using just 4 chains instead of 5?
So, that’s basically what I did and I am very happy with the result! There is no visible joining point and the corners are all the same.
So, let’s see how to crochet a perfect solid granny square with my turning chain-4 method!
MATERIALS
- 5.5-mm (I/9 USA, 5 UK) Hook
- Aran-Weight (4) Yarn. I used Paintbox Yarns Wool Mix Aran.
- Tapestry Needle
You can actually use any yarn weight with the appropriate hook size!
CROCHET ABBREVIATIONS (US TERMS)
Ch – Chain
Dc – Double Crochet
MC – Magic Circle
Sl St – Slip Stitch
St – Stitch
Yo – Yarn over
PATTERN NOTES
- If the pattern says “dc 2”, it means that you have to crochet 1 dc into each of the next 2 sts.
- (…) – Repeat the instruction within brackets for the indicated times.
- […] – Crochet the instructions within brackets into the same indicated st.
How to Start Your Granny Square
To start crocheting my granny squares, I always make a magic circle, also known as an adjustable ring.
The reason why I like the MC is that it will close the center of the square completely, without leaving any holes!
If you do not want to use a MC (by the way, I have a step-by-step tutorial on how to crochet a magic circle here), you can:
- Ch 5 and crochet all the sts of round 1 in the first-made ch;
- Ch 4, join with a sl st into the first ch, and ch 4. Then, crochet all the sts of round 1 inside the little ring you created.
With these two methods, the center of the granny square will not be as tight as with the MC, but both methods work perfectly fine!
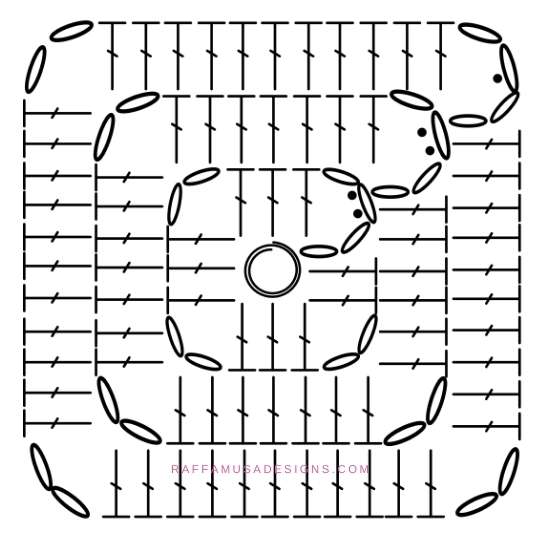
Solid Granny Square Chart Diagram
Crochet Solid Granny Square – Tutorial
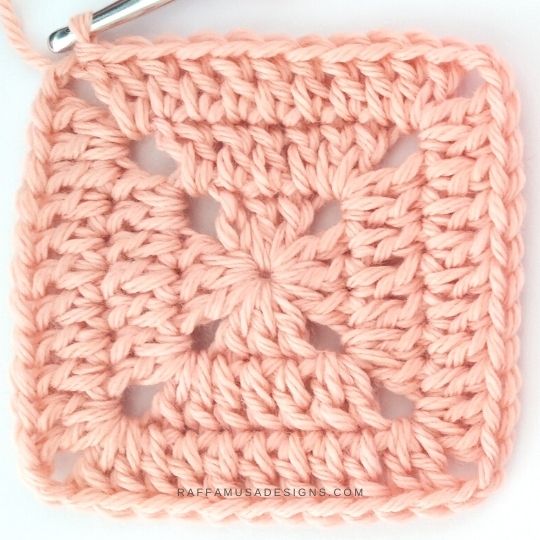
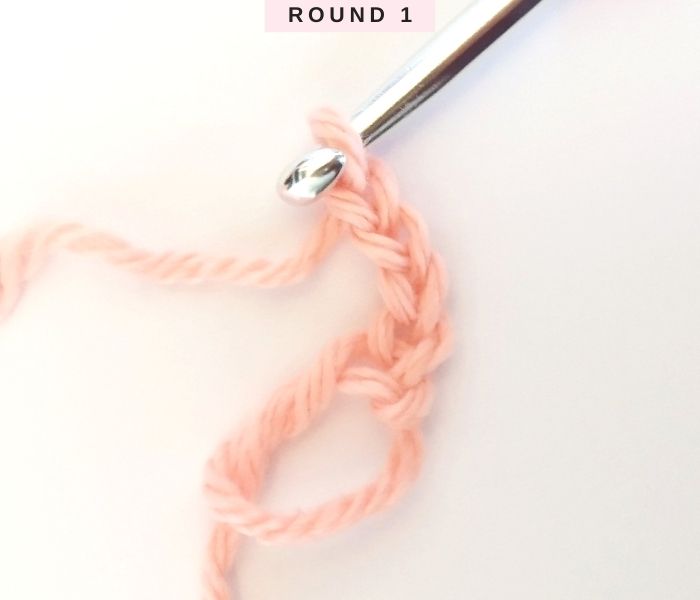
Round 1
Start with a magic circle (MC) and ch 4. (Dc 3, ch 2) 3 times in the MC, dc 2, join the round with a sl st into the third initial chain.
How to join each round of the Granny Square
To join the rounds, I like inserting my hook under both top loops of the third-made chain.
This way the joining point is less floppy than joining only into one of the loops of the chain.
- Step 1. Identify the third-made chain;
- Step 2. Insert your hook under both top loops (you will have the back bump of the chain below the hook);
- Step 3. Sl st.
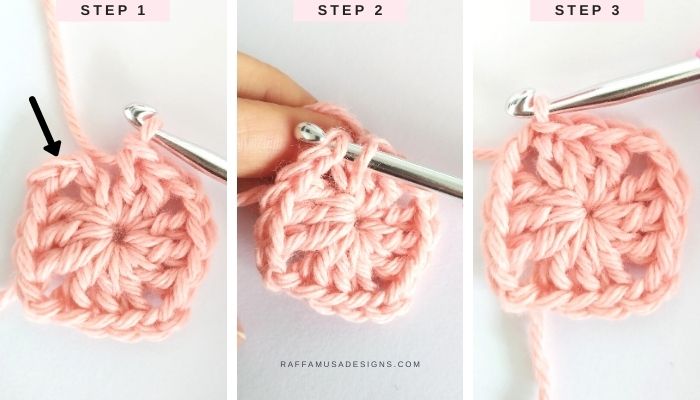
At the end of round 1, you will have 3 dc on each side, a ch-1 space in the first corner, and a ch-2 space at the other three corners.
Round 2
To start, sl st into the ch-1 space/corner.
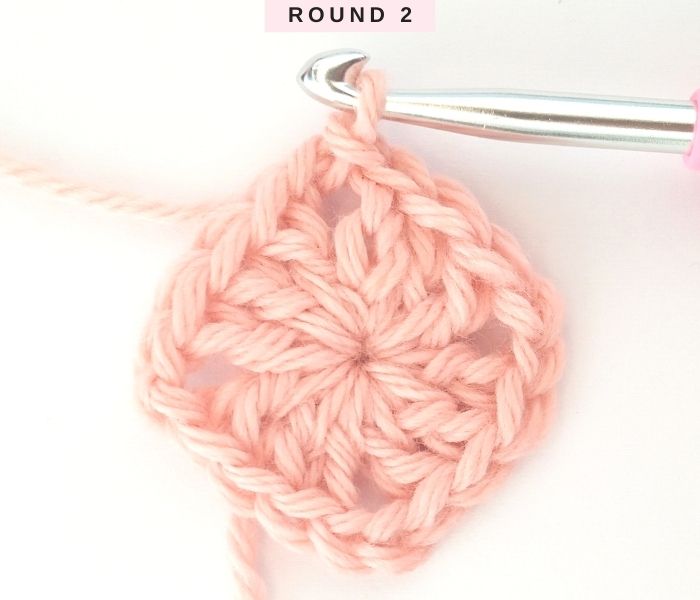
Ch 4, and dc 2 in the same ch-1 space where you slip stitched.
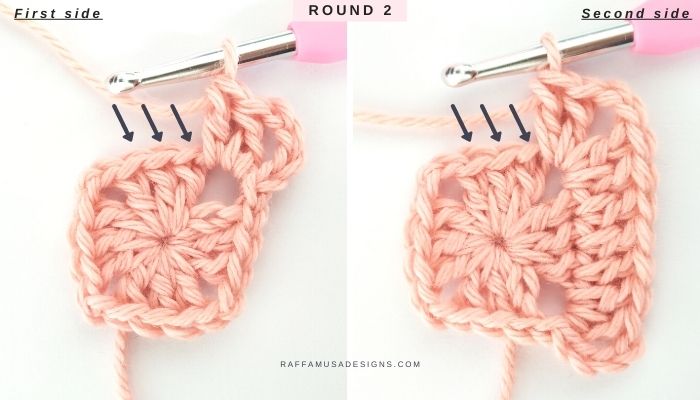
Dc in each dc from the previous round, and at the ch-2 spaces at the corners, [dc 2, ch 2, dc 2].
When crocheting over the dc from the previous round, pay extra attention not to miss the first stitch, which might tend to hide behind the corner sts.
On the last side, make sure not to skip the ch-3 from the previous rounds, which counts as a dc. To make a dc over the ch-3, you will have to insert your hook in the same top loops where you made the sl st at the end of the previous round!
Then, dc 1 in the ch-1 space of the first corner, and sl st into the third-made ch to join your round.
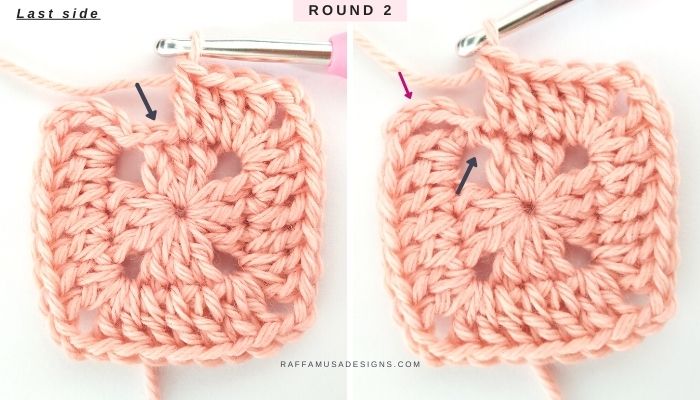
At the end of round 2, you will have 7 dc on each side, a ch-1 space in the first corner, and a ch-2 space at the other three corners.
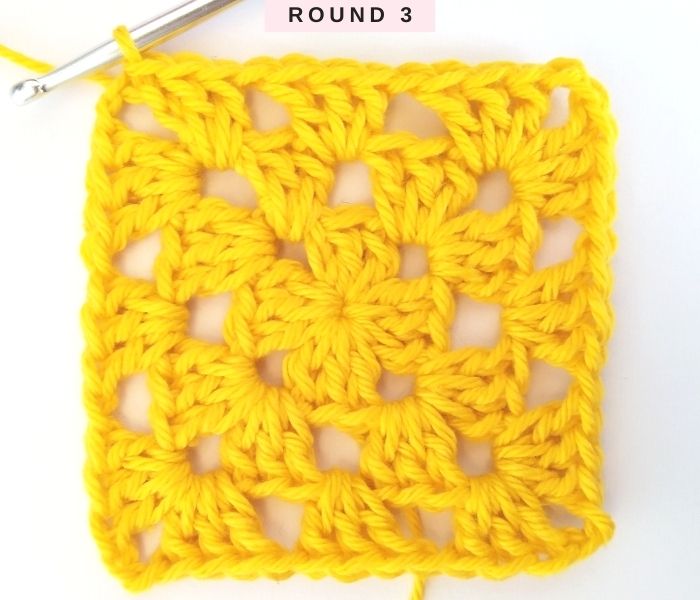
Repeat the instructions for round 2 to add more rounds to your solid granny square!
At each round, you will 4 dc sts per side! So, on round 3, you will have 7+4=11 sts, on round 4, 11+4=15 sts, and so on.
YOUR solid GRANNY SQUARE IS READY!
I hope you liked this pattern tutorial! Please, share your projects on Facebook or Instagram using the hashtag #raffamusadesigns
Here are some more crochet tutorials for beautiful crochet squares!

If you do your double crochet instead of pull through 2 pull through 2.. pull through 1 then pull through 3 it makes a wider dc. Idk what the stitch is called. I seen you said about gaps.. your s looks great though mine never look like yours and I have tried different stitches in the corners and around. I think I need to work on my tension. Thanks for the great detailed information..
Thank you for being able to print your instructions. I am a beginner trying to teach myself. I am finding it a bit of a challenge for me. So, coming across your site has been very helpful. Your picture tutorials with explanations of how and why has also been very helpful and beneficial.
Again, thank you for your help.
I’m happy you found this post helpful 🙂
I had made several solid granny squares using the same method as you, joining in the corner, and had noticed that the first corner had a larger hole than the other corners. Not knowing why this was happening, I started over and did a chain 4 instead of a chain 5 and was happy with the results. I rewrote my instructions and have been doing it that way ever since. It was interesting to read that you had the same occurrence and reduced the beginning chain just like I had.