Just as the name suggests, surface crochet consists of crocheting on the surface of your finished project.
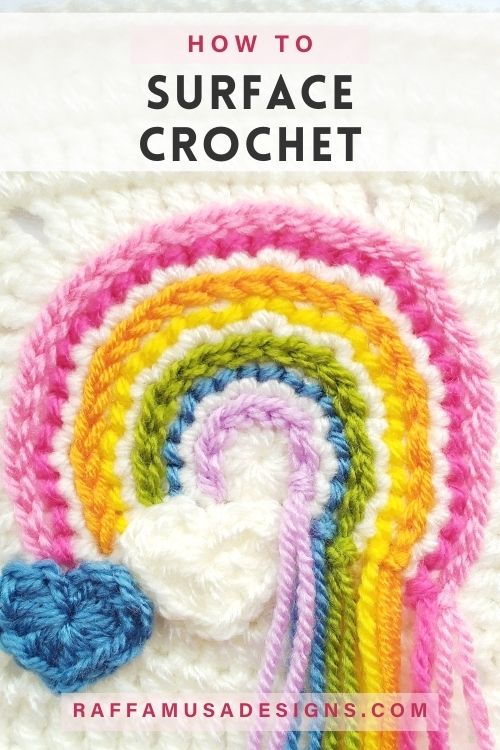
You can surface crochet any stitch, but the most common and easiest surface crochet technique is the surface slip stitch.
What is Surface crochet used for?
Surface crochet is mostly used to add decorative touches to a crochet project.
For example, think about blanket borders and edgings, the slip stitch decorations on Amigurumi, etc.
I personally use surface slip stitches to kind of embroider things on my projects but without really embroidering!
See a few examples of the surface slip stitch in action in the projects below:
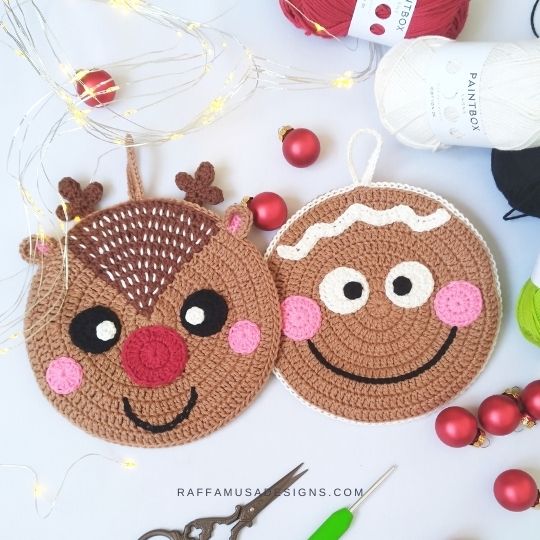
- The smiles of my Christmas Reindeer and Gingerbread Man potholders;
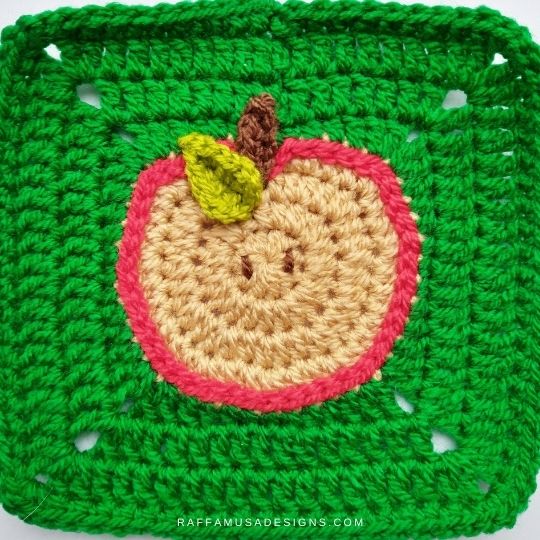
- The red skin of the Apple Granny Square from the Christmas collection;
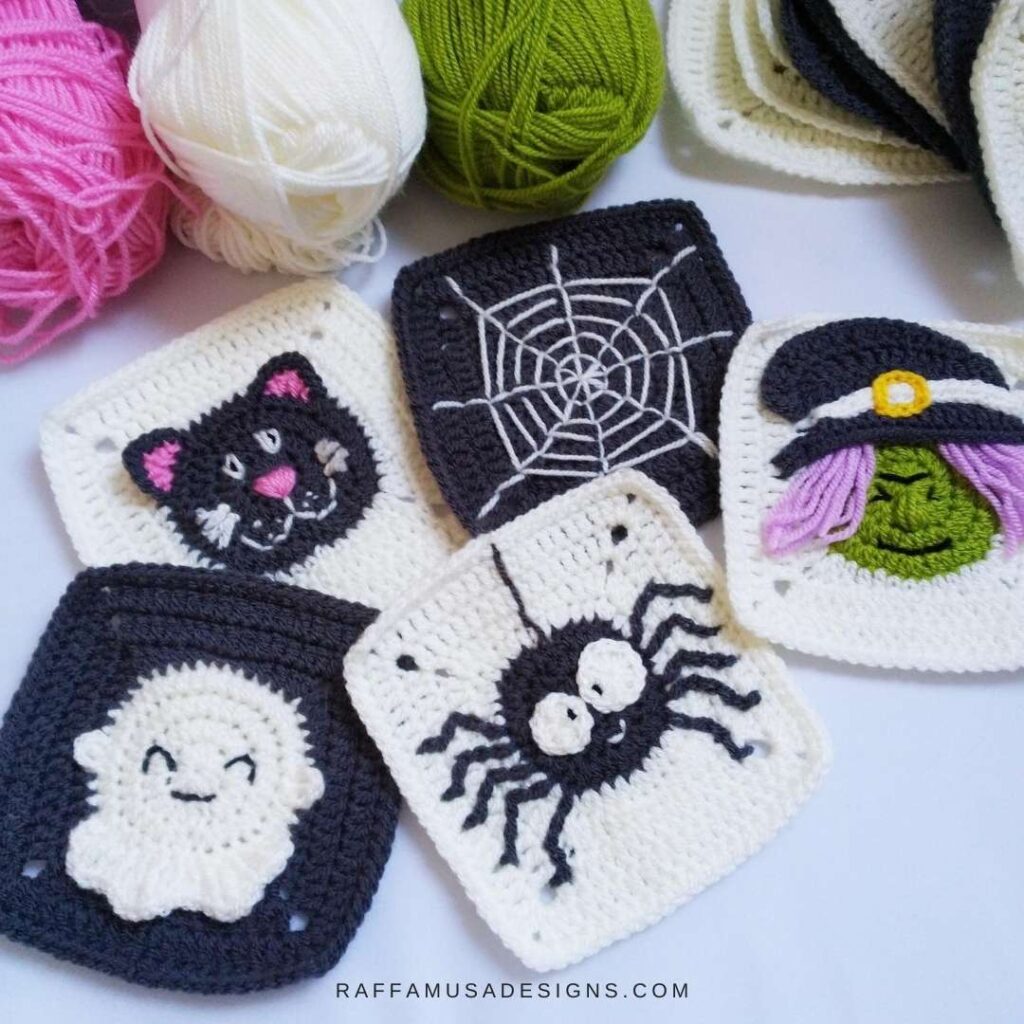
- The legs of the Spider Granny Square from my Halloween collection.
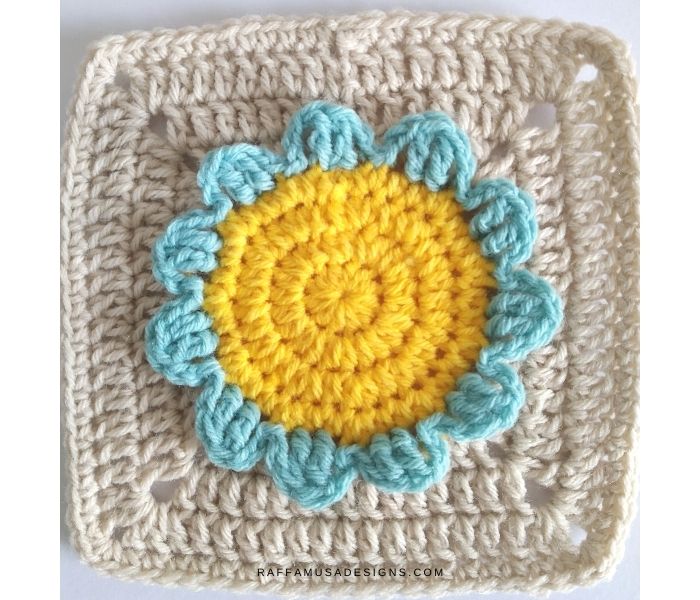
To learn how to surface crochet any other stitch, take a look at how to surface the petals of my Simple 3D Flower Granny Square pattern!
To understand how the surface crochet slip stitch can be an embroidery technique for crocheters, let’s take a closer look at this stitch.
Surface Slip Stitches
On the right side of your work, surface slip stitches will form a sort of chain attached to the surface of your project. On the other hand, on the wrong side of your work, you’ll see that you have a perfectly straight line.
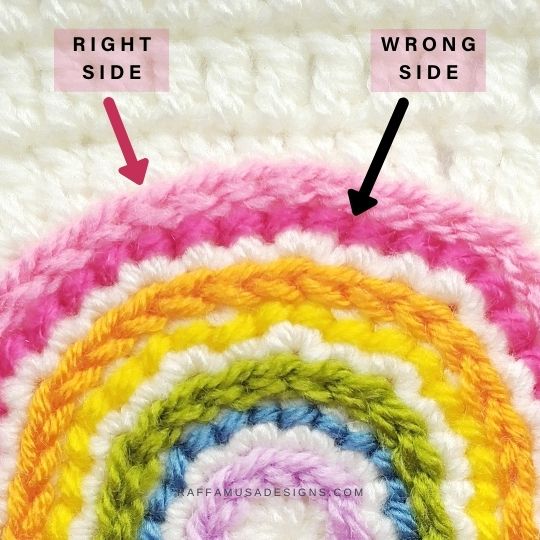
The example above shows a detail of my Rainbow Granny Square (pattern on Ravelry here). You can see that I alternated surface slip stitches on the right sides and slip stitches on the wrong side.
Because after all, who tells you that you should only crochet on the right side of your work?
In fact, I often find that surface crocheting on the wrong side of a project is the easiest way to make a perfectly straight line on the right side!
See for example the line of this Christmas Lights Granny Square from my Christmas Granny Squares Collection.
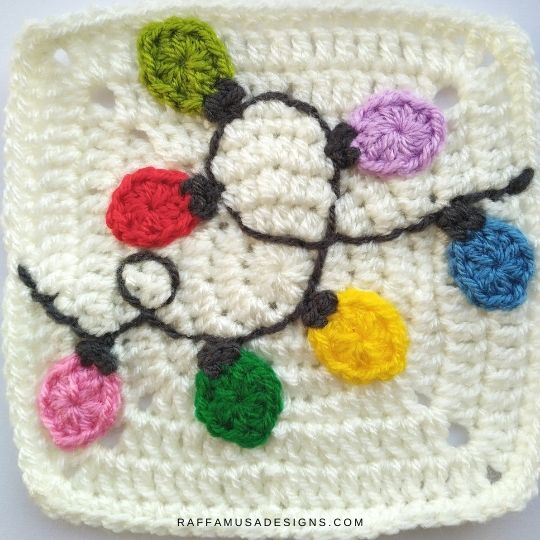
Since the line runs across the granny square (half) double crochet stitches, keeping a straight line while embroidering with yarn and needle would be way more complicated.
Instead, by surface slip stitching on the wrong side of the granny square, I was able to make a beautiful and continuous line!
Abbreviations (US Terms)
- Ch – Chain
- Sl St – Slip Stitch
- St – Stitch
- Yo – Yarn Over
Surface Crochet – Step-by-Step Tutorial
- Step 1. Insert your hook into the indicated st going from front to back of your work.
- Step 2. Position your working yarn on the back of your work.
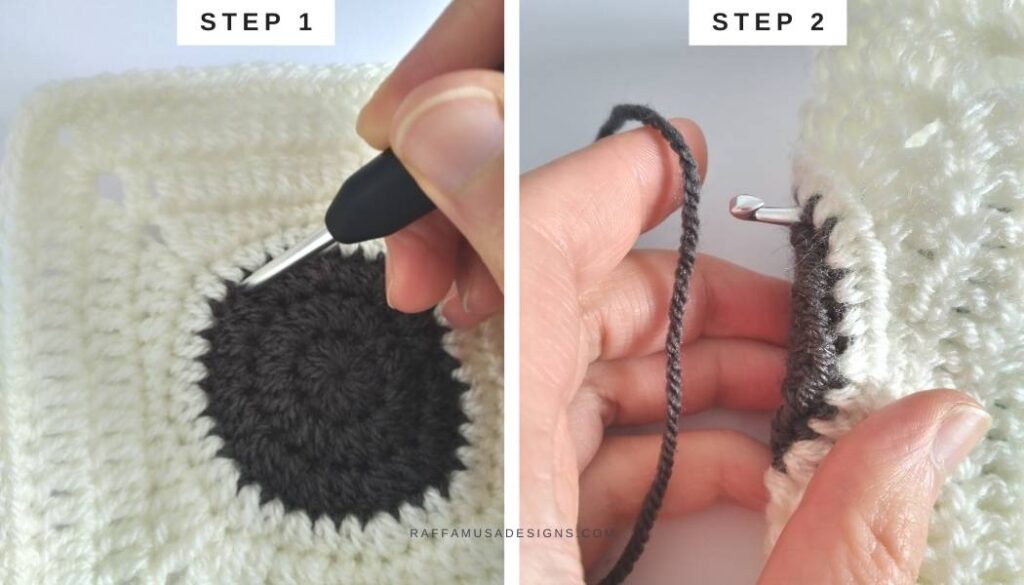
- Step 3-4. On the back of your work, pick up your yarn. To do so, simply yo, and pull up a loop to the front.
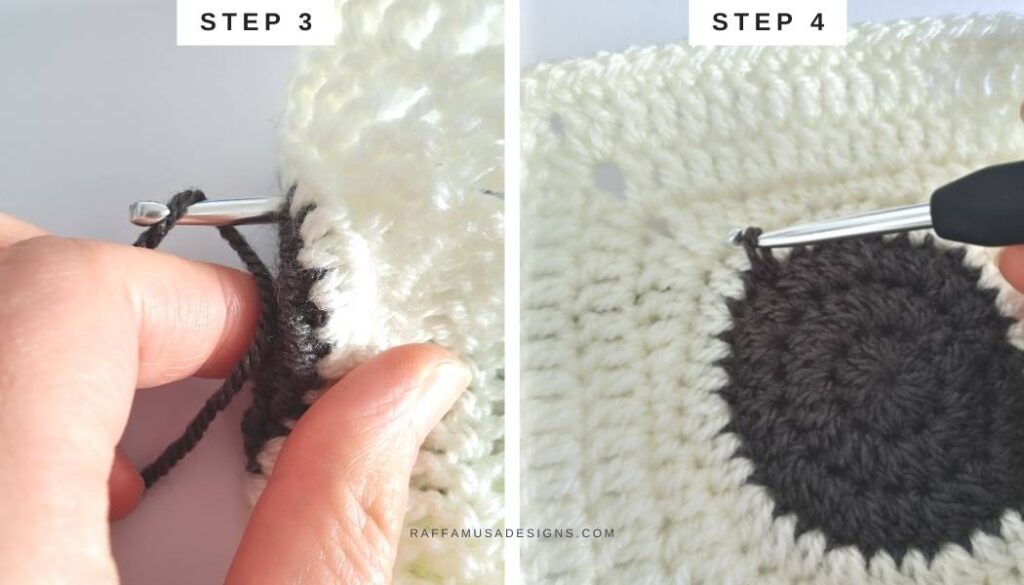
- Step 5. With the loop you just picked up still on your hook, move your hook to the next point/st and insert it from front to back, as you did in step 1.
- Step 6. On the back of your work, yo, and pick up a loop. Pull the loop up to the right side.
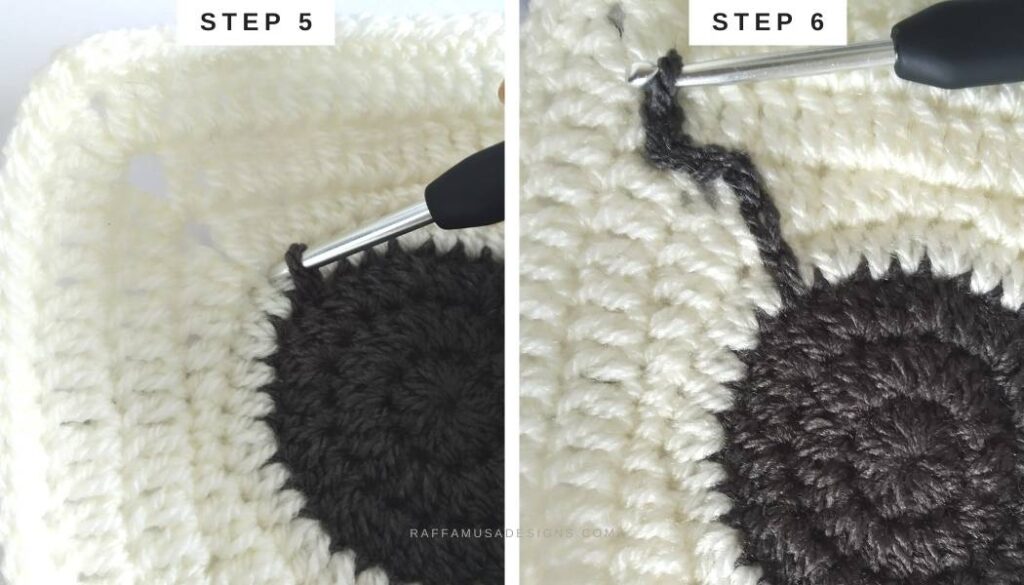
Keep repeating steps 5-6.
Notice how your working yarn remains on the back of your work all the time!
And this was the Surface Crochet Slip Stitch!
Find out more crochet stitch tutorials and techniques…