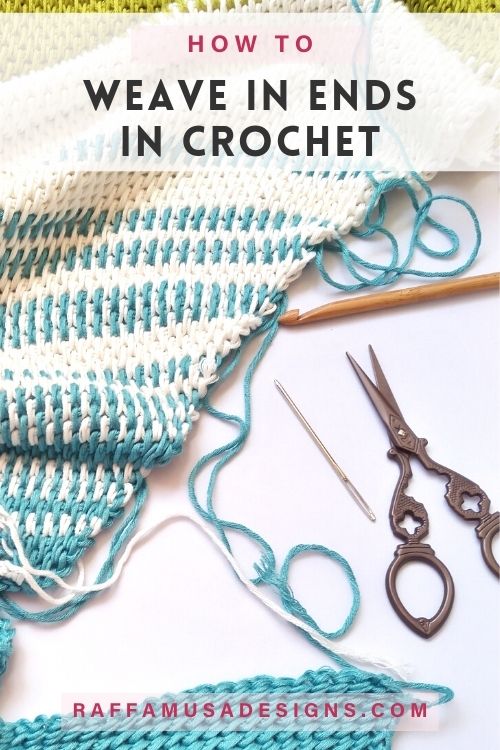
Fasten off and weave in your ends. How many times have you read this sentence in a crochet pattern? And wondered – What on heart am I supposed to do?
Note: this post contains affiliate links. This means that if you purchase something through the links on my blog, I might earn a commission. This will not have any effect on the price you pay. For more info, please, see my Privacy Policy.
I remember that when I finally finished my first-ever scarf, I realized that I had a new problem. How was I supposed to finish off my work and secure all those loose ends? Well, since I had no clue how to do that, I just made a nice knot and cut the tails. Done!
Well, it worked! My scarf is still holding up to this day after wearing it for 3 winters in a row. However, knotting your yarn ends is usually not a good idea.
Knotting yarn will always create big, hard bumps on the back of your work that are not nice to feel. Moreover, those knots are always at risk of opening up, especially after a few cycles in the washing machine.
This said, I must admit that I am one of those people who really like knotting yarn whenever I can. For example, if I am crocheting a blanket, scarf, or beanie, I’ll most certainly join the new skein of yarn with a magic knot. And to be extra secure, I still leave long ends and weave them in at the end.
However, a magic knot is not always possible.
What is the best way to weave in ends in crochet?
There are many ways in which you can weave in your ends. Roughly, we can classify them in:
- Methods that use a tapestry needle or yarn needle;
- Methods to weave in ends without using a needle, but using a crochet hook instead.
- Crocheting over your ends so that you hide them inside your stitches.
Weaving Ends with a Crochet Hook
To weave in ends with a crochet hook, you slide your hook under a few stitches. Then, you grab the loose end and draw it through those stitches.
This method is ok if your project is in loose double crochet stitches and quite thick yarn. However, it would be very difficult in most other cases.
Avoid Weaving in Ends by Crocheting over them
Crocheting over your loose ends is only secure if you have somehow already tied your ends. For example, with a chain 1 and sliding it through, or after joining new yarn with a slip knot.
However, if you have a loose end of yarn, crocheting over it is not safe enough in my opinion. You’ll see why if you keep reading.
How to Weave in You Ends with a Yarn Needle
In this tutorial, I will show you how to weave in ends in crochet using a tapestry needle. And to be as practical as possible, I will show you four examples of real projects.
Before diving into the tutorial though, we must take a look at tapestry needles or yarn needles.
Choose the right Tapestry or Yarn Needle
Tapestry needles or yarn needles are needles that have a round, non-sharp point. The round point is necessary so that you can draw the tails through the strands of yarn. If you were to use a sharp needle, you would risk “stubbing” the yarn.
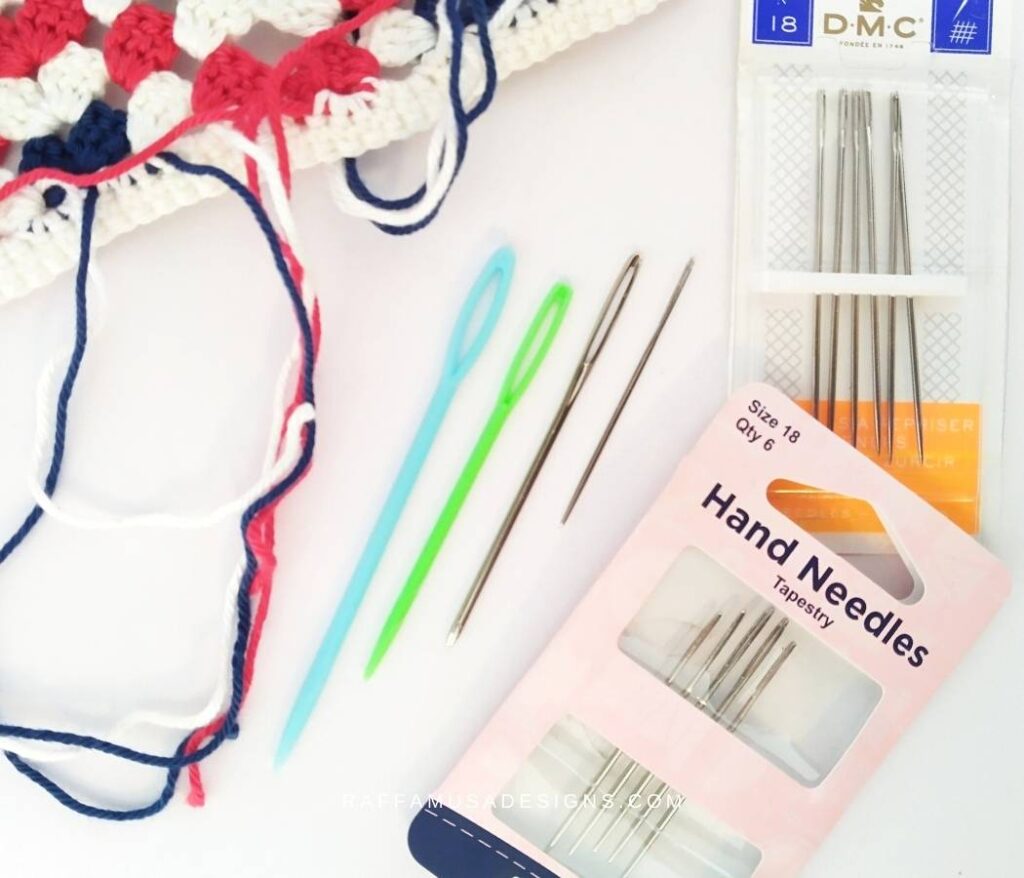
It is important to choose a yarn needle comparable in size (thickness) to your crochet hook.
The large plastic needles that usually come with the first crochet kit or set of hooks that you buy, work well for thicker yarn.
However, for finer yarns, you might want to use a thinner needle, which can pass through your stitches without distorting them.
When purchasing needles, make sure that they say tapestry on the package, like the Hemline Hand Needles from LoveCrafts.
There are also some tapestry needles that have a bent tip, like these yarn needles by KnitPicks for example. I have never used them, so I am not sure if they really make weaving ends a whole lot easier, but they might be worth trying.
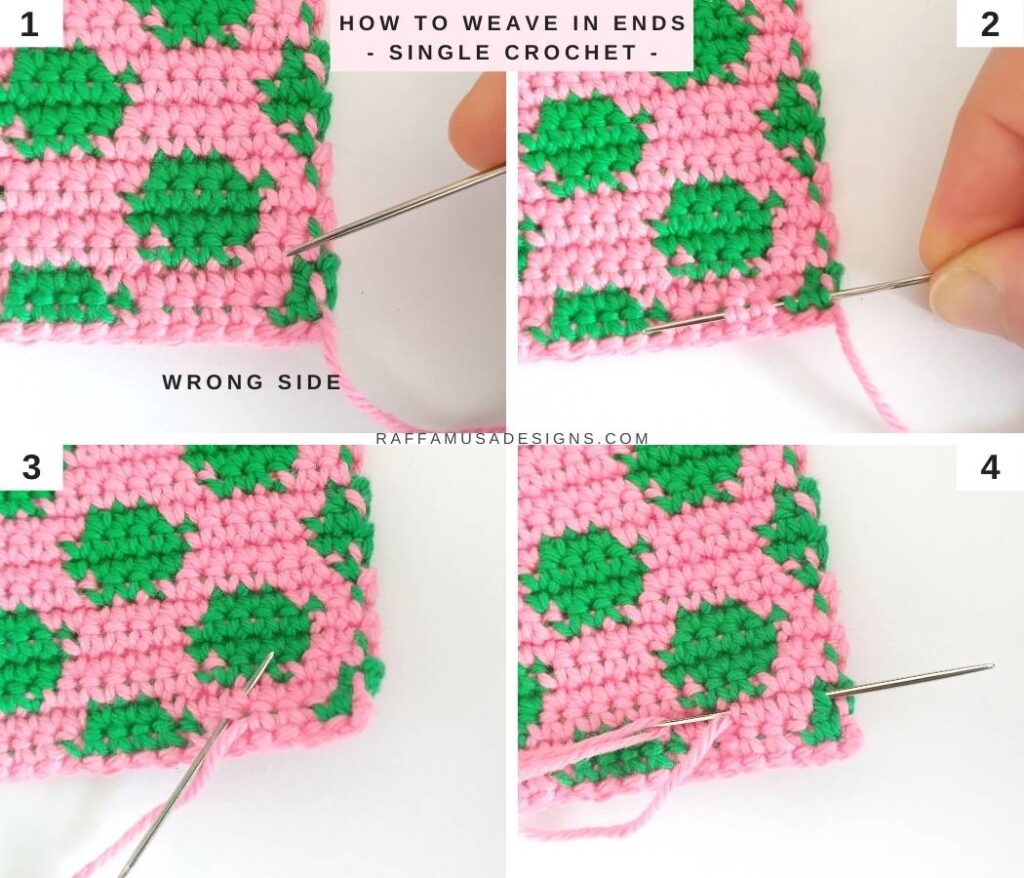
1. Single Crochet
The easiest way to get started in weaving ends is with a single crochet project.
- 1. Thread the yarn tail through the needle.
- 2. On the wrong side of your work, pass the needle through the body of a few stitches from the closest row to your yarn tail.
- 3. Passing underneath your stitches, move the yarn to the row above.
- 4. Draw your needle through a few stitches on the next row in the opposite direction compared to the one in step 2.
Repeat this process a couple of times in different directions. Then, cut your yarn close to the project (paying extra attention not to cut your stitches!).
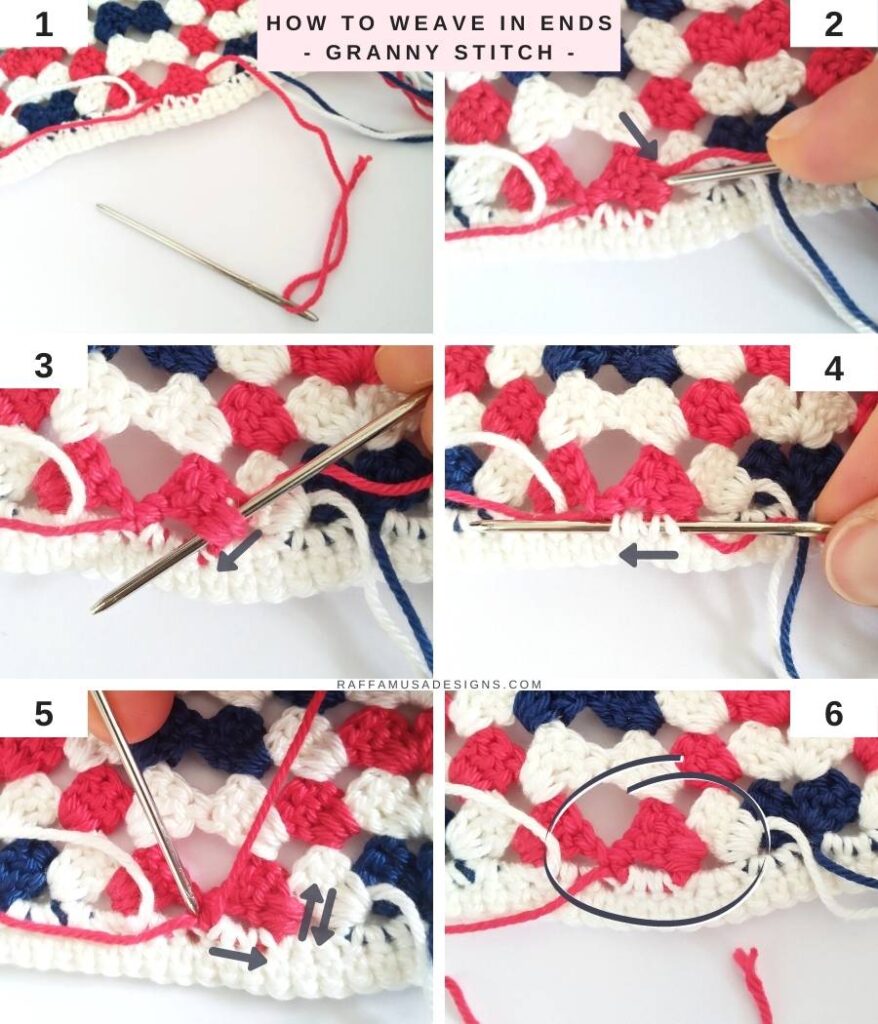
2. Granny Stitch
Granny squares and granny stitch projects are some of the most popular starting points for many crocheters.
So, I thought that it would be useful to see an example of how to weave in your ends with a granny stitch project (see image below). In this example, you will see that I also used the border to help secure my yarn.
3. End of Round
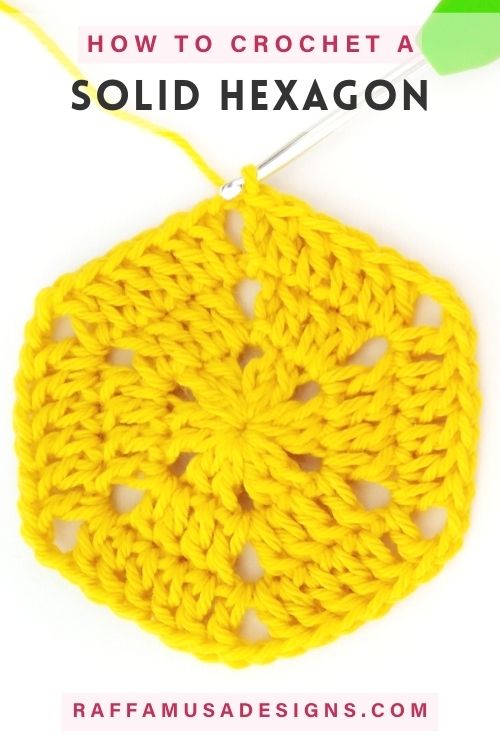
Another common tail to weave in is the one at the end of a granny square or a hexagon, like the one in this case. However, this example can be applied to any project that is worked in rounds.
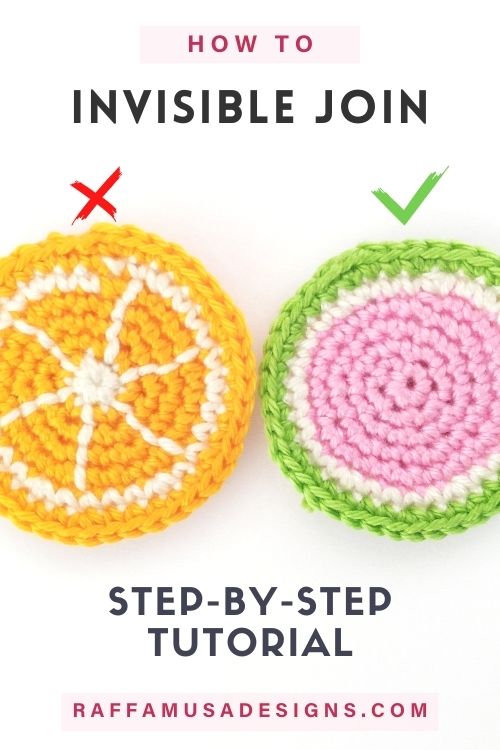
Normally, after you fasten off with a chain 1 and slide yarn through, you are left with a sort of tiny bump in the closing point.
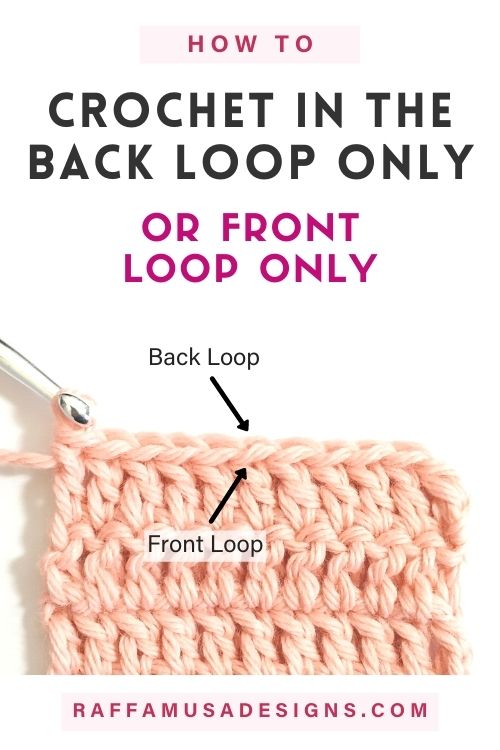
What I like to do on the right side of my work is to draw my yarn tail through the back loop only of the next stitch (Pictures 1 to 3). Then, I flip my work to the wrong side and start weaving in the end (Picture 4).
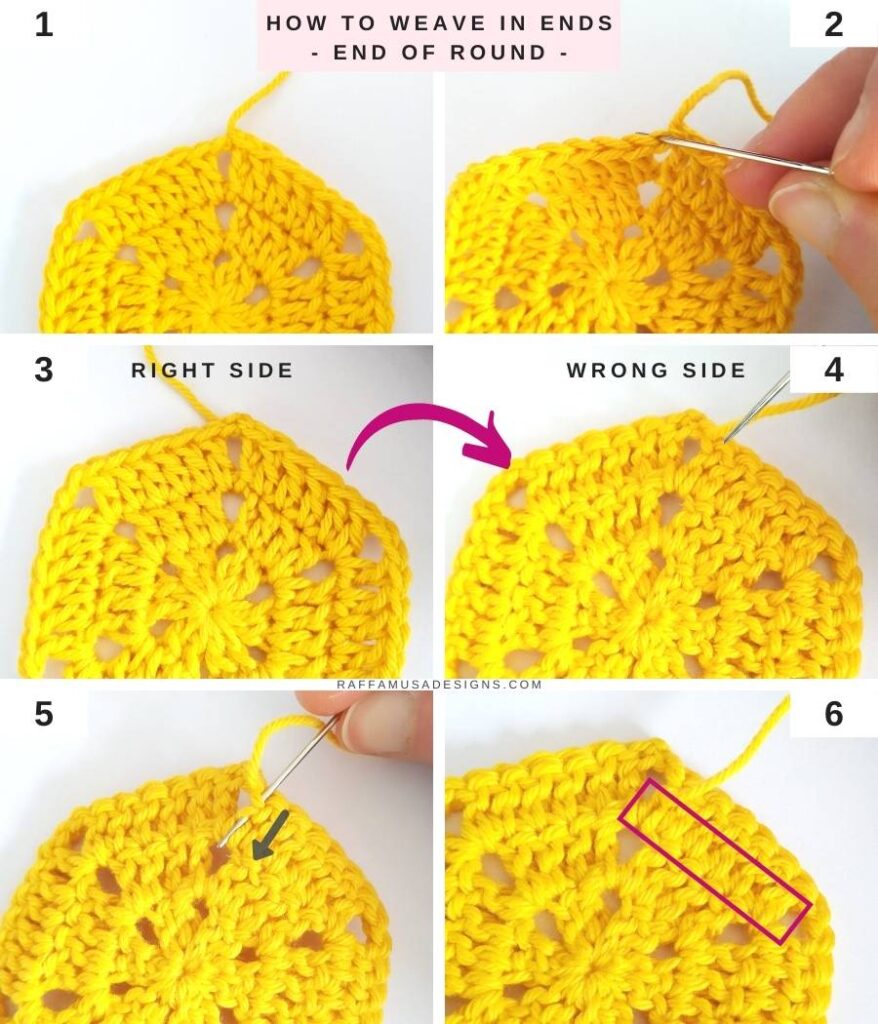
The first step is to bring your yarn down to the base of the stitches on the last round and weave in your ends there (Pictures 5-6). And here we come to a very delicate step.
If your stitches are single crochet stitches, there is no discussion, just weave in your tails like I showed you in the first example.
However, if your stitches are double crochet stitches, like in the example below, weaving in your yarn at the base of the stitches can cause some distortions. See the next example to learn more.
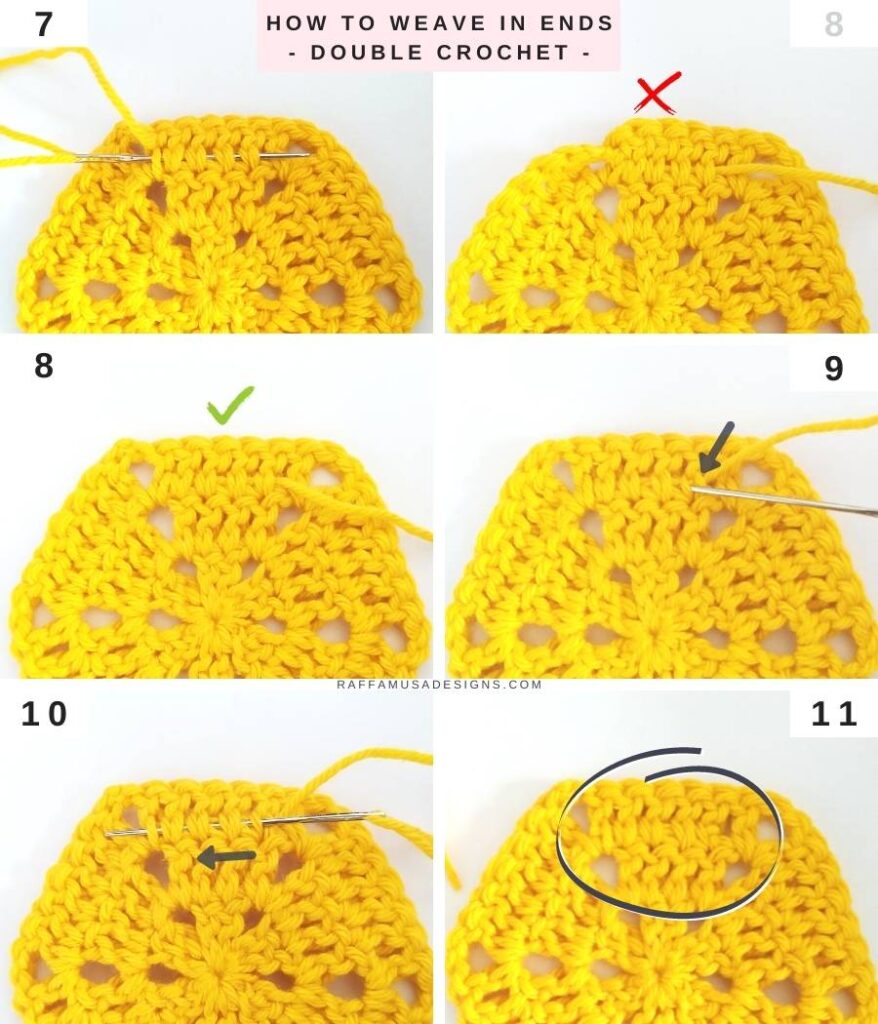
4. Double Crochet
With long stitches, such as double crochet and treble crochet, many experienced crocheters will recommend you weave in your ends following the height of the stitches, basically the post of the stitch (learn what is the post of crochet stitches here).
However, in most cases, I still like weaving in my ends at the base of the stitches. The reason why many crocheters do not like this is that with long stitches there is the risk of collapsing them together. Basically, you risk squeezing your stitches.
See the two pictures 8 below. In the first one, you can see what happens if you pull your yarn too tightly. If that happens, make sure to relax your stitches to the right place before you continue weaving your ends.
5. Magic Circle
Securing the magic circle (or magic ring or adjustable ring) is one of the biggest challenges for crochet beginners. Everyone has got some horror story from the early crochet days, where all the magic circles opened up and blankets got destroyed…
So, don’t let that happen to you! Learn how to secure a magic ring here.
I hope you enjoyed this free tutorial on how to weave in your ends in crochet.
Please, do not hesitate to contact me if you need any help or support. I am looking forward to hearing from you on Facebook and Instagram!
Find more crochet tutorials here on the blog…