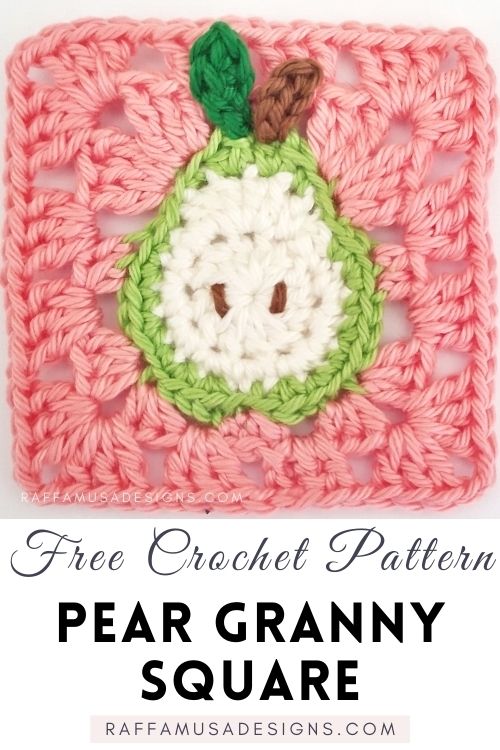
The Tutti Frutti Granny Squares collection wouldn’t be complete without a crochet Pear Granny Square!
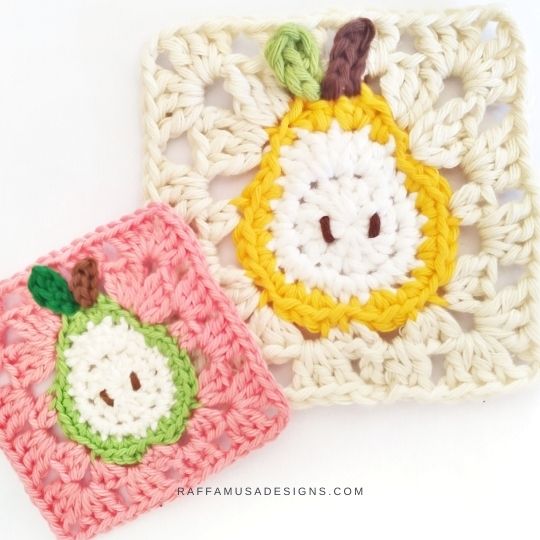
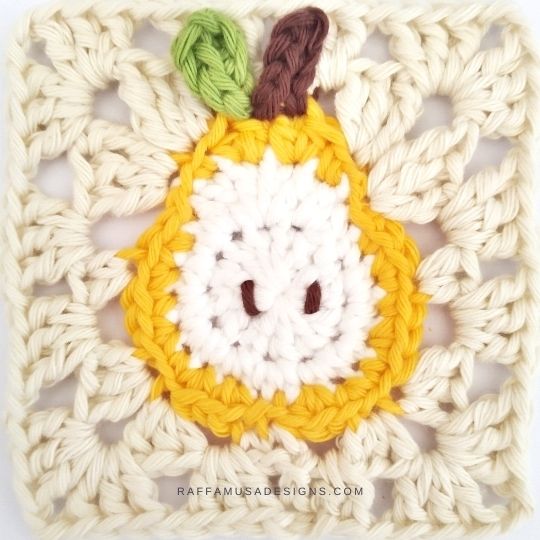
This free crochet square pattern has one Little Pear Applique in the center. Then, it becomes a square with a couple of rounds of the classic granny stitch.
But feel free to add more rounds if you want to make your granny square bigger and mix & match it with any other granny square!
This pear afghan block is perfect for all your kitchen decor ideas, or any pattern using granny squares.
Tutti Frutti Granny Squares
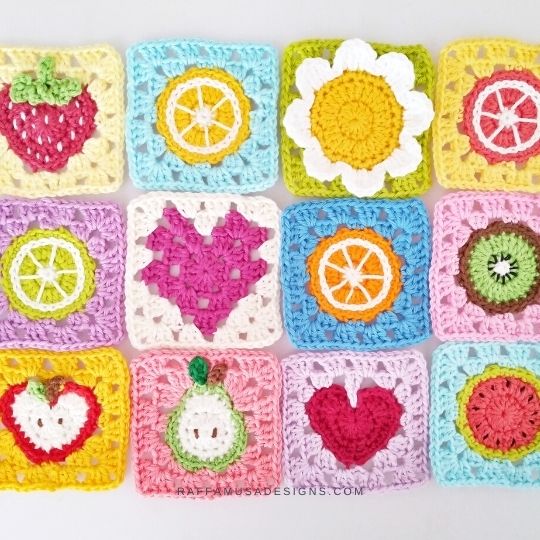
The pattern of the Pear Granny Square is part of the Tutti Frutti Granny Squares collection.
Take a look at the collection HERE on the blog, or get a copy of the e-book on Ravelry, LoveCrafts, or Etsy!
Add this pattern to your Ravelry queue HERE and favorite it (– thank you!). Or save it for later by pinning it to your favorite crochet board on Pinterest using this pin!
Note: this post contains affiliate links. If you purchase something through the links on my blog, I might earn a commission. This will not have any effect on the price you pay. For more info, please, see my Privacy Policy.
How to Crochet A Pear Granny Square – Video Tutorial
PRINTABLE PDF PATTERN
The pattern of the Pear Granny Square is available as a printable PDF file with step-by-step photos! Get your copy on Ravelry, LoveCrafts, or Etsy!



MATERIALS
- 4.5-mm (7 US, 7 UK) Crochet Hook
- Aran (4, Medium) Yarn
- Tapestry Needle
Yarn
I used Paintbox Yarns Cotton Aran in the following colors:
- A – Champagne White (603)
- B – Buttercup Yellow (623)
- C – Vanilla Cream (608)
- D – Coffee Bean (611)
- E – Lime Green (629)
YARN SUBSTITUTIONS
Abbreviations (US Terms)
BLO – Back Loop Only
Ch – Chain
Hdc – Half Double Crochet
Dc – Double Crochet
Inc – Increase
MC – Magic Circle
RS – Right Side
Sc – Single Crochet
Sk – Skip
Sp – Space
Sl St – Slip Stitch
St – Stitch
Yo – Yarn Over
SPECIAL STITCHES
Back Loop Only (BLO)
Learn how to crochet in the back loop only HERE.
Increase (Inc)
One increase consists of 2 sts worked in the same indicated st. The pattern indicates when to make a sc, hdc, dc, or tr inc.
Magic Circle (MC)
Find a step-by-step photo tutorial on how to crochet the magic circle HERE.
Pattern Notes
- If the pattern says “sc 2”, you need to sc 1 in each of the next 2 sts.
- (…) – Repeat the instructions within brackets for the indicated number of times.
- *… – Repeat the instructions from * for the indicated number of times.
- […] – Crochet the instructions within brackets all in the same indicated st.
Pear Granny Square – Free Crochet Pattern
With A, make a MC.
Round 1. Ch 2 (does not count as a st), dc 12 in MC, sl st in first dc to join. (12 sts)
Round 2. Ch 1 (does not count as a st here and throughout), [sc 1, hdc 1] in first st, [dc 4] in next st, [hdc 1, sc 1], sc 1, sc inc 7, sc 1, sl st in first st to join. (24 sts)
Fasten off A. RS facing, join B in the first dc of round 2.
Round 3. Ch 1, sc 1 in same st as joining, [hdc 1, dc 1] in next dc, [dc 1, hdc 1] in next dc, sc 1, sl st 2, (sc 1, sc inc 1) 3 times, [sc 1, hdc 1] in next st, sl st 2 (bottom of pear), [hdc 1, sc 1] in next st, (sc inc 1, sc 1) 3 times, sl st 2, sl st in first st to join.
Make an invisible join and fasten off.
Squaring
RS facing, hold your pear with the bottom up and join C in BLO of the second sl st at the bottom of the pear.
Round 4. BLO sc 1 in same st as joining, ch 1, sk 3, [BLO hdc 2, BLO dc 1] in next st, ch 2, [BLO dc 1, BLO hdc 2] in next st, ch 1, sk 3, BLO hdc inc 1, ch 1, sk 3, [BLO dc 2, BLO tr 1] in next st, ch 2, [BLO tr 1, BLO dc 2] in next st, ch 1, sk 1, BLO sc 2, ch 1, sk 1, [BLO dc 2, BLO tr 1] in next st, ch 2, [BLO tr 1, BLO dc 2] in next st, ch 1, sk 3, BLO hdc inc 1, ch 1, sk 3, [BLO hdc 2, BLO dc 1] in next st, ch 2, [BLO dc 1, BLO hdc 2] in next st, ch 1, sk 3, BLO sc 1 in first sl st of the bottom of the pear, join with a sl st in first sc.
Round 5. Sl st in next ch-1 sp and ch 2 (counts as the post of a dc), [dc 2] in same ch-1 sp, ch 1, [dc 3, ch 2, dc 3] in next ch-2 sp, ch 1, ([dc 3] in next ch-1 sp, ch 1) twice, [dc 3, ch 2, dc 3] in next ch-2 sp, ch 1, [dc 3] in next ch-1 sp, ch 1, sk next ch-1 sp, [dc 3] in next ch-1 sp, ch 1, [dc 3, ch 2, dc 3] in next ch-2 sp, ch 1, ([dc 3] in next ch-1 sp, ch 1) twice, [dc 3, ch 2, dc 3] in next ch-2 sp, ch 1, [dc 3] in next ch-1 sp, ch 1, join with a sl st in first dc (and not into initial ch-2!).
Fasten off and weave in all your ends.
Stem
RS facing, join D in free loop of the first dc of round 3, ch 4.
Row 1. Sl st 3 starting from the second ch from hook, sl st back into same st as joining. (4 sl sts)
Fasten off and weave in your ends.
Leaf
RS facing, join E in free loop of the second dc of round 3, ch 4.
Row 1. Sc 1 in the second ch from hook, hdc 1, sl st 1,, sl st back into same st as joining. (4 sts)
Fasten off and weave in your ends.
Finishing
Finally, with a length of D, embroider the seed in the center of the pear.
Fasten off and weave in all your ends.
And YOUR CROCHET Pear Granny SQUARE IS READY!
Find more free granny square patterns here on the blog…
