Learn how to crochet the waffle stitch with my beginner-friendly step-by-step tutorial and YouTube video!
What is the Waffle Stitch
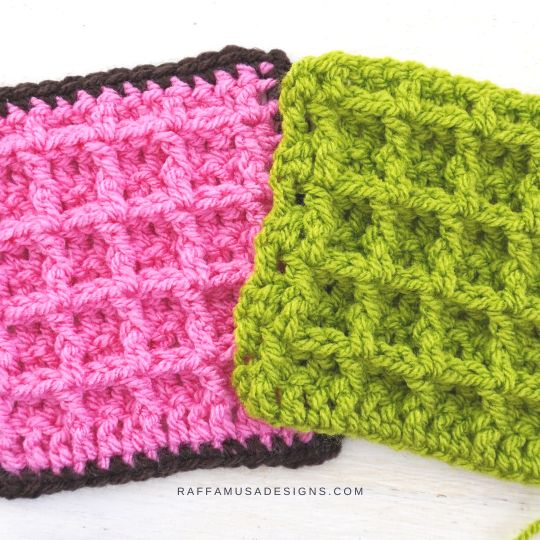
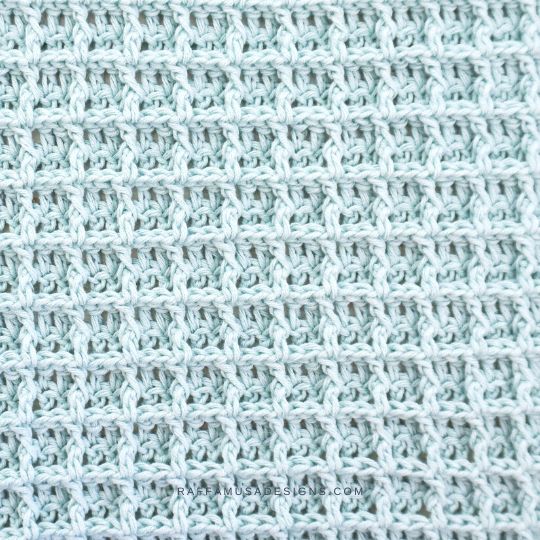
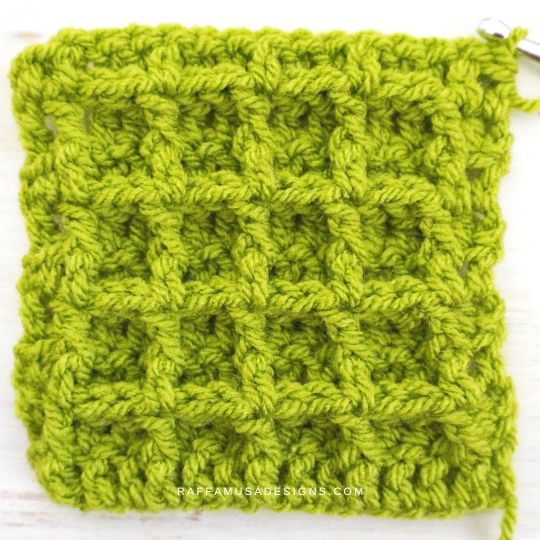
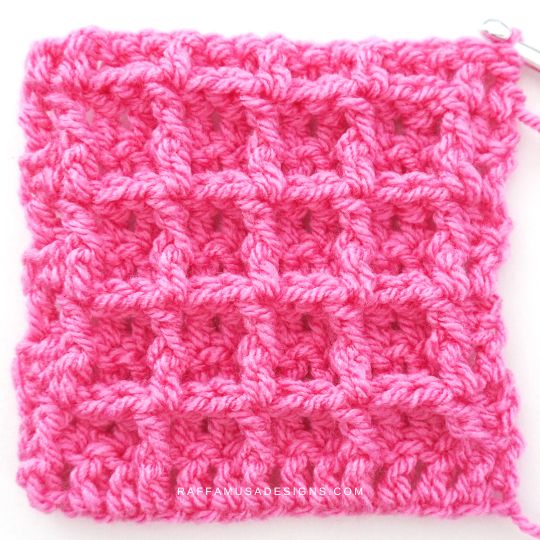
The crochet waffle stitch is a fairly simple stitch pattern that uses double crochets and front post double crochets to create a solid and textured fabric with a super squishy twist!
By simply alternating regular and front post double crochets, you will obtain the characteristic waffle-like grid fabric of the waffle stitch.
What to Crochet with the Waffle Stitch
The waffle stitch results in a solid and warm fabric that is perfect for crocheting all sorts of projects, including:
- Blankets
- Home decor projects, including pillows
- Dishcloths
- Scarves
- Hats
- Winter accessories
How to Crochet the Waffle Stitch
The waffle stitch is a simple 2-row repeat pattern that uses double crochets and front post double crochet stitches in an alternate way.
To make it more simple to understand:
- For the foundation chain, you’ll need to chain a multiple of 3 + 2;
- On the right side, you’ll crochet one front post double crochet followed by two regular crochets;
- on the wrong side, you’ll double crochet in each front post double crochet from the previous row and you’ll make a front post double crochet in each regular double crochet.
But don’t worry, it is not as complicated as it sounds!
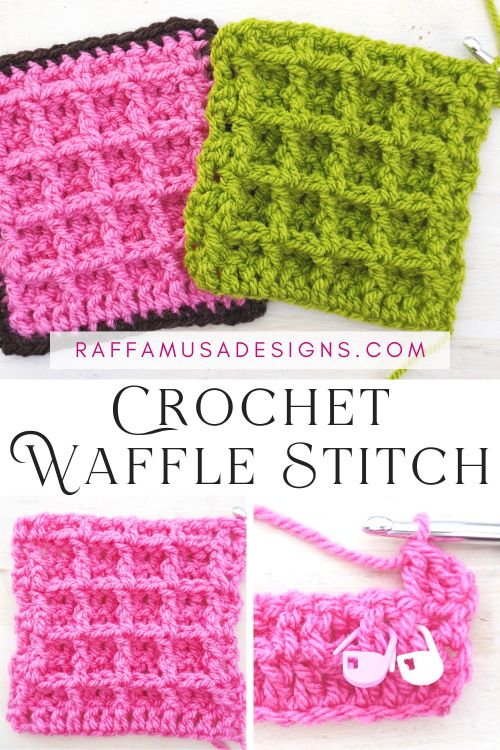
Save this crochet stitch tutorial for later by pinning it to your favorite crochet board using this pin!
Note: This post contains affiliate links. This means that if you purchase something through the links on my blog, I might earn a commission. This will not have any effect on the price you pay. For more info, please, see my Privacy Policy.
How to Crochet the Waffle Stitch – Video Tutorial
MATERIALS
- Yarn of choice
- Appropriate hook size (I suggest you go up 1 or 2 hook sizes compared to the one recommended on the yarn label)
For this tutorial, I used Aran-weight acrylic yarn (Paintbox Yarns Simply Aran) and a 6.0-mm (J/10 US, 4 UK) crochet hook.
ABBREVIATIONS (US TERMS)
- Ch – Chain
- Dc – Double Crochet
- FPdc – Front Post Double Crochet
- Hdc – Half Double Crochet
- RS – Right Side
- St – Stitch
- WS – Wrong Side
- Yo – Yarn over
PATTERN NOTES
- If the pattern says “dc 2”, you have to crochet 1 dc in each of the next 2 sts.
- *… – Repeat the instructions from * for the indicated number of times.
- […] – Crochet the instructions within brackets all in the same indicated st.
Waffle Stitch – Quick Pattern
Chain a multiple of 3 + 2.
Row 1 (WS). Dc 1 in the fourth chain from hook (the turning ch-3 counts as a dc), dc across.
Row 2 (RS). Ch 1 (does not count as a st here and throughout), turn. Hdc 1 in first st, (FPdc 1, dc 2) until you have 2 sts left, FPdc 1, hdc 1.
Row 3. Ch 1, turn. Hdc 1, (dc 1, FPdc 2) until you have 2 sts left, dc 1, hdc 1.
Repeat rows 2 and 3 to grow your work.
Crochet Waffle Stitch – Step-by-Step Tutorial
Ch a multiple of 3 + 2.
For this tutorial, I chained 17, which is 5 times 3 = 15 + 2 = 17.
Row 1 (WS)
Dc 1 in the fourth chain from hook (see arrow in photo 1) and dc in each ch across (photo 2).
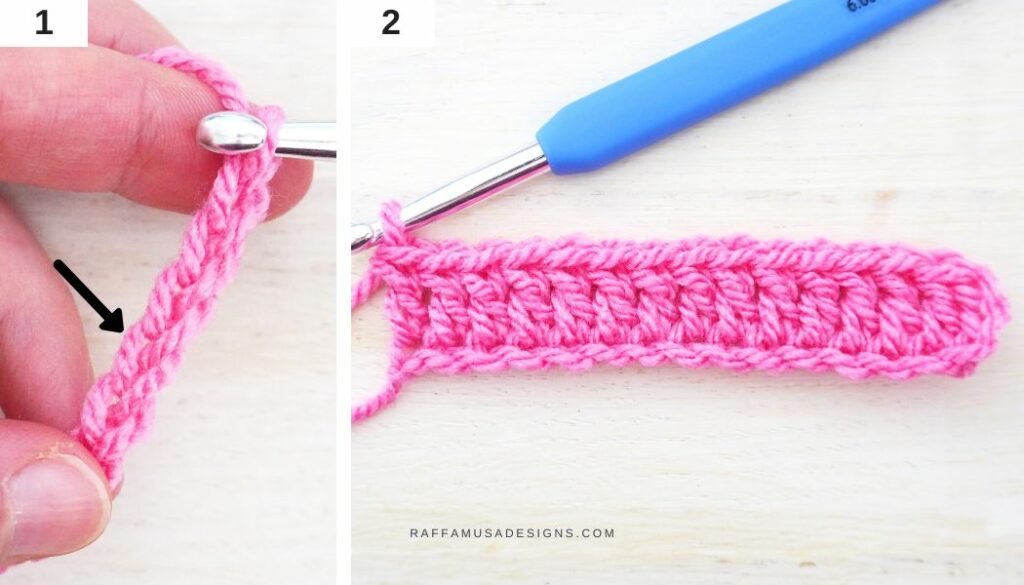
You should have a number of stitches that is a multiple of 3!
In the example of this tutorial, I have 15 stitches, including the turning ch-3 which counts as my first dc.
Row 2 (RS)
Ch 1 (does not count as a st here and throughout), turn. Hdc 1 in first st (see arrow in photo 3), FPdc 1 in next st (the stitch indicated by the needle in photo 4).
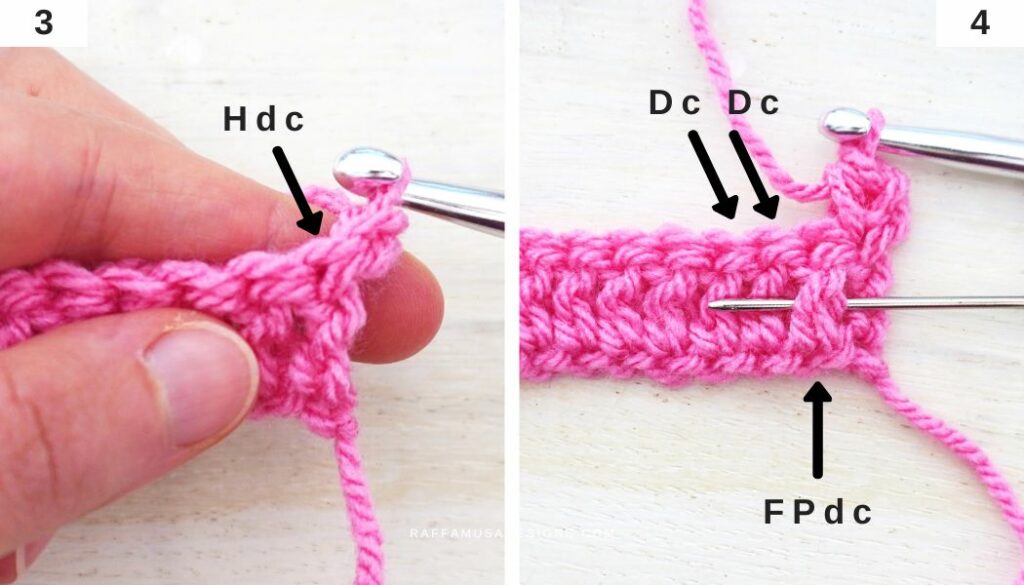
Dc 2 working in the next 2 sts (indicated by the arrows in photo 4).
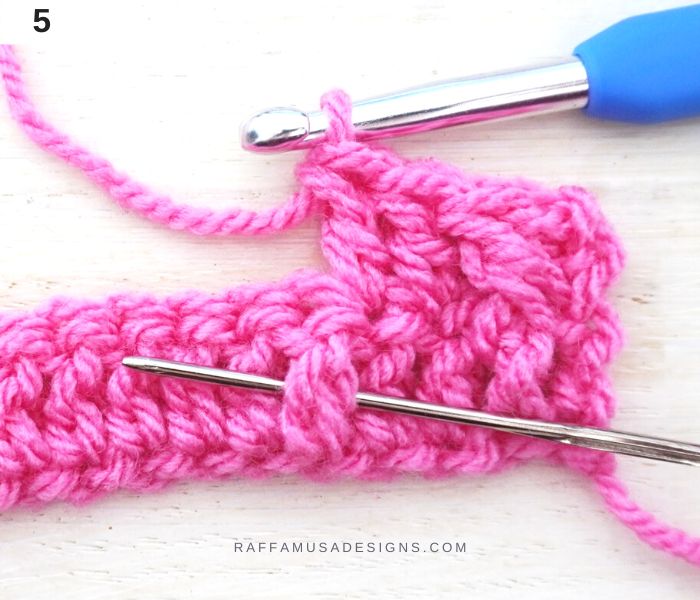
(FPdc 1 in next st (see st marked by the needle in photo 5), dc 2) until you have 2 sts left.
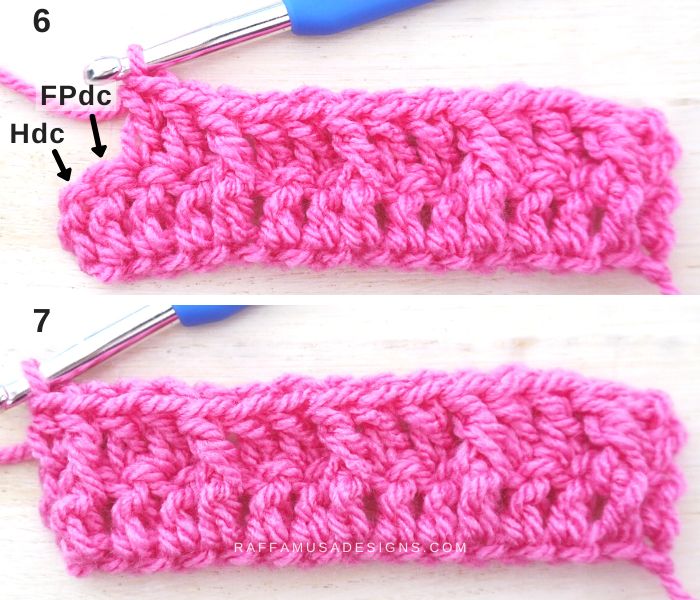
FPdc 1 in next st, hdc 1 in third of initial ch-3 (photos 6 and 7).
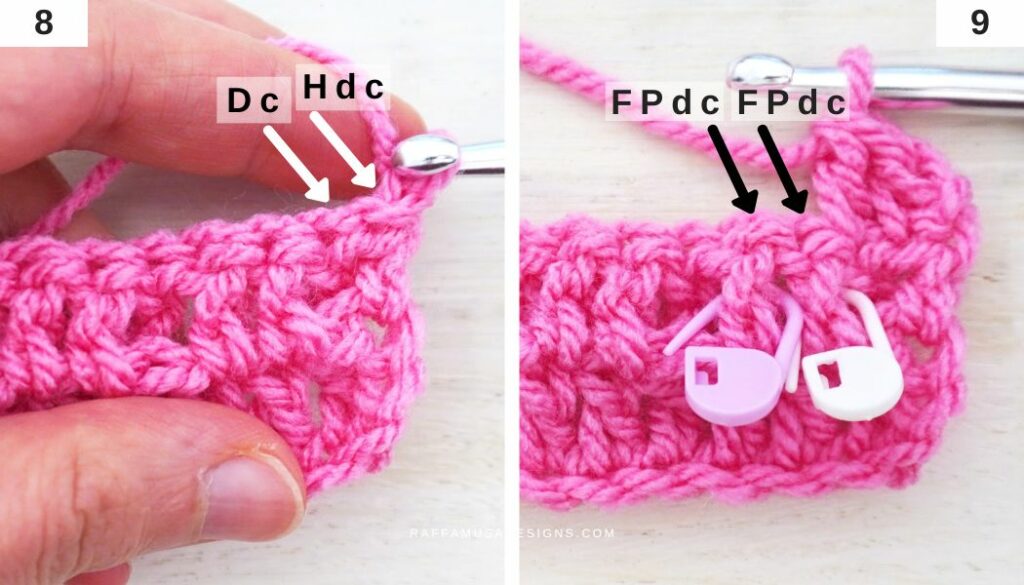
Row 3
Ch 1, turn. Hdc 1 in first st, dc 1 (photo 8). FPdc 2 (see marked sts in photo 9).
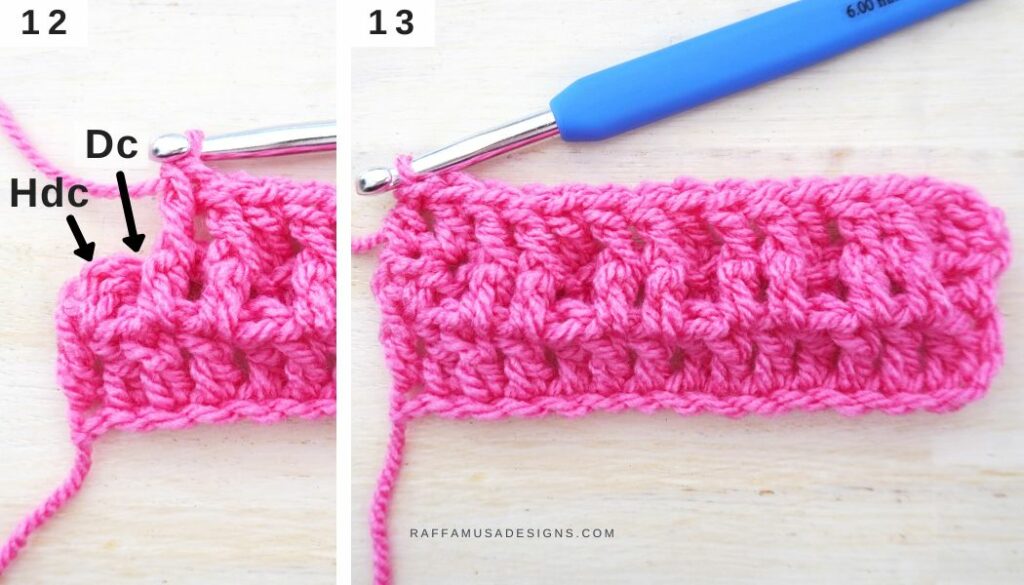
*Dc 1 in next st (see marked st in photo 10, and completed st in photo 11), FPdc 2.
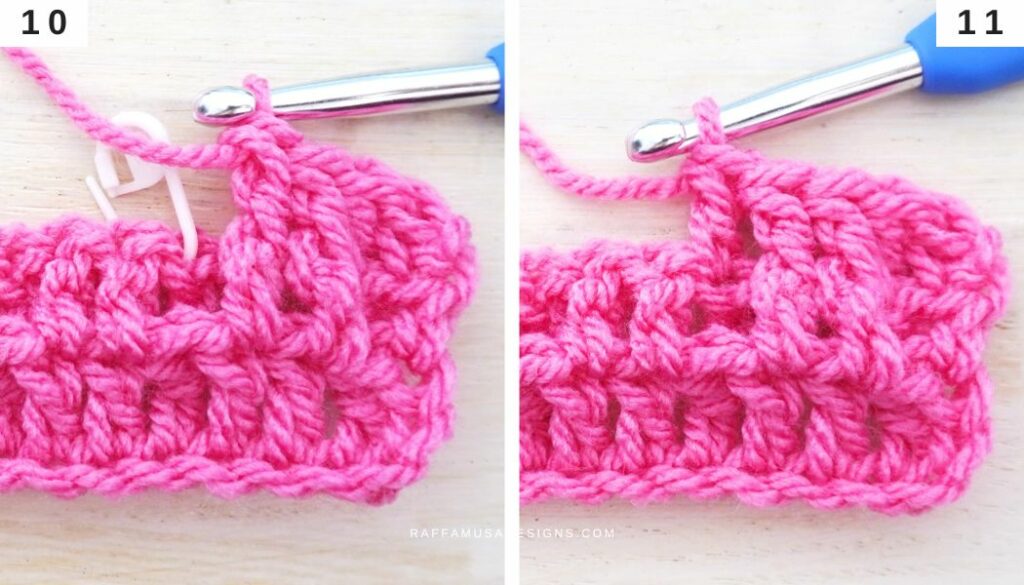
Repeat from * until you have 2 sts left. Then, dc 1, hdc 1 (photos 12 and 13).
Row 4
Ch 1, turn. Hdc 1 in first st, (FPdc 1, dc 2) until you have 2 sts left, FPdc 1, hdc 1.

Row 5
Ch 1, turn. Hdc 1, (dc 1, FPdc 2) until you have 2 sts left, dc 1, hdc 1.
Repeat rows 4 and 5 to grow your work.
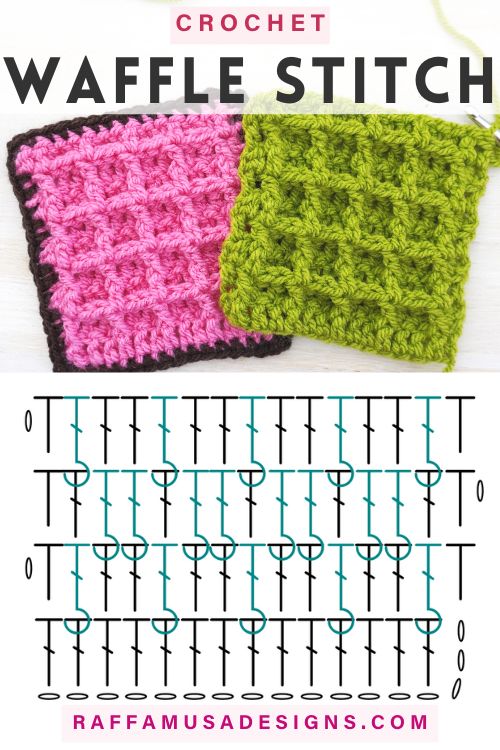
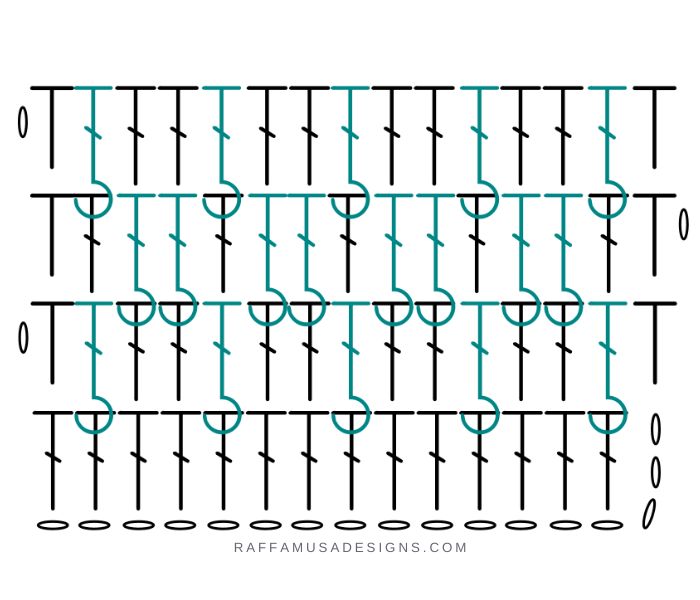
Crochet Waffle Stitch – Stitch Chart
If you prefer learning stitches from a graph or chart, here is the stitch diagram of the crochet waffle stitch.
I hope you enjoyed this step-by-step tutorial on how to crochet the Waffle Stitch!
I’m looking forward to seeing your creations using this stitch. Please, share a pic of your work on Facebook and Instagram using the hashtag #raffamusadesigns!
Find more crochet stitch tutorials here on the blog…