Adding texture and creating impressive tridimensional effects will be the easiest thing once you learn how to crochet front post & back post crochet stitches!
Basically, all crochet stitches can become front or back post stitches.
You’ll know when a pattern calls for it when you see that the stitch abbreviation comes after the abbreviation FP for front post or BP for back post.
Are the most common abbreviations you’ll find in patterns:
| Front Post Stitches | Back Post Stitches |
| FPsc – Front Post Single Crochet | BPsc – Back Post Single Crochet |
| FPhdc – Front Post Half Double Crochet | BPhdc – Back Post Half Double Crochet |
| FPdc – Front Post Double Crochet | BPdc – Back Post Double Crochet |
| FPtr – Front Post Treble Crochet | BPtr – Back Post Treble Crochet |
What is a Crochet post stitch?
Front and back post stitches are regular crochet stitches that are crocheted wrapped around the post of a stitch instead of its top chains.
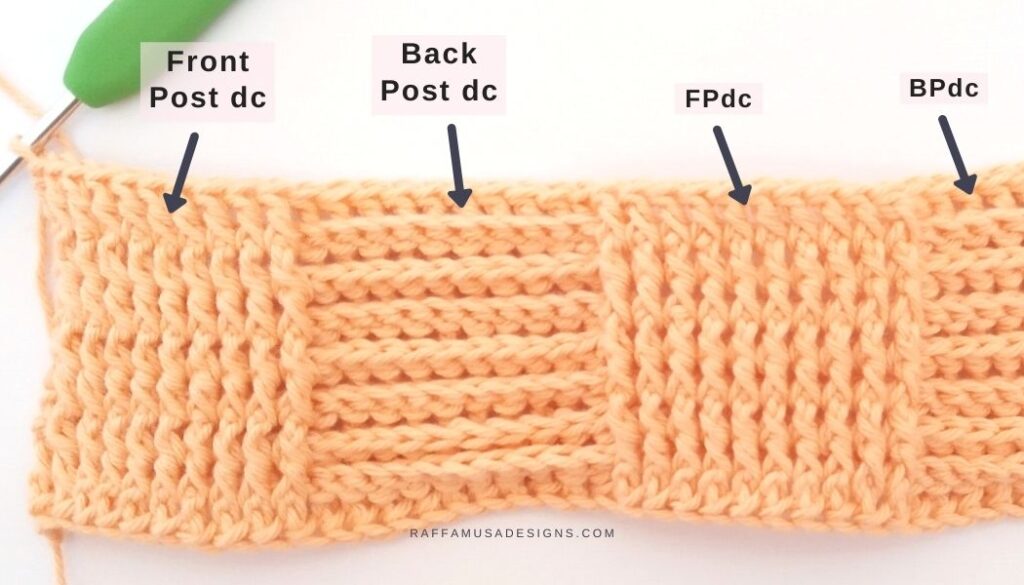
The overall execution of a front post double crochet or a back post treble, for example, is really the same as their regular counterpart. However, since they are made around the post of the stitch, they will partially sit on the previous row or round of stitches.
This way, the texture will be thicker than the one of regular stitches!
What is the Post of a Stitch?
The post of a crochet stitch is simply what I would call the body of the stitch or its vertical part.
If you’re familiar with the anatomy of crochet stitches, you know that every stitch has a top, a post, and in the case of half double crochet, also a third loop on the wrong side.
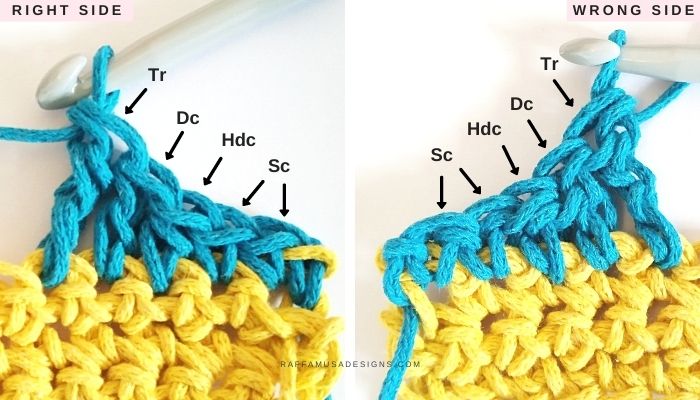
For single crochet, it can be difficult to imagine the vertical part. But if you think of tall stitches, such as the half double crochet, double crochet, or treble crochet, then, you’ll immediately know what is the post of the stitch!
If you need help with learning all about the different parts of a crochet stitch, please, check out this guide on the anatomy of crochet stitches.
Where to use Front and Back Post Stitches?
Front post and back post crochet stitches are really the best allies of texture!
Here are a few crochet stitch patterns where you’ll be able to practice front post and back post stitches:
- Basketweave Stitch – This stitch is simple and cozy, quite stretchy and very soft. It is perfect for blankets, baby items, hats, and much more. Learn how to crochet the basketweave stitch here.
- Waffle Stitch – The waffle stitch is ideal for blankets, dish clothes, and other kitchen accessories.
- Alpine Stitch – When I first discovered this stitch, I immediately fell in love! The alpine stitch is very versatile, solid and warm, perfect for blankets, garments, and other winter accessories. Learn how to crochet the alpine stitch here.
- Wrapped Arrow Stitch – The wrapped arrow stitch is a beautiful stitch where the cable-looking texture is obtained by using front post treble crochet stitches. At first, it might look a bit complicated, but once you master it, it works up easily and quickly. Learn the wrapped arrow stitch with this free tutorial here.
- Crochet Cables – Crochet cables can be intimidating at first, but it is really just a matter of mastering front post and back post double or treble crochet stitches!
- Many other original patterns like the one you I used for my Charity Blanket.
- Lastly, front and back post stitches are a great tool to add brims to hats, beanies, sweaters, and other projects.
Pin this post for later by saving it to your best crochet board on Pinterest using this Pin!
Once you learn how to crochet one of the front post stitches, you’ll be able to crochet all of them.
So, in this photo tutorial, I will only show you step-by-step how to crochet a front post double crochet and a back post double crochet.
Crochet Abbreviations (US Terms)
BPdc – Back Post Double Crochet
Ch – Chain
Dc – Double Crochet
FPdc – Front Post Double Crochet
St – Stitch
Yo – Yarn Over
How to crochet the Front Post Double crochet
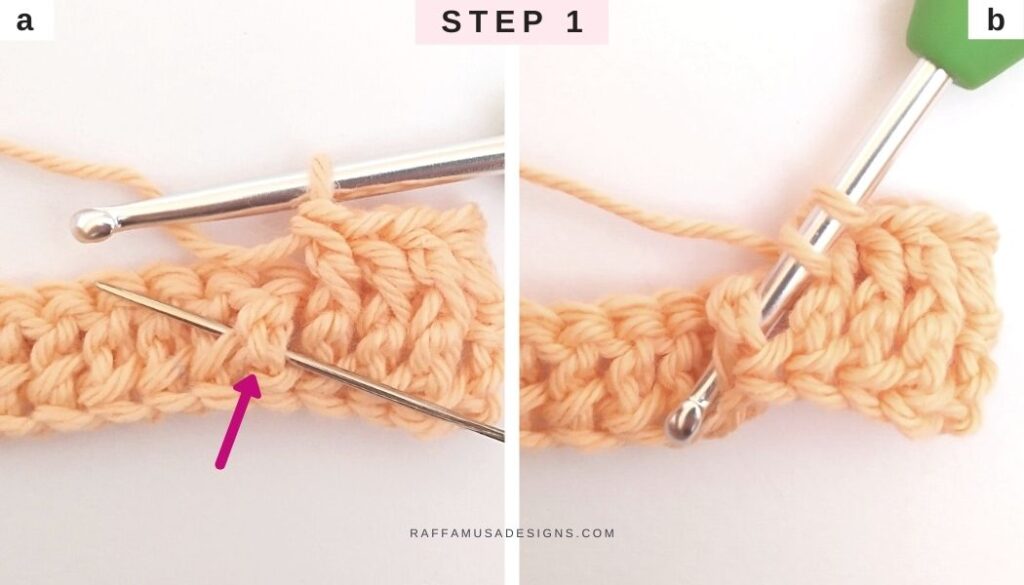
Step 1
Identify the post of the next st (picture a, Step 1).
Yo, and insert your hook from right to left (or if you’re lefthanded, from left to right) under the post of the stitch (picture b, Step 1).
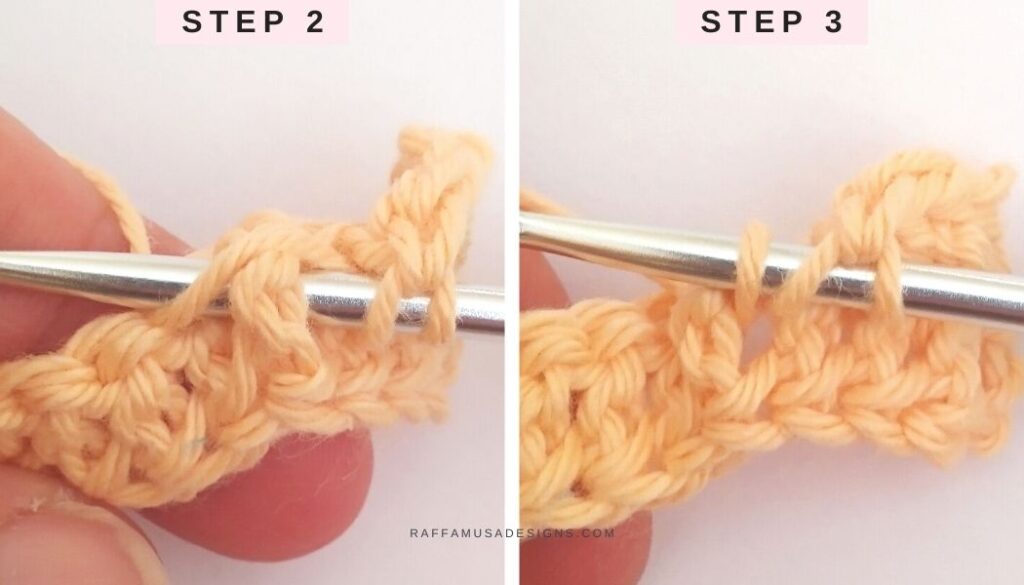
Steps 2-3
Yo and pull up a loop.
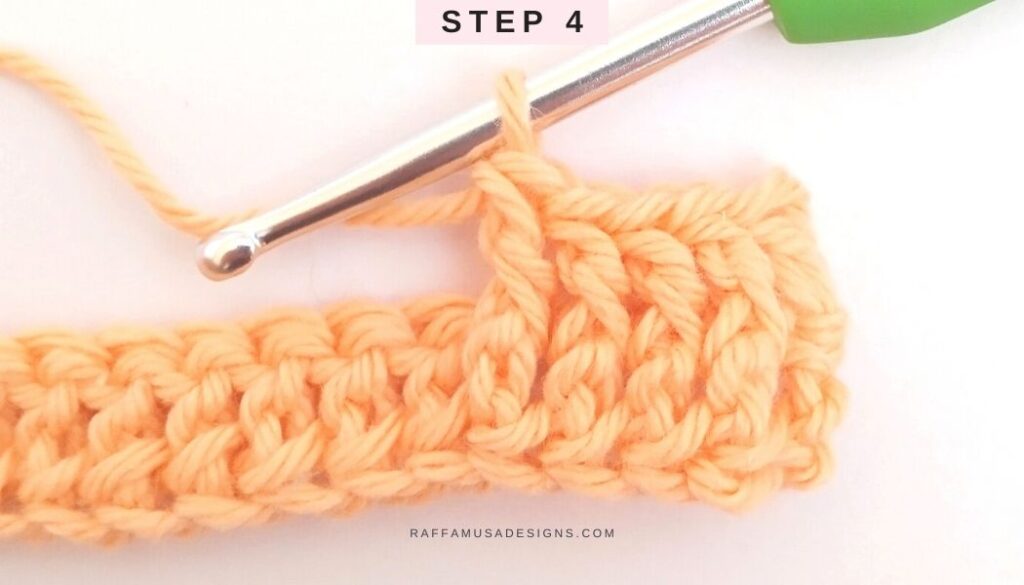
Step 4
Complete your dc: (yo, pull through 2 loops) twice.
How to crochet the Back Post Double Crochet
The execution of back post stitches is similar to that of front post stitches, with the difference that back post stitches are worked on the back of your project.
Step 1
Identify the post of the next st (picture a, Step 1).
Yo. Bring your hook to the back of your work and insert it from right to left (or from left to right if you’re lefthanded) under the post of the stitch (picture b, Step 1).
You will have to move your hook from the back of your work to the front, and then to the back again.

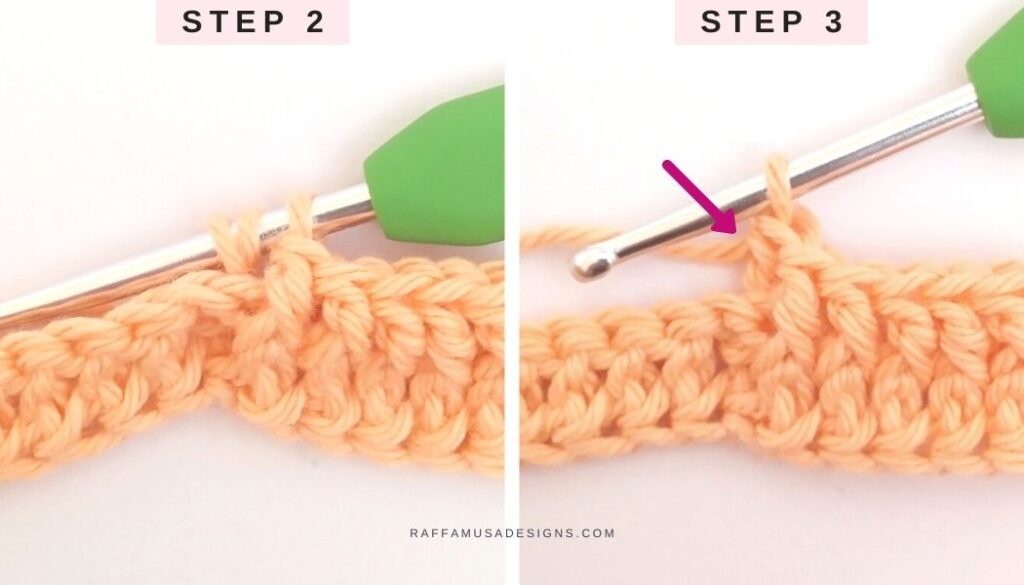
Step 2
Yo and pull up a loop.
Step 3
Complete your dc: (Yo, pull through 2 loops on your hook) twice.
You just learned how to crochet front and back post stitches!
The first row or round using front and back post stitches is quite easy.
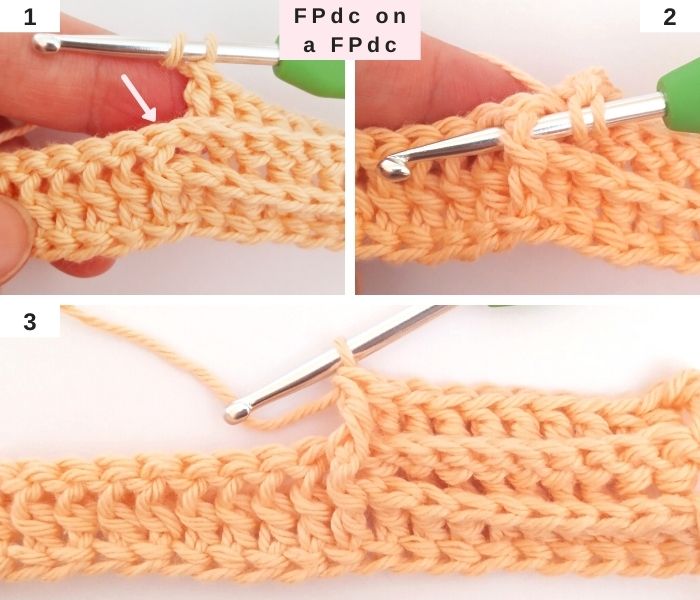
However, things might get more complicated after you have a bunch of front post or back post stitches on your previous row/round.
So, I am leaving you this picture on how to work a FPdc when you already have a front post double crochet in the row below.
And this picture on how to switch from a FPdc to a BPdc.
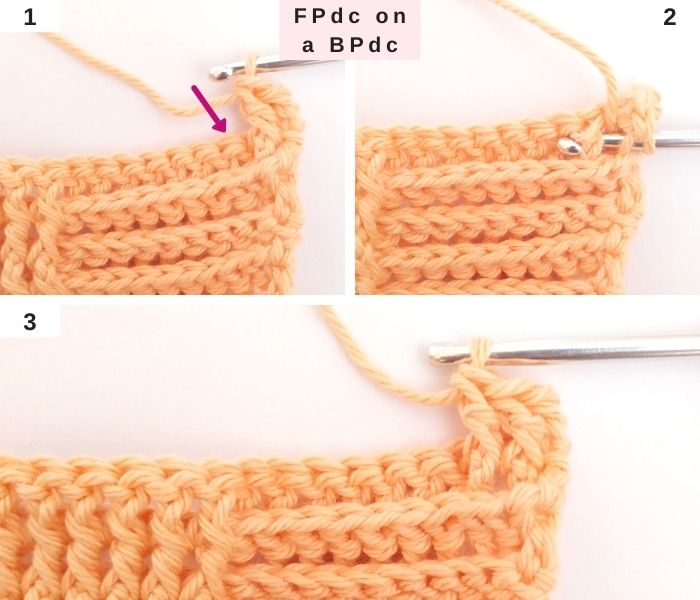
Hopefully, these pictures might help you to figure out how to handle front and back post stitches in the following rows/rounds.
I hope that you enjoyed this tutorial! Don’t forget to show me your projects on Facebook and Instagram using the hashtag #raffamusadesigns
Find more crochet tutorials here on the blog…
I am working on a cowl made with fpdc and bpdc. My problem is on the second row which is starting with bpdc. It doesn’t look right! If you could show me (if possible), how to do the bpdc in the second row (it is every other stitch).
Hi, I think that the difficult part of the second row is that the sts are a bit distorted and they’re not always easy to see clearly. That’s why I find it very useful to lay my work straight and look at the sts that way.
Anyhow, I will try to update the post with more pictures as soon as possible 🙂
Thanks so much for sharing your great skills and knowledge in such accessible ways. I so much appreciate your ideas for edges and borders – all just lovely!