Every journey starts with a little step and every Tunisian crochet project starts with a Tunisian Crochet Foundation Row. Or to be exact, most of the Tunisian crochet projects start with a typical foundation row.
There are some alternative starting rows, especially for Tunisian lace patterns, but for now, we will focus on the one foundation row that will open your way to the majority of the Tunisian crochet patterns.
So, if you are new to Tunisian crochet and want to learn how to start on your new Tunisian project, then, bear with me and learn how to make the most commonly used Tunisian Crochet Foundation Row.
Some Quick Facts about Tunisian Crochet
- Tunisian crochet is somehow in between crochet and knitting. While it makes use of a crochet hook, the stitches are first mounted on the hook, a bit like knitting, and then closed or removed from the hook. You can read more about the basics in this article about some common questions over Tunisian crochet!
- It is important to understand immediately that for every Tunisian crochet row, there is a forward pass in which you mount all your stitches on your hook and a return pass in which you remove your stitches.
- There is a big variety of Tunisian crochet hooks with different shapes and lengths. However, if you are just starting and for the aim of this tutorial, you can simply grab your regular heel hook.
If you are just starting at Tunisian crochet and would like to see more tutorials and easy patterns, take a look at these projects. They can all be made with a regular steel hook!
Pin this free tutorial on Pinterest using this Pin!

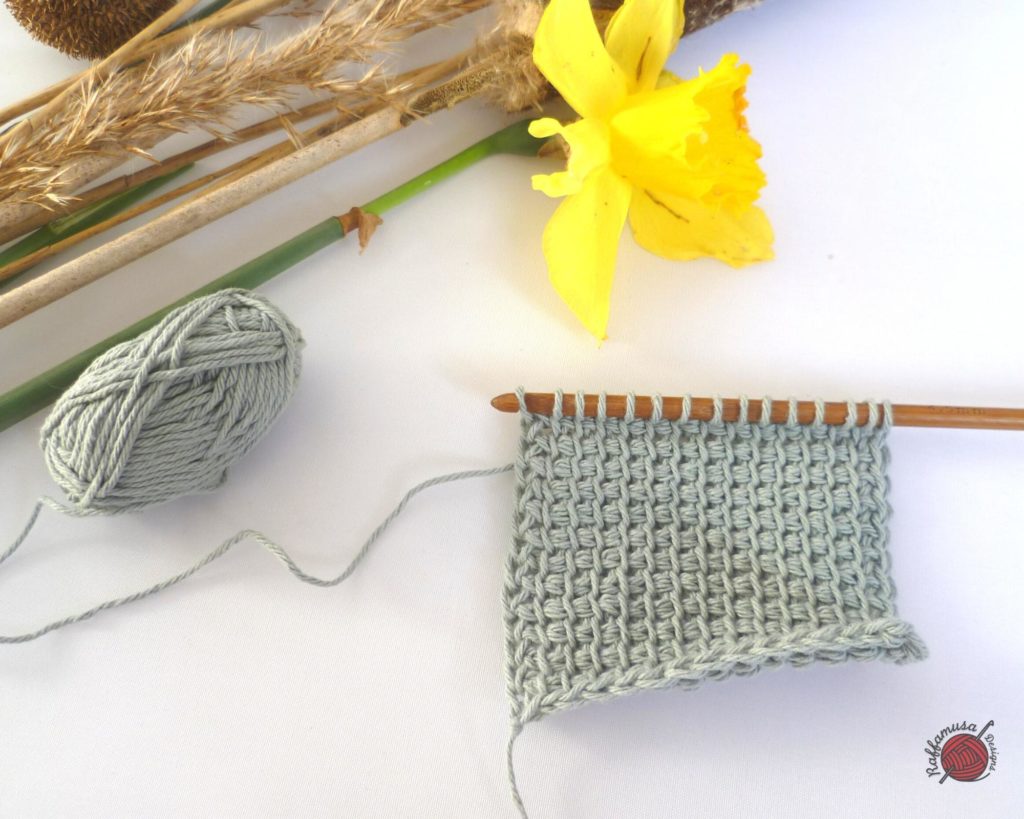
Tunisian Crochet Foundation Row – Tutorial
For this tutorial, I used some sport-weight yarn and a 4.5 mm (7 US) crochet hook, but you can use any yarn and the appropriate hook size.
What Hook Size Should You Choose?
My rule of thumb with Tunisian crochet is to go at least two hook sizes up compared to regular crochet. So, while I would normally use a 3 mm (11 UK) or 3.5 mm (E/4 US, 9 UK) hook to crochet a sport-weight yarn, I here used a 4.5 mm (7 US) crochet hook.
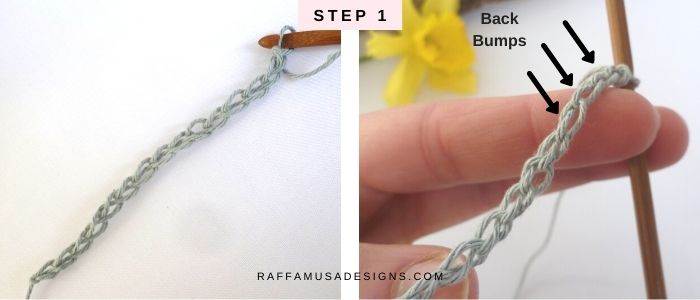
We are going to work with 15 chains. This way, you can simply try your hand at Tunisian crochet using your regular steel hook.
Step 1. Chain 15. Turn your chain and identify the back bumps.
Working in the back bumps will give a cleaner look to your bottom edge.
Step 2. Insert your hook into the back bump of the second chain from the hook, yarn over, and pull up a loop.
Step 3. Continue picking up loops one in each of the remaining chains.
In the case of our tutorial, you should have 13 more loops to pick up.
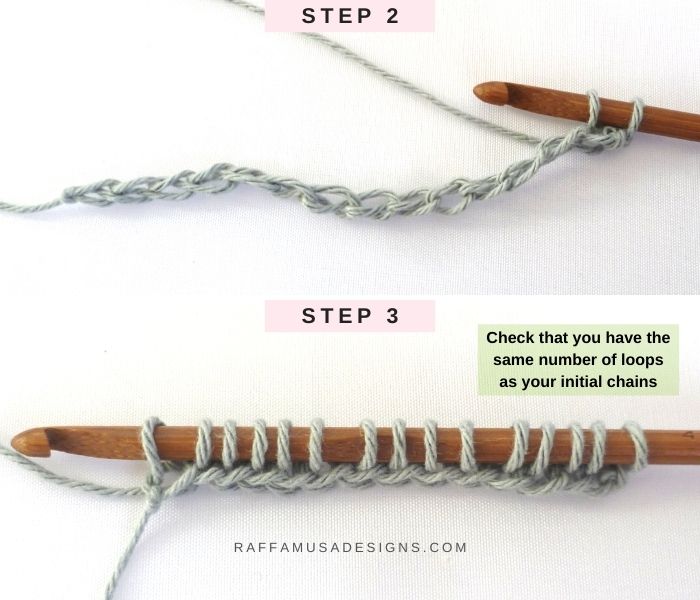
Congratulations, you just completed your first Tunisian crochet forward pass.
Counting Stitches in Tunisian Crochet
Notice how you mounted the same number of loops as the initial chains!
In this tutorial, we started with a chain of 15 and at this point, we have a total of 15 loops on the hook.
Tunisian Crochet Standard Return Pass
Now that we have the first forward pass mounted on the hook, we can go on and learn how to make a return pass.
What the return pass essentially does is to close and remove the loops (or stitches) from the hook.
The most common return pass is the standard return pass.
Surely, there are many other ways in which you can close the stitches off your hook, especially with Tunisian crochet lace patterns and Tunisian cables. However, you’ll see that the standard return pass is by far the most used in the majority of the Tunisian crochet patterns.
Let’s take a look at it step-by-step.
First, we are going to close the edging stitch at the end of the row. In other words, the closest stitch to the tip of your hook.
Step 4. Yarn over, and draw your yarn through the first loop on your hook.
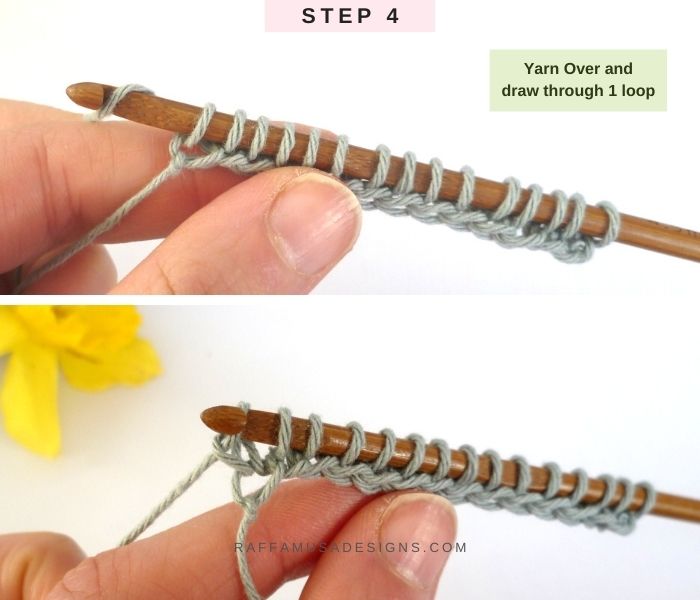
Notice how we added one extra loop on the hook!
In the next step, we will progressively move that extra loop through all the remaining loops on the hook. Here’s how we do that.
Step 5. Yarn over, and draw yarn through two loops on your hook.
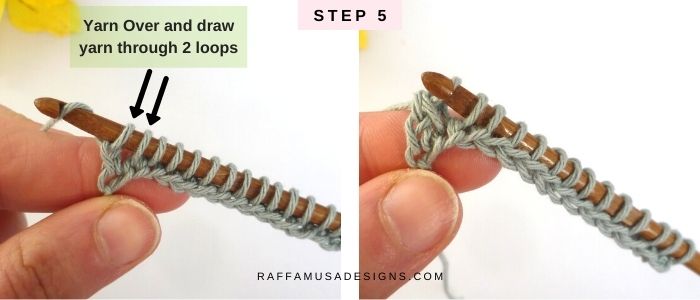
Repeat steps 5 until you only have two loops remaining on your hook (see image below). Once you are there, yarn over and pull through those last loops.
Think Twice
Here, I would like you to notice how for every yarn over and draw through two, you actually only close one stitch at the time. The reason is that that first loop on your hook is not an actual stitch of your foundation row. Instead, it is that extra loop that you were sliding to the right side of the row.
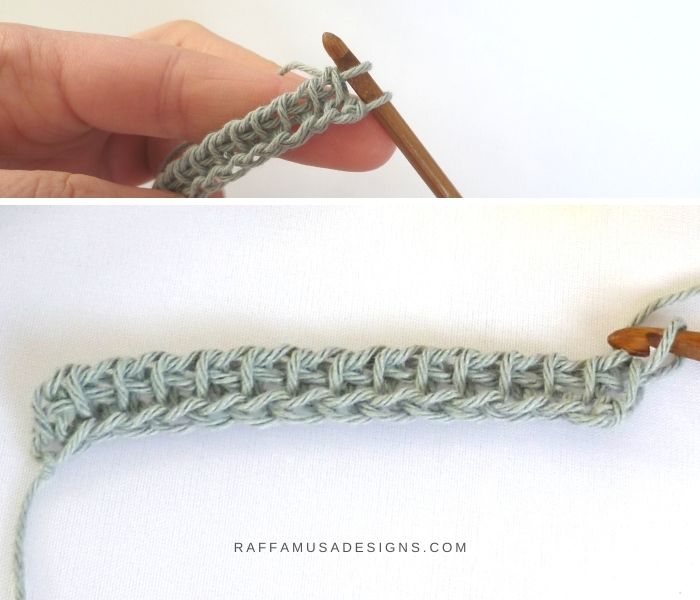
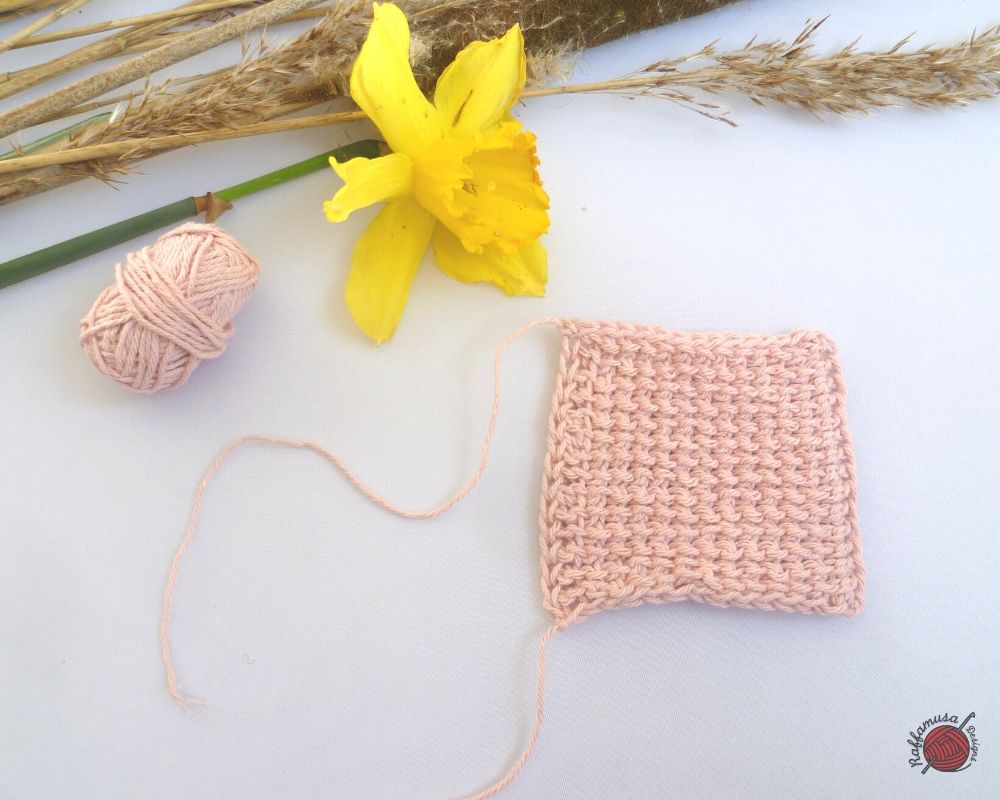
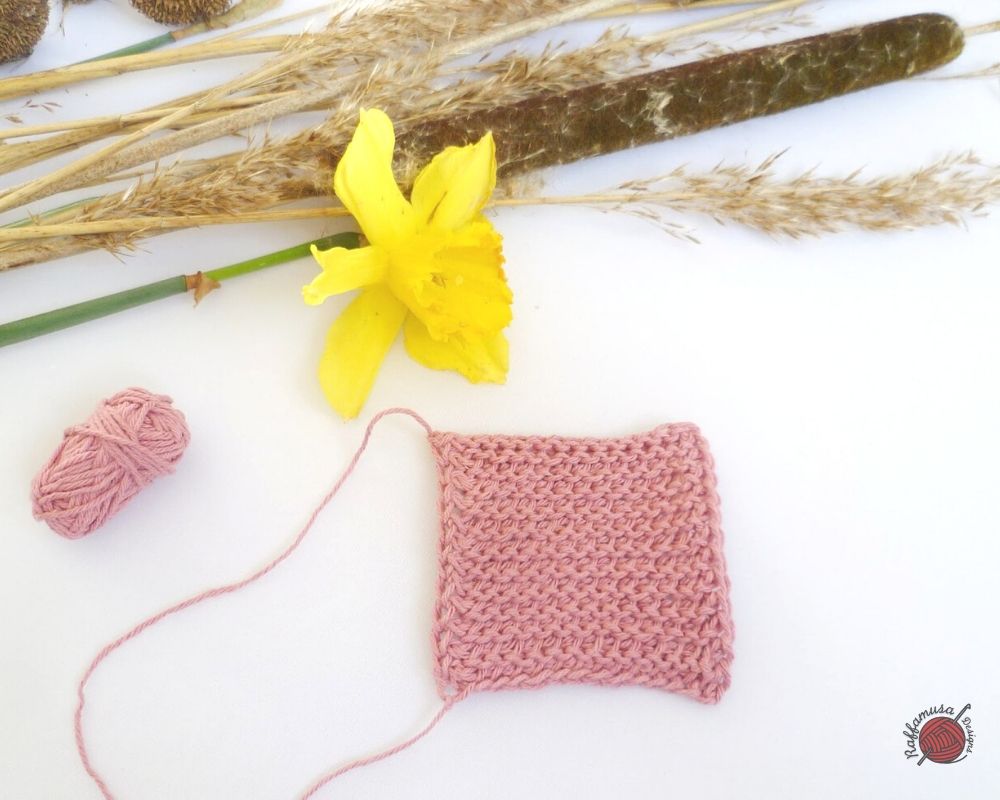
Your Tunisian Crochet Foundation Row is complete!
I hope you enjoyed crocheting learning how to make the Tunisian Crochet Foundation Row. Please, do not hesitate to contact me if you need any help or support. I am looking forward to seeing all your beautiful makes on Facebook and Instagram!
Learn more Tunisian crochet stitches!
Well done, Raffa; I’m sure there’ll be lots of people who find this post extremely helpful.
Thank you ☺️ I’ve also prepared some basic Tunisian stitch tutorials that I’ll be publishing these days. So, get ready to be inundated with my posts 🙈 #selfisolating
I don’t mind ! Whilst I may not need any basic instructions for Tunisian, I like reading about it. 🙂