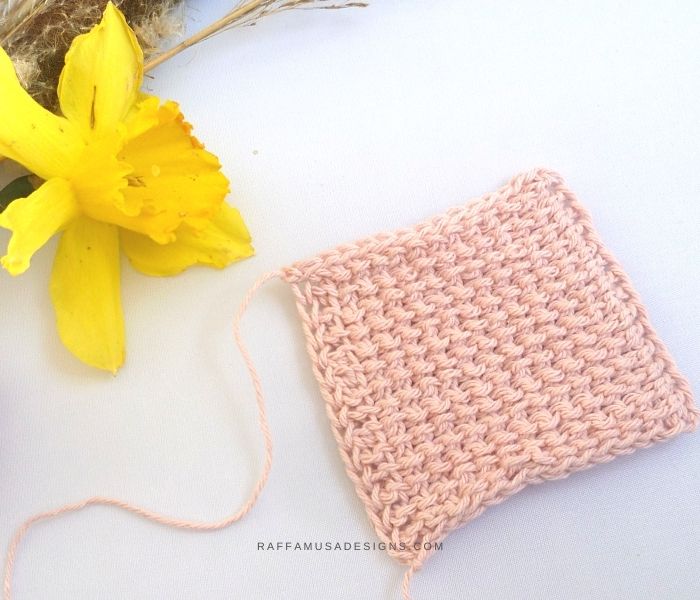
The Tunisian Crochet Reverse Stitch is one of my favorite Tunisian stitches. Even though it might look a little bit like a purl stitch, the reverse stitch is much more tridimensional and stands out on your fabric way more than a purl stitch.
Because of its tridimensional effect, the Tunisian reverse stitch is perfect to create interesting contrasts in the texture of your project.
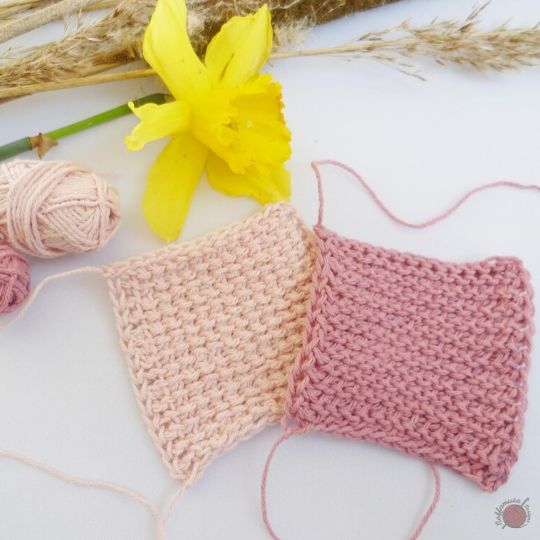
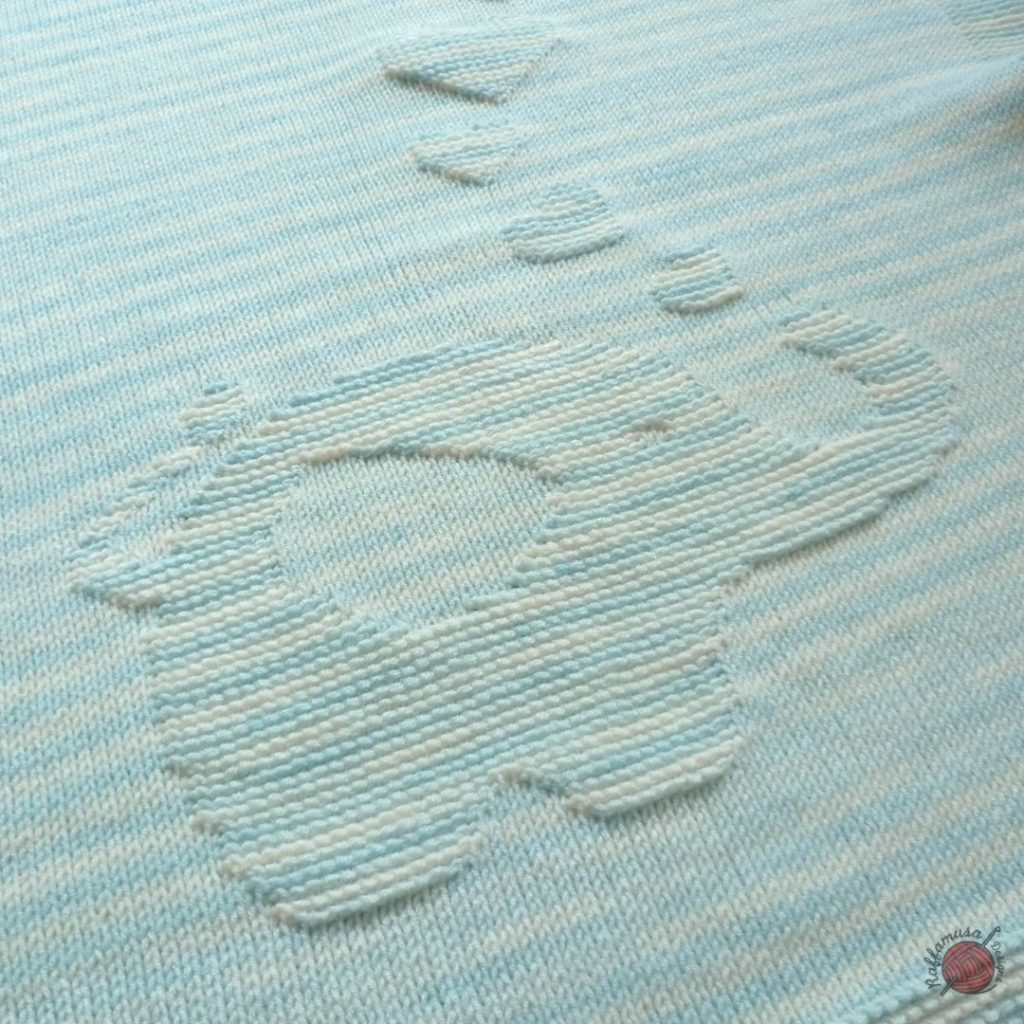
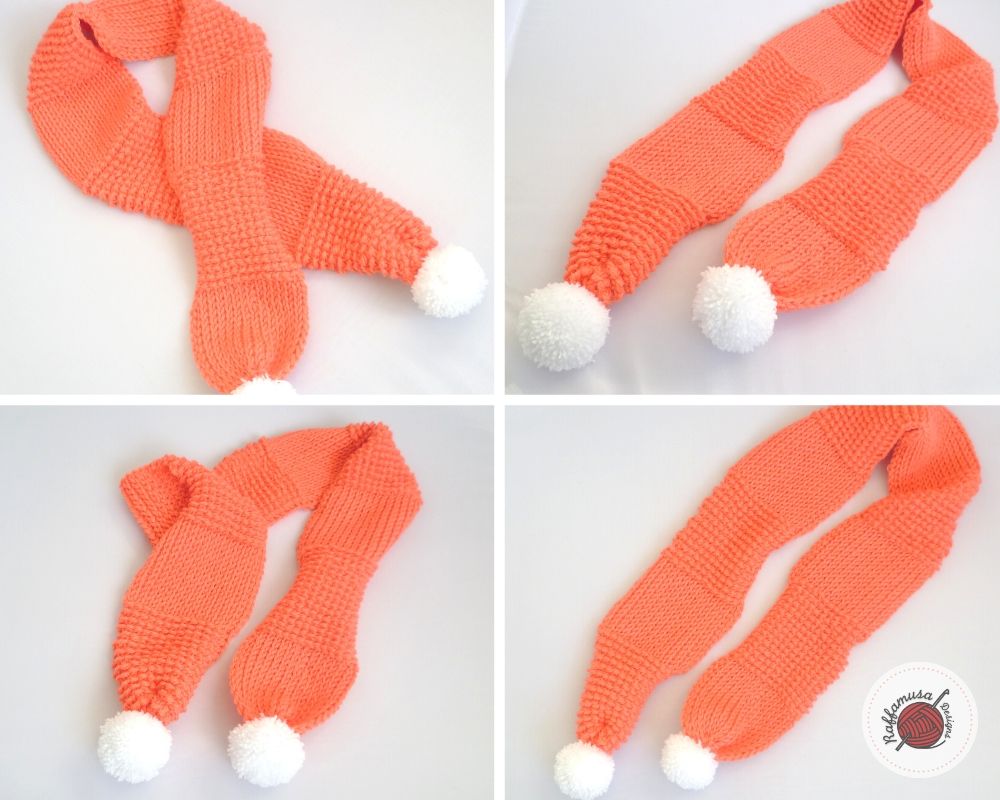
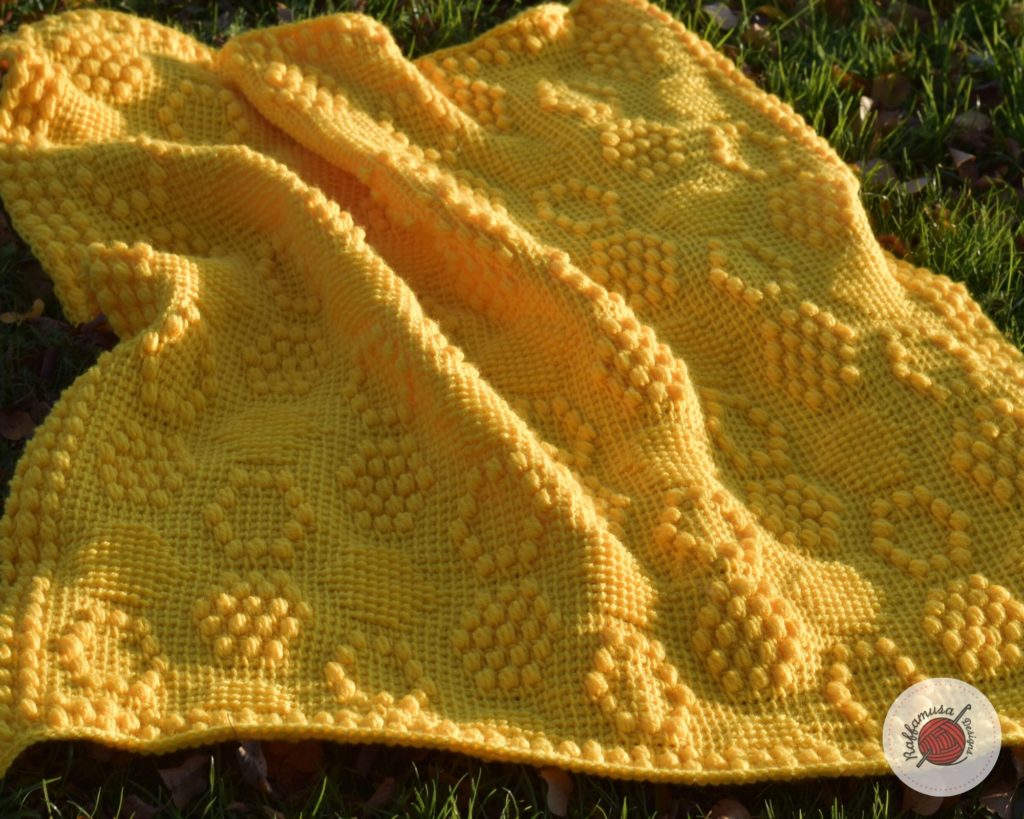
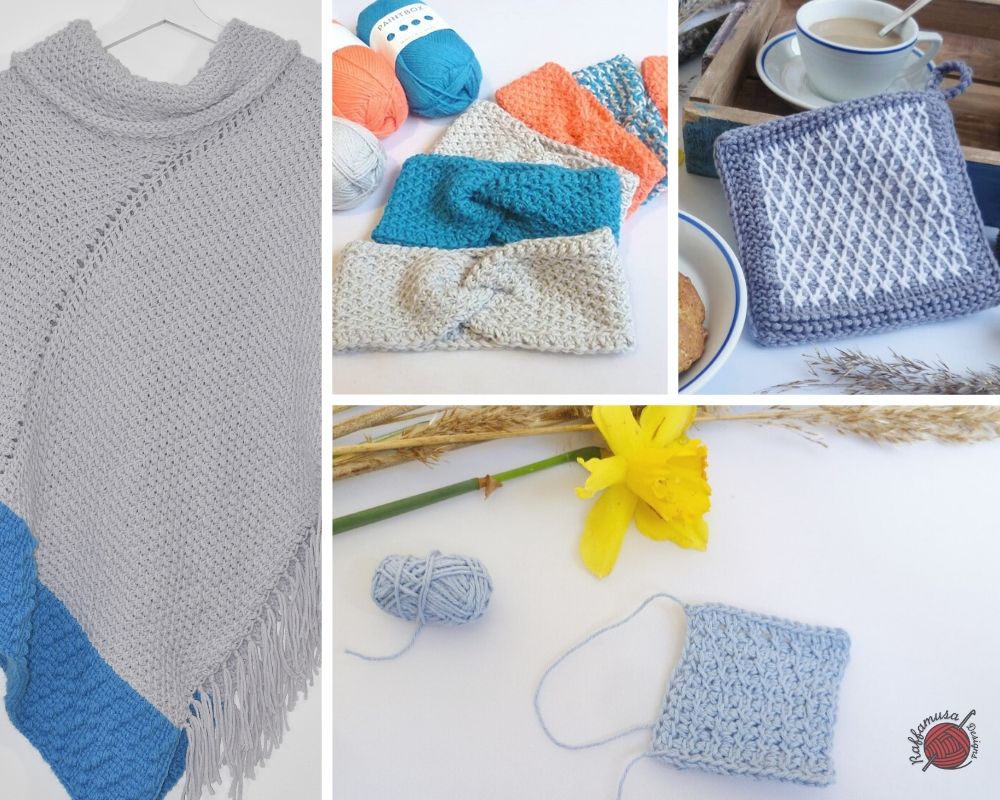
Here below, you can see some examples of projects I made playing on the contrast between the reverse stitch and either the Tunisian knit or simple stitch.
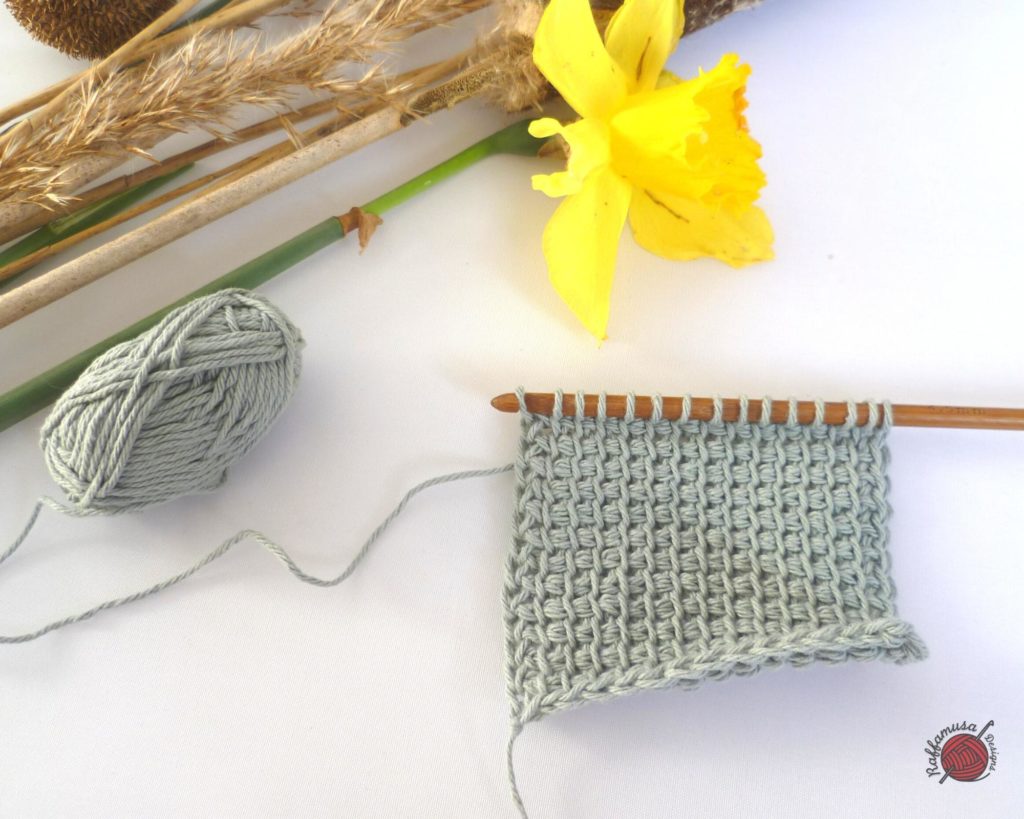
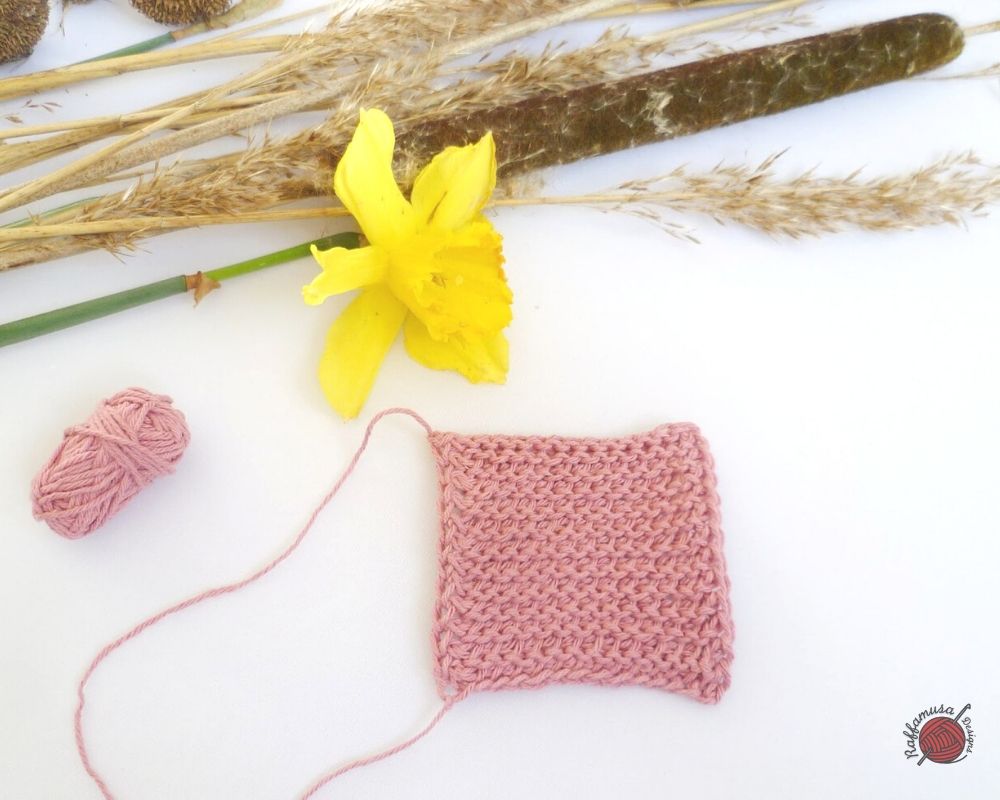
Another key characteristic of the Tunisian reverse stitch is that it doesn’t curl!
Yes, exactly! It does not curl at all, completely flat, almost miraculous for being Tunisian crochet.
So, since it is so flat, the Tunisian reverse stitch is the perfect stitch to add at the bottom of your project or all around as a border so that the entire piece stays flat and relaxed.
Abbreviation and Chart Symbol
The official abbreviation of the Tunisian Reverse Stitch is Trs and here below you can see its official chart symbol.

Before You Start This Tutorial
This tutorial assumes that you already know how to crochet a foundation row.
In case you do not know how to make one, I suggest you go back to this tutorial and learn how to crochet a Tunisian foundation row. If you make one with 15 stitches, then you’re ready to give the reverse stitch a go!
If you already know how to crochet a Tunisian foundation row, that’s super! Get your foundation row ready with 15 sts and go ahead with learning the Tunisian crochet reverse stitch.
Pin the free tutorial of the Tunisian crochet Reverse Stitch using this Pin!

Materials
– Yarn of choice. In this tutorial, I used some sport-weight yarn.
– Regular crochet hook without big handles. For this tutorial, I used a 4.5 mm (7 US) crochet hook.
Tunisian Crochet Reverse Stitch – Tutorial
Step 1 – The Anatomy of a Tunisian Crochet Stitch
In the picture below, a bit twisted and ugly, you can see my starting point for this tutorial. What I have here is a Tunisian crochet foundation row made up of 15 sts.
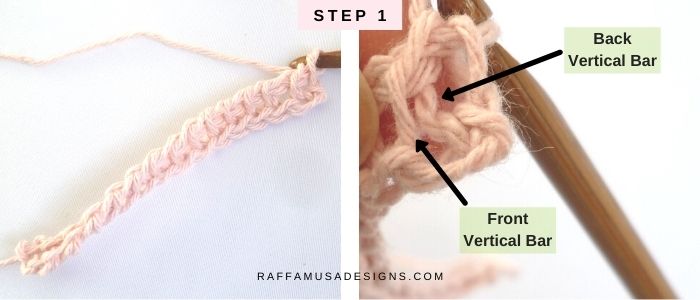
Every stitch in Tunisian crochet has got a front vertical bar and a back vertical bar.
Now, before we go on with learning how to crochet the Tunisian reverse stitch, please, make sure to take a good look at your stitches and try to identify your front and back vertical bars.
This little exercise is necessary since the Tunisian reverse stitch is worked up in those back vertical bars.
Step 2. Bring your crochet hook to the back of the work. Insert your hook into the back vertical bar of the first st with a movement from right to left (of from left to right if you are left-handed). Yarn over, and pull up a loop.
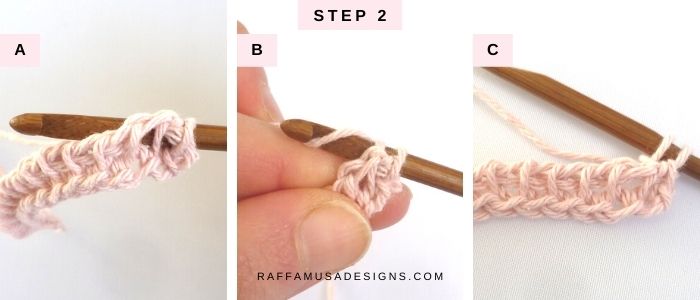
Congratulations, you just did your first Tunisian crochet reverse stitch!
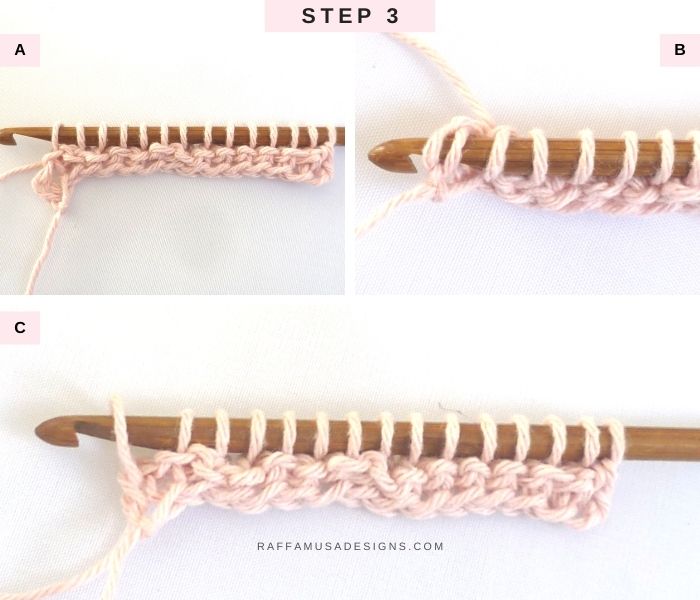
Step 3. Keep picking up loops in the back vertical bars of each stitch across until you reach the last stitch.
In order to obtain a neater edge, work the last stitch by bringing your hook back to the front of your work and inserting it under both vertical bars of the last stitch.
Step 4. Standard return pass (or as described by the pattern).
Step 5. Repeat Steps 1-3 to grow your work.
Once you reach your final row, it is time to bind off! Scroll down to learn how to best bind off when working the Tunisian crochet reverse stitch.
How to Make a Standard Return Pass
For more details about the standard return pass, you can take a look at this blog post.
In short, yarn over and pull through one loop on your hook, *yarn over and pull through two. Repeat from * until you have only one loop remaining on your hook.
How to Bind Off with the Reverse Stitch
As with knitting, also in Tunisian crochet, the bind off looks way better when you do it “in pattern”. So, what does that mean?
It simply means that you have to work your bind-off row with the same stitch pattern as your previous rows.
For the Tunisian reverse stitch, this means the following:
Binding Off. Insert your hook into the back vertical bar of the next stitch, yarn over, and slip stitch through both loops on your hook.
Continue repeating this step for all of your stitches.
For the last stitch, again “in pattern”, bring your hook back to the front of your work, insert it through both vertical bars of the last stitch, yarn over, and slip stitch.
Your Tunisian crochet project is ready to go! Unless you have to seam it…in which case, happy seaming 🙂
I hope you enjoyed learning how to crochet the Tunisian Crochet Reverse Stitch.
Please, do not hesitate to contact me if you need any help or support. I am looking forward to seeing all your beautiful makes on Facebook and Instagram!
Learn more Tunisian crochet stitches with these free tutorials on the blog!
When I was doing an online course I’d bought and learning all about Tunisian crochet, I found the reverse stitch very difficult; so for someone to have so careful a lesson as yours is marvellous. Goodonyer, Raffa !
Thank you Margaret. I hope someone will find this useful! ☺️
Thank you so much
Thank you…😊