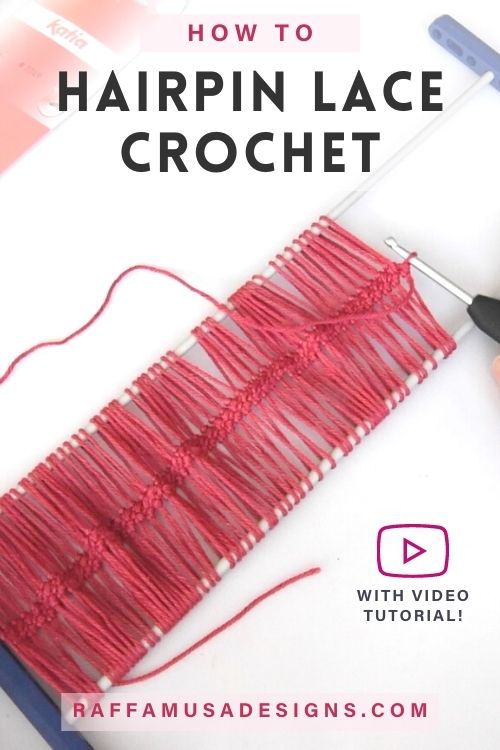
In today’s tutorial. I would like to share with you my easy way to hairpin lace crochet.

What Loom Should You Use?
In this tutorial, I will be using the hairpin loom by Katia, which consists of two needles and two supports.
The supports have several holes in which you can place your bars. This way, you can create hairpin lace strips with all sorts of widths.
I am sure most hairpin looms work in a similar way. So, regardless of the kind of loom you have, you will be able to follow this tutorial. At the end of the day, the basic principles of hairpin lace crochet will be the same.
Save this free tutorial for later by pinning it to your favorite crochet board on Pinterest using this pin!
How to Hairpin Lace Crochet – Video Tutorial
Materials
- Hairpin Crochet Loom
- Any Yarn
- Appropriate Crochet Hook
- Optional, 1 Stitch Holder
Crochet Abbreviations (US Terms)
Ch – Chain
Sc – Single Crochet
Sk – Skip
Sl St – Slip Stitch
St – Stitch
Yo – Yarn Over
How to Hairpin Lace Crochet – Step-by-Step Tutorial
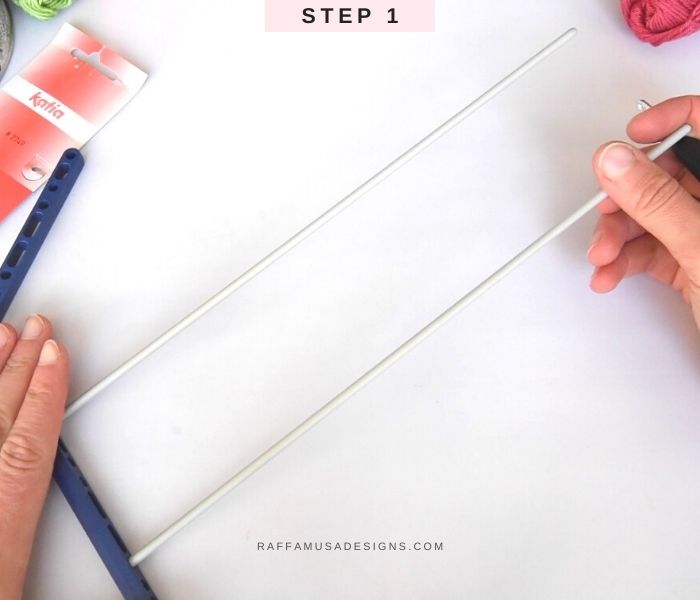
Step 1. Set up your loom by placing the two bars on one of the supports. Follow the pattern indications for the right width of your hairpin strip. For now, leave the top of your loom open.
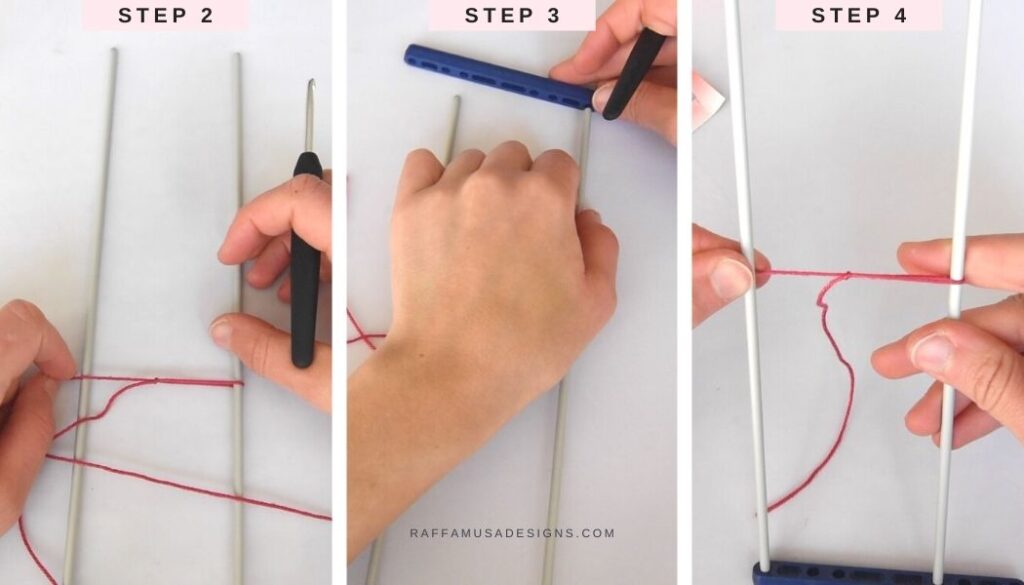
Step 2. Take your yarn and make a slip knot. Adjust the slip knot so that its total length is approximately half the distance of the two vertical bars of the loom. Then, slide your slip knot on one of the needles and close the loom. If necessary adjust the slip knot again so that it is in the middle of the loom.
Step 3. Clore the top of the loom by placing the second holder.
Step 4. Hold your yarn so that the loop of the slip knot is on your right (or your left if you are left-handed) and pass the working yarn to the back of the left needle of the loom (it would be the right needle of the loom if you are left-handed).
Steps 5-6. Holding your working yarn on the left with your left hand, flip the loom around the left needle. Be careful not to pull the yarn too hard otherwise you’ll slide your slip knot!
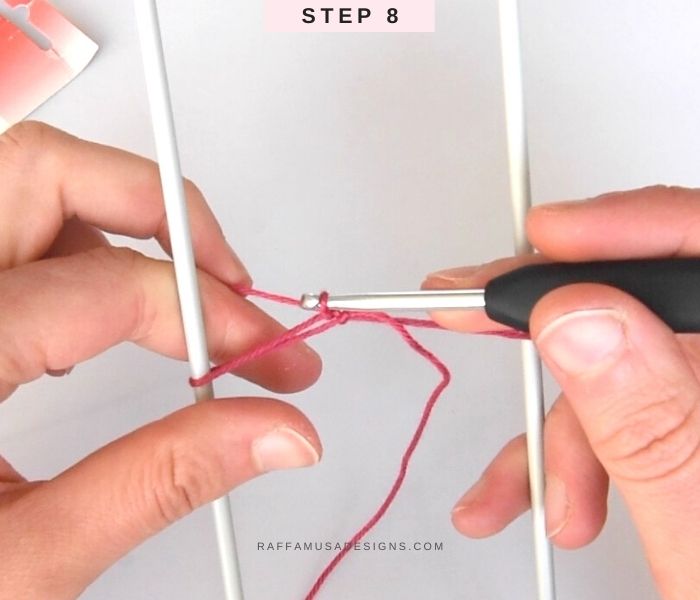
Step 7. Insert your crochet hook into the slip knot with a bottom-up movement.
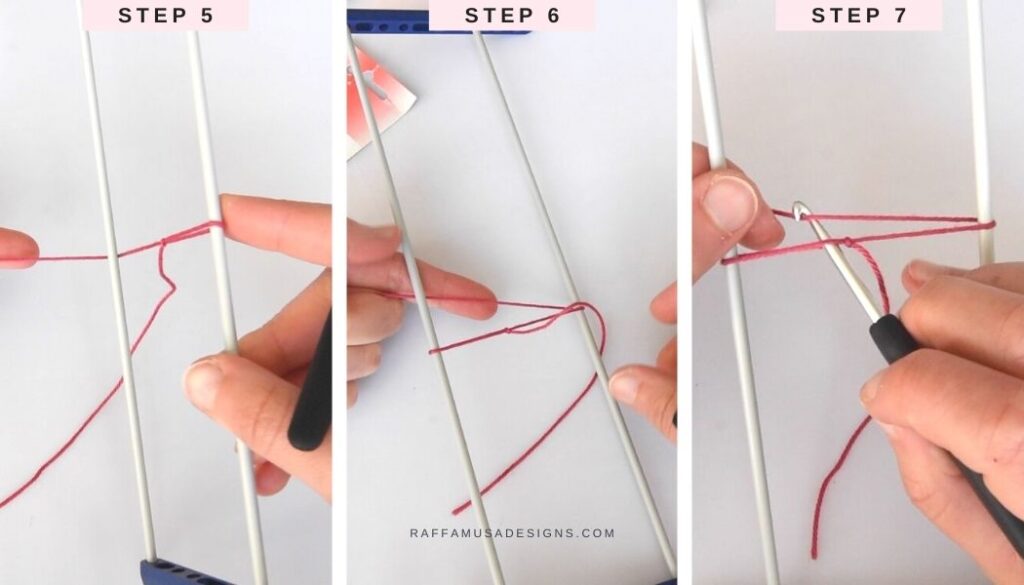
Step 8. Yo, pull up a loop, and complete the first sc around the loop of the slip knot that is facing you.
Steps 9-11. With a counterclockwise movement, bring your hook to the back of your work by making it fall inside the loom.
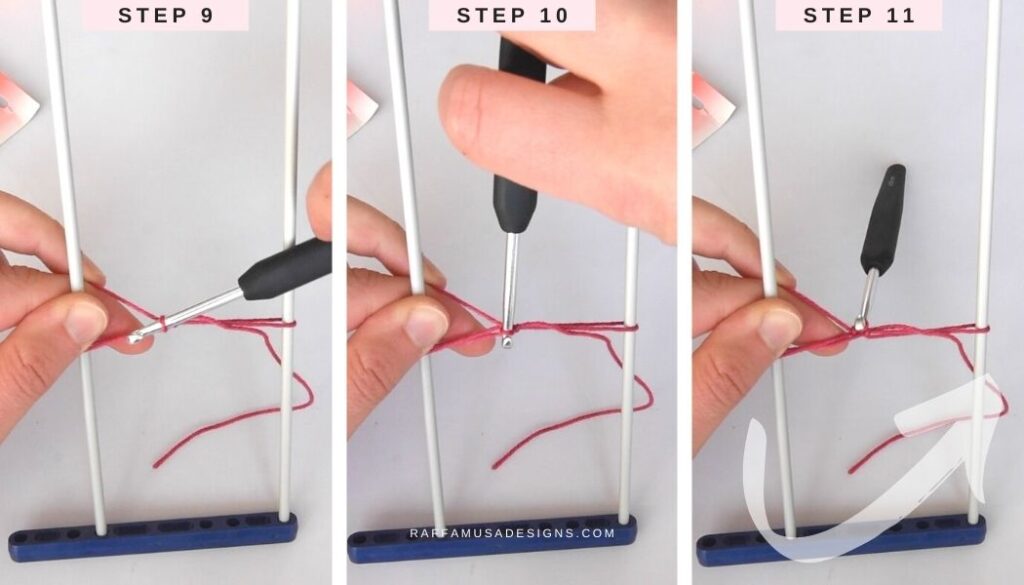
Steps 11-12. Then, holding your working yarn with your left hand, flip the loom around the left needle, as you did in steps 5-6.
Steps 13-14. Insert your hook under the loop that is facing you and make a sc.
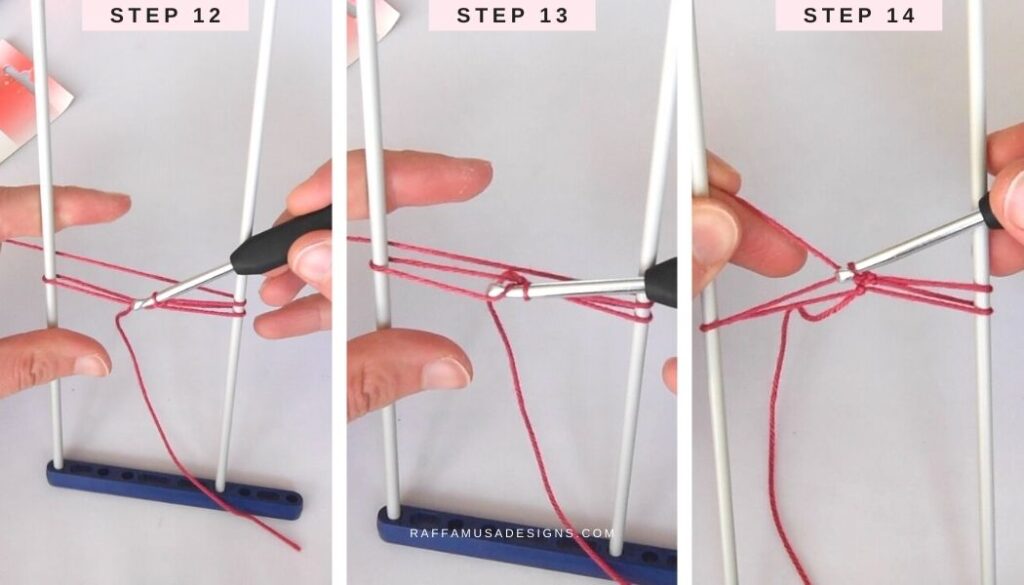
Repeat steps 9-14 until you reach the desired length for your hairpin lace strip.
How to Finish your Hairpin Lace Crochet
Once you have a hairpin strip of the desired length, it is time to remove your work from the loom.
Before opening up your loom, make sure that the last loop of your work is secured. You can either fasten off or place a stitch holder in that loop.
Then, open up your loom and slide your work out.
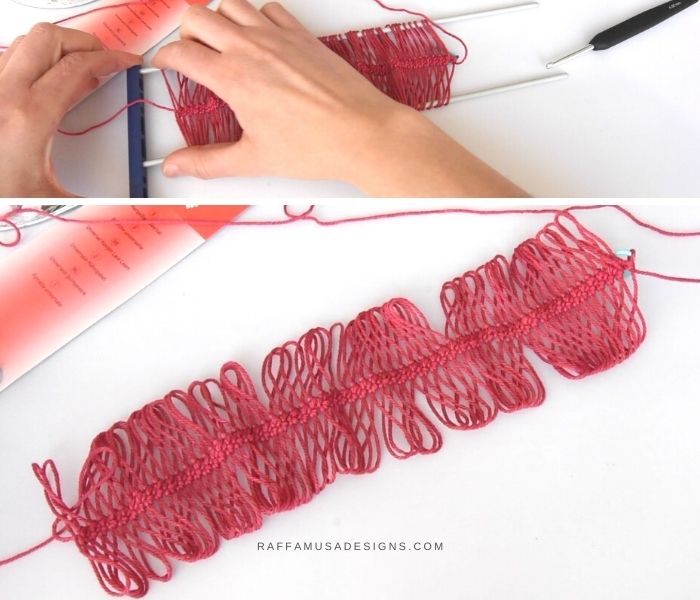
You just learned to hairpin lace crochet!
I hope you enjoyed this hairpin lace crochet tutorial. Please, do not hesitate to contact me if you need any help or support. I am looking forward to chatting with you on Facebook and Instagram!
Learn more crochet stitches and techniques…
Very pretty Raffa! Yes, I’ve seen it. I haven’t tried it yet though . . Maybe I will follow your tutorial then 🙂.
That would be lovely! I’m somehow ashamed of making video tutorials (you know, my English is not the best) but I try my best… I’d love to hear what you think and if the video is clear enough that someone can actually follow 🙂
Love your video. I messaged you. I’m following you on YouTube now!
You’re too nice! I’ve just read your message on Ravelry, I’ll get back to you tomorrow. Going to bed right now 🙂
Dear Raffaella, your video and instructions are perfect. I can’t wait to get started!
Thank you so much! I cannot wait to see your hairpin lace creations 🙂