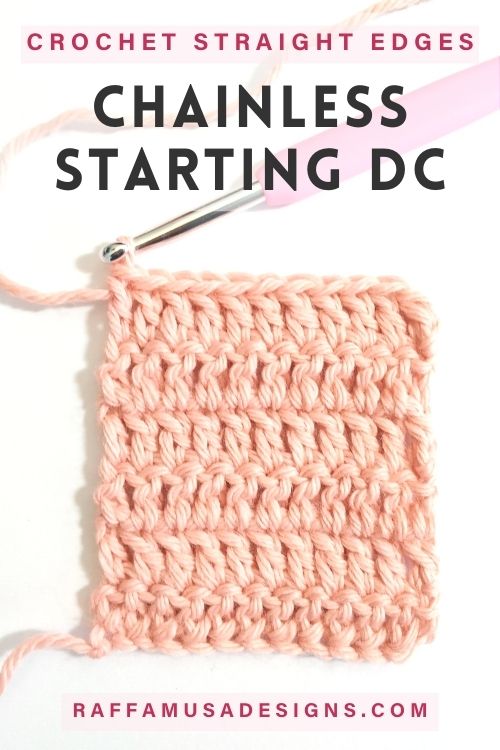
Keeping perfectly straight edges in double crochet is not only possible but extremely easy with this little trick! Learn how to crochet the Chainless Starting Double Crochet!
How to Start a New Row in Double Crochet
When working in double crochet, there are mainly two ways in which you can start a new row.
Let’s take a look at them together and let’s understand why they do not produce nice straight edges!
Method 1: Ch 3 and Skip 1
One very common way to start a new row of double crochet is to chain 3. In this case, the initial chains count as one double crochet, so obviously, you skip the first stitch and start double crocheting into the second stitch of the row.
Pros
Easy, no brainer.
Cons
Every row has a little gap at the beginning because the initial ch-3 is not as thick as one regular double crochet. Moreover, you skip the first stitch, which increases the gap.
Method 2: Ch 2, do not Skip any sts
Another common way to begin a new double crochet row is to chain 2 and double crochet in each stitch from the previous row. In this case, the initial ch-2 does not count as one double crochet.
Pros
Also this method is very easy and does not cause any gaps in your project.
Cons
The 2 chains at the beginning of each row will stick out. As a result, the edges of your double crochet project have some sort of little steps.
When Should You Use the Chainless Starting Double Crochet?
I have to admit that for some projects I really like this sort of ladder effect and I intentionally use this method to turn row. My Popcorn Bath Rug is one example.
However, other times, like when crocheting a shawl, scarf, or headband, I really want my edges to have a neater look.
And that’s when the Chainless Starting Double Crochet comes into play!
Make sure to Pin this free tutorial to your favorite Pinterest crochet board so that you can always find it later!
Learn the CHAINLESS STARTING DOUBLE CROCHET on YouTube
If you prefer learning from a video, you can check how to chainless double crochet on YouTube!
Or if you prefer the step-by-step tutorial, here it is.
CHAINLESS STARTING DOUBLE CROCHET (CH-LESS DC) – Step-by-step tutorial
Step 1
Pull the yarn up to the height of one regular double crochet or slightly less.
Step 2
Hold the loop firmly on the hook using your finger and twist the hook around the height of the loop.
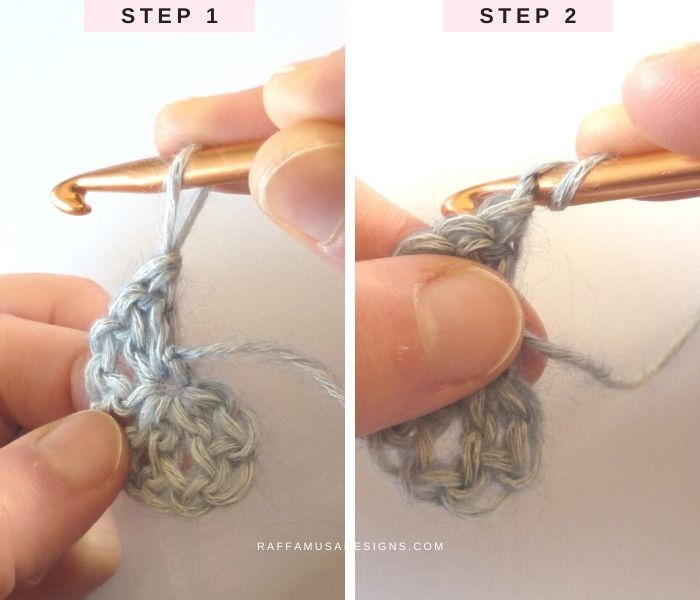
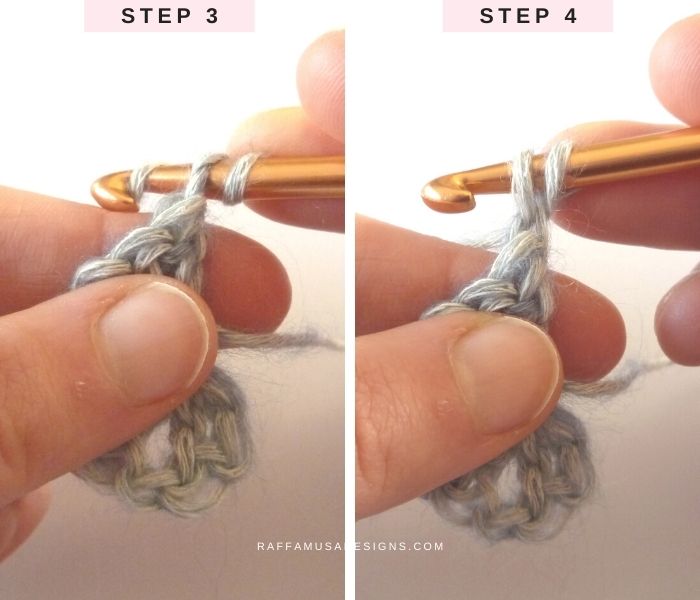
Steps 3 & 4
Yarn over making sure not to lift the finger that is holding the loop on the hook otherwise everything will come undone!
Pull through one.
Step 5 & 6
Yarn over.
Pull through two.
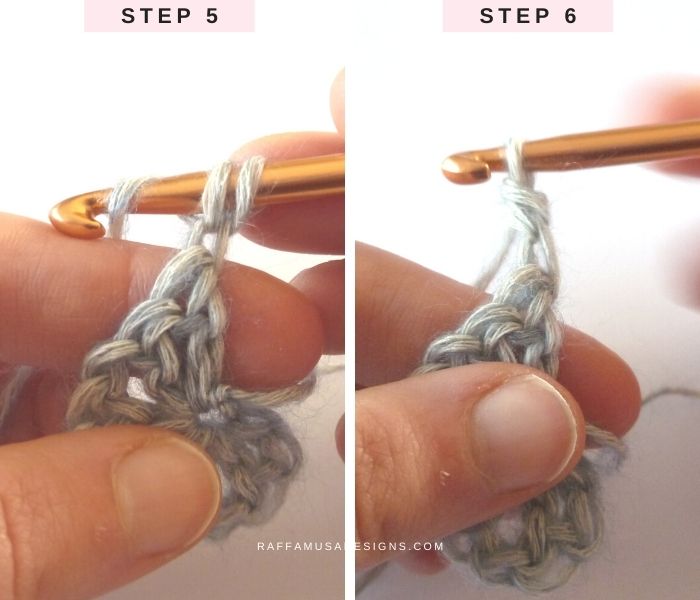
And voila, this was your first Chainless Starting Double Crochet!
How to Crochet the next Rows ~ STRAIGHT!
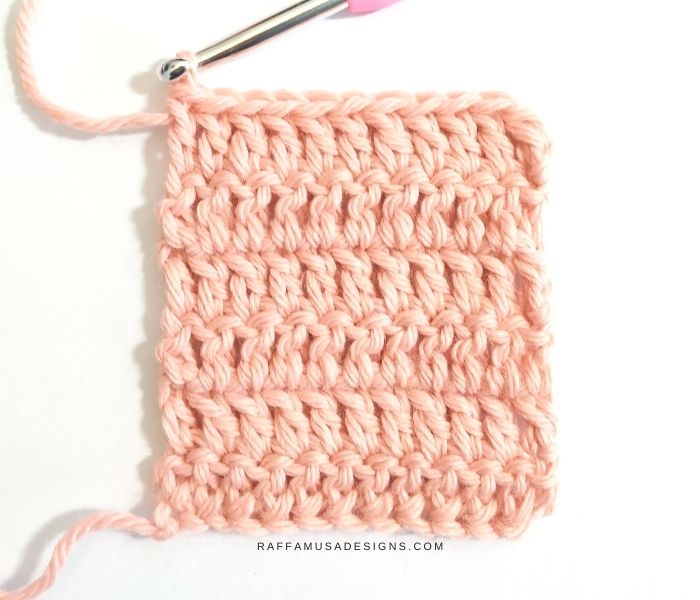
Now that you made your Chainless starting double crochet, you can go on and crochet the rest of your row.
Here are a few things to keep in mind to make sure that you’ll keep straight edges throughout your project.
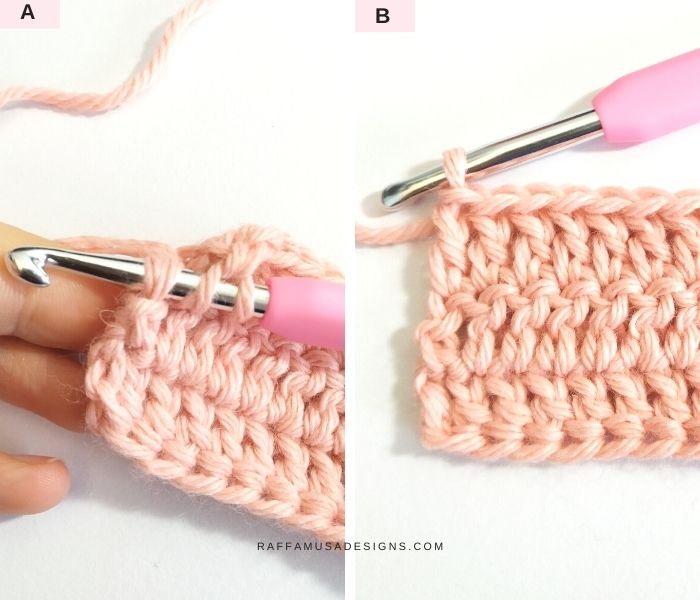
- Remember that the chainless starting double crochet counts as your first stitch of the row. So, your first, regular double crochet will go into the second stitch of the previous row!
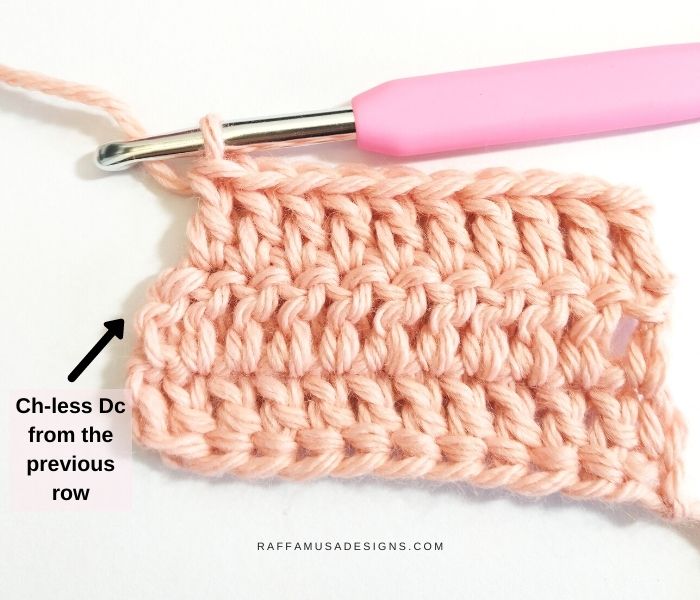
Pay attention at the end of each row not to miss the chainless double crochet from the previous row. It might tend to hide and you risk missing it.
If you want to be sure that you are not missing a stitch you can:
- Visually check that your edge is straight (compare the left edge shown in the previous picture with the edge shown in panel B in the next picture)
- Count your stitches.
I hope you enjoyed my free tutorial on how to crochet THE Chainless Starting Double Crochet!
Don’t forget to share your projects on Facebook and Instagram using the hashtag #raffamusadesigns
Find more tips-and-tricks and crochet tutorials here!


Very good instructions. I learned from them. Thank-You!