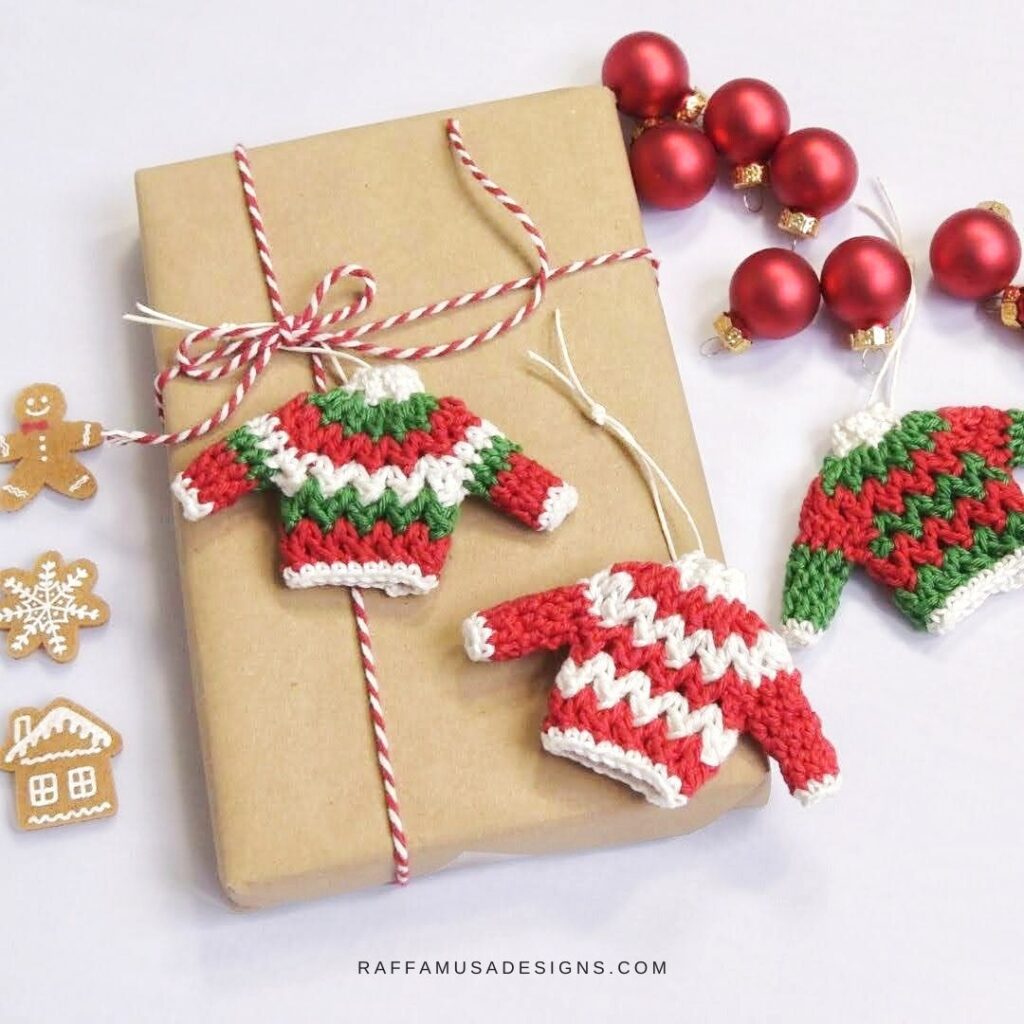
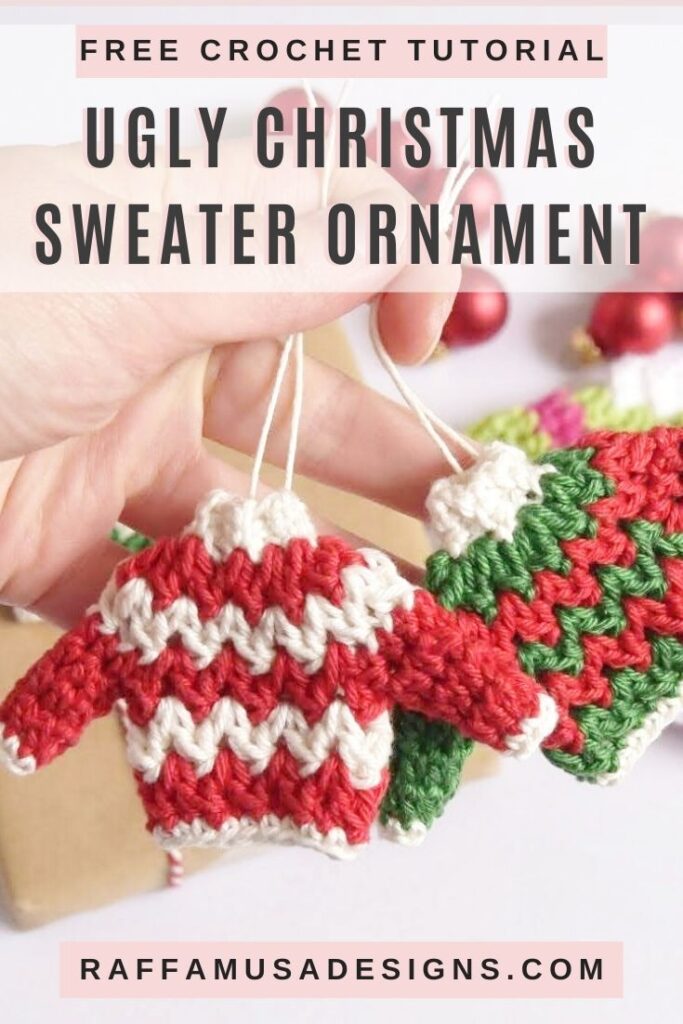
This year, I decided to start thinking about Christmas waaaay in advance and I kicked off my personal Christmas-tree-decorating project with this Ugly Christmas Sweater Crochet Ornament!
Don’t get me wrong, I am usually not this prepared at all for Christmas and I always end up making gifts, baubles, and other small things at the very last minute.
Are you also like me? Panicking at the very last minute and regretting you did not start earlier with your Christmas crochet?
Christmas Ornaments Marathon
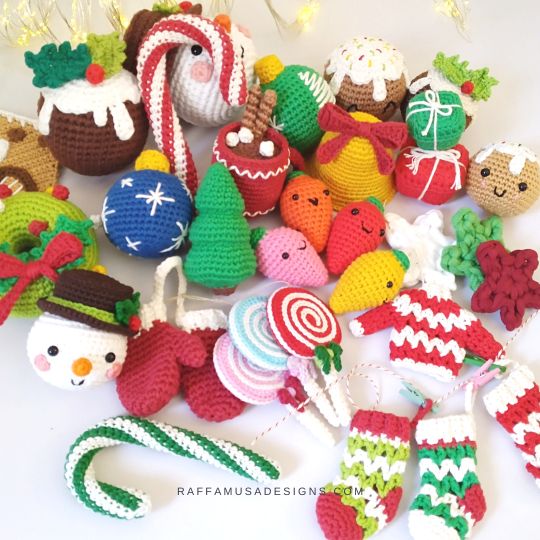
The pattern of the Ugly Christmas Sweater is part of my 2022 Christmas Ornaments Marathon CAL with many free ornament patterns for your Christmas tree!
Get all the info and details on this super festive crochet marathon HERE!
So, how about starting to prepare your Christmas makes with me?

More Ideas
Even though I made my Ugly Christmas Sweater ornament to decorate my Christmas tree, there are so many more ways you could use yours.
For example, you could make some Ugly Christmas Sweaters to tag your Christmas presents! But you could also think of using them to make cute garlands or magnets for your fridge or working space.
There are definitely lots of options!
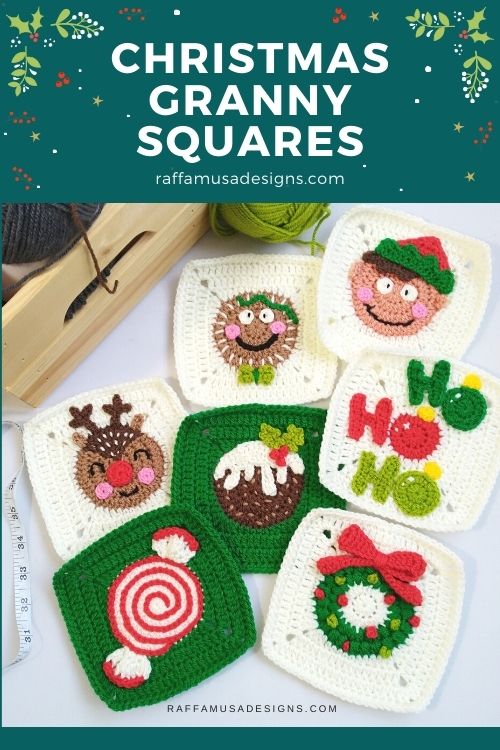
Make sure to add the free crochet pattern of the Ugly Christmas Sweater Ornament to your Ravelry queue HERE or save it for later by pinning it to your favorite crochet board on Pinterest! Feel free to use this Pin!
Note: this post contains affiliate links. This means that if you purchase something through the links on my blog, I might earn a commission. This will not have any effect on the price you pay. For more info, please, see my Privacy Policy.
Ad-Free Downloadable Pattern
The pattern of the Ugly Christmas Sweater Ornament is available as an ad-free PDF in my Ravelry, LoveCrafts, and Etsy stores!


Materials
- 2.5-mm (C/2 USA, 12 UK) Hook
- 3.5-mm (E/4 USA, 9 UK) Hook
- Sport Weight Yarn (Fine 2) in two (or more) contrasting colors. I used Schachenmayr Catania
- Ten Stitch Markers (Optional, but you’ll understand why in the Collar Section of the Pattern)
- Tapestry Needle
- Scissors
Size & Gauge
This pattern is too small to accurately determine the gauge.
However, when using the indicated yarns and hooks, you should get a sweater of 2.25” (6 cm) by 4” (10 cm).
How Much Yarn Will You Need?
For this pattern, you will need approximately 18-20 yards (15-17.5 m) of yarn, of which about 8-9 yds in color 1 and 11-12 yds in color 2.
Yarn Alternatives
For your Ugly Christmas Sweater Crochet Ornament, you can use really any yarn you have in your stash. And actually, this is the perfect pattern to use up some scrap yarn.
All you have to do is to choose the appropriate hooks for the yarn you have.
For example, using DK yarn, such as Paintbox Yarns Simply DK, and 3.5 mm and 4.0 mm crochet hooks will result in a sweater of ~3” (7.5 cm) by 5” (13 cm).
Crochet Abbreviations (US Terms)
BLO – Back Loop Only
Ch – Chain
Dc – Double Crochet
Hdc – Half Double Crochet
Hdc2Tog – Half Double Crochet Two Together
Inc – Increase
Sc – Single Crochet
Sk – Skip
Sl St – Slip Stitch
St – Stitch
V-St – V-Stitch
Yo – Yarn Over
Special Stitches
Back Loop Only (BLO)
Learn how to crochet in the back loop only with this detailed guide HERE.
Half Double Crochet Two Together (Hdc2Tog)
(Yo and insert your hook into the next st, yo, and pull up a loop) twice. Yo and draw yarn through all the loops on your hook.
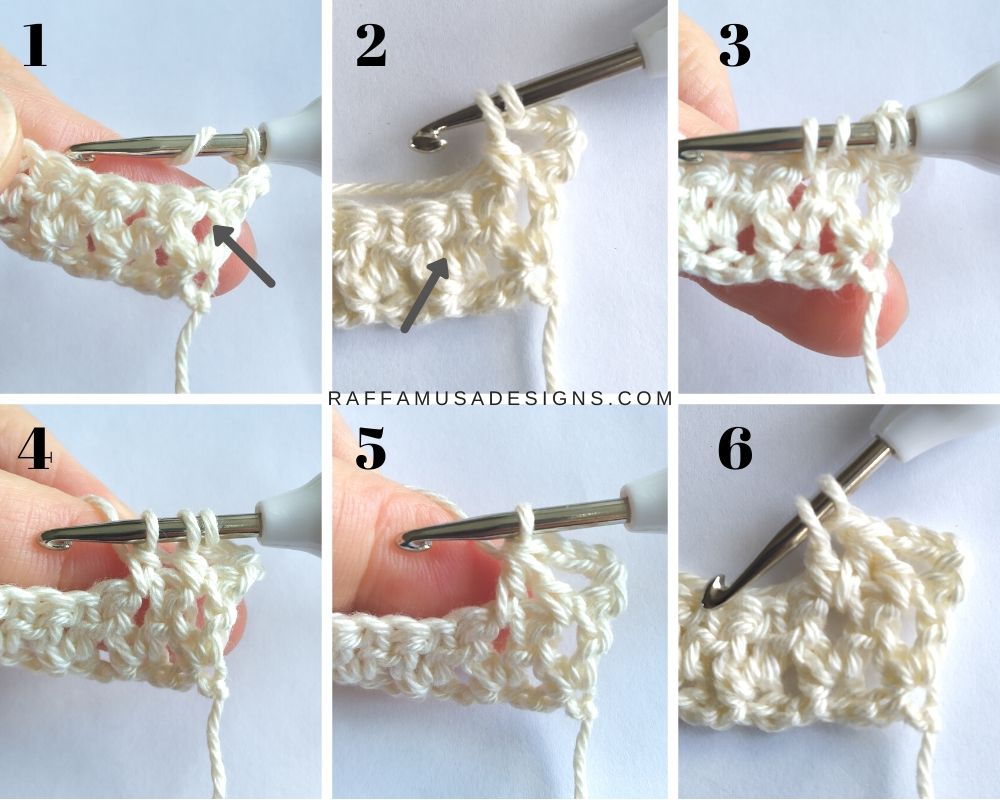
V-Stitch (V-St)
For my Ugly Christmas Sweater Crochet Ornament, I used a variation of the classical V-st. You can read more about this alternative way of crocheting the V-st in this step-by-step tutorial on how to crochet the V-stitch.
But here’s in short how I made the V-sts for this pattern:
1. Yo, go into the indicated st and pull up a loop.
2. Yo and draw yarn through two loops on your hook.
3. Yo and insert your hook into the next indicated st. Pull up a loop.
4. Yo and draw yarn through two loops (3 loops on your hook.
5. Yo and pull through all 3 loops at once.
6. Ch 1 (this is the center of your V-st), yo, and insert your hook into the same st as in step 3. Yo and draw through 2 loops on your hook.
Repeat from step 3 to make more V-sts.
Construction
This pattern is written in three sections: the collar, the body, and the sleeves. The sweater is crocheted top-down mostly using V-stitches.
Ugly Christmas Sweater Ornament – Free Pattern
Collar
With your first color (C1) and your 2.5 mm crochet hook, ch 4.
Row 1. 1 sc in the back bump of the second ch from your hook, sc in the back bumps of the next 2 ch. (3 sts)
Row 2-10. Ch 1 and turn your work. Sc 3 in the BLO. (3 sts)
In the next step, we will be crocheting on one of the long sides of the collar by working our stitches on the side of each row.
In order to make sure not to miss any sts, I found it very convenient to mark each row with a stitch marker. This way, I know exactly where I am supposed to insert my hook.
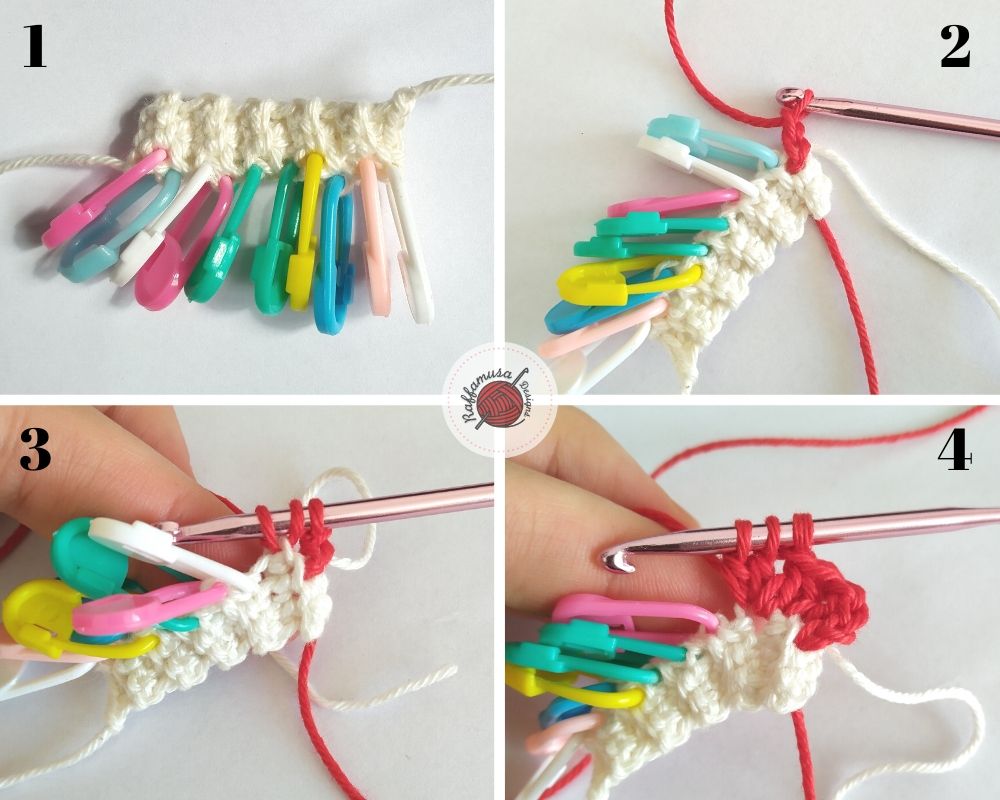
Sweater Body
Next, using your 3.5 mm crochet hook, join the yarn in your second color (C2) on the side of the first row of the collar (photo 2).
Round 1
Ch 2 (photo 2. Counts as the first leg of the first V-st, which you will complete at the end of this round). Crochet 1 V-st into the next st. Make 2 V-sts into the next st. Place a st marker in between the 2 V-sts of the inc, i.e. the 2 dc closed together. Make 1 V-st into each of the next 4 sts (marked by a st marker).
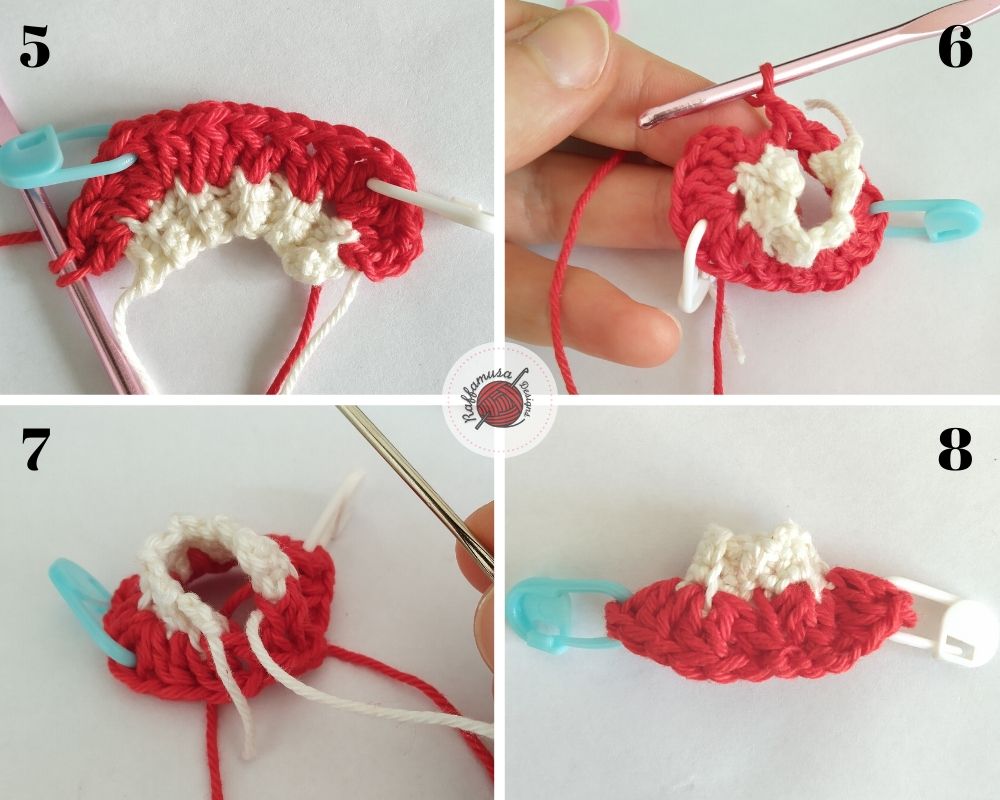
Make 2 V-sts into the next st. Place a st marker in between the 2 V-sts of the inc. Make 1 V-st into each of the next 2 sts (photo 5).
Fold your work so that you can easily yo and insert your hook back into the very first st where you joined C2. Yo and pull up a loop, yo, and draw yarn through all three loops on your hook (photo 6). Ch 1 and close the round with a sl st into the first dc (photo 7). (12 V-sts)
Fasten off and weave in your ends.
Using the C1 tails, seam the short sides of the collar together. Weave in your ends (photo 8).
Do you Really Have to Weave in Your Ends at Each Round?
Weaving in your ends round by round will make it easier to work through the next rounds. However, if you prefer, feel free to carry over your colors.
Join C1 on the back of the sweater (the side where you joined your previous round) in the third V-st from the second st marker you placed. Ch 2 (counts as the first half of a dc) (photo 9).
Round 2
Starting from the next V-st compared to where you join C1, make 1 V-st in each of the next 3 ch-1 spaces of the V-sts from the previous round (photo 10). At the st marker, make one extra V-st (photo 11) and place the st marker in the V-st you just made. Make 6 V-sts, 1 extra V-st at the next st marker placing the st marker in the V-st you just made, 2 V-sts.
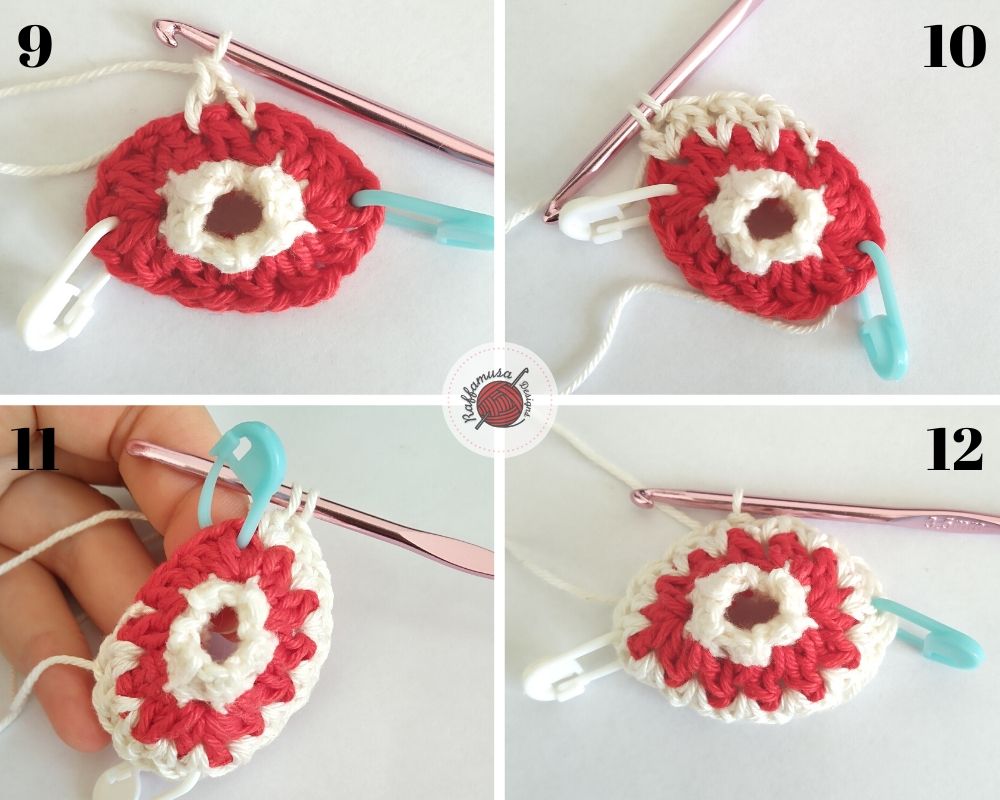
Make one dc in the first V-st where you joined your yarn, ch 1 and join the round with a sl st on top of the first dc (photo 12). (14 V-sts)
Join C1 on the back of the sweater in the second V-st from the second st marker you placed. Ch 2 (counts as the first half of a dc) (photo 13).
Round 3
In the next V-st, make 2 V-sts, closing the last dc of the second V-st on its own (photo 14). Ch 1. Sk the next 3 V-sts and make 4 V-sts closing the last dc of the third V-st as a regular dc. Ch 1. Sk the next 3 V-sts and make 1 V-st into the next (photo 15).
To complete the first V-st of the round, yo and make the first half of a dc in the V-st where you joined C1. Close the two dc on your hook together. Ch 1 and join the round with a sl st on top of the first dc (photo 16). (4 V-sts and 1 ch twice)

Join C1 in any V-st from the previous round (photo 17), preferably, on the back of the sweater.
Round 4
Ch 2 and make 1 V-st in each of the V-sts and each of the ch-1 from the previous round (photo 18). (10 V-sts)
Join C2 yarn in any V-st from the previous round.
Round 5
V-st in each V-st from the previous round (photo 19). (10 V-sts)
Switch to your 2.5 mm hook and join C1 in any of the sts from the previous round. Be careful that this time, you have to join on a st and not in the middle of a V-sts.
Round 6
Ch 1, 20 sc. Join with a sl st into the first st (photo 20). (20 sts)
Tie off and weave in your ends.

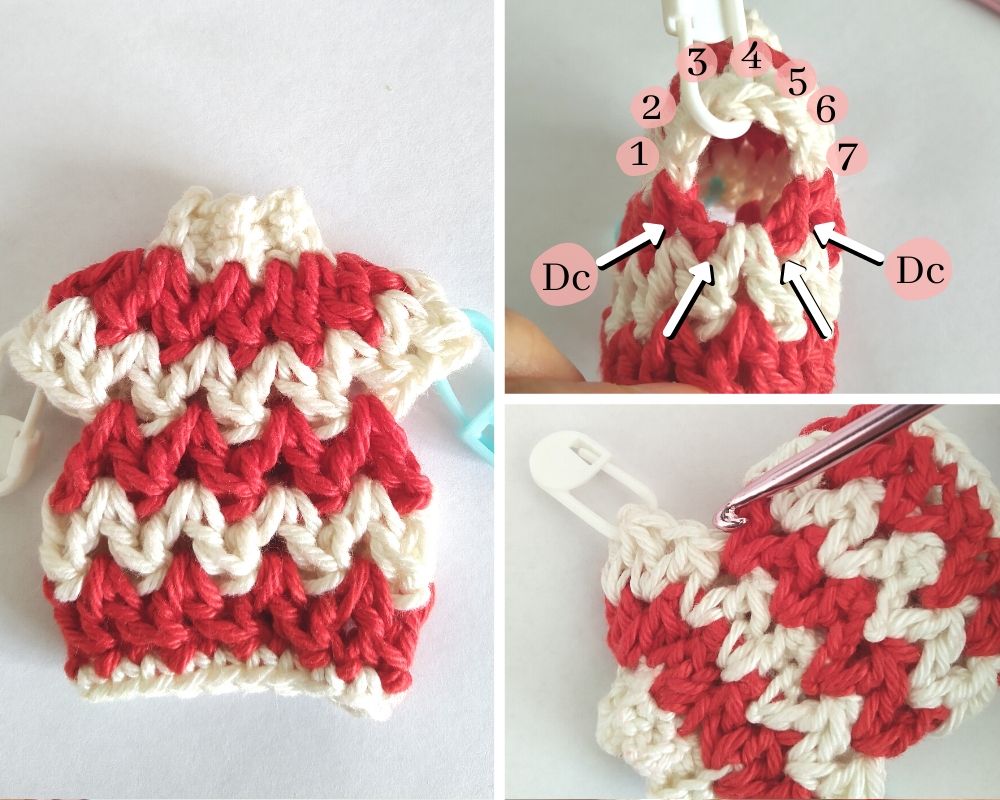
The Anatomy of the Sleeves
If you look at stitches in the holes for the sleeves (see photo below), you’ll see that you have 7 sts in C1 from the V-sts of round 2, the post of the dc in C2 from round 3, and the base of the V-st in C1 from round 4 (which you had made into the ch-1 from round 3).
Right Sleeve
Hold your sweater with the back side facing you. With your 3.5-mm hook, join C2 in the second st of the 3 skipped V-sts from round 2.
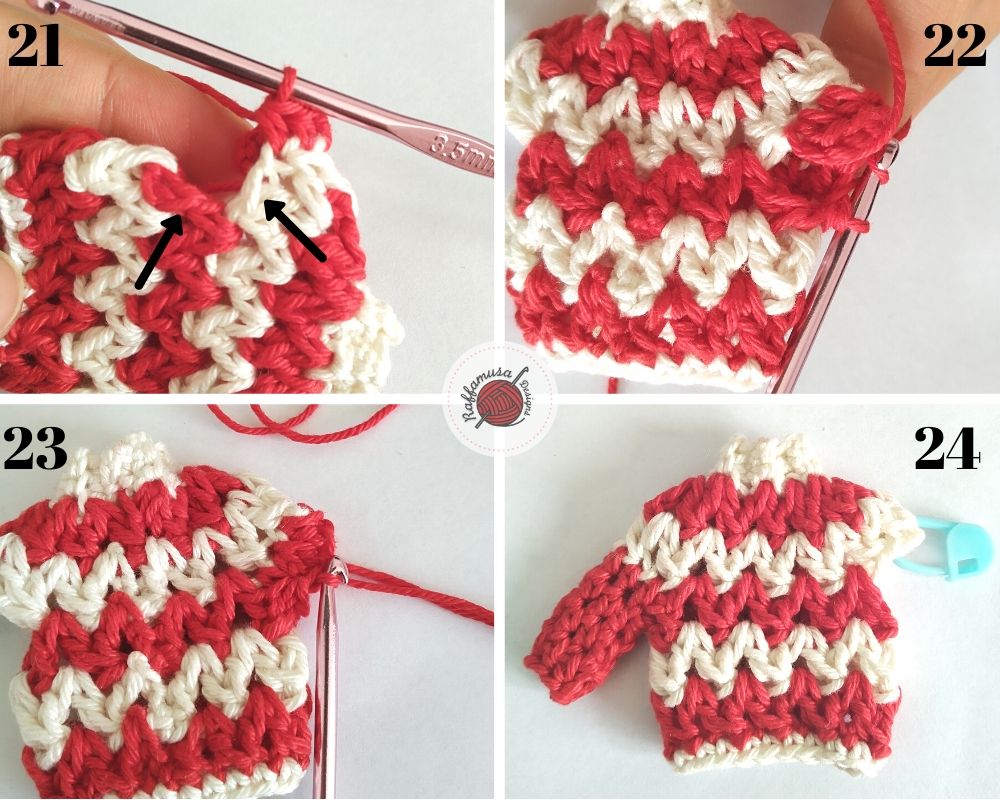
Round 1. Ch 1 (does not count as a st here and in the rest of the sleeve), 5 hdc, hdc2tog by making your sts into the seventh st from round 2 and on the side of the dc post from round 3 (photo 21). Hdc2tog by making your sts on the sides of the V-st from round 4 (photo 22). Hdc2tog by making your sts on the post of the next dc and into the first of the 7 sts from round 2 (photo 23). Join with a sl st into the first hdc. (8 sts)
Round 2. Ch 1, 8 hdc. Join with a sl st. (8 sts)
Round 3. Ch 1, 2 hdc, hdc2tog, 4 hdc. Join with a sl st. (7 sts)
Round 4. Ch 1, 7 hdc. Join with a sl st. (7 sts)
Tie off and weave in all your ends (photo 24).
Left Sleeve
Hold your sweater with the back side facing you. With your 3.5 mm jook, join C2 in the sixth st of the 3 skipped V-sts from round 2.
Round 1. Ch 1 (does not count as a st here and in the rest of the sleeve), 1 hdc, hdc2tog by making your sts into the seventh st from round 2 and on the side of the dc post from round 3. Hdc2tog by making your sts on the sides of the V-st from round 4. Hdc2tog by making your sts on the post of the next dc and into the first of the 7 sts from round 2. Make 4 hdc. Join with a sl st into the first hdc. (8 sts)
Round 2. Ch 1, 8 hdc. Join with a sl st. (8 sts)
Round 3. Ch 1, 1 hdc2tog, 6 hdc. Join with a sl st. (7 sts)
Round 4. Ch 1, 7 hdc. Sl st to join. (7 sts)
Tie off and weave in all your ends.
Both Right and Left Sleeve
With your 2.5 mm crochet hook, join C1 in any st from round 4 of your sleeve.
Round 5. Ch 1, 7 sc. Join with a sl st into the first sc. (7 sts)
Tie off and weave in your ends.
Finishing Your Ugly Sweater Ornament
Finally, attach a hanging loop or a short piece of cord to the back of the collar.
Your Ugly Christmas Sweater Crochet Ornament is ready!
I hope that you enjoyed crocheting your Ugly Christmas Sweater Crochet Ornament.
Please, do not hesitate to contact me if you need any help or support.
And please, please, show me your beautiful Ugly ornaments on Facebook and Instagram tagging me @raffamusa_designs!
Looking for a different kind of Christmas crochet idea?


Hi, I was wondering what you meant exactly when the pattern said to make 2 V-stitches in one stitch? Does that mean to essentially do the exact same process as if I were moving on to the next stitch, except remaining in the same stitch, or does it mean something different?
Hi Victoria, that’s correct. That’s exactly what it means 🙂
Don’t know why I’m having so much trouble with this but I am. The v stitch (2 v stitch in one) is confusing me.
Ok, maybe try to focus on one V at a time.
Start with the first V: (dc 1, ch 1, dc 1) all in the same st. Then, make another V in that same st. So (dc 1, ch 1, dc 1) in the same spot as your last V-st. Think of each V as a unit of (dc 1, ch 1, dc 1)…and put lots of stitch markers on the brim, so you do not miss any rows!
I hope this helped a bit but feel free to ask more questions in case it didn’t 🙂
Have a nice day,
Raffaella