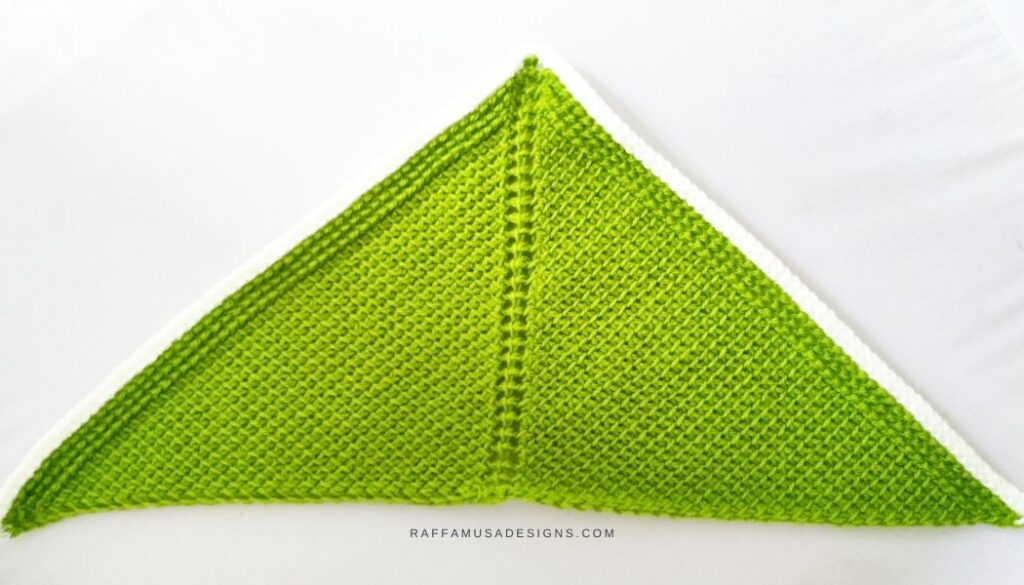
In today’s tutorial, I would like to share with you a very easy way to make a Tunisian Simple Stitch Triangle.
There are several ways in which you can make a triangle in Tunisian crochet.
You can make triangles of any shape: equilateral (with all the sides of the same length), scalene, or isosceles, like the one that we’ll see in today’s tutorial.
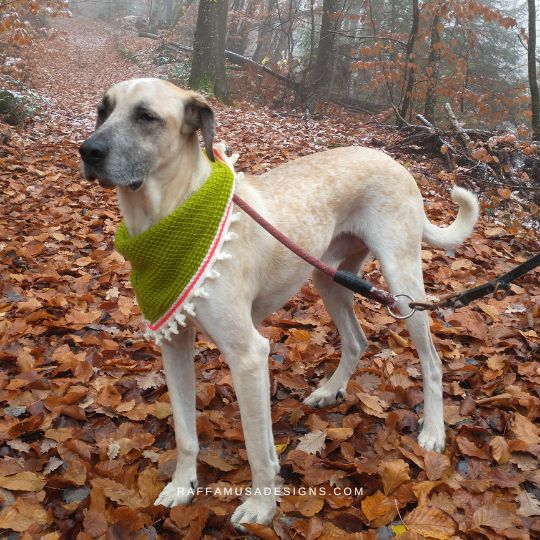
The isosceles triangle is perfect for making scarves, shawls, bandanas, etc.
I used this shape to make my Tunisian crochet Dog Bandana, but I’m looking forward to seeing your creations with the Simple Stitch Triangle!
Materials
- Any Yarn
- Appropriate Tunisian Crochet Hook Size with a Cable Extension
Abbreviations (US Terms)
- Ch – Chain
- Sp(s) – Space(s)
- St – Stitch
- TFR – Tunisian Foundation Row
- Tfs – Tunisian Full Stitch
- Trs – Tunisian Reverse Stitch
- Tss – Tunisian Simple Stitch
SPECIAL STITCHES
Standard Tunisian Return
Yo, pull through 1, (yo, pull through 2) until you only have 1 loop on your hook.
Tunisian crochet step-by-step tutorials:
- Tunisian Foundation Row (TFR)
- Tunisian Full Stitch (Tfs)
- Tunisian Reverse Stitch (Trs)
- Tunisian Simple Stitch (Tss)
Pattern Notes
- (…) – Repeat the instructions within brackets for the indicated number of times.
- The first stitch is included in the stitch count.
- The last stitch is worked under both loops of the final ch from the previous row.
Tunisian Simple Stitch Triangle
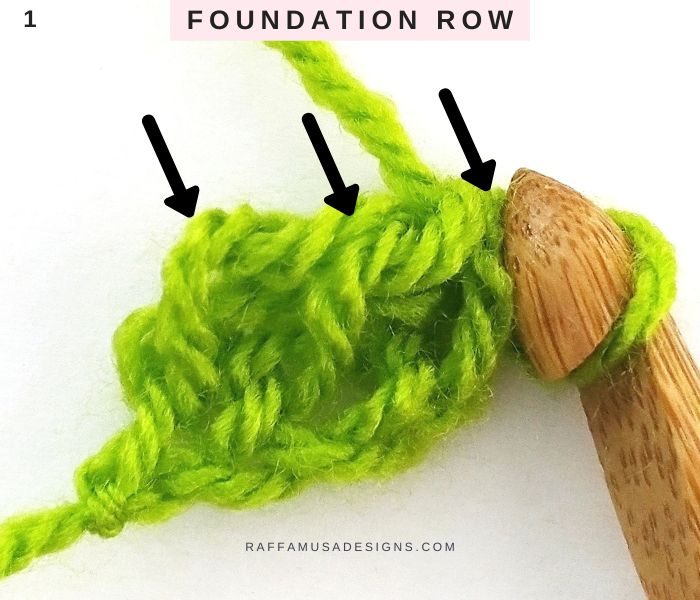
Make a TFR with 3 sts (photo 1).
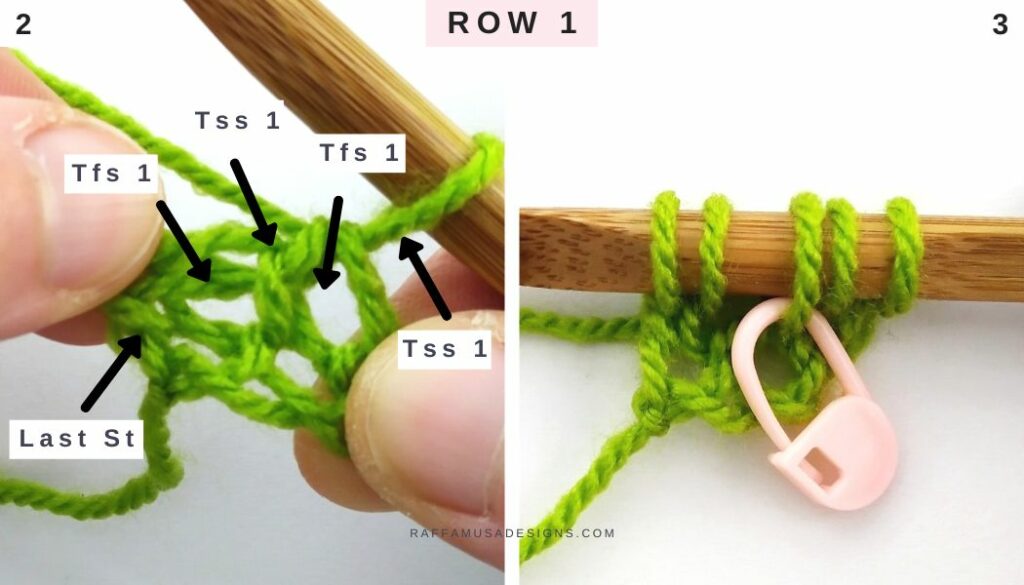
Row 1
Tss 1 (the st is already on your hook!), tfs 1 in sp between first two sts of TFR, tss 1 (center of the triangle, mark this st with a st marker), tfs 1 in sp between last 2 sts of TFR, last st (photo 2). (5 sts, photo 3)
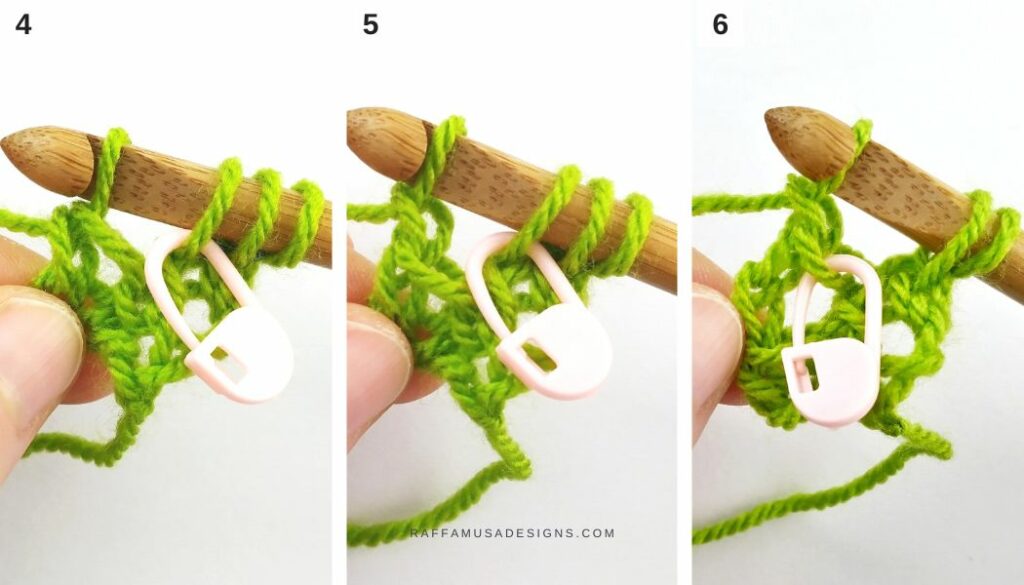
Return. Yo, pull through 1, yo, pull through 2 (photo 4), ch 1 (photo 5), yo pull through 2, ch 1 (photo 6), (yo, pull through 2) twice.
Row 2
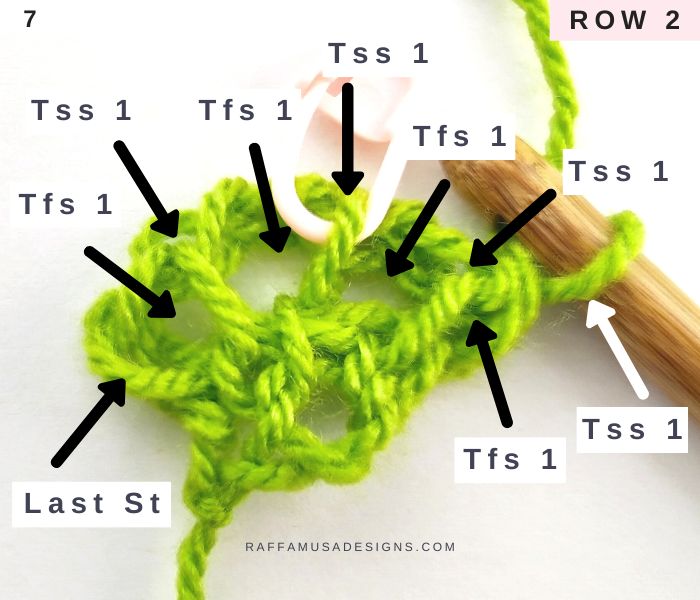
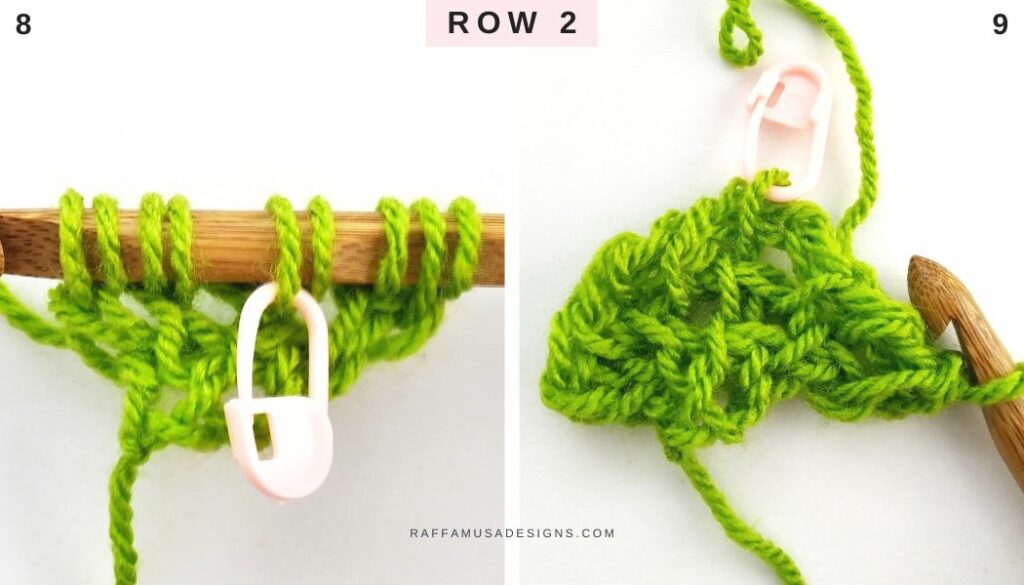
Tss 1 (the st is already on your hook!), tfs 1 in sp between first two sts of row 1, tss 1, tfs in ch-1 sp before st marker, tss 1 (move st marker along), tfs 1 in ch-1 sp after st marker, tss 1, tfs 1 in sp between last two sts of row 1, last st (photo 7). (9 sts, photo 8)
Return. Yo, pull through 1, (yo, pull through 2) until st before st marker (3 times for row 2), ch 1, yo pull through 2, ch 1 (tip of the triangle), (yo, pull through 2) until the end (4 times for row 2, photo 9).
Row 3
Tss 1 (the st is already on your hook!), tfs 1 in sp between first two sts of the previous row, tss in each tss until before st marker, tfs in ch-1 sp before st marker, tss 1 (move st marker along), tfs 1 in ch-1 sp after st marker, tss in each of next tss until the semi-last one, tfs 1 in sp between last two sts of the previous row, last st. (13 sts)
Return. Yo, pull through 1, (yo, pull through 2) until st before st marker, ch 1, yo pull through 2, ch 1 (tip of the triangle), (yo, pull through 2) until the end (photo 10).
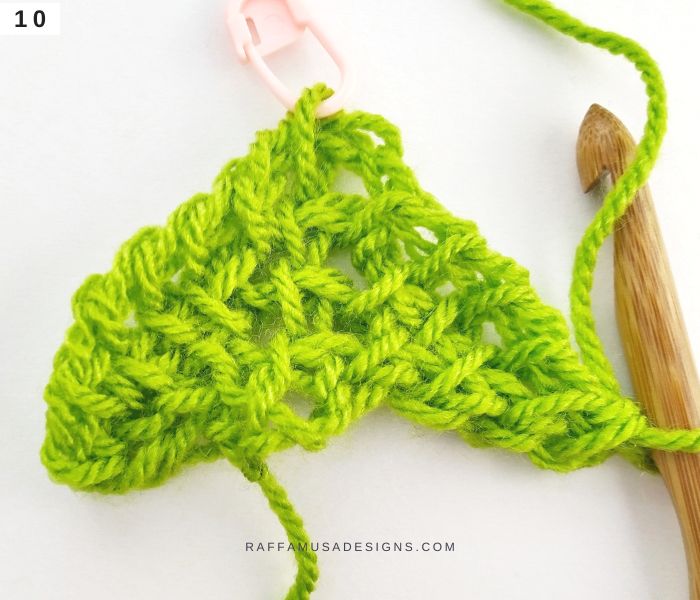
Keep growing your triangle by repeating the same pattern as for row 3.
To fix the curling, in the end, add a few rows or Trs by working the increases in the same way as for row 3 using the Tfs.
Bind off in pattern by slip-stitching the sts off your hook.
YOUR Tunisian CROCHET Simple Stitch Triangle IS READY!
I hope you enjoyed this free Tunisian crochet tutorial, and I’d love to see your creations with it! Please, share a pic of your work on Facebook and Instagram using the hashtag #raffamusadesigns!
Find more free Tunisian crochet tutorials here on the blog…