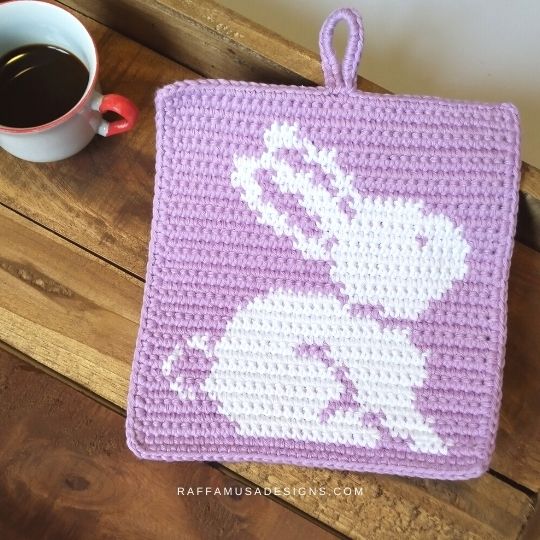
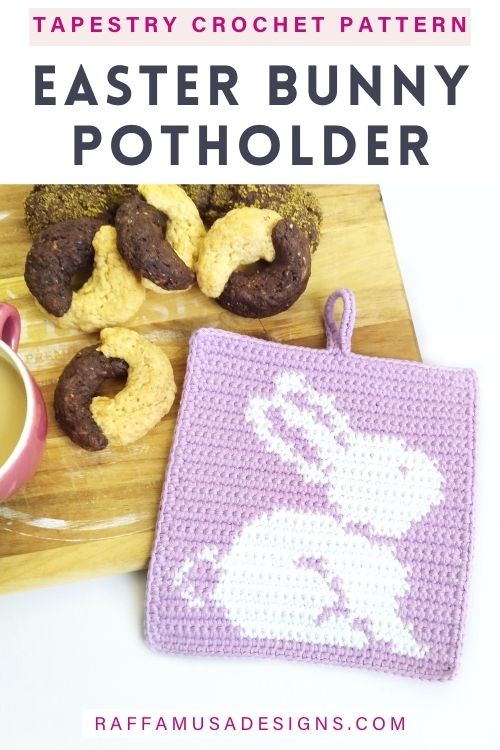
The tapestry crochet Easter Bunny Potholder is the April potholder for my 2022 collection A Year of Potholders.
This fun, little rabbit is a super cute idea to crochet for your kitchen home decor for Easter and Spring!
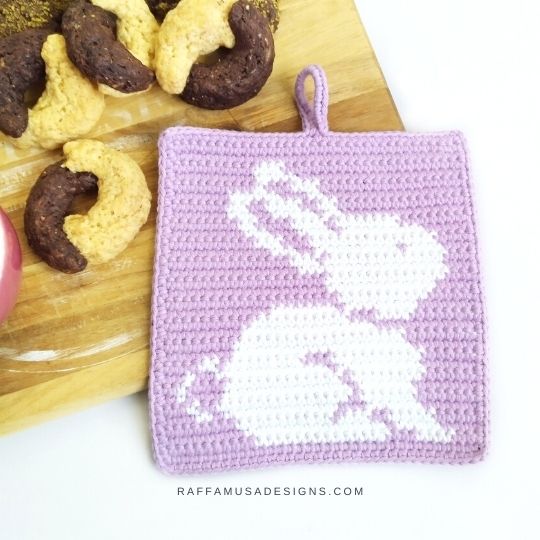
Just like for the Farmhouse Collection, I used tapestry crochet to create a thick and solid hot pad that is safe to use and cute to look at!
A YEAR OF POTHOLDERS
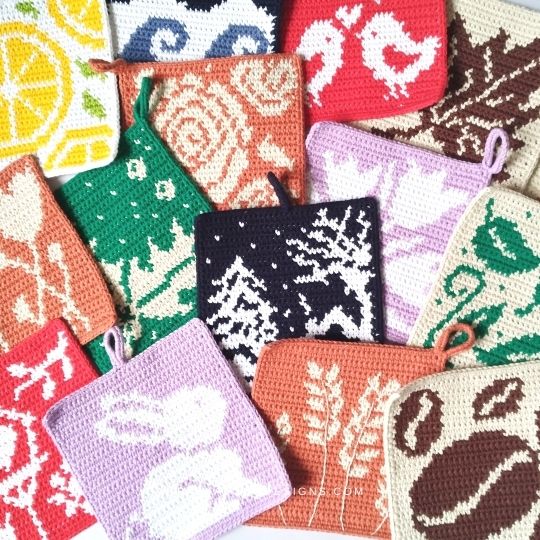
This Easter Bunny Potholder is part of my tapestry crochet collection “A Year of Potholders”!
The idea is to share a new tapestry crochet potholder every month for the entire year, and every potholder has a different theme inspired by a different month.
- Take a look at the entire “A Year of Potholders” collection HERE
- or grab the eBook with all the patterns on Etsy HERE or Ravelry HERE!
Keep in mind that the free patterns here on the blog will only have the written instructions, while the PDF and ebook have both written instructions and color charts!
Find more Easter and Springtime crochet ideas…
Add this pattern to your Ravelry queue HERE and favorite it (– thank you!). Or save it for later by pinning it to your favorite crochet board on Pinterest using this pin!
Note: this post contains affiliate links. This means that if you purchase something through the links on my blog, I might earn a commission. This will not have any effect on the price you pay. For more info, please, see my Privacy Policy.
Spring Fling Bundle
The pattern of the Easter Bunny Potholder is featured in the Spring Fling Bundle by Helen of Sunflower Cottage Crochet.
The Spring Fling Bundle is a collection of 31 crochet patterns for Spring and Easter! You’ll find all sorts of fun and cute accessories, home decor items, toys, and more.
When you get the Spring Fling Bundle, you’ll gain immediate access to the 31 printable patterns!
AD-FREE PRINTABLE PATTERN
The ad-free, printable PDF pattern of the Easter Bunny Potholder including the pattern color chart is available in all my online shops. Get your copy of the pattern on Ravelry, LoveCrafts, or Etsy!
MATERIALS
- 3.5-mm (E/4 USA, 9 UK) Hook
- Aran (4, Medium) Weight Cotton Yarn
- Tapestry Needle
YARN & YARDAGE
I used GB Wolle Schulgarn, 100% Cotton (50 g, ~95 yds / 87 m) in the following colors and amounts:
- A – Red (1030) – 47.2 yds / 43.2 m
- B – White (1010) – 20.3 yds / 18.6 m
YARN SUBSTITUTIONS
ABBREVIATIONS (US TERMS)
Ch – Chain
RS – Right Side
Sc – Single Crochet
Sk – Skip
Sl St – Slip Stitch
St – Stitch
WS – Wrong Side
Yo – Yarn Over
TAPESTRY CROCHET & INVISIBLE COLOR CHANGES
- Find a guide to step-by-step guide to flat tapestry crochet HERE
- Learn how to make invisible color changes in tapestry crochet HERE.
Or watch the video tutorial on my YouTube channel HERE.
Just keep in mind that while in the video I do consider the initial ch-1 as my first st, for this pattern, the first chain does NOT count as a stitch!
SIZE
6.2” (15.7 cm) by 6.3” (16 cm).
GAUGE
22.5 sc for 21 rows in 4” (10 cm) worked in tapestry crochet.
PATTERN NOTES
- The pattern is written in 2 sections. The Potholder is worked in rows, the Border in rounds.
- The potholder is worked entirely in sc.
- If the pattern says “(A) 5”, it means that you need to sc 1 in each of next 5 sts using color A.
- At the end of each row, ch 1 and turn.
- The initial ch 1 does NOT count as a st.
- All odd-numbered rows are crocheted on the right side. All even-numbered rows are crocheted on the wrong side.
- (…) – Repeat the instructions within brackets for the indicated number of times.
- With the exception of the border, the stitch count is always 34 sts.
- The color chart of the potholder can be found in the PDF pattern.
Easter Bunny POTHOLDER – FREE TAPESTRY CROCHET PATTERN
POTHOLDER
(A) Ch 35.
← Row 1 (RS). (A) 34 (starting crocheting from the second ch from your hook). (34 sts)
→ Row 2 (WS). (A) 10, (B) 14, (A) 3, (B) 4, (A) 3.
← Row 3 (RS). (A) 4, (B) 5, (A) 1, (B) 15, (A) 9.
→ Row 4 (WS). (A) 8, (B) 10, (A) 1, (B) 3, (A) 2, (B) 5, (A) 5.
← Row 5 (RS). (A) 6, (B) 6, (A) 3, (B) 12, (A) 1, (B) 2, (A) 4.
→ Row 6 (WS). (A) 3, (B) 1, (A) 2, (B) 14, (A) 1, (B) 6, (A) 7.
← Row 7 (RS). (A) 7, (B) 6, (A) 1, (B) 13, (A) 4, (B) 1, (A) 2.
→ Row 8 (WS). (A) 2, (B) 1, (A) 4, (B) 12, (A) 1, (B) 8, (A) 6.
← Row 9 (RS). (A) 6, (B) 9, (A) 1, (B) 12, (A) 2, (B) 1, (A) 3.
→ Row 10 (WS). (A) 4, (B) 2, (A) 1, (B) 8, (A) 3, (B) 10, (A) 6.
← Row 11 (RS). (A) 7, (B) 19, (A) 8.
→ Row 12 (WS). (A) 8, (B) 18, (A) 8.
← Row 13 (RS). (A) 11, (B) 14, (A) 9.
→ Row 14 (WS). (A) 10, (B) 10, (A) 3, (B) 4, (A) 7.
← Row 15 (RS). (A) 6, (B) 8, (A) 1, (B) 7, (A) 12.
→ Row 16 (WS). (A) 19, (B) 10, (A) 5.
← Row 17 (RS). (A) 4, (B) 12, (A) 18.
→ Row 18 (WS). (A) 18, (B) 13, (A) 3.
← Row 19 (RS). (A) 3, (B) 16, (A) 15.
→ Row 20 (WS). (A) 14, (B) 3, (A) 1, (B) 13, (A) 3.
← Row 21 (RS). (A) 3, (B) 4, (A) 1, (B) 9, (A) 2, (B) 3, (A) 12.
→ Row 22 (WS). (A) 10, (B) 3, (A) 3, (B) 14, (A) 4.
← Row 23 (RS). (A) 5, (B) 9, (A) 1, (B) 4, (A) 3, (B) 3, (A) 9.
→ Row 24 (WS). (A) 8, (B) 2, (A) 4, (B) 4, (A) 1, (B) 7, (A) 8.
← Row 25 (RS). (A) 14, (B) 2, (A) 1, (B) 5, (A) 2, (B) 3, (A) 7.
→ Row 26 (WS). (A) 7, (B) 2, (A) 2, (B) 4, (A) 2, (B) 2, (A) 15.
← Row 27 (RS). (A) 16, (B) 2, (A) 3, (B) 6, (A) 7.
→ Row 28 (WS). (A) 10, (B) 1, (A) 3, (B) 3, (A) 17.
← Row 29 (RS). (A) 19, (B) 5, (A) 10.
→ Row 30 (WS). (A) 10, (B) 3, (A) 21.
← Row 31 (RS). (A) 34.
→ Row 32 (WS). (A) 34.
Border
After row 32, you are still facing the WS and both A and B are at the left, top corner (if you are right-handed, or the right corner if you are left-handed).
Fasten off B.
With A, ch 1, and turn (RS).
Round 1 (RS). Start crocheting along the top side of the potholder. Sc 17. Hanging Loop. Ch 15, sl st back into the last-made sc, ch 1, and turn (WS). Sc 18 inside the loop you just made, sl st back into the last sc of the 17 you made at the beginning of the round.
Sc 17 to complete the top side of the potholder. At the corner, ch 1, and start working on the next side. Sc 32 on the left side, ch 1, sc 34 on the bottom, ch 1, sc 32 on the right side of the potholder. Ch 1, and join the round with a sl st into the first st. (32 sts on top and bottom, 34 sts on left and right sides, 1 ch at each corner).
Fasten off, weave in all your ends.
YOUR TAPESTRY CROCHET Easter Bunny POTHOLDER IS READY!
Get more inspiration with these crochet potholders…





I just tried to make this adorable potholder and the feet and body were on the wrong/opposite side of the head, what did I do wrong!! Everything else looks just fine except the heads turning the wrong way.
Hi, I’m not sure I’m following…
Would you mind sending me a picture of your potholder?
You can either e-mail me at raffaella(at)raffamusadesigns.com or send me a picture on Instagram @raffamusa_designs 🙂
Thank you for participating in the Spring Fling Event but says the code has expired and the 24 hours isn’t up yet since it started at 5 AM EST on the 23rd and it was only 1:45 AM EST on the 24th so should have a couple of hours yet. Any help would be appreciated. This is so cute. Thank you in advance.
Thank you so much the code just worked for me!!!
Hi! I crochet with both my right and left hand, does this pattern still work? Or do I have to work with ’wrong side’ ’right side’?
Hi, if you crochet with both hands, you can crochet the “wrong sides” backwards. So, basically, follow the pattern for rows 2, 4, 6, etc starting from the end.
For example, the pattern for row 2 (WS) says: (A) 10, (B) 14, (A) 3, (B) 4, (A) 3. What you need to do is: (A) 3, (B) 4, (A) 3, (B) 14, (A) 10. 🙂