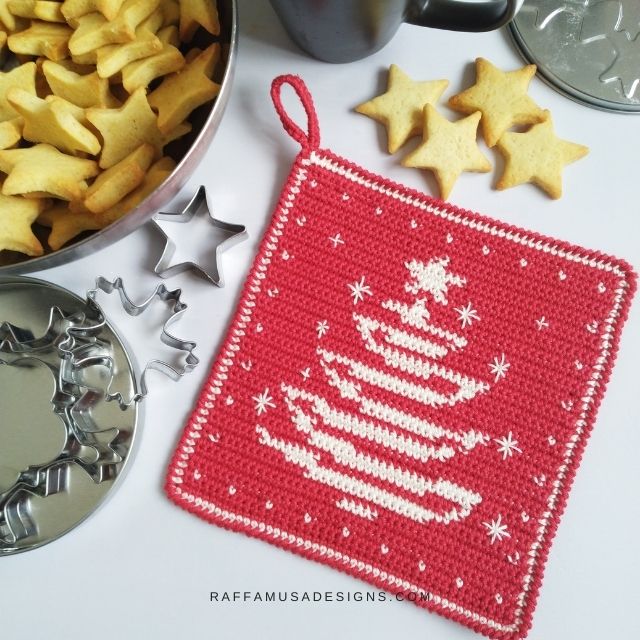
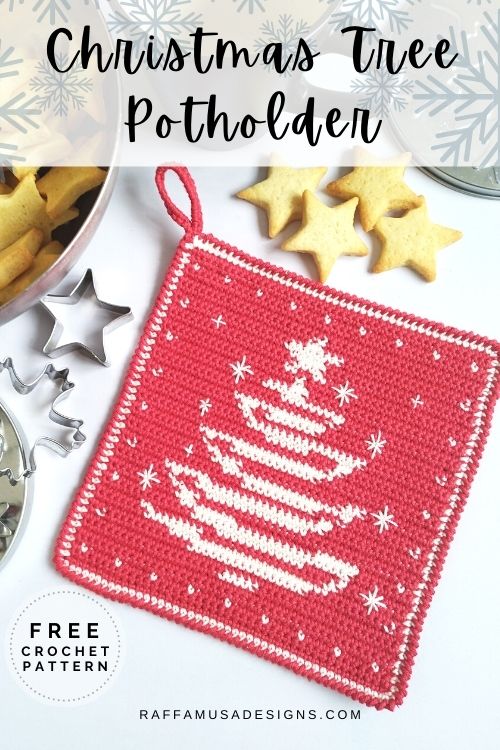
Are you ready to decorate your house for Christmas? Get your kitchen ready with this classic-look tapestry crochet Christmas Tree Potholder!
This year, I am literally counting the days until Christmas.
So, while I am here waiting and counting, I might as well get some decorations ready.
Of course, I decided to start with my favorite place in the house, the kitchen!
So, using the same template of the Farmhouse Collection, I went on and made this Christmas tree.
I hope you’ll enjoy this pattern and have fun getting all your Christmas crochet done (or almost…)!
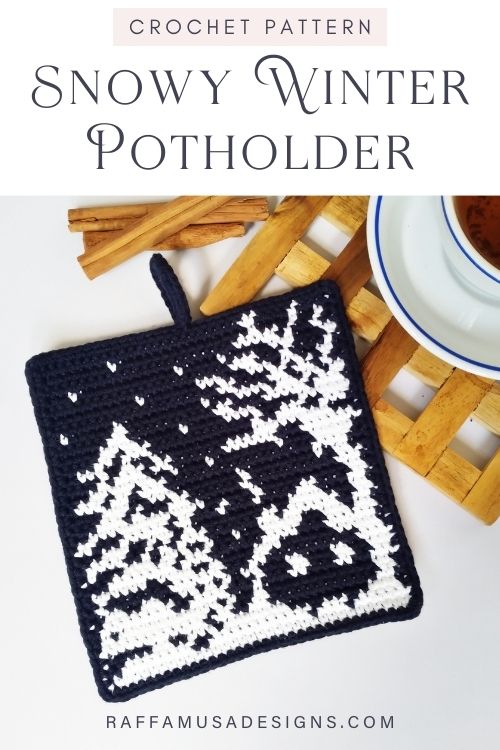
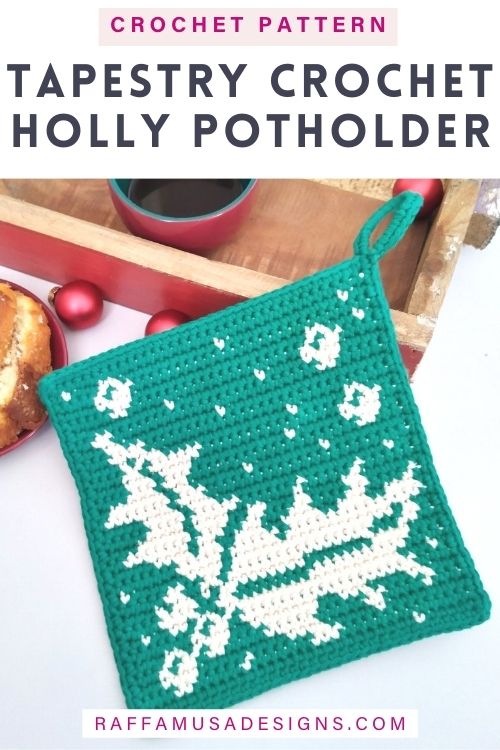
Find more crochet potholders for Christmas here on the blog…
Pin this pattern to your favorite Christmas crochet board on Pinterest!
Note: this post contains affiliate links. If you purchase something through the links on my blog, I might earn a commission. This will not have any effect on the price you pay. For more info, please, see my Privacy Policy.
AD-FREE DOWNLOADABLE PATTERN
You can purchase the ad-free PDF of this pattern, including a color chart, in my Ravelry, LoveCrafts, and Etsy shops!


Materials
- 3.0-mm (D-3 USA, 11 UK) Crochet Hook
- Paintbox Yarns Cotton DK in two contrasting colors. I will refer to them as color 1 (CC1) and color 2 (CC2).
- Tapestry Needle
Yardage
- CC1: 57 m / 62 yds
- CC2: 36 m / 39 yds
Size
6.7” (17 cm) by 7.3” (18.5 cm)
Crochet Abbreviations (US Terms)
Ch – Chain
Crab St – Crab Stitch
RS – Right Side
Sc – Single Crochet
Sk – Skip
Sl St – Slip Stitch
St – Stitch
WS – Wrong Side
Yo – Yarn Over
Special Stitches
Backstitch
Pull the needle and yarn up, make one straight st forward. From the WS, space your needle out the length of one st and pull the needle up to the RS. Insert the needle back into the end of the first st.
Crab Stitch (Crab St)
Insert your hook into the previous st and crochet a sc.
Color Change in Tapestry Crochet
For a nice result with tapestry crochet projects, it is important to change the colors smoothly. To do so, it is necessary that each final stitch in a specific color is closed using the yarn in the next color.
In other words, when crocheting the last st of one given color, insert your hook in the indicated st, yo, pull up a loop, drop the currently used color, yo using the yarn in the new color and pull through both loops on your hook.
Check out my step-by-step tutorial on how to change color in tapestry crochet here!
Gauge
28 sc for 26 rows in 4” (10 cm) worked in tapestry crochet.
Pattern Notes
- (…) – Repeat the instruction within brackets for the indicated number of times.
- If the pattern says “sc 5”, it means that you have to make one single crochet in each of the next 5 stitches.
- At the end of each row, you turn your work to crochet the next series of sts.
- The starting ch 1 DOES count as your first stitch and is always made with the main color.
- The right side (RS) is determined after row 3, which is crocheted on the right side.
- All uneven rows are crocheted with the right side up, while the even-numbered rows are crocheted on the wrong side.
- Throughout the pattern with the exception of the border, the stitch count is always 45 sts.
- The pattern is written in three sections. The Potholder is worked in rows, then the Border is worked in rounds. The Finishing details are embroidered.
Potholder
(CC1) Ch 46.
Row 1 (RS). Sc in the second st from your hook and in each st across, turn.
Row 2 (WS). Ch 1 (counts as a st here and in the rest of the pattern), sc in each st across, turn.
Row 3. Ch 1 and start carrying your contrasting color (CC2) yarn inside your sts. (CC1) sc 1, [(CC2) sc 1, (CC1) sc 4] eight times, (CC2) sc 1, (CC1) sc 2, turn.
Row 4-5. Repeat Row 2.
Row 6. Ch 1, (CC1) sc 19, (CC2) sc 5, (CC1) sc 20, turn.
Row 7. Repeat Row 2.
Row 8. Ch 1, (CC1) sc 1, (CC2) sc 1, (CC1) sc 12, (CC2) sc 16, (CC1) sc 11, (CC2) sc 1, (CC1) sc 2, turn.
Row 9. Ch 1, (CC1) sc 10, (CC2) sc 22, (CC1) sc 12, turn.
Row 10. Ch 1, (CC1) sc 7, (CC2) sc 8, (CC1) sc 17, (CC2) sc 2, (CC1) sc 10, turn.
Row 11. Ch 1, (CC1) sc 8, (CC2) sc 1, (CC1) sc 5, (CC2) sc 12, (CC1) sc 9, (CC2) sc 2, (CC1) sc 7, turn.
Row 12. Ch 1, (CC1) sc 13, (CC2) sc 22, (CC1) sc 9, turn.
Row 13. Ch 1, (CC1) sc 1, (CC2) sc 1, (CC1) sc 5, (CC2) sc 6, (CC1) sc 11, (CC2) sc 8, (CC1) sc 9, (CC2) sc 1, (CC1) sc 2, turn.
Row 14. Ch 1, (CC1) sc 10, (CC2) sc 3, (CC1) sc 31, turn.
Row 15. Ch 1, (CC1) sc 15, (CC2) sc 14, (CC1) sc 3, (CC2) sc 2, (CC1) sc 10, turn.
Row 16. Ch 1, (CC1) sc 8, (CC2) sc 1, (CC1) sc 3, (CC2) sc 18, (CC1) sc 14, turn.
Row 17. Ch 1, (CC1) sc 12, (CC2) sc 2, (CC1) sc 15, (CC2) sc 7, (CC1) sc 8, turn.
Row 18. Ch 1, (CC1) sc 1, (CC2) sc 1, (CC1) sc 16, (CC2) sc 10, (CC1) sc 3, (CC2) sc 1, (CC1) sc 9, (CC2) sc 1, (CC1) sc 2, turn.
Row 19. Ch 1, (CC1) sc 10, (CC2) sc 18, (CC1) sc 16, turn.
Row 20. Ch 1, (CC1) sc 13, (CC2) sc 4, (CC1) sc 14, (CC2) sc 3, (CC1) sc 10, turn.
Row 21. Ch 1, (CC1) sc 29, (CC2) sc 2, (CC1) sc 13, turn.
Row 22. Ch 1, (CC1) sc 11, (CC2) sc 1, (CC1) sc 3, (CC2) sc 12, (CC1) sc 17, turn.
Row 23. Ch 1, (CC1) sc 1, (CC2) sc 1, (CC1) sc 12, (CC2) sc 19, (CC1) sc 8, (CC2) sc 1, (CC1) sc 2, turn.
Row 24. Ch 1, (CC1) sc 28, (CC2) sc 2, (CC1) sc 14, turn.
Row 25. Ch 1, (CC1) sc 12, (CC2) sc 2, (CC1) sc 4, (CC2) sc 6, (CC1) sc 20, turn.
Row 26. Ch 1, (CC1) sc 16, (CC2) sc 16, (CC1) sc 12, turn.
Row 27. Ch 1, (CC1) sc 26, (CC2) sc 2, (CC1) sc 16, turn.
Row 28. Ch 1, (CC1) sc 1, (CC2) sc 1, (CC1) sc 12, (CC2) sc 2, (CC1) sc 2, (CC2) sc 7, (CC1) sc 16, (CC2) sc 1, (CC1) sc 2, turn.
Row 29. Ch 1, (CC1) sc 17, (CC2) sc 13, (CC1) sc 14, turn.
Row 30. Ch 1, (CC1) sc 26, (CC2) sc 1, (CC1) sc 17, turn.
Row 31. Ch 1, (CC1) sc 15, (CC2) sc 9, (CC1) sc 20, turn.
Row 32. Ch 1, (CC1) sc 16, (CC2) sc 6, (CC1) sc 22, turn.
Row 33. Ch 1, (CC1) sc 1, (CC2) sc 1, (CC1) sc 19, (CC2) sc 2, (CC1) sc 18, (CC2) sc 1, (CC1) sc 2, turn.
Row 34. Ch 1, (CC1) sc 20, (CC2) sc 1, (CC1) sc 23, turn.
Row 35. Ch 1, (CC1) sc 19, (CC2) sc 2, (CC1) sc 2, (CC2) sc 2, (CC1) sc 19, turn.
Row 36. Ch 1, (CC1) sc 19, (CC2) sc 4, (CC1) sc 21, turn.
Row 37. Ch 1, (CC1) sc 20, (CC2) sc 5, (CC1) sc 19, turn.
Row 38. Ch 1, (CC1) sc 1, (CC2) sc 1, (CC1) sc 15, (CC2) sc 8, (CC1) sc 16, (CC2) sc 1, (CC1) sc 2, turn.
Row 39. Ch 1, (CC1) sc 21, (CC2) sc 2, (CC1) sc 21, turn.
Row 40. Ch 1, (CC1) sc 20, (CC2) sc 1, (CC1) sc 23, turn.
Row 41-42. Repeat Row 2.
Row 43. Ch 1, (CC1) sc 1, [(CC2) sc 1, (CC1) sc 4] eight times, (CC2) sc 1, (CC1) sc 2, turn.
Row 44-45. Repeat Row 2.
Do not tie off.
Border
After row 45, both CC1 and CC2 are at the left, top corner of your potholder.
Round 1. With (CC2) (RS facing), place 45 sc on each side of the potholder starting from the left side, then the bottom, right side, and top. At the corners, sc 1 in the last st of the side, ch 1 and sc in the first st of the next side. (45 sts on each side and 1 ch at the corners)
Round 2. With CC1 (RS facing), carb st in each st from round 1. At the corners, make one crab st in the ch-1 space.
Once you are back at the top, left corner, make the hanging loop: ch 20 and sl st back into the same corner.
Without chaining, turn your work and sc 25 inside the loop. Sl st back into the same corner st. (45 sts on each side and 1 st at the corners)
Fasten off, weave in ends.
Finishing
With RS facing, embroider a few stars around the Christmas tree using the backstitch.
For a nicer result, split your yarn in half so that your embroidery looks more delicate.
Weave in all your ends.
Your tapestry crochet Christmas Tree Potholder is ready!
I hope this free crochet potholder pattern! I’m looking forward to seeing your Christmas tree potholders on Facebook or Instagram. Make sure to use the #raffamusadesigns so that I can find and share your pics!
Find more Christmas ideas for the kitchen here on the blog…

“Deck the Halls with Yarn” Blog Hop
The tapestry crochet Christmas Tree Potholder was featured in the Deck the Halls with Yarn blog hop hosted by Sheri (from Country Willow Designs) and Alexandra (from Eye Love Knots). The focus of the blog hop was on home decor and beautiful crochet things to make your house a cozy nest during these coming holidays. Make sure to check all the beautiful designs featured in the blog hop here!
This potholder is stunning! I enjoy all of your beautiful designs. All beautiful pieces of art. I’ve been tempted to try, but me and tapestry aren’t great friends.
Hi, thank you so much! I have to admit that I was quite terrible at tapestry crochet the first times I tried XD but I kind of got stubborn and kept trying…