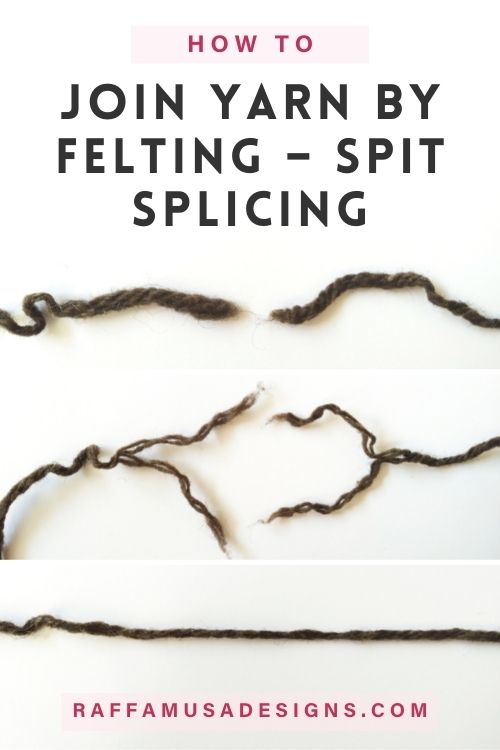
If you’re knitting or crocheting with wool and getting to the end of your yarn ball, you must check this absolutely amazing technique for joining new yarn: the spit splicing!
The spit splice or wet splice method is a way of joining yarn ends together by felting them. The cool thing is that it does not require any special tools. Really, just your spit and your hands will do the work.
The spit or wet part of the spit splice method is needed for moisturizing the yarn. Then, the felting will happen by rubbing the yarn between your hands and generating heat this way.
The main advantages of this technique are:
- It is easy;
- There are no knots involved;
- You won’t have any ends to weave in at the end;
- No matter what yarn weight you’re using, it won’t create any tension issues;
- The joining point is completely invisible.
The bad news is that you cannot use it with any fibers.
Since the spit splicing is a felting technique, it will only work with pure animal fibers, such as wool, alpaca, mohair, etc.
So, if you’re working with other fibers, such as acrylic or cotton, you might want to check other joining methods like for example the magic knot.
When to Use the Spit Splicing
The spit splicing felting technique only works with 100% animal fibers, such as:
- Wool (but not superwash merino because that doesn’t felt!)
- Alpaca
- Mohair
- Cashmere
- Angora
- Camel
- Silk
When Not to use the Spit Splicing
The spit splicing does not work with synthetic and cellulosic fibers, such as:
- Nylon
- Acrylic
- Polyester
- Cotton
- Bamboo
- Linen
- Jute
- Hemp
Pin this free tutorial on how to join new yarn by felting with the spit splicing!
Note: this post contains affiliate links. This means that if you purchase something through the links on my blog, I might earn a commission. This will not have any effect on the price you pay. For more info, please, see my Privacy Policy.
Join Yarn with the Spit Splicing – Step-by-Step Tutorial
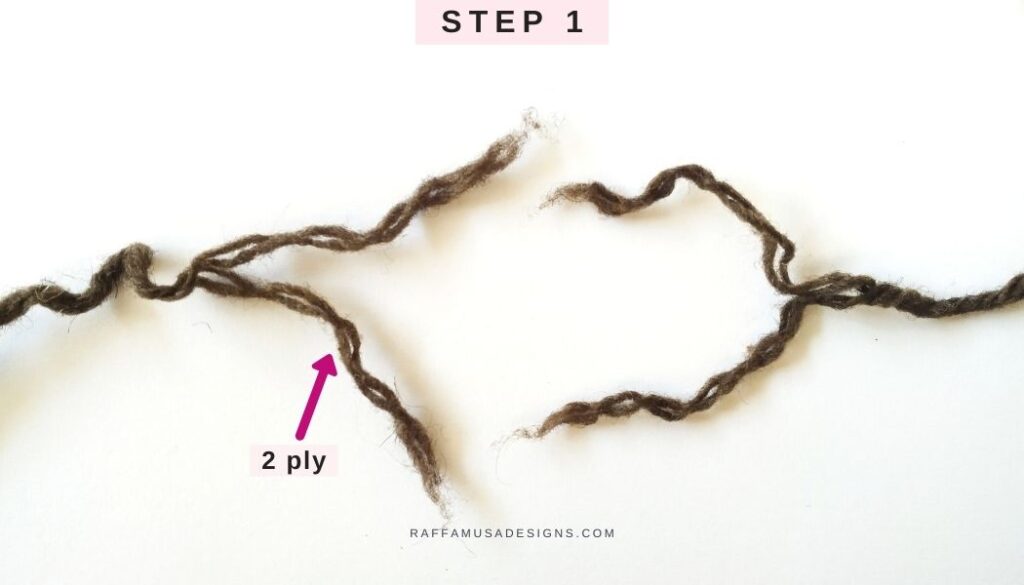
Step 1
Untwist the two ends of yarn and separate the ply in half.
In my case, I had a 4 ply yarn. So, I opened up the plys and separated them into two 2-ply strands.
Step 2
On each yarn end, cut about 1″ (2.5 cm) of one of the two halves you created in step 1.

This step is important to maintain a constant thickness of the yarn!
If you do not want to cut your ends, you can absolutely skip this step. However, you might have a thicker spot in your yarn in correspondence with the joining point.
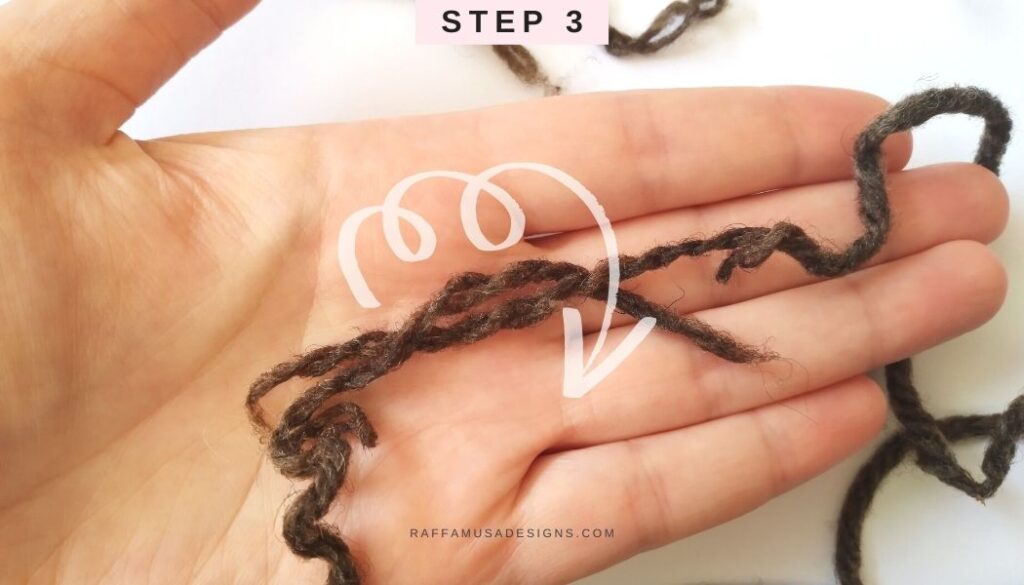
Step 3 – Spit and twist
Here for the fun bit of this technique: we need some spit!
The options are:
- You lick the yarn ends by putting them in your mouth and making sure that they are all wet.
- Put the yarn ends in a small dish and spit on them. Also here, it is important to wet them completely!
I know this sounds gross and some people might want to use water instead. However, I’m sorry but water does NOT work as well as spit. After all, it is called spit splicing for a reason…
Once your yarn is very well wet with spit, twist the two ends together. Make sure to twist all the way from the point where you cut the yarn up to the tip.
Note that the picture below only shows the beginning of the twisting process. Use both hands to twist the yarn completely and hold the two strands together.
step 4 – felting
While you twist the yarn ends, start rolling them with your fingers. Then, close your hands together palm against palm with the yarn in the middle, and roll the yarn vigorously until it is not moist anymore.
You will need to generate some heat because that is what will make the yarn felt.
So, especially in the winter, it might help to do the felting by rubbing the twisted yarn ends on your jeans (if you’re wearing jeans…) in order to warm them up.
During the felting process, check the yarn every now and then to see if it still needs more rubbing.
If needed, trim the loose bits of yarn that are sticking out of the newly joined ends.
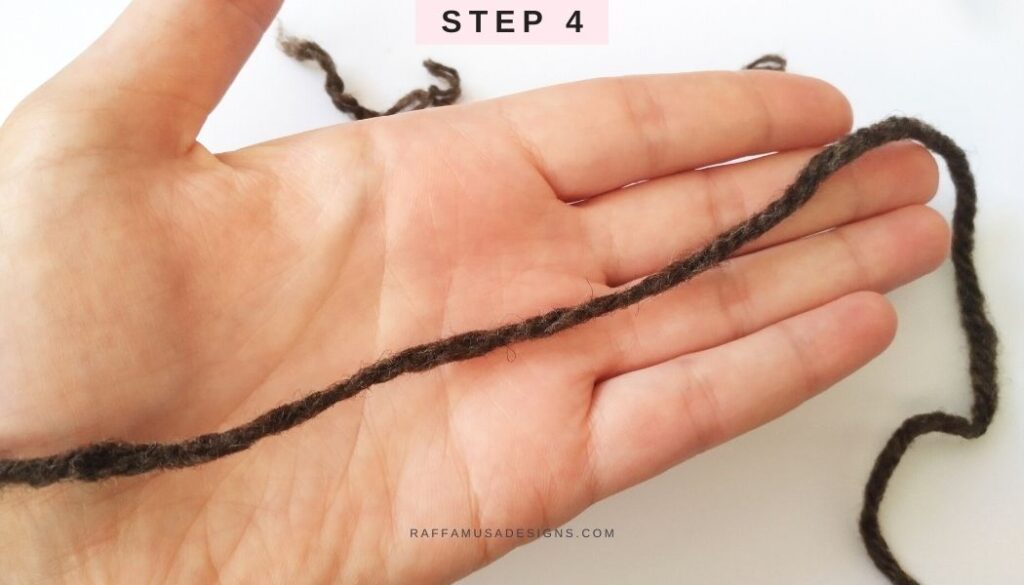
Well done, you just leanred how to join new yarn by felting with the spit splicing!
You can now use your yarn for crocheting or knitting without having the problem of knots, loose ends, or tension!
I hope you enjoyed this tutorial! Feel free to share your opinions on your favorite joining methods by tagging me on Facebook or Instagram and using the hashtag #raffamusadesigns
Find more tutorials here on the blog…