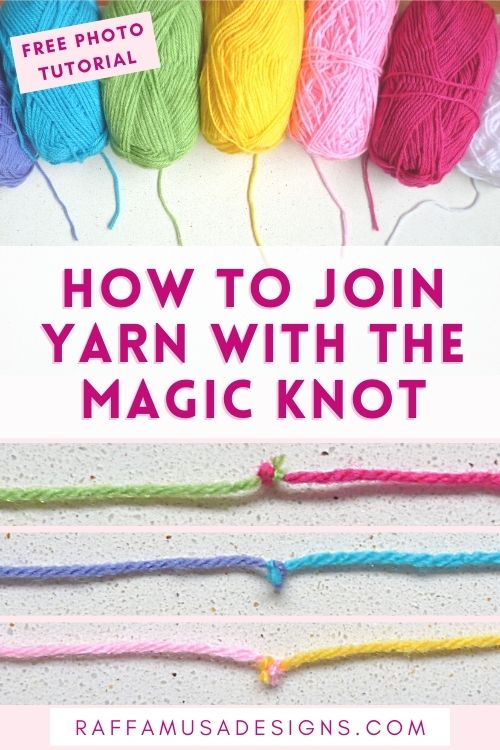
Whether you crochet, knit, or do other yarn crafts, you have for sure come to the sad end of your ball of yarn. Now, if you are a navigated crafter, this might not be a problem for you as you already know what to do. However, if you are new to the yarn world, you might fall into despair! So, this easy photo tutorial is meant for all of you yarn newbies! Do not despair over your finished yarn ball! Just keep reading and learn how to join yarn with the Magic Knot!
In this step-by-step tutorial on how to join yarn with the magic knot, you’ll see that I will be joining yarn in two different colors.
That’s purely for the sake of clarity. It is way easier to follow what happens to each end of the yarn when you have them in a different color!
Is the Magic Knot Safe?
The magic knot is one of the safest ways of joining your yarn. It is easy to do, it is not too big so that you will easily hide it in your work, and, above all, it will not come undone!
Extra Tip
To make extra sure that my yarn is properly joined, I like to use a double level of security! So, what I usually do is to first make a magic knot leaving very long ends (you’ll get what I mean once you see how to make a magic knot later in this post). Then, once my work is done, I like weaving in those long ends.
This way, I feel extra safe that my work will not unravel!
Pin the free tutorial on how to join yarn with the Magic Knot to your favorite craft Pinterest board using this Pin!
Magic Knot – Tutorial
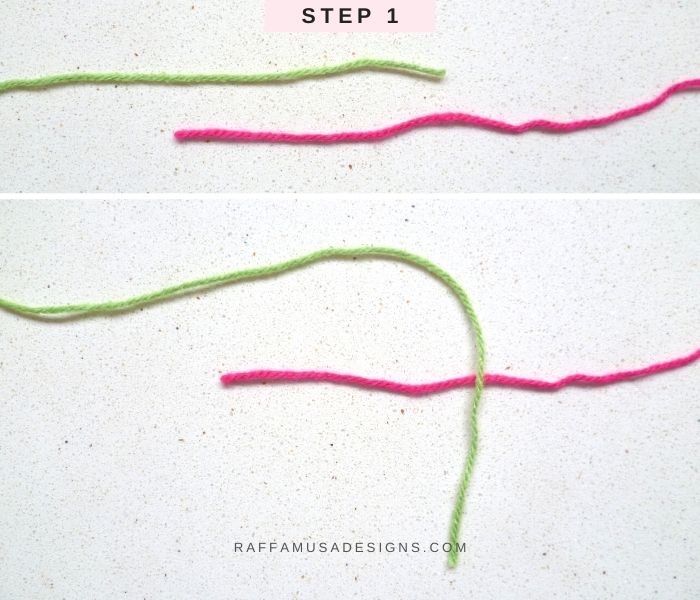
Step 1
Place the two ends of yarn one above the other as shown in the figure below and fold the yarn on the top (green in the picture) over the other (pink).
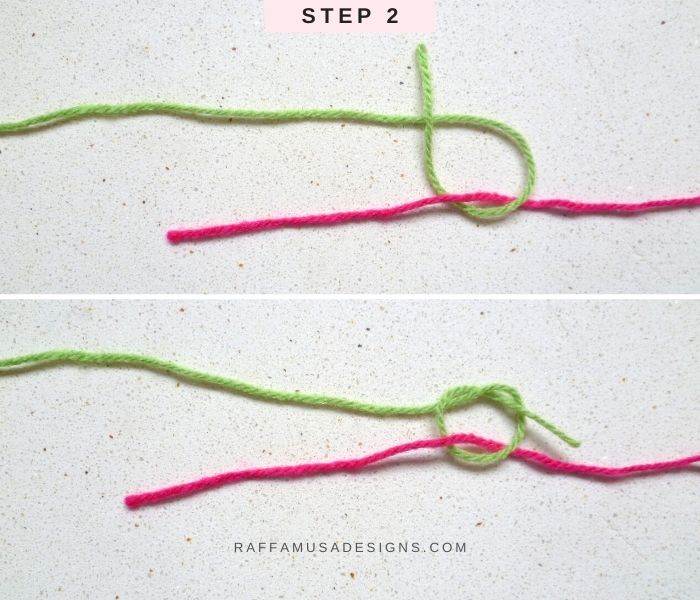
Step 2
Slide the green end underneath the pink one. Then, lay the green end on top of the green yarn and make a simple knot.
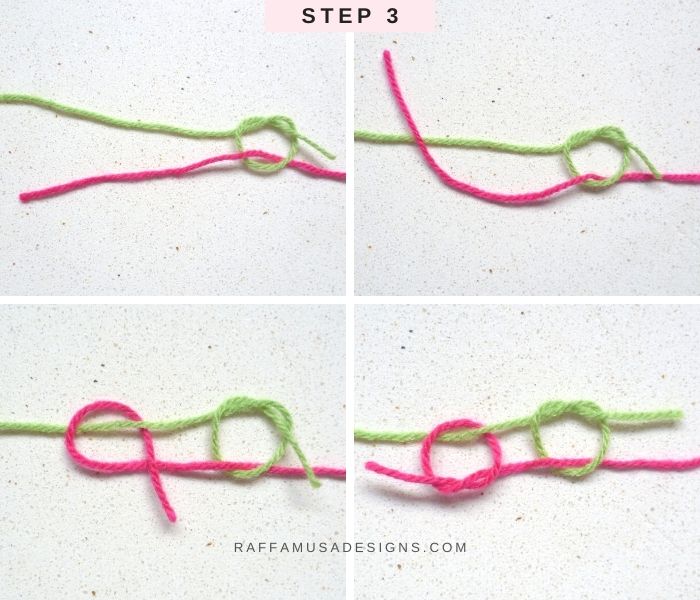
Step 3
Repeat the same instructions as in Steps 1 and 2 for the pink yarn.
In short, bring the pink end over the green yarn, then underneath it, and over the main part of the pink itself. Make a simple knot.
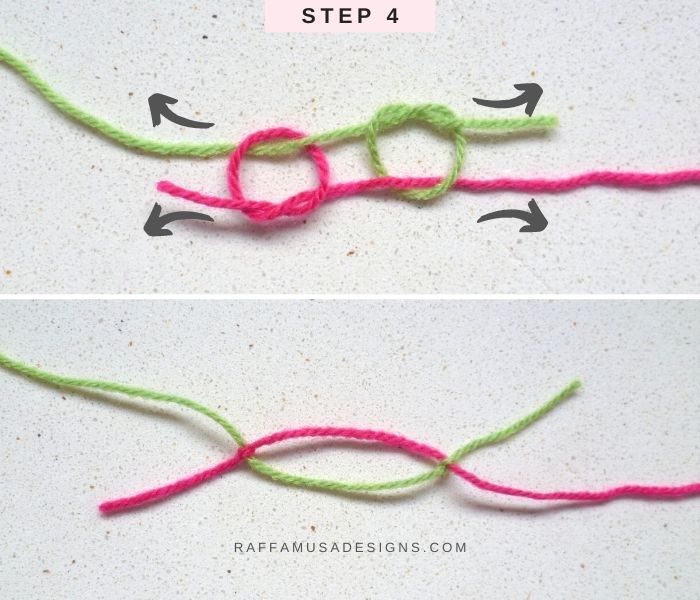
Step 4
Carefully pull the yarn from all four ends as shown by the arrows in the figure below. It is useful to tighten the knots a little bit before pulling them in order not to unfold them.
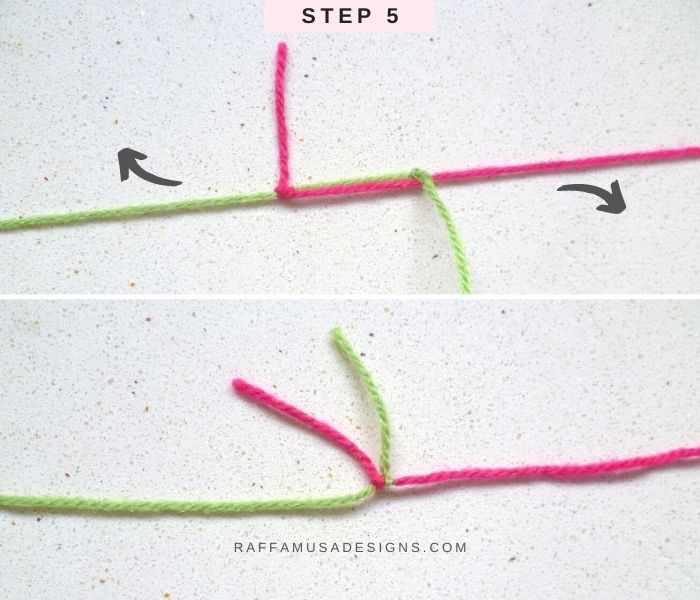
Step 5
Pull the yarn so that the knots slide toward each other. Pull the knots tightly in order to secure them and cut the extra tails.
You have successfully learned how to join your yarn with the magic knot!
I hope you enjoyed this tutorial. Please, do not hesitate to contact me if you need any help or support. I am looking forward to hearing from you on Facebook and Instagram!
Learn new techniques with these blog posts…
Thanks so much for this amazing tip. I just knot my ends and then it becomes too bulky. This will be wonderful for my thread ends😊
God bless you and a BIG thanks! ❤
You’re welcome 😊
This is not a magic knot. Magic knot must pass the yarn under both, back over then through loop.
Hello Shona,
It would be lovely if you could link to a tutorial that shows how to do it.
I am looking forward to seeing it.
Raffaella
Agreed, Shona. The knot would be much stronger if a “square knot” join were used on both ends.
Does this work for Super Chunky yarn. I am about to embark on two sweaters as presents for my best friend and wondered if this would be the best way to join the yarn as I go.
Hi Carmel,
With super chuncky yarn, you might get quite a big knot, and I guess that’s not ideal for a sweater. If it were for a home decor item or something else, then sure, no problem. But for a chunky sweater it might be best to weave in your ends in a classical way.
Hope this helps!
Good luck with your sweater 🙂
Raffaella
Chunky yarn best use russian join, it hardly seen at all.
Thanks a lot for sharing the best knot in joining yarns….it’s pretty awesome….
This is a common reef knot. Nothing magic about it. Has been in use by the British navy and boy scouts for centuries
Hi Jane, that’s perfectly true but I guess the yarn community knows this knot as the magic knot! That’s why I called it like that 🙂
Magic knot seems fitting to me. Thanks for this sweet tip!
You’re welcome! I’m happy you found it useful 🙂
Wow…call it what you want…it works. Great instructions that were welcomed by more positive than negative comments.
I agree…. Why be so negative ? I find the tip great and magic. And I’m grateful Rafaella spent time to write a long instruction plus made a fabulos video. Thank you very much !! 😍
This was magic to me! I had never used this knot before, but I will from now on. Thanks so much for the excellent pictures and instructions.
Hi Susan, I’m so glad you like this knot!
Very nice, I’ll definitely be using this. Thank you for the wonderful step by step instructions.
Hi Mary, that’s great to hear! Thank you so much for your comment 🙂
Very easy instructions and diagrams. Thank you so much….now I don’t have so much sewing at the end.
I love it. Thank you very much. Only way to go from now on!!!
Huh, tried this knot 3 times, it pulled apart every time. Guess I cut the yarn too close to the knot.
Hi, for sure it’s not ideal to cut the yarn too close to the knot. Moreover, as I mention in the post, I always prefer to leave kind of long ends that I can weave in. Consider this knot as an extra “level of security” 🙂
I love this knot!! It is a game changer for me. I love to knit with different colors and stitches so I will use this all the time!! Thanks so much for your instructions.
Dear Rafamusa,
I loved the knot and the instructions were amazing. Beautiful step by step pictures.
They were perfect.
Please ignore the negative comments I don’t know what gets into people these days. If they don’t find it useful they don’t need to comment.
Thanks again,
Heidi
Hi, thank you so much 🙂
I agree! Been knit crochet over 45 years and always tying my ends and weaving cause I just don’t trust only weaving the ends. I like this!!!! “Thank you”! Rose in NJ.
I have been using this technique for a long time and it has always worked well for me. I recommend it highly. Carol
Used the magic knot to join cotton yarn fot baby blanket I’m knitting. I pulled it tight before I snipped the ends close. Now I’m worried it will unravel and wish I’d left some ends to weave in. Is there any way of reinforcing the knot orcdo I worry too much?
Hi,
Normally, the knot should not come undone. However, I also don’t trust them 100%, so I usually make the knot by leaving long tails so that I can weave them in later.
In your case, if you cut the tails and you’re worried about the knots, I guess the best next solution is to put a very little drop of glue around the knot, just the knot. Some superglue or specific glue for fabric should work fine! Just be careful not to put too much…
Best,
Raffaella
Thank you for the clear instructions!
Could you explain where I do the join when doing colour changes in a c2c graphgan. ?
Many thanks
Hi, sorry for replying late.
I guess that for a C2C graphan, it’s difficult to make the knot exactly where you need to change color. So, I’d still join the new yarn the classical way, so with the last yo of the st and then weaving in ends…