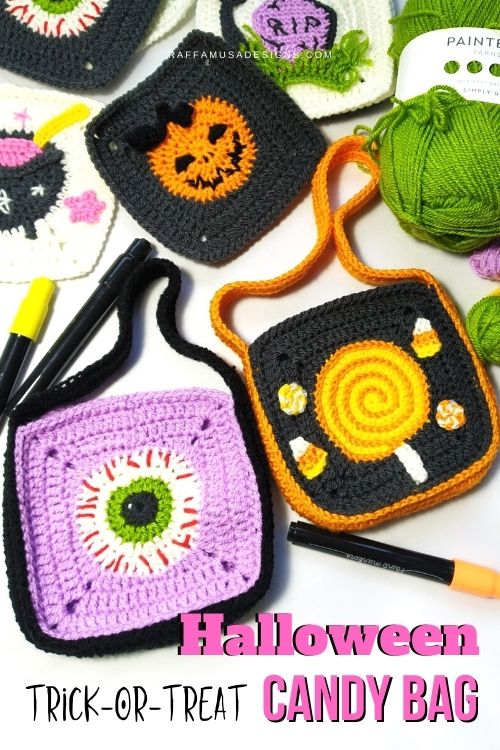
Now that the Granny Squares Halloween CAL is over, it is finally time to put all those granny squares to use! I decided to start with an easy peasy Halloween granny square Trick-or-Treat bag!
We all know that Halloween (and not only Halloween) is going to be quite different this year. I am even wondering if there will be much trick-or-treating at all!
So, why bother with a candy bag?
Well, candies just cannot miss on a Halloween night, no matter what. Especially if you have kids or grandkids.
And you know what they say, presentation is everything!
That’s why an awesome trick-or-treat bag can make the difference between just candies and Halloween fun!
So, let’s make a cute granny square candy bag together!
Note: this post contains affiliate links. This means that if you purchase something through the links on my blog, I might earn a commission. This will not have any effects on the price you pay. For more info, please, see my Privacy Policy.
Get Your Granny Squares Ready
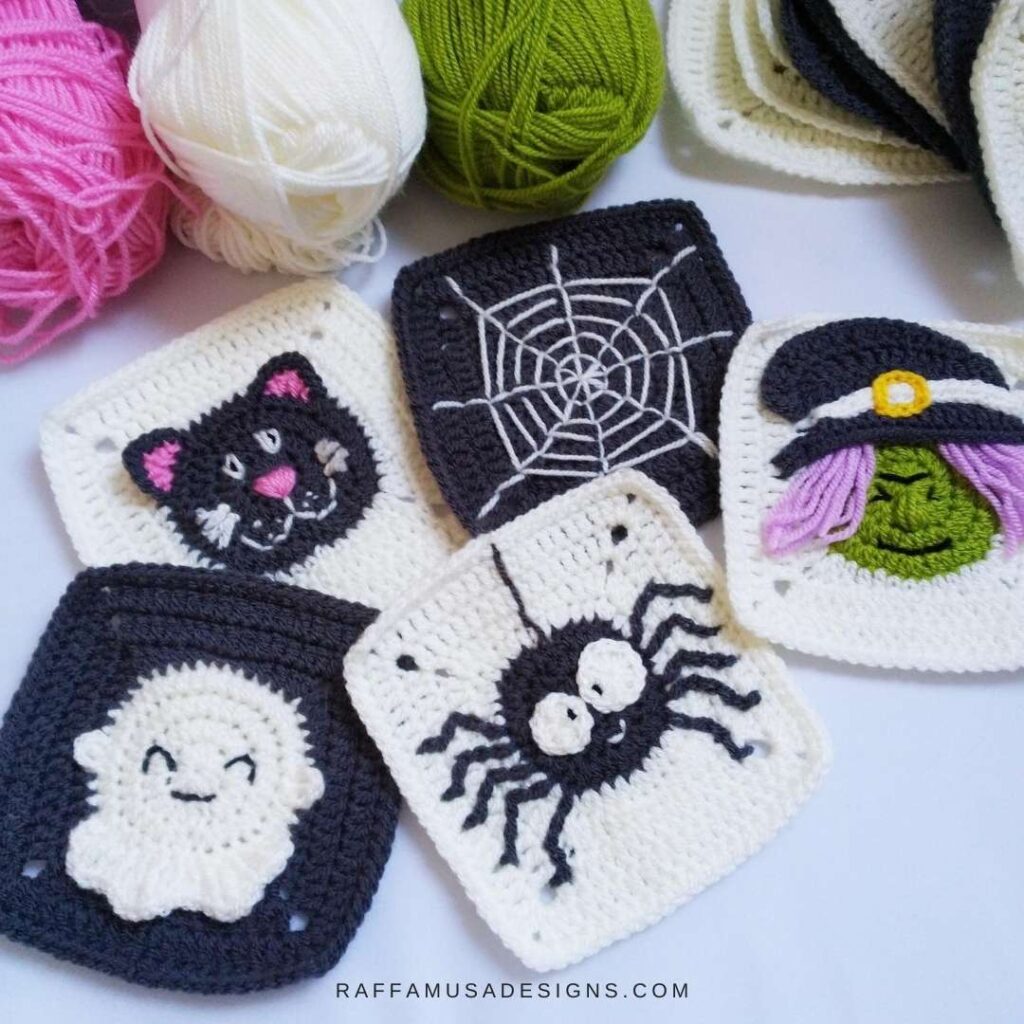
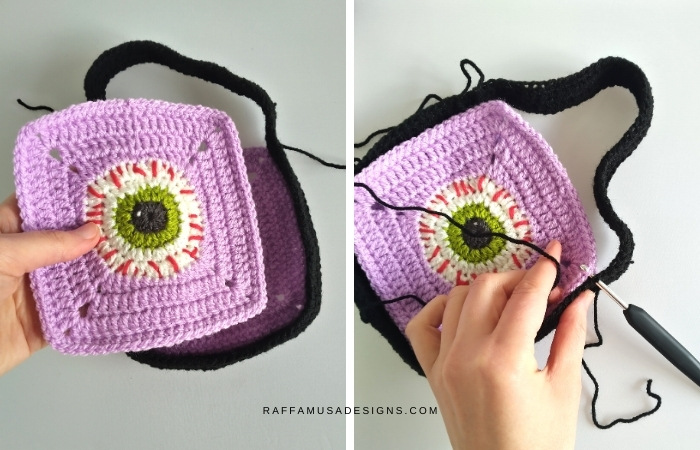
Before we start, make sure to chose two of your favorite squares from the Halloween granny squares collection.
If you have been following the CAL, you should already have quite a few Halloween granny squares that you can choose from.
If you have not been following the CAL, you can still snag a couple of your favorite patterns on Ravelry or LoveCrafts.
Or…
You can purchase the bundle with all 20 Halloween Granny Squares in my LoveCrafts and Etsy stores!
Materials
– Two 5.5″ (14 cm) Halloween or Simple Circle Granny Squares
– 4-mm (G/6 USA, 8 UK) Hook
– Paintbox Yarns Simply DK
– Tapestry Needle
Gauge
Make sure to keep the same gauge as for your granny squares.
Granny Square Bag Tutorial
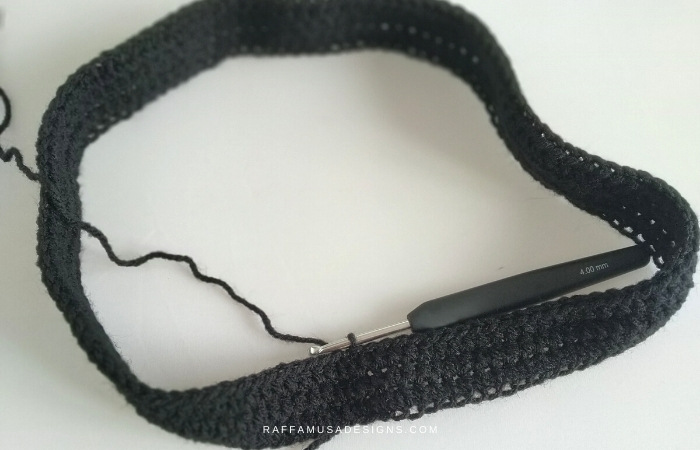
With your 4-mm hook, ch 121.
Little Tip
You can crochet a longer chain to make a cross-candy-bag!
Paying attention not to twist the chain, join it in a circle with a sl st into the first ch.
Round 1. Hdc 1 in the second ch from your hook and in each st around. (120 sts)
Round 2-3. Ch 1, hdc 120. Join the round with a sl st into the first hdc. (120 sts)
Do not bind off.
Join the band that you just crocheted to your first granny square.
Step 1. Place the band on the table with the right side facing out and place your granny square inside the band with the right side facing up. With the last loop of the band still on your hook, insert your hook into the corner of the granny square, yo, and sl st.
Step 2. Insert your hook into the next st on the band and also the following st on the side of the granny square.
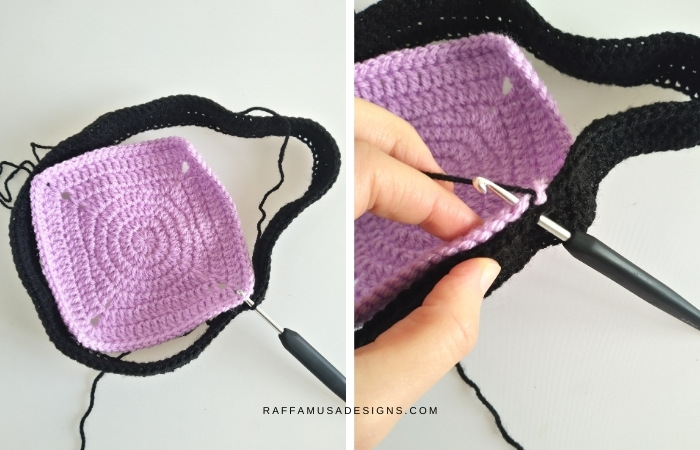
Step 3. Sl st all around until you join three sides of the granny square to your band. Fasten off.
Step 4. Turn your work.
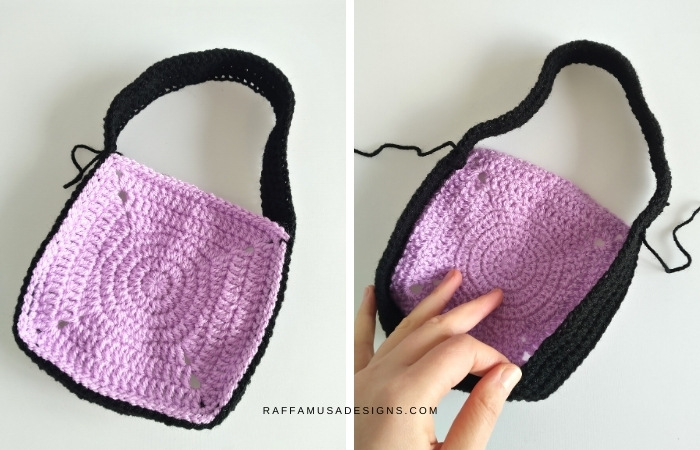
Step 5. Place your second granny square over the first one with the right side facing up.
Step 6. Identify the st on round 1 of the band corresponding to the st on round 3 where you made your last sl st. Join the top corner of your square to that identified st with a sl st.
Step 7. Join the second granny square to the band by sl st all around.
Step 8. Fasten off and weave in all your ends.
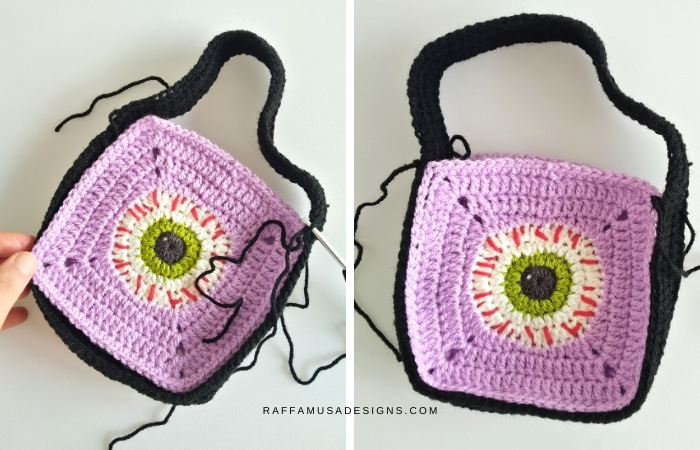
You Halloween granny square Trick-or-Treat bag is ready!
I hope you liked this tutorial and I’d love to see your makes! Please, share your work on Facebook or Instagram using the hashtag #raffamusadesigns
Find more Fall inspiration here!