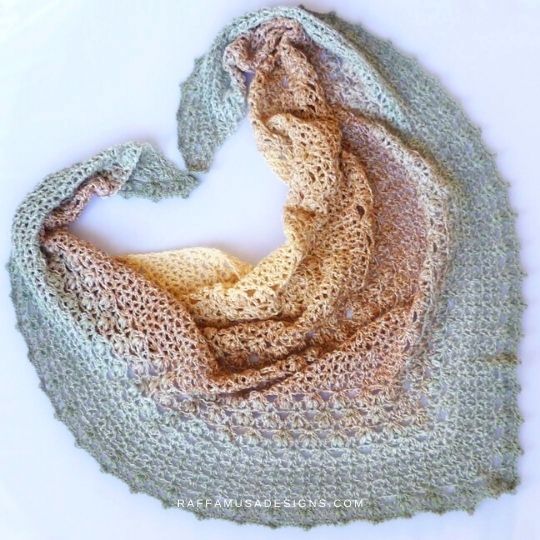
After much frogging and crocheting, I am so happy to present to you the Proserpina V-Stitch Crochet Shawl.
As the name suggests, this shawl is mostly made of V-stitches, so that it is technically very easy and accessible to beginners.
To explain the “Proserpina” bit of the name, I have a much longer story that I will tell you here below.
But let’s say that it all started with the beautiful colors of this Silk Degradé yarn cake kindly provided by Katia Yarns.
Why Proserpina?
The alternation of a warm, prosperous half of the year, think of spring and summer, and a dark, cold half, meaning autumn and winter, has been a long-lasting, mysterious phenomenon for our early civilizations.
If you think of it, how would you explain such a phenomenon if you did not know of the Earth’s rotation around the Sun? So obviously, lots of myths arose everywhere in the world to explain the cycling of the seasons.
One of these myths is the ancient Roman myth of Proserpina, which has fascinated me ever since I first read it in high school.
The Rape of Proserpina
Proserpina was the daughter of Ceres, the Goddess of agriculture, crops, and fertility.
One day, Proserpina was picking up flowers with some nymphs close to a beautiful lake located somewhere in Sicily.
That day, Pluto, the ruler of the underworld, decided to come out of the volcano Etna and take a look at the word above. Of course, he immediately saw Proserpina, fell in love with her, and abducted her to the underworld in order to marry her.
The Despair of Ceres
When Ceres found out about Proserpina’s disappearance, she desperately started looking for her daughter everywhere, in every corner of the world. But despite her efforts, she could not find her anywhere.
For the despair, Ceres stopped the growth of fruit and vegetables on Earth, and humans started suffering for the lack of food.
Ceres eventually asked for Jupiter’s help to convince Pluto to return Proserpina to her. At first, Jupiter refused to help, but given that Ceres was stubborn and was still stopping any crops from growing on Earth, he decided to send Mercury and order Pluto to release Proserpina.
Even though Pluto obeyed the order of Jupiter, he managed to make Proserpina eat some pomegranate seeds. Based on this theft of the pomegranate seeds, Pluto concluded a deal with Jupiter according to which Proserpina would spend four months of the year in the underworld with him. She could spend all the rest of the months together with her mother Ceres on Earth.
The Cycling of the Seasons
So, when Proserpina was with her mother, Ceres was happy and made the crops blossom with flowers. These flowers would go on and flourish in the summer.
Just before Proserpina had to prepare herself to return to the underworld, Ceres would gift her some beautiful autumn colors that were her daughter’s favorite. Then, when Proserpina returned to the underworld with Pluto, Ceres would stop the growth of crops again, and the cold and grey would dominate the entire winter.
I guess that the reason why I have always been fascinated by this myth is that it is a genius and romantic story. Seriously, such a poetic way of explaining the cold and apparent sterility of the earth in the wintertime, and then the richness of spring and summer!
Had I not been aware of certain recent scientific discoveries, I would have totally bought the story of the despair and fury of Ceres!
If you would like to read a way better and more detailed account of the myth of Proserpina, I invite you to visit the Wiki page dedicated to Proserpina.
Now that you know more about the myth of Proserpina, I hope you can also appreciate how the fading of the browns into the greens is a bit like the transformation that happened on earth when Proserpina returned from the underworld.
Enough with the talking, let’s get to the free pattern of the Proserpina V-Stitch Crochet Shawl!
Or Pin the free crochet pattern of the Proserpina V-Stitch Shawl for later using this Pin!

Note: this post contains affiliate links. This means that if you purchase something through the links on my blog, I might earn a commission. This will not have any effect on the price you pay. For more info, please, see my Privacy Policy.
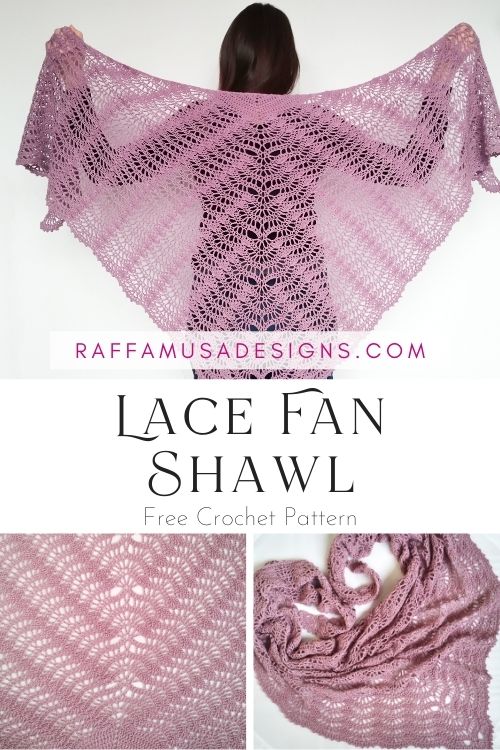
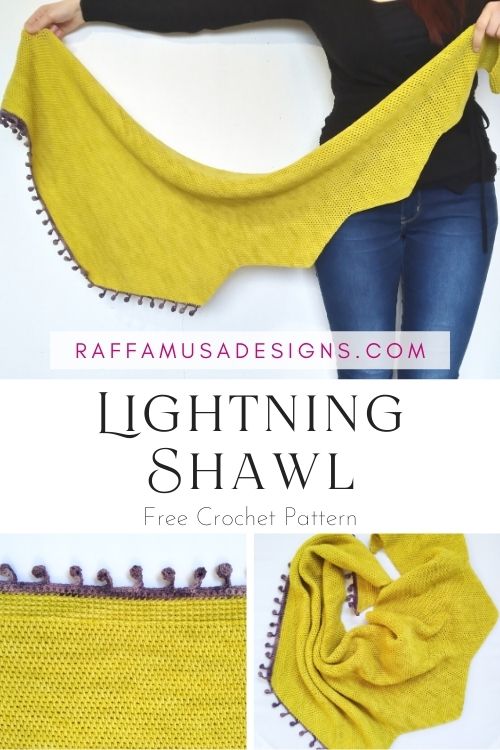
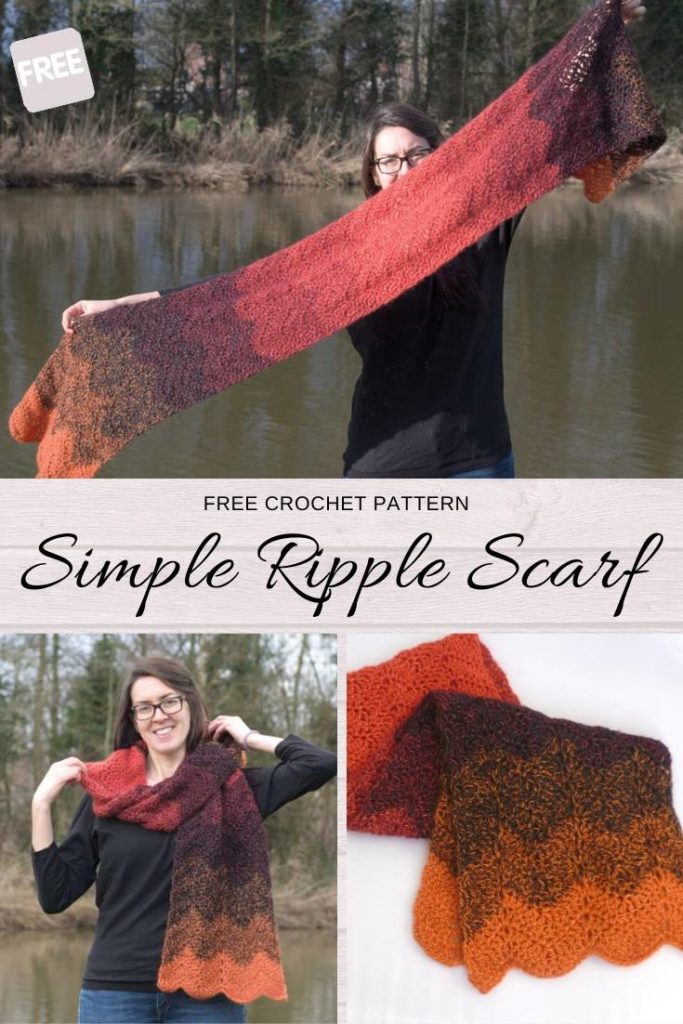
Looking for more shawl inspiration? Check these free patterns!
Ad-Free Downloadable Pattern
The pattern of the Proserpina V-Stitch Shawl is also available as Ad-Free Printable File. Get it in my Ravelry, LoveCrafts, or Etsy stores!


Materials
- 3.5-mm (E-4 USA, 9 UK) Crochet Hook
- One cake (656 yards, 600 m) of Katia Concept Silk Degradé (I used color 302)
- Tapestry Needle
A Special Note About the Yarn
Katia Concept Silk Degradé is classified as a DK (11 wpi) yarn. However, this yarn is more like a fine, fingering yarn!
So, keep it in mind when choosing the yarn for your shawl!
Yarn Substitutions
You can crochet the Proserpina V-Stitch Crochet Shawl with any yarn you like and the appropriate hook.
If you use a much thicker yarn, your shawl is going to grow faster, so you will have to crochet fewer rows than the ones indicated in this pattern.
For example, I crocheted one Proserpina Shawl using a cotton cake in worsted weight and a 5.5 mm crochet hook.
So, the message here is: feel free to choose whatever yarn you like and keep crocheting rows until you reach your desired width!

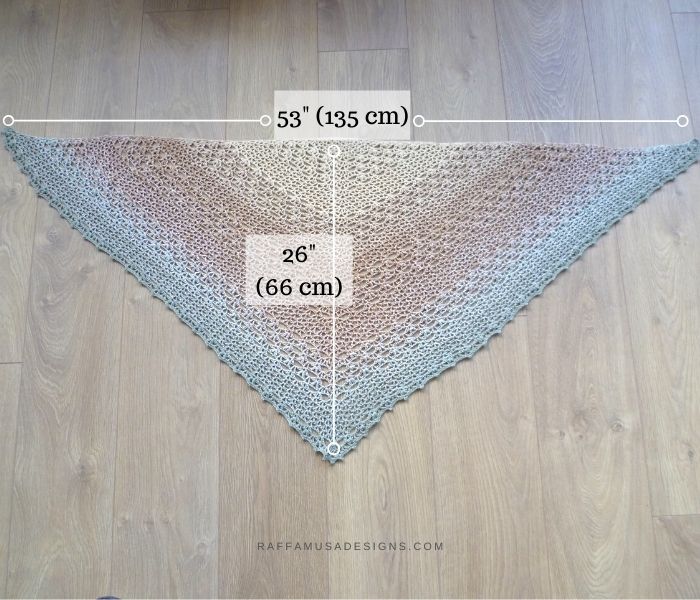
Size
53” (135 cm) in width and 26” (66 cm) in length measured in the middle, so from the center of the long side to the point.
Crochet Abbreviations (US Terms)
Ch – Chain
Ch-Less Dc – Chainless Starting Double Crochet
Dc – Double Crochet
Sc – Single Crochet
Sk – Skip
Sl St – Slip Stitch
St – Stitch
V-St – V-Stitch
V-Puff – V-Puff Stitch
Yo – Yarn Over
Special Stitches
Chainless Starting Double Crochet (Ch-less Dc)
Please, take a look at this step-by-step tutorial on how to crochet the Ch-less Dc.
If you prefer learning from a video, you can check how to make a chainless double crochet on YouTube!
V-Stitch (V-st)
[Dc 1, ch 1, dc 1] in indicated st or ch-1 sp.
See also a step-by-step tutorial on how to crochet the V-Stitch HERE!
V-Puff (V-puff stitch)
(Yo, insert hook indicated st or ch-1 sp and pull up a loop) 3 times. Yo, pull yarn through 6 loops, yo, pull through last two loops.
Ch 1.
(Yo, insert hook indicated st or ch-1 sp and pull up a loop) 3 times. Yo, pull yarn through 6 loops, yo, pull through last two loops.

Picot
Ch 3, sl st into the first ch made.
Gauge
6.5 V-sts for 10 rows in 4” (10 cm).
Pattern Notes
- At the end of each row, you turn your work to crochet the next series of sts.
- Since the number of rows is quite high, I decided not to write detailed instructions for every single row. Instead, I am going to guide you through the first 18 rows and explain the logic behind the pattern.
There are essentially two things to keep in mind.
In order to obtain a flat, long side, it is necessary to alternate a row with one V-st increase at the beginning and one V-st increase at the end, with one row in which there are no increases.
The second essential element is the alternating pattern for the middle point of this triangular shawl. What you have to keep in mind is that whenever you work a row with V-st increases, you will have to work a simple (dc, ch 2, dc) on the tip of the shawl. On the other hand, for every row that does not have V-st increases, the tip of the shawl is worked as a fan of [(dc, ch 1) four times, dc].
All this will become clearer after you start working on your shawl, so I suggest you come back and read this again after you’ve worked a few rows.
Proserpina V-Stitch Crochet Shawl – Pattern
Row 1. Ch 3, (dc in first ch, ch 1) 4 times, make 2 more dc in the first ch.
Row 2. Ch-less dc, V-st in the space between the first two dc from the previous row.
This first V-st corresponds to an increase.
V-st in the first ch-1 space, sk 1 dc, (dc, ch 2, dc) into the next dc, sk the next ch-1 space, V-st into the next ch-1 space.
Like at the beginning of the row, we’ll now work another increase by making a V-st in the space between the last dc and the initial ch-3.
Complete the row with a dc in the third ch of the initial ch-3.
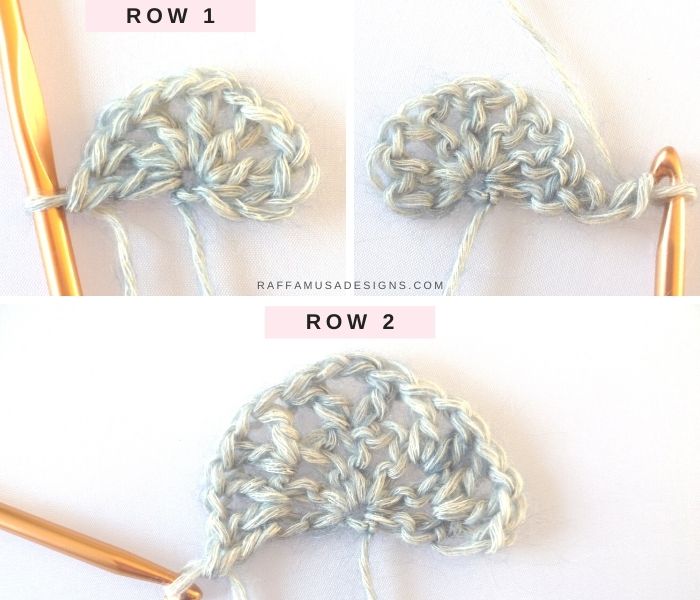
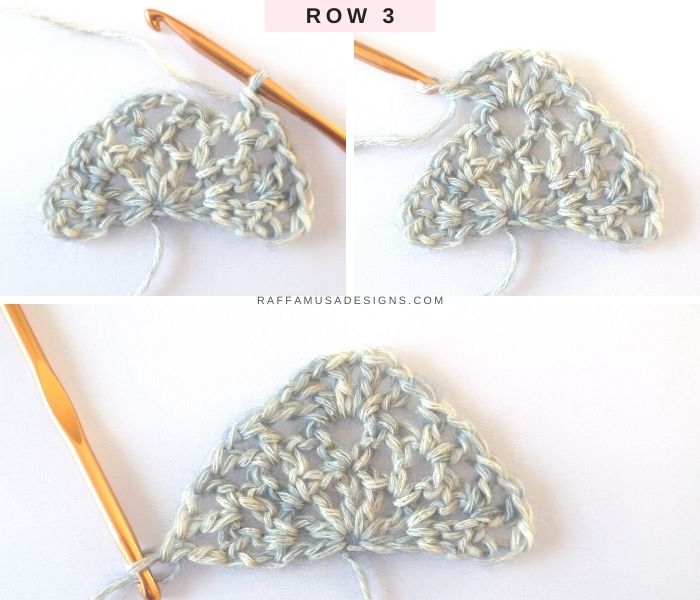
Row 3
In the next row, we will not increase at the beginning and at the end, but we will add the fan variation at the tip of the shawl.
Row 3. Ch-less dc, V-st into the first two V-sts from the previous row, [(dc, ch 1) four times, and dc] in the next ch-2 space, V-st into the next two V-sts, dc in the last st.
Row 4
In the next row, we will again increase the number of V-sts per side and will work a larger, 2-ch-V-st at the tip of the shawl.
Row 4. Ch-less dc, V-st in between the first dc and the first V-st, V-st in the next two V-sts, V-st into the next ch-1 space. Notice how you are now working a V-st in the first “V-st” of the fan.
Sk the next dc and ch-1 space, (dc, ch 2, dc) into the next dc, sk the next ch-1 space and dc, V-st in the next ch-1 space, V-st into the next two V-sts, V-st in the space between the last V-st and the last ch-less dc, dc in the last ch-less dc.

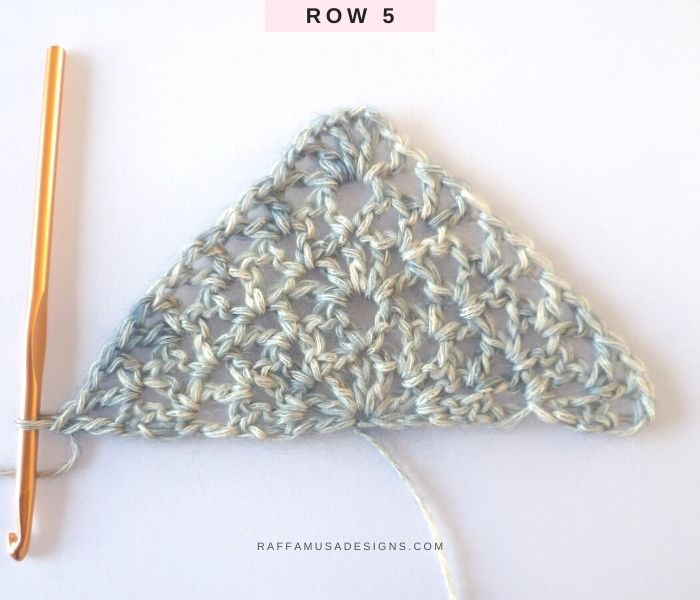
Row 5
This next row will be another one without increases on the flat side of the shawl and with the fan worked into the top ch-2 V-st.
Row 5. Ch-less dc, V-st into the first 4 V-sts, [(dc, ch 1) four times and dc] in the ch-2 space, V-st into the next 4 V-sts, dc in the last st.
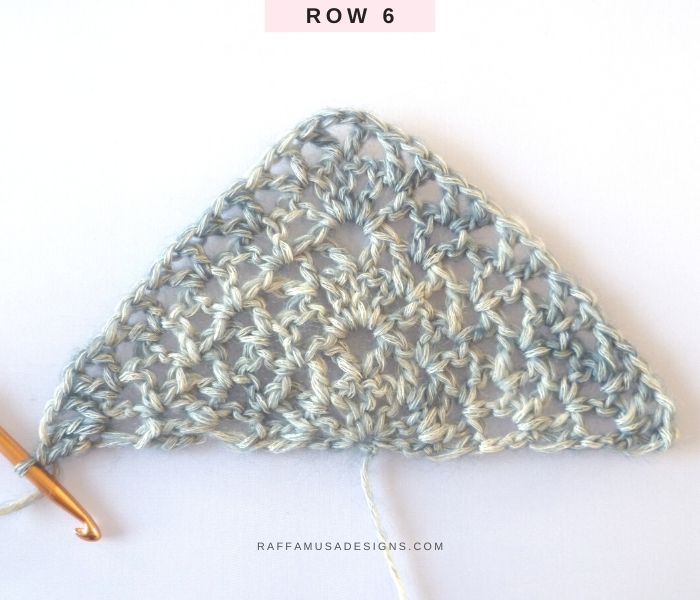
Row 6
Row 6. Ch-less dc, V-st in between the first dc and the first V-st, V-st in the next 4 V-sts, V-st into the next ch-1 space, sk next dc and ch-1 space, (dc, Ch 2, dc) into the next dc, sk next ch-1 space and dc, V-st in next ch-1 space, V-st into the next 4 V-sts, V-st in the space between the last V-st and the last ch-less dc, dc in the last ch-less dc.
Spring Section
In this section, we introduce the shell and V-puff stitches variation that is going to give a more flowery and spring look to our Proserpina V-Stitch Crochet Shawl.
The logic of the increases remains the same. So, in the next row, there will be no increases on the flat side of the shawl and the point of the shawl is going to be worked as a fan.
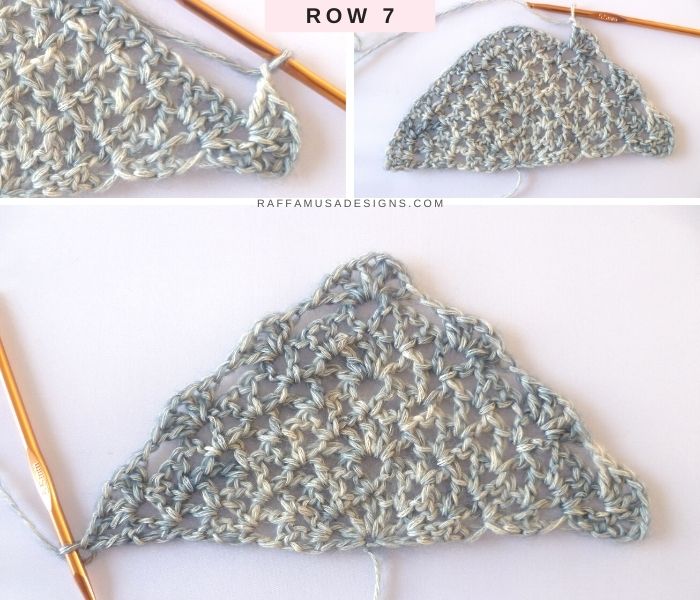
Row 7
Ch-less dc, *(2 dc, ch 1, 2 dc) in the first V-st, ch 1, sk next V-st. Repeat from * other two times. [(Dc, ch 1) four times, dc] in the next ch-2 space, *ch 1, sk next V-st, (2 dc, ch 1, 2 dc) in the next V-st. Repeat from * other two times. (2 dc, ch 1, 2 dc) in the last V-st, dc in the last ch-less dc.
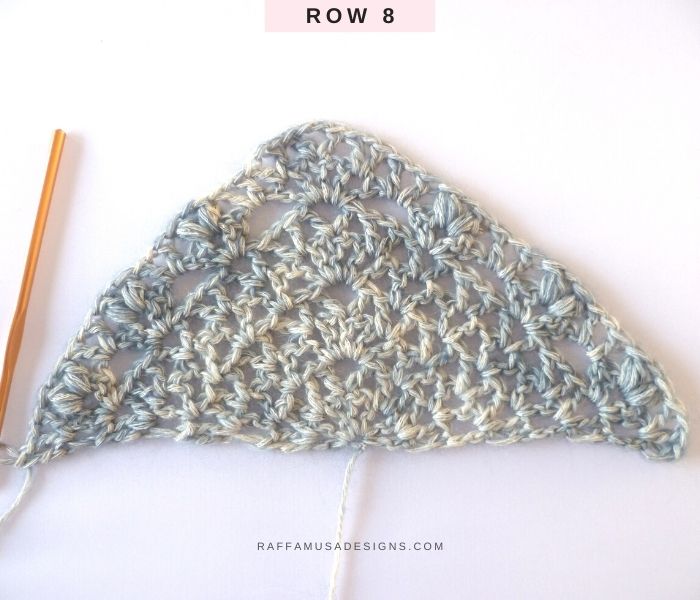
Row 8
This next row is basically a simple V-st row with a V-st increase at the beginning and at the end. However, instead of working all regular V-sts, we will alternate them with V-puff sts.
Take a look at the Special Stitches section to learn how to make a V-puff st.
Row 8. Ch-less dc, V-st in between the first dc and the first 2-dc cluster, (V-puff in the next ch-1 space, V-st in the next ch-1 space) three times, V-st in next ch-1 space, sk next dc and ch-1 space, (dc, ch 2, dc) in next dc, sk next ch-1 space and dc, V-st in next ch space, (V-st in next ch space, V-puff in next ch-1 space) three times, V-st in between last 2-dc cluster and last dc, dc in the last st.
General Pattern Rules
- Notice how you have 2 V-sts right before the large, ch-2-V-st at the tip of the shawl, and 2 V-sts right after.
- Also, notice how the two V-sts before and after the large, ch-2-V-st at the tip are worked in the first and last spaces of the fan from the previous row.
From now on, we will repeat rows 7 and 8 two more times, with the appropriate increases.
Row 9
Ch-less dc, *(2 dc, ch 1, 2 dc) in the first V-st, ch 1, sk next V-puff. Repeat from * other three times. [(Dc, ch 1) four times, dc] in the next ch-2 space, *ch 1, sk next V-puff, (2 dc, ch 1, 2 dc) in the next V-st. Repeat from * other three times. (2 dc, ch 1, 2 dc) in the last V-st, dc in the last ch-less dc.
Row 10
Ch-less dc, V-st in between the first dc and the first 2-dc cluster, (V-puff in the next ch-1 space, V-st in the next ch-1 space) four times, V-st in next ch-1 space, sk next dc and ch-1 space, (dc, ch 2, dc) in next dc, sk next ch-1 space and dc, V-st in next ch space, (V-st in next ch space, V-puff in next ch-1 space) four times, V-st in between last 2-dc cluster and last dc, dc in the last st.
Row 11
Ch-less dc, *(2 dc, ch 1, 2 dc) in the first V-st, ch 1, sk next V-puff. Repeat from * other four times. [(Dc, ch 1) four times, dc] in the next ch-2 space, *ch 1, sk next V-puff, (2 dc, ch 1, 2 dc) in the next V-st. Repeat from * other four times. (2 dc, ch 1, 2 dc) in the last V-st, dc in the last ch-less dc.
Row 12
Ch-less dc, V-st in between the first dc and the first 2-dc cluster, (V-puff in the next ch-1 space, V-st in the next ch-1 space) five times, V-st in next ch-1 space, sk next dc and ch-1 space, (dc, ch 2, dc) in next dc, sk next ch-1 space and dc, V-st in next ch space, (V-st in next ch space, V-puff in next ch-1 space) five times, V-st in between last 2-dc cluster and last dc, dc in the last st.
Row 13
To complete the Spring section, we will now work one more row like row 7 ( or 9 and 11).
Row 13. Ch-less dc, *(2 dc, ch 1, 2 dc) in the first V-st, ch 1, sk next V-puff. Repeat from * other five times. [(Dc, ch 1) four times, dc] in the next ch-2 space, *ch 1, sk next V-puff, (2 dc, ch 1, 2 dc) in the next V-st. Repeat from * other five times. (2 dc, ch 1, 2 dc) in the last V-st, dc in the last ch-less dc.
V-Stitches Again
The next 5 rows are worked with only V-stitches.
Row 14. Ch-less dc, V-st increase by making a V-st in the space between the first st and the first ch-2 cluster. Keep working V-sts in each ch-1 space. Work a V-st in the first ch-1 space of the top fan. Sk the next dc and ch-1 space, make a (dc, ch 2, dc) into the next dc of the fan. Sk the next ch-1 space and dc, make a V-st into the next ch-1 space. Work a V-st into each of the next ch-1 spaces. Make one last V-st into the space between the last 2-dc cluster and the last st. Dc in the last ch-less dc.
Row 15-18. Work rows analogous to rows 3 and 4 twice.
Keep Stitching…
Repeat the Spring Section and the V-Stitch Section other three times.
In other words, apply the same logic that we used so far to grow your shawl until you reach row 54.
To work all the remaining rows of your shawl, you can now apply the same rules that you have been using so far. To recap them very briefly:
- Alternate a row without V-st increases at the beginning and at the end with rows with V-st increases.
- At the tip of your shawl, alternate rows with large, ch-2-V-sts with rows with a fan worked in the ch-2 space from the previous row.
- Whenever you’re crocheting a row with V-st increases at the beginning and at the end, remember that the tip of the shawl has to be one large, ch-2-V-st worked on top of the third dc of the fan from the previous row.
- For all the rows without V-st increases at the beginning and at the end, the tip is going to be a fan worked in the ch-2 space of the ch-2-V-st from the previous row.
At this point, I also suggest you go back and read the Pattern Notes again.
Adapting the Pattern for Thicker Yarn
If you are working with a much thicker yarn than fingering weight, you might want to repeat the Spring and V-Stitch sections only twice, or maybe decrease the number of rows of the last section.
Just keep in mind that before moving on to the border, you should have one row similar to row 4, which is a row with V-st increases at the beginning and at the end.
Add a Border to your Proserpina V-Stitch Crochet Shawl
Crochet one row like row 7 and one more row like row 8.
Ch 1, sc in the very first st, *ch 1, sc in the ch-1 space of the first V, ch 1, sc in the space between the V-st and the V-puff, ch 1, (1 sc, 1 picot, 1 sc) in the ch-1 space of the next V-puff, ch 1, sc in the space between the V-puff and the following V-st.
Repeat from * 26 times. Repeat from * once more but this time crochet the (sc, picot, sc) in the ch-1 space of the second V-st, and the last sc in the space between the last V-st of the side and the turning, larger V-st. Ch 1, (1 sc, 1 picot, 1 sc) in the next ch-2 space, ch 1, sc in the space between the turning V-st the next V-st.
Ch 1, (sc, picot, sc) into the ch-1 space of the next V-st, ch 1, sc in the space between V-sts, ch 1, sc in the ch-1 space of the next V-st, *ch 1, sc in the space between the V-st and the next V-puff, ch 1, (1 sc, 1 picot, 1 sc) in the ch-1 space of the next V-puff, ch 1, sc in the space between the V-puff and the following V-st, ch 1, sc in the ch-1 space of the next V-st. Repeat from * other 25 times.
Ch 1, sc in the space between the V-st and the next V-puff, ch 1, (1 sc, 1 picot, 1 sc) in the ch-1 space of the next V-puff, ch 1, sc in the space between the V-puff and the following V-st, ch 1, sc in the ch-1 space of the next V-st, ch 1, sc in the last st.
Fasten off and weave in your ends.
Your Proserpina V-Stitch Crochet Shawl is ready!
I hope you enjoyed crocheting the Proserpina V-Stitch Crochet Shawl. Please, do not hesitate to contact me if you need any help or support. I am looking forward to seeing all your beautiful makes on Facebook and Instagram!

Raffa, that shawl is really lovely ! But ..
I have just (last night) finished crocheting a V-stitch cardigan; so another project of that stitch is out of the question for about an eon.
You ARE clever !
Ahahah yes, I understand. Once I crocheted a cowl and then a scarf both with the hdc in the third loop. I haven’t done hdc in the third loop since then 😅
Precisely. I shall now take need re that stitch ! [grin]
The shawl is beautiful. It will make a wonderful mother’s day gift. thank you for sharing. I will definitely make it and read the story about Proserpina.
That’s great to hear, looking forward to seeing your shawl 🙂
Hello, Rafaella! I love this shawl and now, I’m crocheting it. But the edges of my shawl didn’t form a regular triangle. I started 3 times and every time it formed rader something like a kite… (sorry for my english) so I modified the pattern of v-stitch section. I added some inscreases and I think it’s better like that. Maybe I made somthing wrong… I don’t know… thank you anyway for this pattern! 🙂
Hi Joanna, one of my testers had the same problem but it turned out that she was missing some stitches. Would you mind sending me a picture via e-mail so that I can try to understand what’s the problem and help you out? You can contact me at [email protected]
I have to write that this shawl is really beautiful and finally I crocheted it without changing the pattern 🙂 Just I had to do it very loose 🙂
Hi, I had the same problem with mine. I will also send you a picture. Thanks
Hi Anita, sure, send me a picture via email. In general, unless you missed some stitches, the reason for the fan shape might be a tight tension. So, to solve the problem you might want to try and use a larger hook size. But we can look at your stitches together if you drop me an email
Beautiful!! Thanks for the pattern and naming it after a myth. Totally smiling 😀
You’re welcome! I’m glad you liked the myth that inspired it 😊
I am reviewing the stitches to make sure I understanding everything before starting out on this gorgeous shawl. I’m not sure I understand why step 6 in your instructions for the Chainless Starting Double Crochet seems to be going wrong for me. You say to pull through 1 but that leaves me with 2 loops on my hook before starting the next stitch. Am I misunderstanding a step? (I was hoping the video would clarify, but my internet connection is horribly slow and videos just keep buffering – sorry!)
Thanks for any help and thank you for this lovely pattern!
Hi Bev,
Thank you for your comment. You’re totally right! Step 6 should be “pull through 2”. I’ll correct that immediately 🙂
Sincerely,
Raffaella
Hi
Love your patterns
i would like to pass on 2 tips they given to me many years ago (in late 60’s) when i was just starting with my hook and yarn
first tip
use tails cut finished projects in place of a stitch marker a must if working with fine yarns the work is not pulled with the weight of the marker waste yarn can be used many times
i unravel thick waste yarn also use yarn you can see clearly when working
second tip
this i use then i want photograph shawls
run a length of yarn along the top of shawl leavening extra each end to tie to peg
best yarn to use would be same as shawl if run out use yarn you will not see in picture (i take several pic’s before the final one)
the yarn will take the weight of the shawl with out the worry of misshaping
it can be pegged (don’t forget to tie ends to end pegs) to a drying line and you will have a straight line on the top
Hi Jackie,
Thank you for your suggestions. I loved both tips, and I am definitely going to try!
Thank you so much again for sharing them with me and the other readers 🙂
Raffaella
Hi. It looks a lovely pattern, but I seem to be having the same problem as some others in that it will not lay flat, nor is it straight along the top edge.
I have checked the number of stitches per row according to the pattern and they seem to be:
Row 1 = 11
Row2 = 18
Row 3 = 24
Row 4 = 30
From row 2 on it appears to be an increase of 6 per row. My understanding is for an item to lay flat the increases should be the same as the number of stitches in the 1st row. This means that the following rows are 5 stitches short or the 1st row is 5 too many.
Hi,
I am not sure about the rule you mention for increasing.
However, one thing that I can say is that this shawl is supposed to be worked with a very loose tension. So, going up a hook size might be the solution to your problem. At least, this was the thing that solved the issue for some other crocheters.
Let me if it also works for you 🙂
Thanks for the effort of sharing , the pattern is not clear , many inconsistencies, hope u can work on improving it.
Hi Shadin, may I ask you what exactly you find unclear and inconsistent? I would really appreciate your suggestions on what needs to be improved 🙂