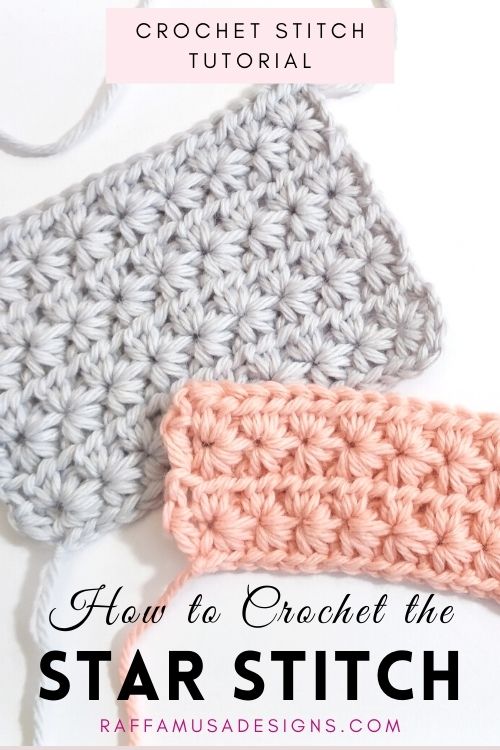
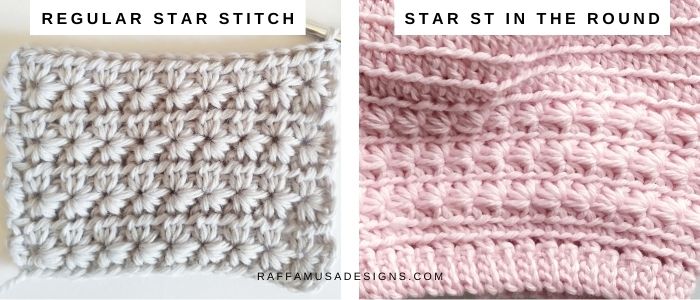
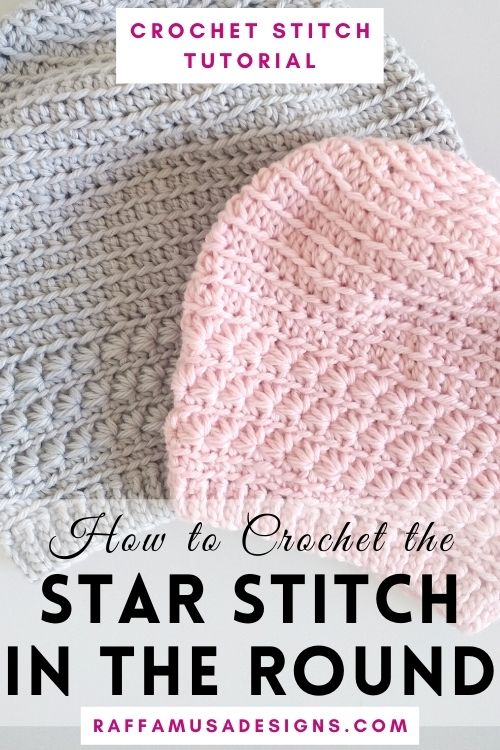
The star stitch (or daisy or marguerite stitch) is one of my favorite closed stitches to add texture to a warm winter project. Last week, I shared with you how to crochet the star stitch when working on flat projects. Today, I’m sharing a little variation, the star stitch worked in the round.
The star stitch that I am showing you here is different from the regular star stitch not only because it is worked in the round.
One major difference is the second round of the 2-round repeat, which is done in single crochet instead of the regular half double crochet.
The reason behind the use of single crochet instead of half double crochet is that the first round is worked in the back loop only! Crocheting the stars in the back loop only creates the same effect as working the regular star stitch.
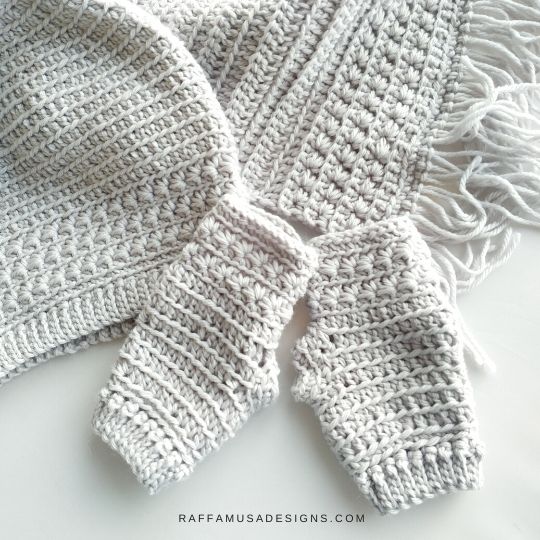
I first used this variation of the star stitch in the round when I made my Star Stitch Beanie, and then used it for the matching Star Stitch Fingerless Gloves.
Both the beanie and the gloves are graded for a wide range of sizes, so I am sure you’ll find something to fit you!
So, if you’re looking for a simple project to practice the star stitch in the round or flat, make sure to check these posts:
Pin the free tutorial of the star stitch in the round to your Pinterest crochet board!
Note: this post contains affiliate links. This means that if you purchase something through the links on my blog, I might earn a commission. This will not have any effect on the price you pay. For more info, please, see my Privacy Policy.
MATERIALS
- Aran Weight Yarn. I used Paintbox Yarns Wool Mix Aran in Blush Pink (853)
- 5.5 mm (I/9 US, 5 UK) Crochet Hook
ABBREVIATIONS (US TERMS)
Ch – Chain
Hdc – Half Double Crochet
Sc – Single Crochet
St – Stitch
Yo – Yarn Over
How to Crochet the Star Stitch in the round – Step-by-Step tutorial
Round 1
This photo tutorial will guide you step-by-step on how to crochet the star stitch when working in the round either in sc or hdc!
Remember to work all the sts of this round in the BLO!
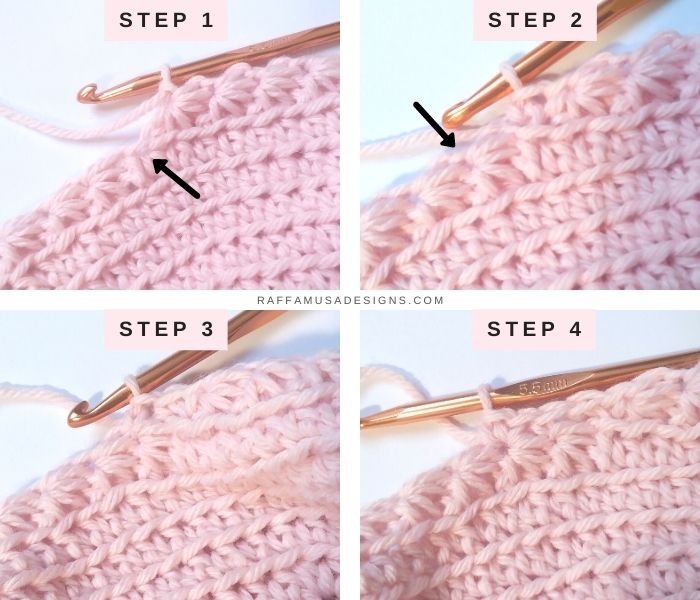
Step 1. (Right side facing) This is how your work looks like right before starting the Star Stitch Section. The photos here show hdc sts but the tutorial is still valid if you’re working in sc.
Step 2. Ch 1.
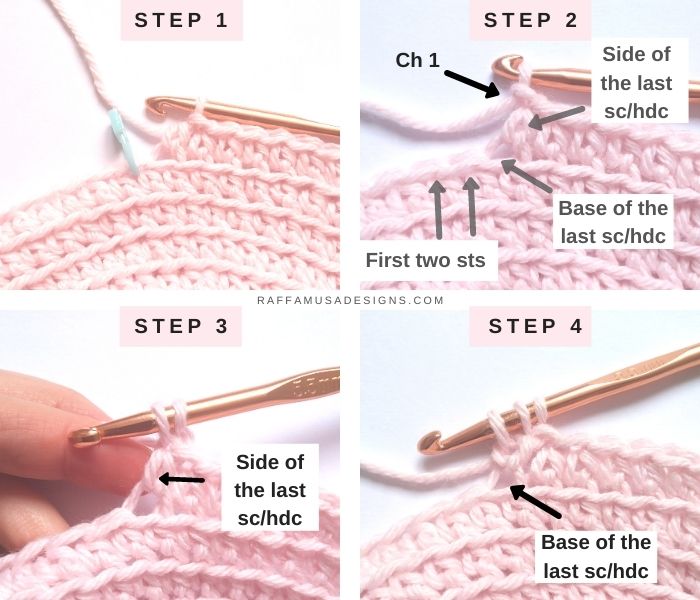
Take a second to study the anatomy of the stitches in which you are going to work your first star.
- The back bump of the ch you just made.
- The side and base of the last st of the previous round.
- The first two sts of the previous round.
Step 3. Insert your hook into the back bump of the ch you just made, yo, and pick up a loop. (2 loops on your hook)
Step 4. Pick up a loop on the side of the last sc you worked. (3 loops on your hook)
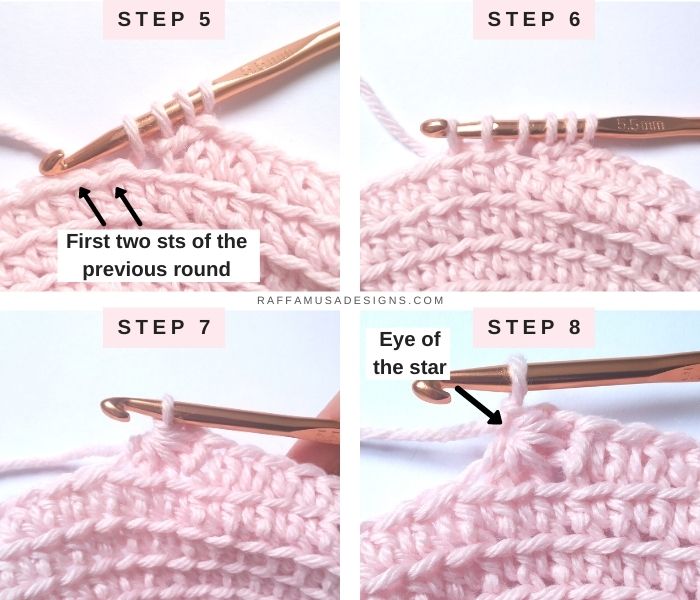
Step 5. Insert your hook into the BLO of the st where you worked your last sc. Yo and pick up a loop. (4 loops on your hook)
Step 6. Pick up a loop in the BLO on the next two sc (the first two sts of the previous round) (6 loops on your hook)
Step 7. Yo and pull yarn through all six loops on your hook.
Step 8. Ch 1 to make the “eye” of your star.
The next star is going to be worked in a similar way as the first star but this time, you do not have a sc as first st. Instead, you have the star you just worked!
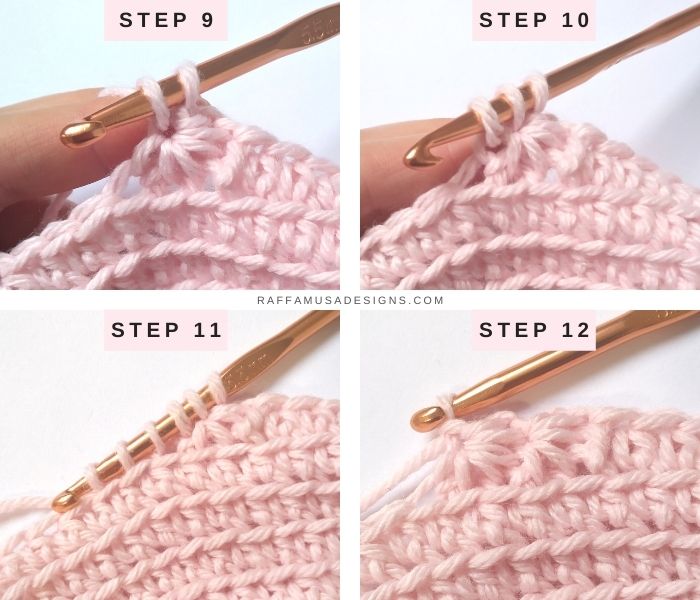
Step 9. Pick up your first loop in the eye of the previous star.
Step 10. Pick up a loop on the last leg of the star. (3 loops on your hook)
Step 11. Pick up a loop in the BLO of the last st where you worked your previous star, and in the next two sts. (6 loops on your hook)
Step 12. Yo and draw yarn through all six loops on your hook. Ch 1 to complete your star.
Star Stitch – Round 2
The sts of round 2 are worked normally (not in the BLO)!
Step 1. This is how your work looks at the end of the first round of the Star Stitch Section.
Step 2. Sc 1 in the ch-1 that you had made at the beginning of the first round.
Step 3. Sc 1 in the eye of the first star.
Step 4. Make 2 sc in the eye of each of the next stars.
YOU LEARNED how TO CROCHET THE STAR STITCH in the round!
I hope you enjoyed this free stitch tutorial!
Don’t forget to show me your star stitch projects on Facebook and Instagram using the hashtag #raffamusadesigns
Find more tips-and-tricks and crochet tutorials here!