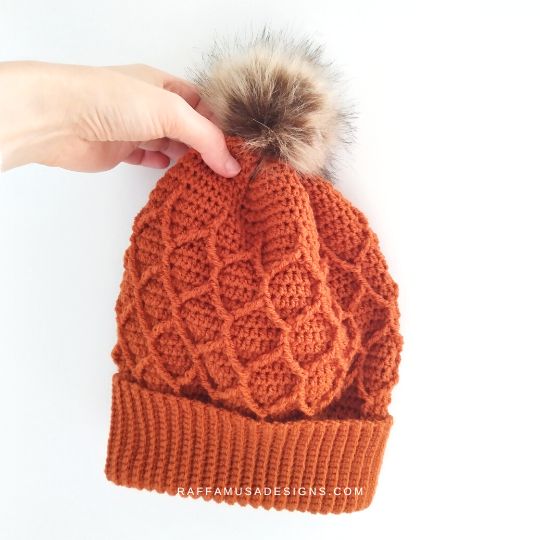
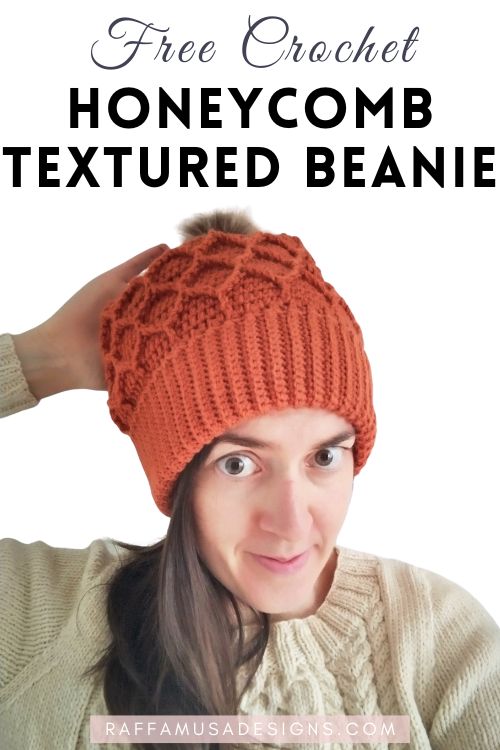
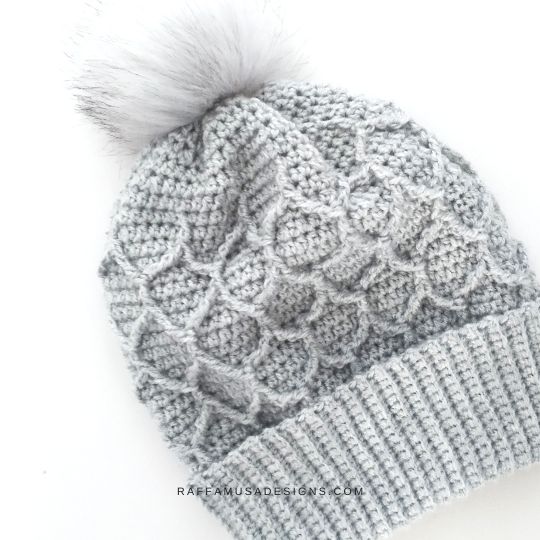
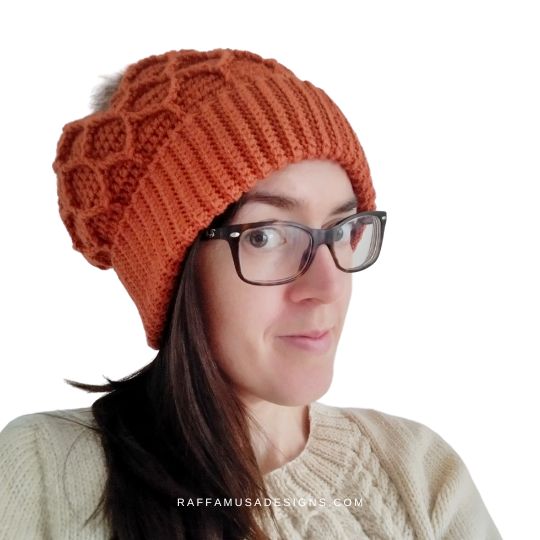
The crochet Honeycomb Beanie is a warm and soft hat with a double-folded brim, a beautiful texture, and a pompom!
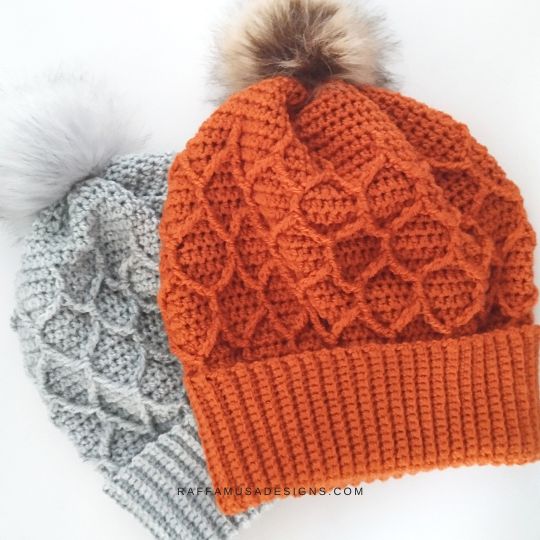
For this pattern, I used the Honeycomb Textured Stitch with a few modifications to make the pattern work in the round.
The Honeycomb stitch works beautifully for winter accessories because it creates a solid but very soft fabric!
The pattern comes in 3 sizes: Teen/Adult S, Adult M, and Adult L.
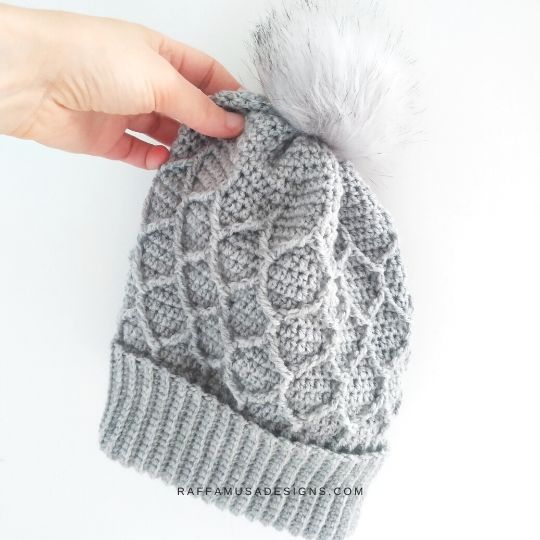
I crocheted my honeycomb beanies with the super soft Hobbii Amigo in Light Gray Melange and Rust, which I was lucky enough to yarn-sample.
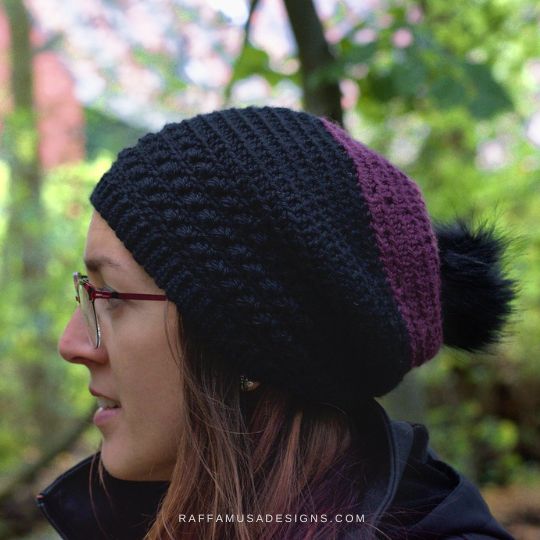
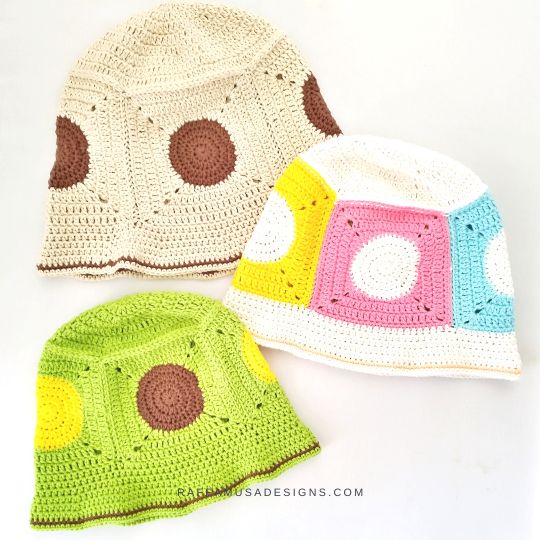
Find more hats and accessories here on the blog…
Add this pattern to your Ravelry queue HERE and favorite it (– thank you!). Or save it for later by pinning it to your favorite crochet board on Pinterest using this pin!
Note: this post contains affiliate links. If you purchase something through the links on my blog, I might earn a commission. This will not have any effect on the price you pay. For more info, please, see my Privacy Policy.
Warm My Heart Blog Hop & Pattern Bundle
The pattern of the Honeycomb Beanie is part of the Warm my Heart Blog Hop & Bundle.
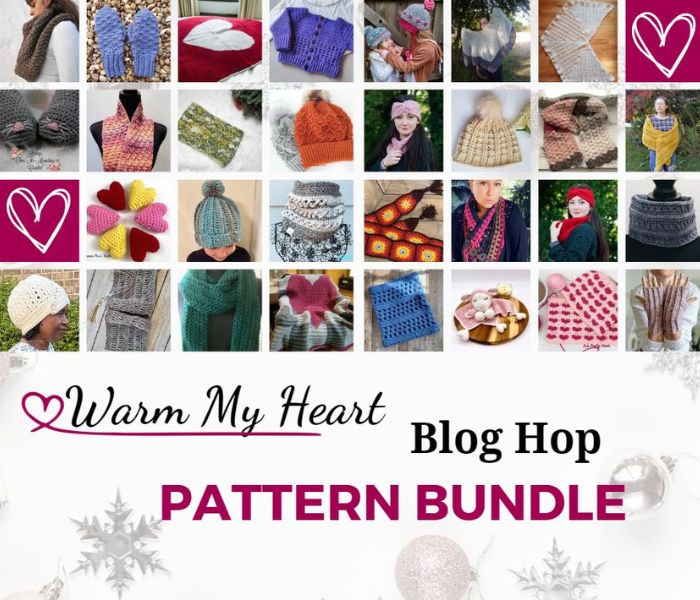
The Warm my Heart blog hop & Bundle is all about cozy patterns to keep you warm during the cold months.
Warm my Heart Bundle
Wanna start crocheting right away?! Get the Warm my Heart Bundle HERE with 30 beautiful patterns just for you.
Take a look at all the patterns included in the bundle HERE and see if this bundle is right for you!
Join the blog hop
Or join the blog hop HERE!
Make sure to note down the special coupon code that you’ll need to get the featured pattern on Ravelry.
AD-FREE PRINTABLE PATTERN
The ad-free, printable PDF crochet pattern of the Honeycomb Textured Beanie is available in all my online shops. Get your copy on Ravelry, LoveCrafts, or Etsy!


Materials
- 3.5-mm (E/4 US, 9 UK) Crochet Hook
- 4.5-mm (7 US, 7 UK) Crochet Hook
- DK (3, Light) Yarn
- Tapestry Needle
- One pompom
Yarn
I used Hobbii Amigo (191 yds (175 m) per 50 g).
Feel free to use any yarn that meets the gauge.
Size & Yardage
The pattern is written for sizes Adult S (Adult M, Adult L).
| SIZE | HEAD CIRCUMFERENCE | YARDAGE |
|---|---|---|
| Teen/Adult S | 21″ (53 cm) | 273 yds, 250 m |
| Adult M | 22″ (56 cm) | 306 yds, 280 m |
| Adult L | 23″ (59 cm) | 350 yds, 320 m |
Gauge
21 BLO sc for 22 rows in 4″ (10 cm)
Abbreviations (US Terms)
- BLO – Back Loop Only
- Ch – Chain
- Dc – Double Crochet
- Dec – Decrease
- FPdtr2tog – Front Post Double Treble Two Together
- FPtr – Front Post Treble Crochet
- Hdc – Half Double Crochet
- Sc – Single Crochet
- Sk – Skip
- Sl St – Slip Stitch
- St – Stitch
- Tr – Treble Crochet
- Yo – Yarn over
Special Stitches
Back Loop Only (BLO)
Learn about crocheting in the BLO HERE.
Decrease (Dec)
One decrease consists of 2 sts worked together. To make a hdc dec:
Yo, insert hook in indicated st, yo, and pull up a loop (3 loops on the hook), yo, insert hook into next st, yo, and pull up a loop (5 loops on the hook). Yo, and pull through all 5 loops.
Front Post (FP) Stitches
Learn how to crochet in the front post HERE.
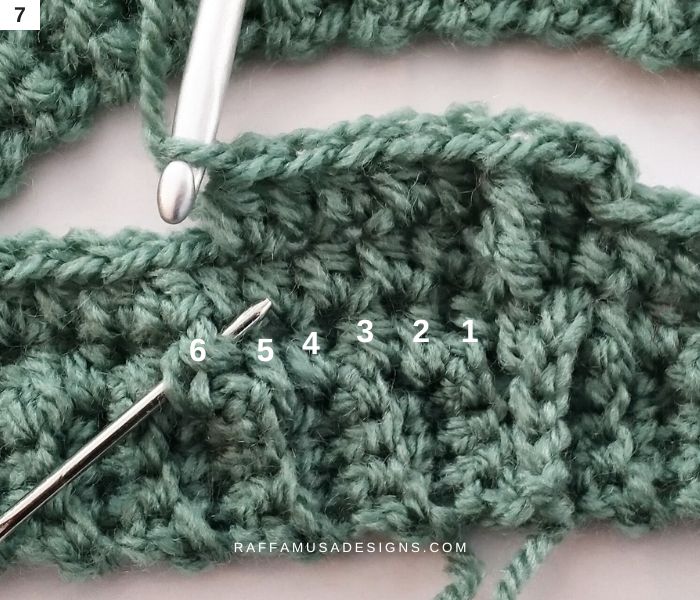
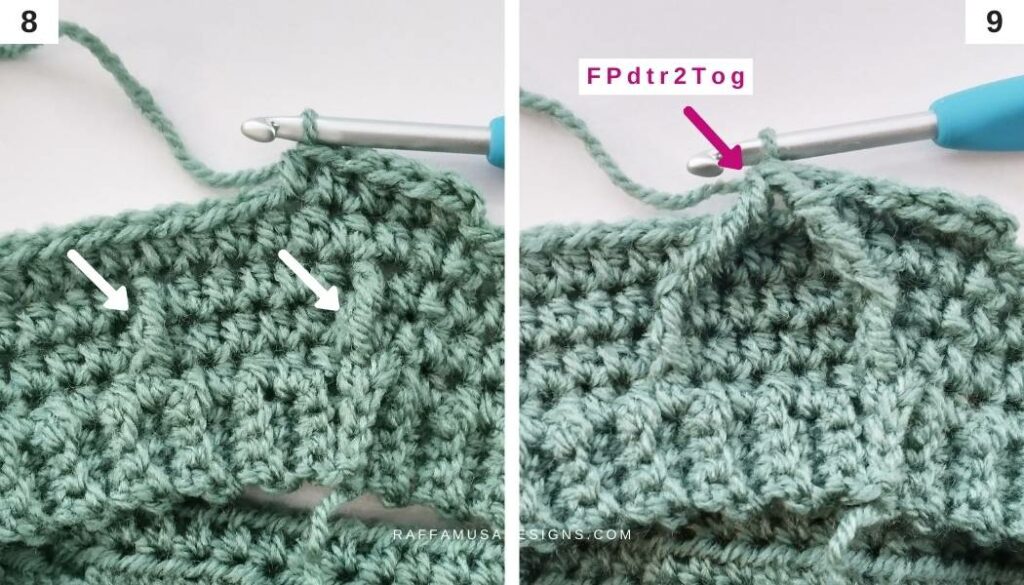
Front Post Double Tr Two Together (FPdtr2tog)
See the tutorial of the Honeycomb Textured Stitch HERE.
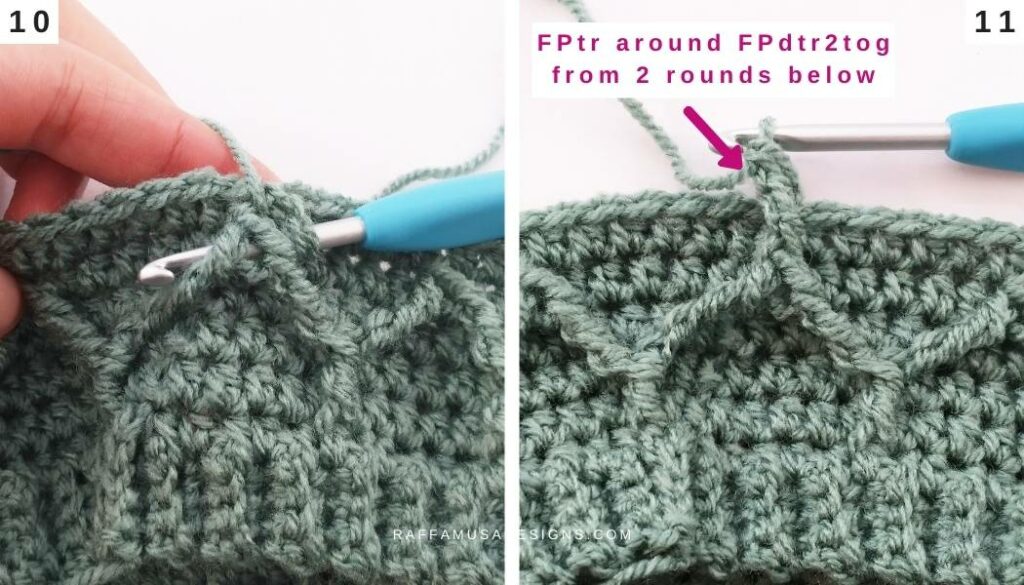
Front Post Treble around FPdtr2tog 2 Rows Below (FPtr)
See the tutorial of the Honeycomb Textured Stitch HERE.
Pattern Notes
- If the pattern says “hdc 2”, you have to crochet 1 hdc in each of the next 2 sts.
- (…) – Repeat the instructions within brackets for the indicated number of times.
- The st count is indicated within brackets at the end of a row/round when it changes from the previous row/round.
- Always sk the st behind each FPtr and FPdtr2tog!
Construction
This Honeycomb Beanie is crocheted bottom up.
First, the brim is crocheted from side to side as a long strip working in rows. it is then joined by single crocheting the short sides (first and last rows) together to obtain a tube.
The body is worked directly on the top side of the tube and it is worked in the round by joining each round with a sl st.
Finally, the crown is crocheted in the round using hdc sts.
The main st used for the body is the honeycomb stitch in the round. You can find a video tutorial on how to crochet the honeycomb stitch flat HERE.
The video is useful to get a general idea of how to crochet the honeycomb textured stitch, but keep in mind that we’ll have to make some adjustments to make it work in the round!
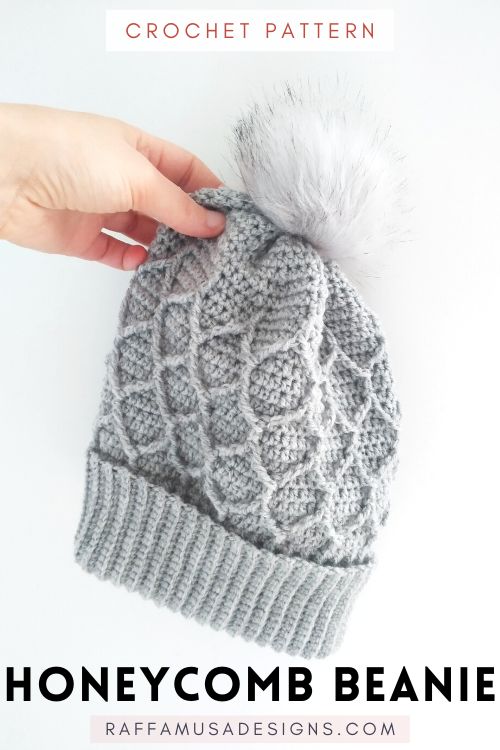
Crochet Honeycomb Textured Beanie – Free Pattern
Brim
With your 3.5-mm hook, ch 33.
Row 1. Working in the back bumps, sc across starting from the second ch from hook. (32 sts)
Row 2. Ch 1 (does not count as a st here and throughout), turn. BLO sc across. (32 sts)
Repeat row 2 until you have 83 (89, 95) rows.
Last Row. Ch 1, turn. Fold the first and the last rows toward the center of the brim. Join the brim by single crocheting together the corresponding sts of the last row and initial ch as follows:
- Insert your hook into the BLO of next st on the last row of the brim;
- Insert your hook into the corresponding st of the initial foundation chain;
- Yo and pull through all loops on your hook.
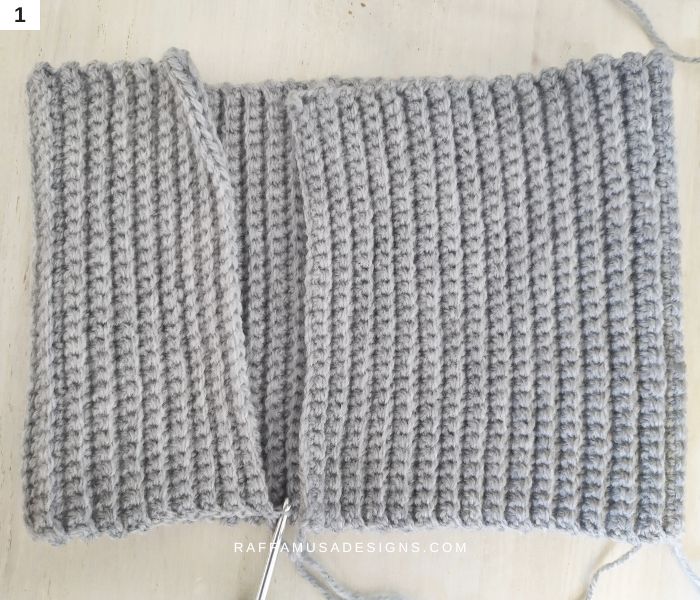
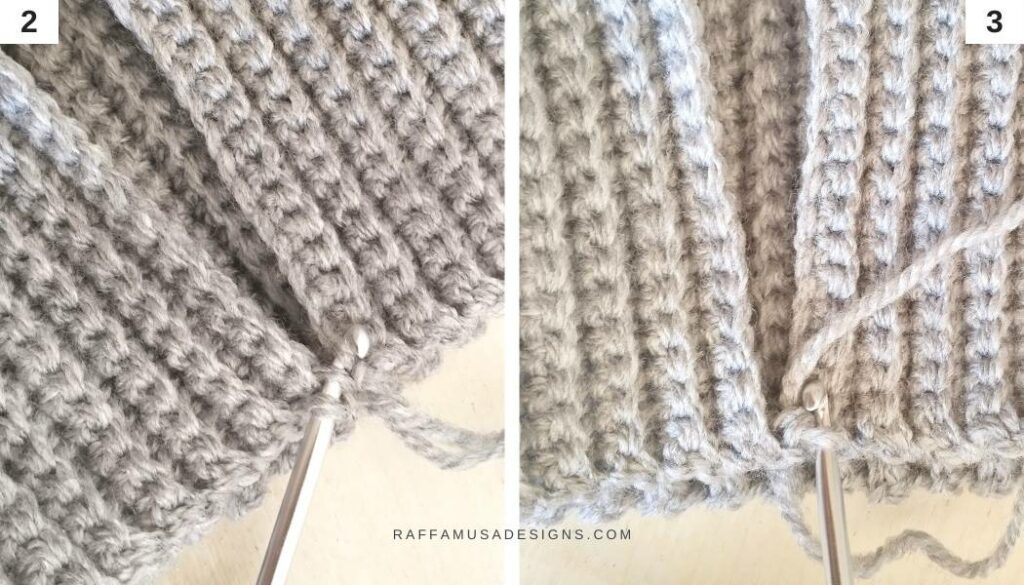
When you joined all the sts of the first and last rows of the brim, do not fasten off but move directly to the body.
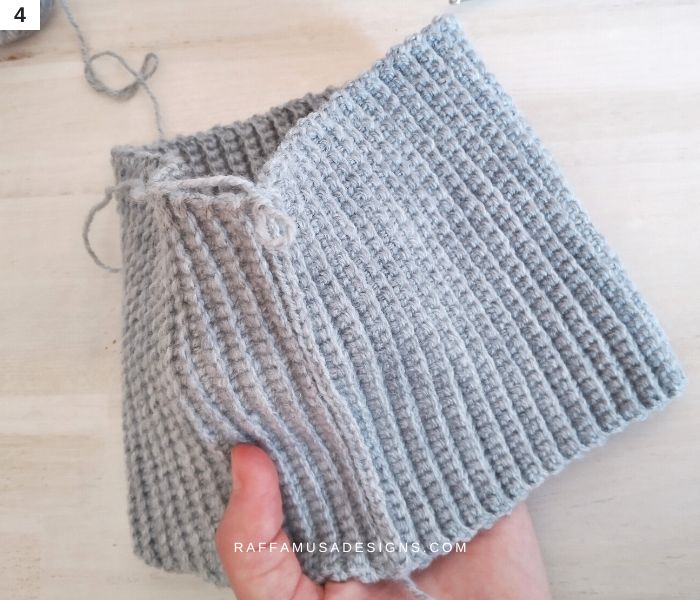
Body
Remeber to sk the st behind each FPtr and FPdtr2tog!
Switch to your 4.5-mm hook.
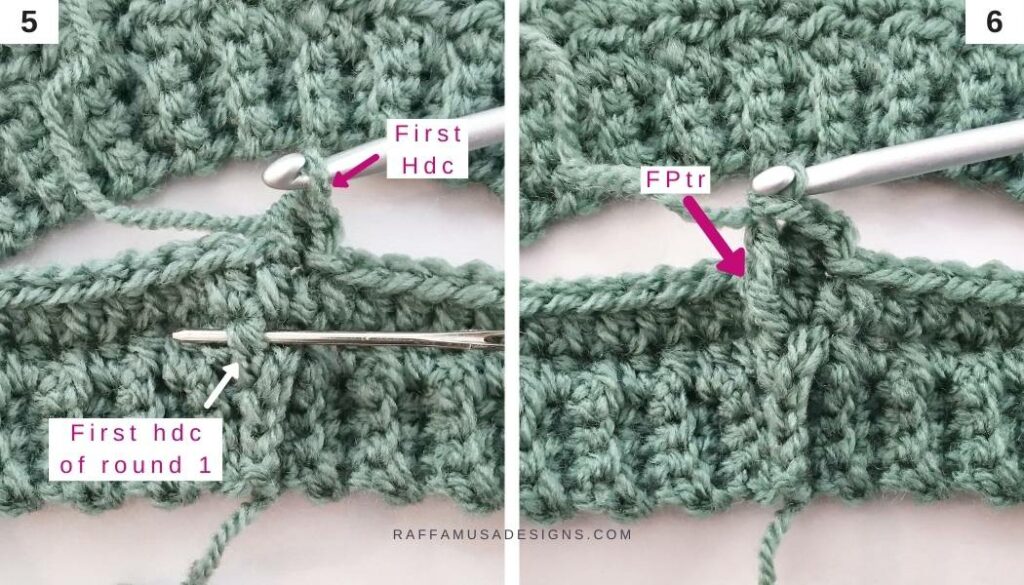
Round 1. Ch 1 (does not count as a st here and throughout). Hdc 1 on the side of each row of the brim. Join the round with a sl st in the first hdc. (84, 90, 96 hdc)
Round 2. Ch 1, hdc around. (84, 90, 96 hdc)
Round 3. Ch 1, hdc 1, FPtr 1 in first st of round 1, sk second st on round 2, (hdc 5, sk 5 sts on round 1 and FPtr 1 in next st) 13 (14, 15) times, hdc 4, sl st to join. (70 (75, 80) hdc; 14 (15, 16) FPtr)
Round 4. Ch 1, hdc around, sl st to join. (84, 90, 96 hdc)
Round 5. Ch 1, (hdc 5, FPdtr2tog) 14 (15, 16) times. (70 (75, 80) hdc; 14 (15, 16) FPdtr2tog)
Round 6. Ch 1, hdc around, sl st to join. (84, 90, 96 hdc)
Round 7. Ch 1, FPtr 1 around last FPdtr2tog from round 5, (hdc 5, FPtr 1) 13 (14, 15) times, hdc 5, sl st to join. (70 (75, 80) hdc; 14 (15, 16) FPtr)
Round 8. Ch 1, hdc around. (84, 90, 96 hdc)
Round 9. Ch 1, hdc 4, FPdtr2tog, (hdc 5, FPdtr2tog) 13 (14, 15) times, hdc 1, sl st to join. (70 (75, 80) hdc; 14 (15, 16) FPdtr2tog)
Round 10. Ch 1, hdc around, sl st to join. (84, 90, 96 hdc)
Round 11. Ch 1, (hdc 5, FPtr 1) 14 (15, 16) times, sl st to join. (70 (75, 80) hdc; 14 (15, 16) FPtr)
Round 12. Ch 1, hdc around, sl st to join. (84, 90, 96 hdc)
Round 13. Ch 1, hdc 3, FPdtr2tog, (hdc 5, FPdtr2tog) 13 (14, 15) times, hdc 2, sl st to join. (70 (75, 80) hdc; 14 (15, 16) FPdtr2tog)
Round 14. Ch 1, hdc around, sl st to join. (84, 90, 96 hdc)
Round 15. Ch 1, hdc 4, FPtr 1, (hdc 5, FPtr 1) 13 (14, 15) times, hdc 1, sl st to join. (70 (75, 80) hdc; 14 (15, 16) FPtr)
Round 16. Ch 1, hdc around, sl st to join. (84, 90, 96 hdc)
Round 17. Ch 1, hdc 2, FPdtr2tog, (hdc 5, FPdtr2tog) 13 (14, 15) times, hdc 3, sl st to join. (70 (75, 80) hdc; 14 (15, 16) FPdtr2tog)
Round 18. Ch 1, hdc around, sl st to join. (84, 90, 96 hdc)
Round 19. Ch 1, hdc 3, FPtr 1, (hdc 5, FPtr 1) 13 (14, 15) times, hdc 2, sl st to join. (70 (75, 80) hdc; 14 (15, 16) FPtr)
Crown – Sizes S and L Only
The pattern is written for sizes S (L). For size M, see the next paragraph.
Round 20. Ch 1, hdc 6 (7), hdc dec 1, (hdc 12 (14), hdc dec 1) 5 times, hdc 6 (7), sl st to join. (78, 90 sts)
Round 21. Ch 1, (hdc 11 (13), hdc dec 1) 6 times, sl st to join. (72, 84 sts)
Round 22. Ch 1, hdc 5 (6), hdc dec 1, (hdc 10 (12), hdc dec 1) 5 times, hdc 5 (6), sl st to join. (66, 78 sts)
Round 23. Ch 1, (hdc 9 (11), hdc dec 1) 6 times, sl st to join. (60, 72 sts)
Round 24. Ch 1, hdc 4 (5), hdc dec 1, (hdc 8 (10), hdc dec 1) 5 times, hdc 4 (5), sl st to join. (54, 66 sts)
Size S Only
Fasten off and cinch the top of the beanie closed.
Size L Only
Round 25. Ch 1, (hdc 9, hdc dec 1) 6 times, sl st to join. (60 sts)
Round 26. Ch 1, hdc 4, hdc dec 1, (hdc 8, hdc dec 1) 6 times, hdc 4, sl st to join. (54 sts)
Fasten off and cinch the top of the beanie closed.
Crown – Size M Only
Round 20. Ch 1, (hdc 13, hdc dec 1) 6 times, sl st to join. (84 sts)
Round 21. Ch 1, hdc 6, hdc dec 1, (hdc 12, hdc dec 1) 5 times, hdc 6, sl st to join. (78 sts)
Round 22. Ch 1, (hdc 11, hdc dec 1) 6 times, sl st to join. (72 sts)
Round 23. Ch 1, hdc 5, hdc dec 1, (hdc 10, hdc dec 1) 5 times, hdc 5, sl st to join. (66 sts)
Round 24. Ch 1, (hdc 9, hdc dec 1) 6 times, sl st to join. (60 sts)
Round 25. Ch 1, hdc 4, hdc dec 1, (hdc 8, hdc dec 1) 5 times, hdc 4, sl st to join. (54 sts)
Fasten off and cinch the top of the beanie closed.
Finishing
Attach a pompom at the top of the hat and weave in all your ends.
YOUR CROCHET Honeycomb Beanie IS READY!
I hope you enjoyed this free crochet pattern. I would love to see your Honeycomb Beanies on Facebook and Instagram. Make sure to use the hashtag #raffamusadesigns so that I don’t miss your pics!
Get more free accessory patterns here on the blog…