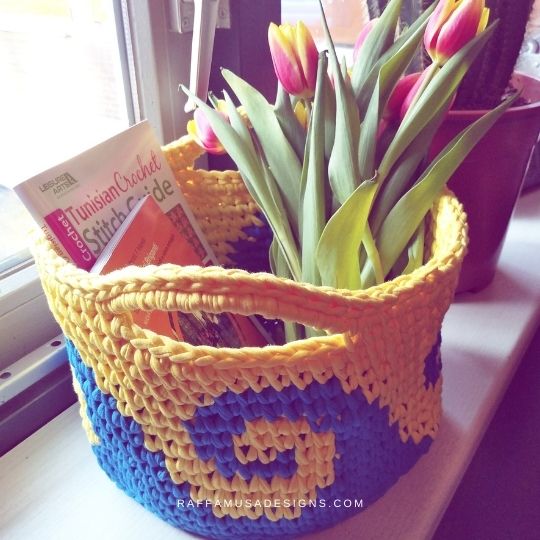
Summer is definitely in the air and I was feeling like decorating my craft room a bit. So, I made this crochet Hairpin Lace Dreamcatcher.
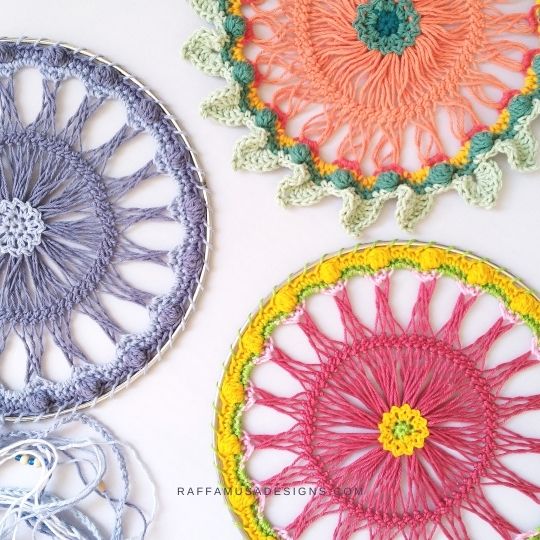
I’d had the idea of making a sort of flower with hairpin crochet for a while. I think it was last summer when I first started playing around with hairpin crochet and made a sort of huge flower.
However, for one year, this flower stayed there, hidden in a corner of my messy craft room without being anything more than a round-something. But I never forgot about it and kept thinking about what I could possibly do with it.
So, I am so happy that I finally managed to transform it into something more than a half-done project!
Don’t Know How to Hairpin Crochet?
If you are new to hairpin crochet, don’t be afraid to try this out.
I prepared a photo and video tutorial on how to hairpin crochet for beginners HERE.
Find more home decor ideas here on the blog!
Add this pattern to your Ravelry queue HERE, or save it for later by pinning it to your favorite crochet board on Pinterest using this pin!

Note: this post contains affiliate links. This means that if you purchase something through the links on my blog, I might earn a commission. This will not have any effect on the price you pay. For more info, please, see my Privacy Policy.
AD-FREE Printable PATTERN
Grab the ad-free, printable PDF pattern of the Hairpin Lace Dreamcatcher in my Ravelry, LoveCrafts, and Etsy stores!


Hairpin Lace Dreamcatcher – Video Tutorial
Materials
- 4-mm (G/6 USA, 8 UK) Crochet Hook
- Hairpin Crochet Loom with a width of 2” (5 cm).
- Sport (2, Fine) Cotton Yarn
- One metal loop or wooden hoop with a diameter of 8″ (20-cm).
- Tapestry Needle
- Stitch Marker
- Optional: Decorating Beads
Yarn
I used Schachenmayr Catania in the following colors:
- A – Strawberry Pink (258)
- B – Apple Green (205)
- C – Sun Yellow (208)
- D – Orchid Pink (222)
Yardage
Approximately 50-60 yds for the dreamcatcher, and 50-60 yds for the fringes.
Size
8″ (20 cm)
Gauge
9 sc for 12 rows in 2” (5 cm)
Crochet Abbreviations (US Terms)
Ch – Chain
Bobble – Bobble Stitch
Dc – Double Crochet
MC – Magic Circle
Sc – Single Crochet
Sk – Skip
Sl St – Slip Stitch
St – Stitch
Yo – Yarn Over
Special Stitches
Magic Circle (MC)
You can learn all about the magic circle in this step-by-step tutorial on how to crochet the MC.
Hairpin Lace Crochet
Learn how to hairpin lace crochet HERE.
Bobble Stitch (Bobble)
Yo, insert your hook into the indicated st, yo, and draw up a loop, yo, and draw yarn through two loops (you now have two loops remaining on your hook). Repeat from the beginning other 4 times. You will now have six loops on your hook. Yo and draw yarn through all six loops.
Pattern Notes
- If the pattern says “sc 2”, it means that you need to crochet 1 sc in each of next 2 sts.
- (…) – Repeat the instruction within brackets for the indicated number of times.
- *… Repeat the instructions from * for the indicated number of times.
- […] – Crochet the instructions within brackets in the same indicated st.
- The stitch count is indicated within brackets at the end of each round’s instructions.

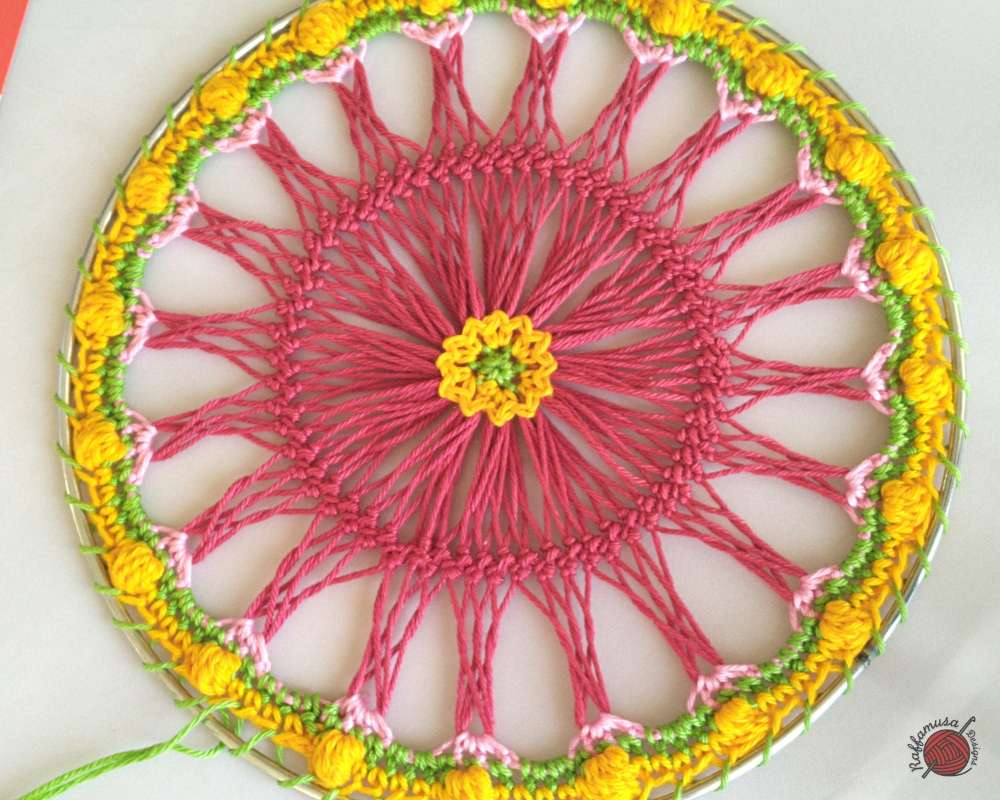
Hairpin Lace Dreamcatcher – Free Crochet Wall Hanging Pattern
Hairpin Lace Strip
Set up your hairpin loom at a width of 2.75” (7 cm).
Using your 4-mm crochet hook and A, make a hairpin lace strip with 60 loops on each side.
Remove your hook and place a stitch marker on the loop to prevent your work from unraveling.
Find HERE a step-by-step photo and video tutorial on how to crochet a hairpin lace strip.
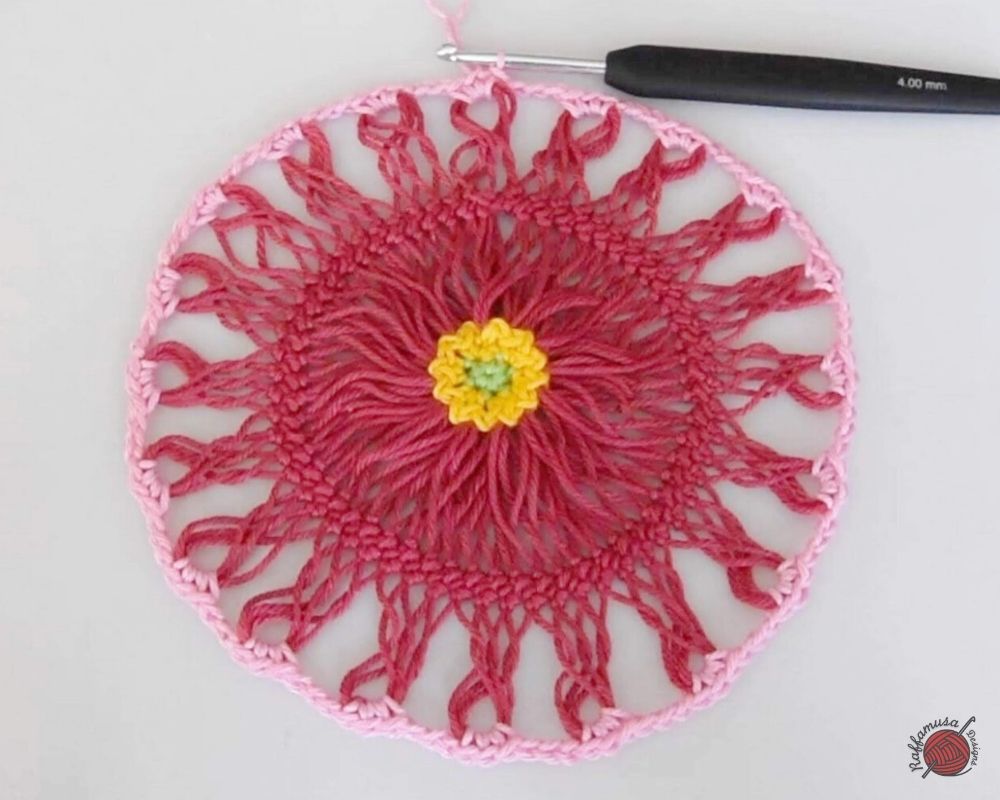
Dreamcatcher
With your color of choice and your 4-mm crochet hook, make a MC.
Round 1. Sc 6 in MC. Join with a sl st into the first st. (6 sts)
Round 2. On one side of your hairpin strip, divide the loops in groups of 5.
Here’s a Little Tip
To create a more invisible join between the beginning and end of your hairpin strip, leave the first 2 loops separate, and proceed to group the other ones. At the end, you will have 3 loops remaining, which you can group together with the first two loops once your strip is circularized.
*(Sc, sl st into 5 loops of your hairpin strip at the same time) twice in the first st. Repeat from * for each st around. This way, you’ll have 6 increases. Join with a sl st into the first st. (12 sc and 12 sl sts)
Remove your stitch marker from your hairpin strip and sl st into the first st of the strip to join in a circle.
Working the Outside of the Flower
Round 3. Group the loops on the outside of the strip in groups of 3.
To make a more invisible join between the beginning and the end of your hairpin work, start making your groups of 3 starting from the second loop. This way, you will join the first loop together with the last two.
Join your yarn into the first group of 3 loops and make 3 sc. Ch 3. *Group the next three loops with 3 sc, ch 3. Repeat from * other 18 times. Join with a sl st into the first st. (120 sts)
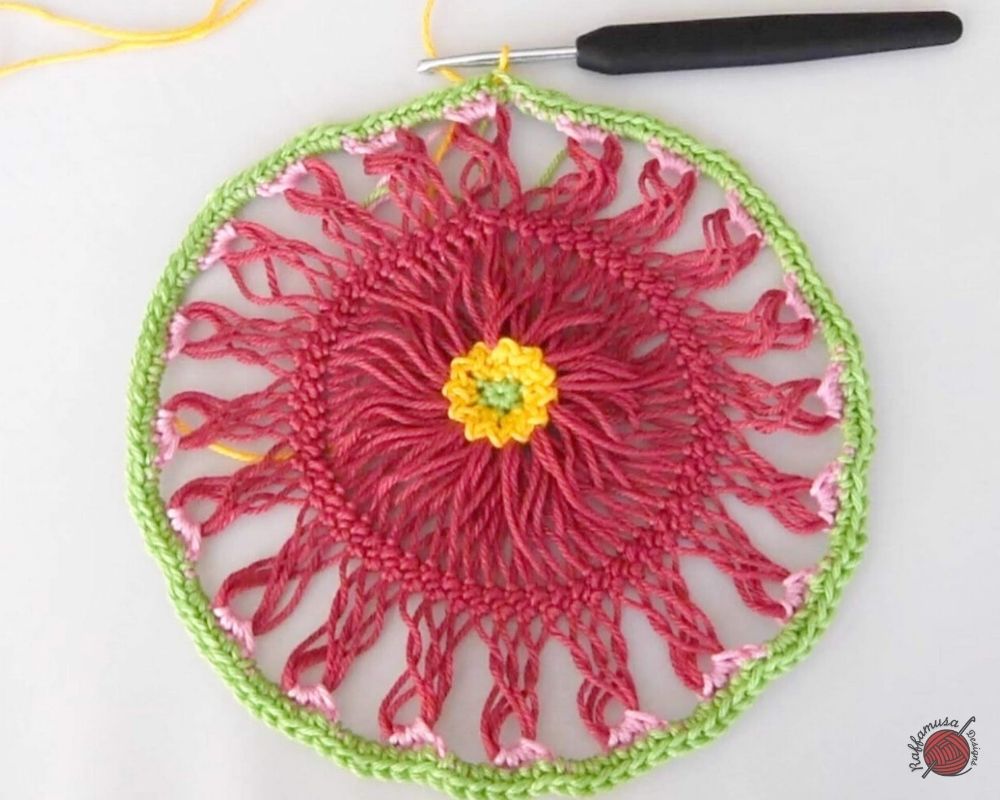
Round 4. Ch 1. Make 1 sc on top of each sc and 3 sc in each 3-ch space all around. Join with a sl st into the first st. (120 sts)
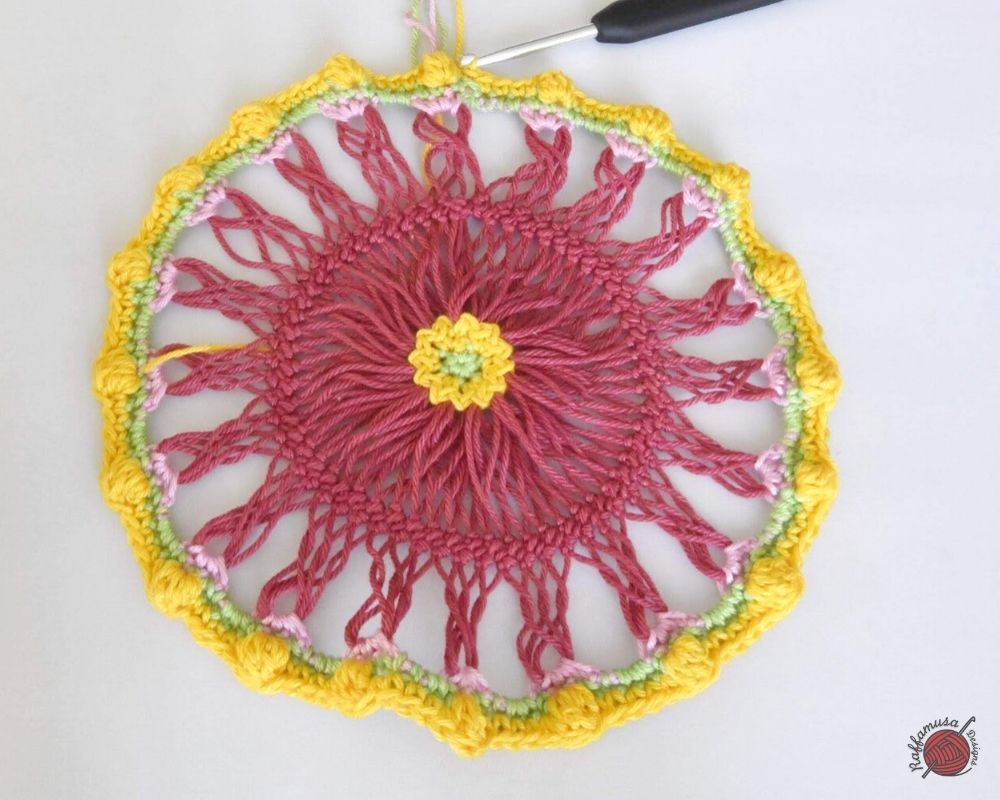
Round 5. Ch 1, 1 sc, (1 bobble, 5 sc) 19 times, 1 bobble, 4 sc. Join with a sl st into the first st. (120 sts)
Fasten off and weave in all your ends.
Assembling
To attach to the loop or to the hoop, cut a piece of yarn with a length of about 60” (150 cm). Thread it onto your yarn needle, and insert your needle through any st of of the last round going from the back of your work to the front. Holding your crochet work inside the loop, thread your needle around the loop going from front to back. Sk 1 st and insert your needle into the next st from the back to the front of your work. Repeat all around and fasten off.
Weave in your ends.
Finishing
Cut 42 to 72 pieces of yarn of approximately 35” (88 cm). Fold the lengths of yarn in half and attach them to the bottom of your loop or hoop as you normally attach fringes.
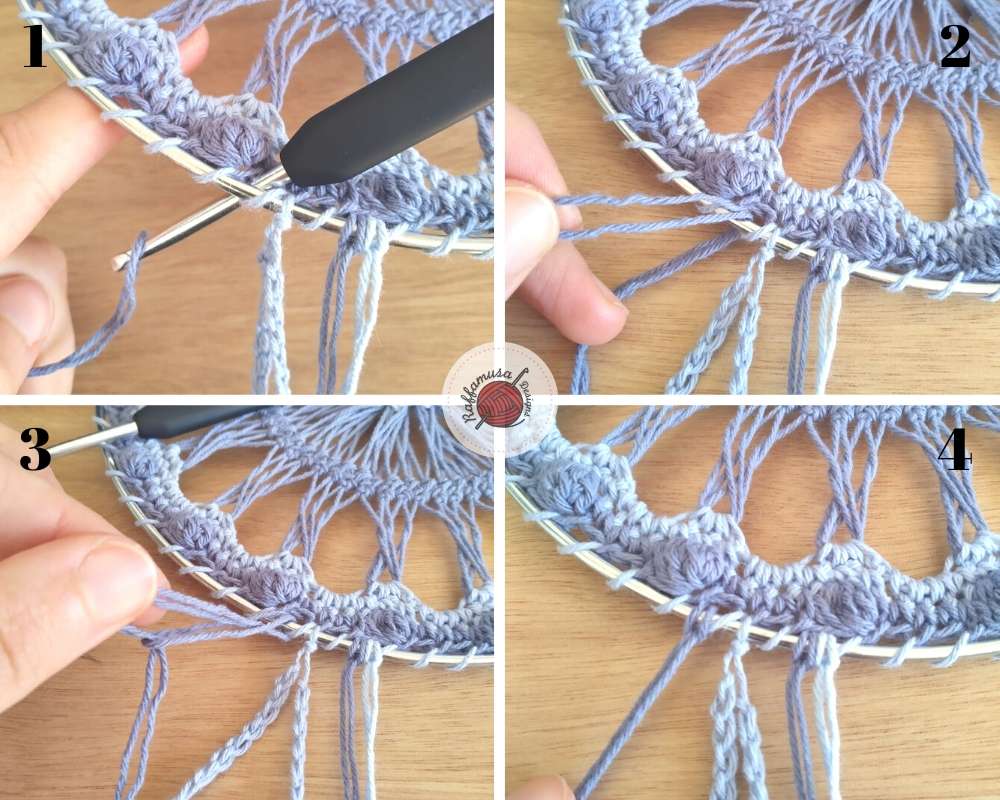
Please, note that in the images below, I pulled my fringe from the back to the front.
1-2. With the help of your crochet hook, pull the length of yarn from the front to the back of the loop grabbing it from its center.
3. Pass the tails of yarn through the pulled-up loop.
4. Tighten your fringe by pulling the tails of yarn.
Optional
Decorate your fringes with beads, braids, or macrame stitches.
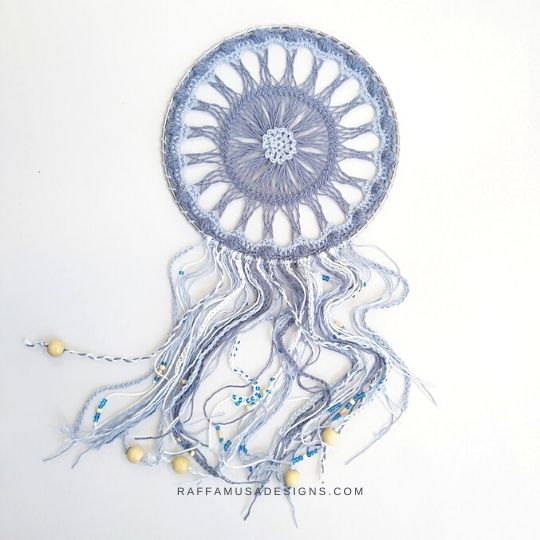
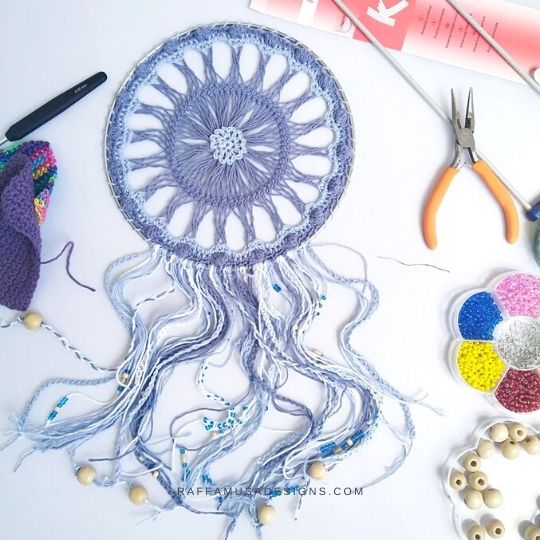
Your Crochet Hairpin Lace Dreamcatcher is ready!
I hope you enjoyed crocheting this pattern. Please, do not hesitate to contact me if you need any help or support. I am looking forward to seeing all your beautiful makes on Facebook and Instagram!
Quick Summer Makes Blog Hop

On June 9th, 2022, the pattern of the Hairpin Lace Dreamcatcher is featured in the Quick Summer Makes Blog Hop hosted by Alysha of Littlejohn’s Yarn.
Check the main round-up post on Alysha’s blog HERE to get the special coupon code to use on Ravelry!

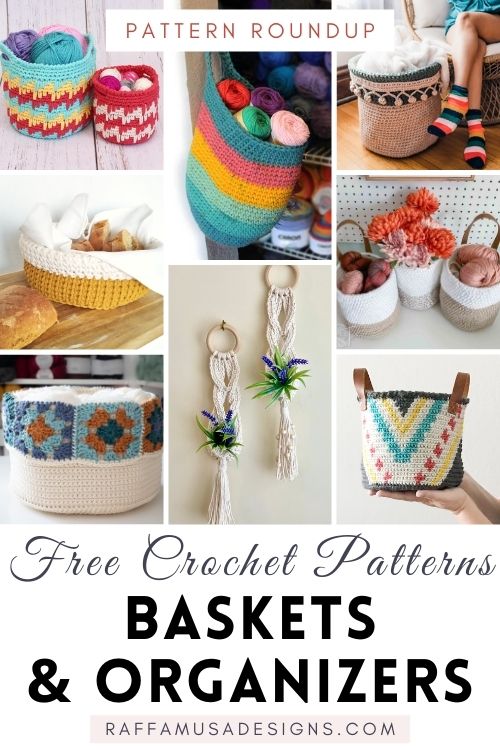
Find more free crochet patterns for the home decor here on the blog…
Summer Solstice Giveaway
The pattern of the Crochet Hairpin Lace Dreamcatcher was featured in the Summer Solstice Giveaway organized by Shannon from The Loophole Fox. Make sure to check it out for some great summer ideas to crochet!
Hi, when I tap on enter coupon code it brings me back to the pattern page and won’t let me input the code. Help!
Hi Sinead, my best guess is that it is a glitch of the new Ravelry. I just tried and it worked fine for me. Just to make sure, are you logged in in Ravelry? Sometimes it logs off by itself…Let me know if it works!
What a challenge! Thank you for sharing your art! Years ago I started a wall hanging on a board where you weave yarns and threads on the warp which is attached to slots on a board. The center of your dream catcher has given me some ideas to put one on my ages old project. This will be a winter project…it’s too busy right now. Thank you again for sharing.