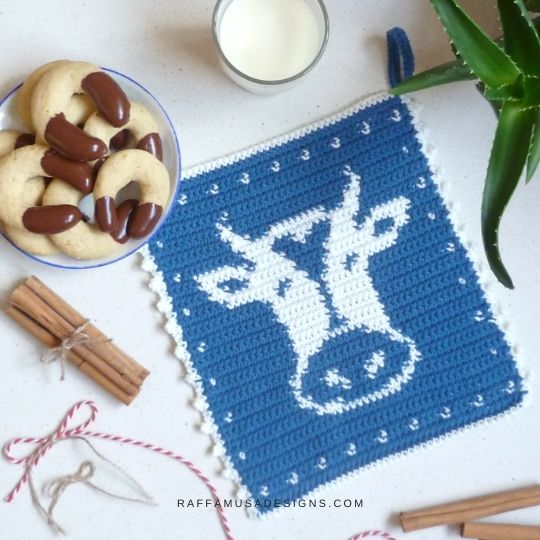
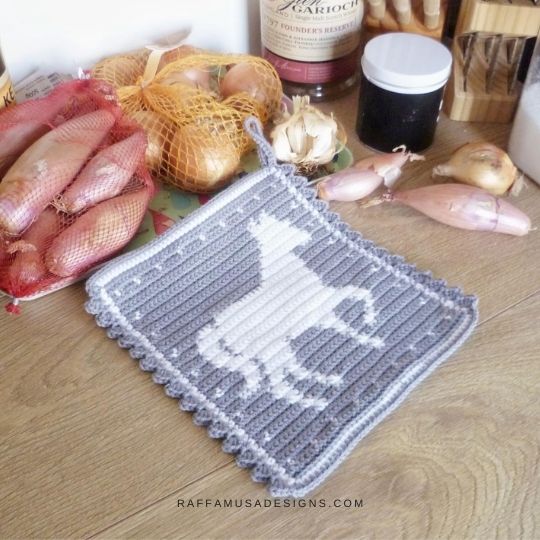
The Tapestry Crochet Cow Potholder is the third entry of the Farmhouse Collection of crochet potholders.
The theme of the Farmhouse Potholders Collection is easy to guess. Yes, correct, farm animals!
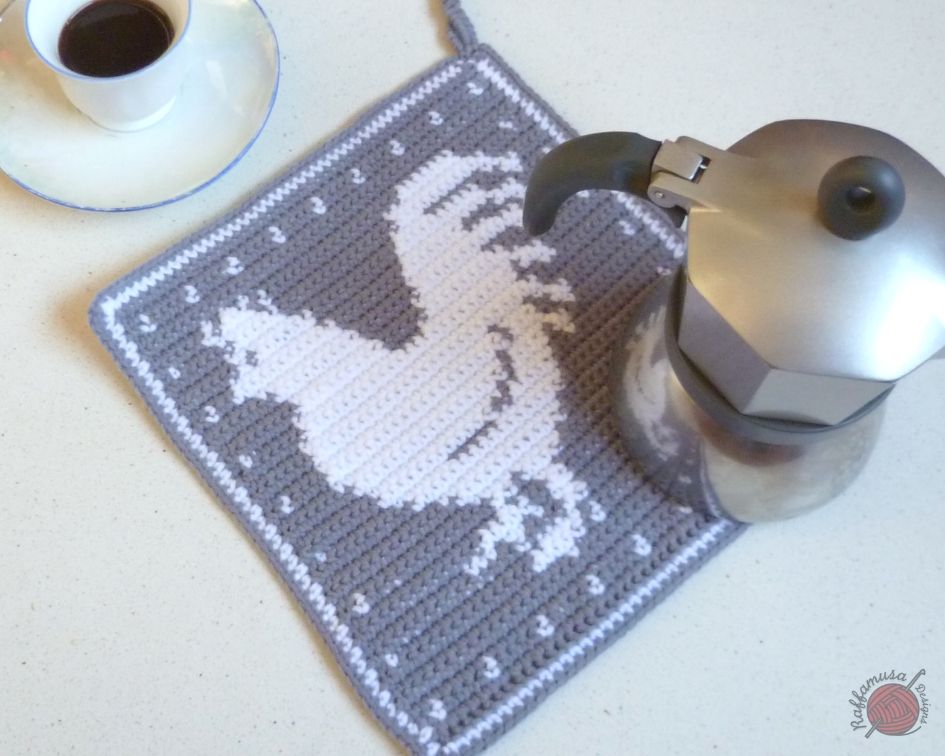
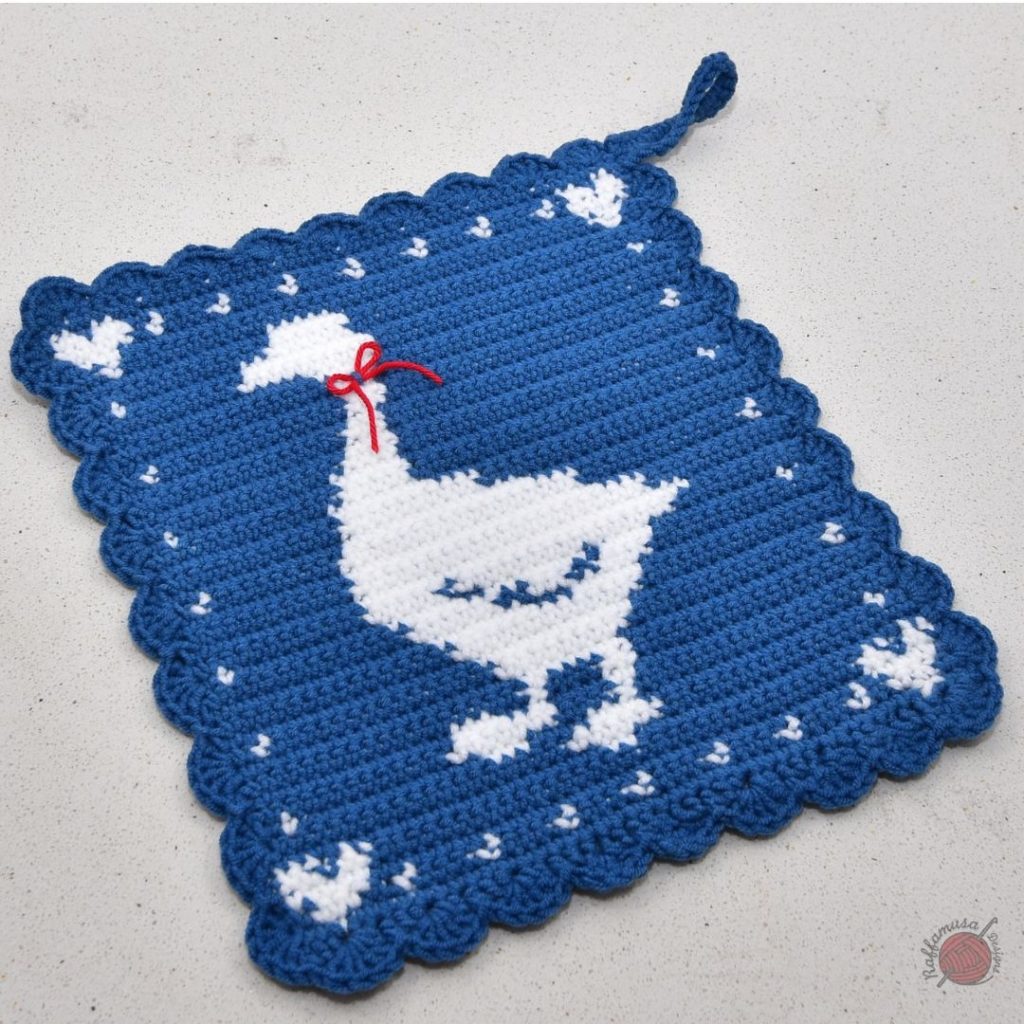
When I designed the first potholder of the series, the Rooster Potholder, I was not planning on making a collection. However, I kind of could not stop crocheting farm animals and the Goose Potholder came shortly after. The cow was logically going to come next!
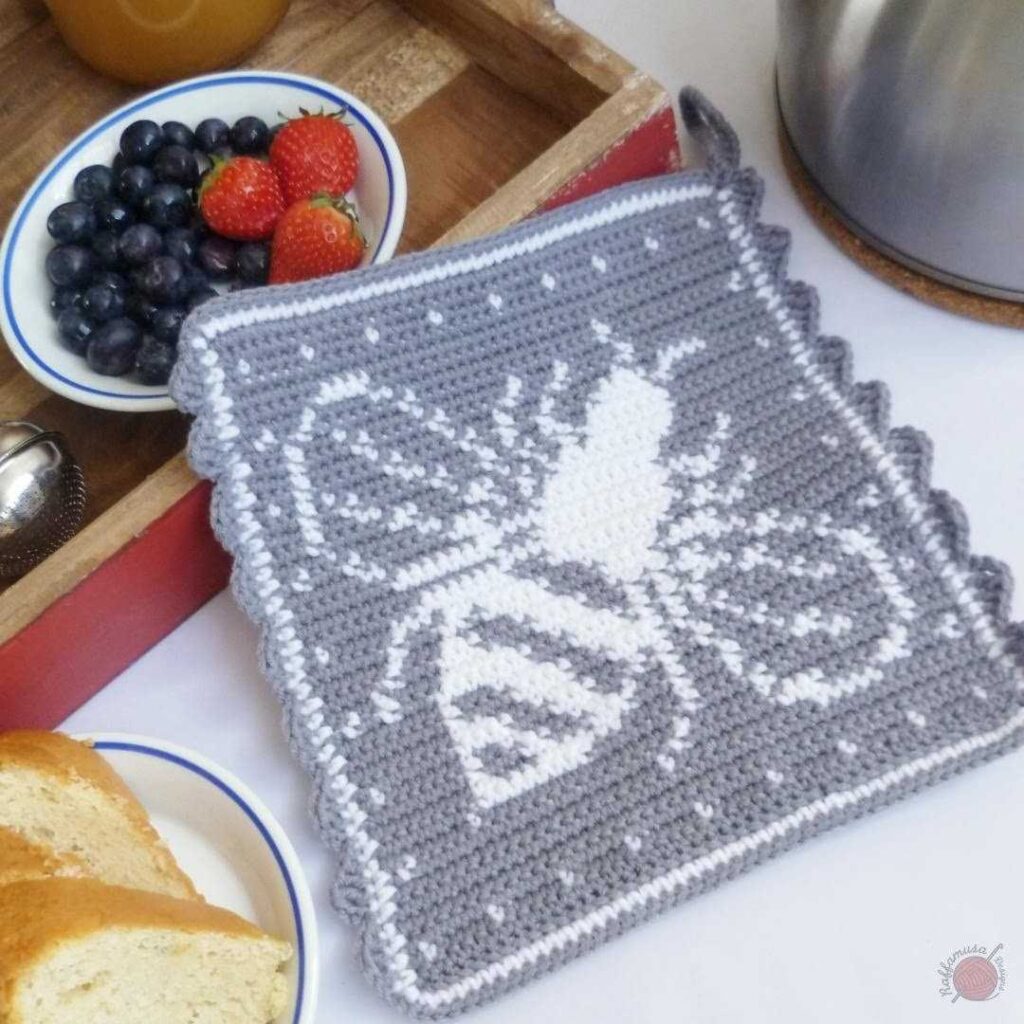
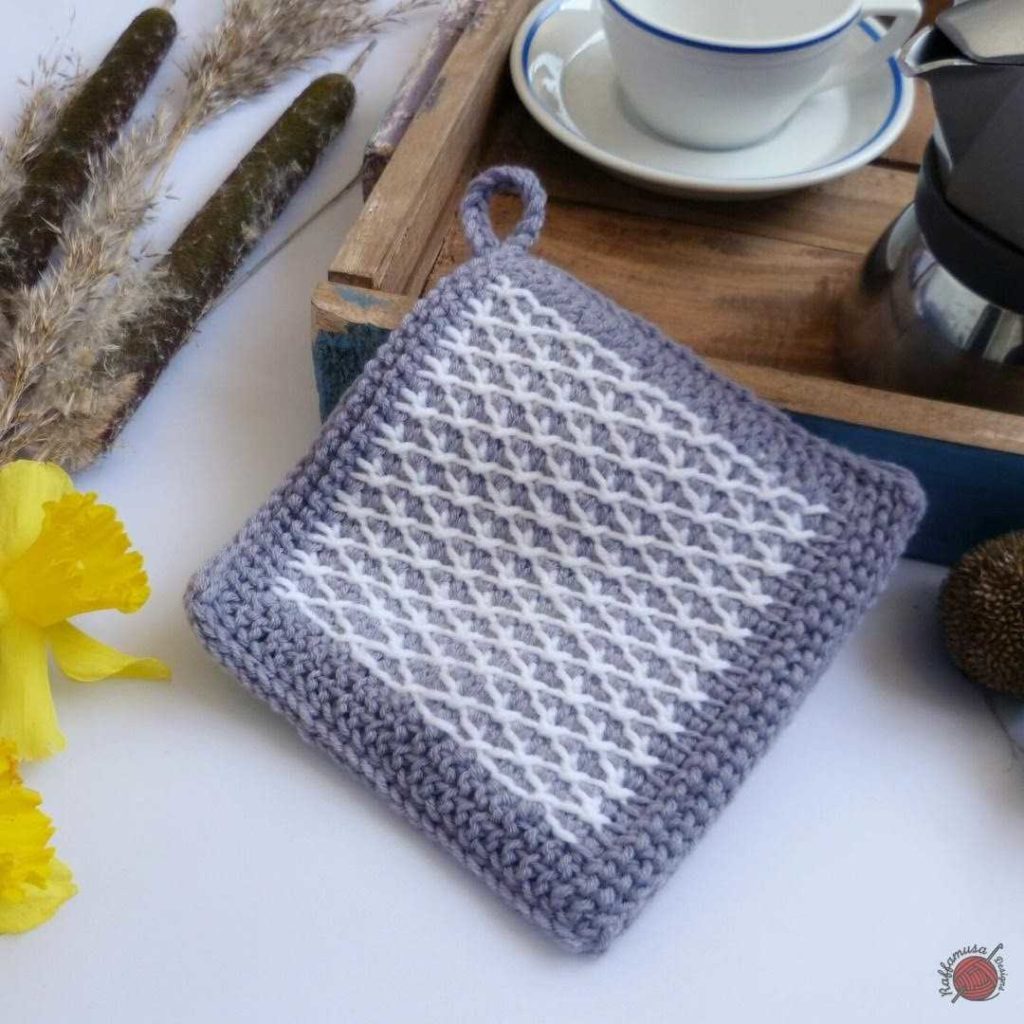
Right now, the Farmhouse Potholders Collection can claim several other animals and designs. You can take a look at all of them in the post I created to list all my Farmhouse Potholders.
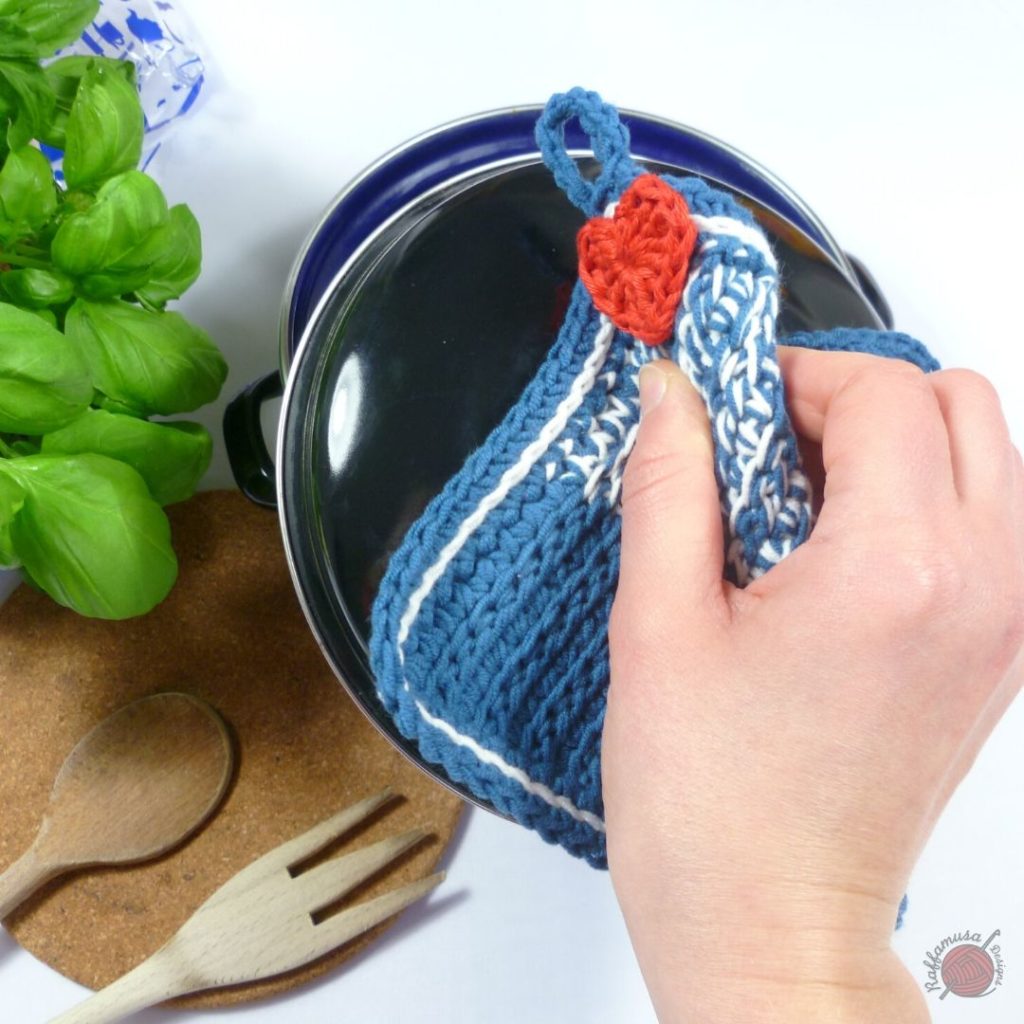
No Holes in my Potholder!
My keyword for crochet potholders is functionality!
Of course, it should look good, but you sure do not want to burn your hands while you’re busy handling hot pans and pots.
This is why I designed the Cow Potholder without any holes whatsoever! In other words, I created a very compact texture. This way, you can use the potholder without having to fold it a thousand times just not get burned.
Moreover, the thickness of the potholder is not such to make you feel like a dodo trying to hold a hot pot. And I could achieve all this by crocheting my Cow Potholder in tapestry crochet.
Tapestry Crochet
In tapestry crochet, you carry all the colors that you need for a given row inside of your stitches. You just crochet the unused colors inside of the stitches that you are making with the current color. This makes sure that tapestry crochet has the compactness of single crochet with some extra thickness thanks to the extra yarn carried inside.
Just the perfect solution to my need for a compact and functional potholder!
If you would like to read more about how to change color in tapestry crochet, you can take a look at this free tutorial on the blog.
The tutorial also includes a little trick for a better color change when working on the wrong side!
The Yarn of Choice for Potholders
As I mentioned in the Rooster Potholder and Goose Potholder posts, the best yarns for potholders are wool (best if felted) and cotton. On the other hand, it is best to avoid synthetic yarns because they might actually melt with high temperatures.

Note: this post contains affiliate links. This means that if you purchase something through the links on my blog, I might earn a commission. This will not have any effect on the price you pay. For more info, please, see my Privacy Policy.
AD-FREE DOWNLOADABLE PATTERN
I know ads are annoying… But no worries! The crochet pattern of the Cow Potholder is available as an ad-free PDF in my Ravelry, LoveCrafts, and Etsy stores!


Materials
– 3.0-mm (D-3 USA, 11 UK) Crochet Hook
– Paintbox Yarns Cotton DK in two contrasting colors. I will refer to them as color 1 (CC1) and color 2 (CC2).
– Tapestry Needle
YARDAGE
- CC1: 56.25 m/61.7 yds
- CC2: 35m/38.4 yds
SIZE
The finished potholder measures 6.7” (17 cm) by 7.3” (18.5 cm)
GAUGE
28 sc for 26 rows in 4” (10 cm) worked in tapestry crochet.
Crochet Abbreviations (US Terms)
Ch – Chain
Picot – Picot Stitch
Sc – Single Crochet
Sl St – Slip Stitch
St – Stitch
Yo – Yarn Over
PATTERN NOTES
- (…) – Repeat the instruction within brackets for the indicated number of times.
- If the pattern says “sc 5”, it means that you have to make one single crochet in each of the next 5 stitches.
- At the end of each row, you turn your work to crochet the next series of sts.
- The starting ch 1 DOES count as your first stitch and is always made with the main color.
- All uneven rows are crocheted on the right side (RS), while the odd-numbered rows are crocheted on the wrong side (WS).
- Throughout the pattern with the exception of the border, the stitch count is always 45 sts.
- The pattern is written in two sections. The Potholder is worked in rows, then the Border is worked in rounds.
Crochet Cow Potholder Pattern
(CC1) Ch 46.
Row 1 (RS). Sc in the second ch from your hook and in each ch across, turn.
Row 2 (WS). Ch 1 (counts as a st here and in the rest of the pattern), sc in each st across, turn.
Row 3. Ch 1 and start carrying your contrasting color (CC2) yarn inside your sts. (CC1) sc 1, [(CC2) sc 1, (CC1) sc 4] eight times, (CC2) sc 1, (CC1) sc 2, turn.
Row 4-7. Ch 1, (CC1) sc 44, turn.
Row 8. Ch 1, (CC1) sc 1, (CC2) sc 1, (CC1) sc 14, (CC2) sc 11, (CC1) sc 14, (CC2) sc 1, (CC1) sc 2, turn.
Row 9. Ch 1, (CC1) sc 14, (CC2) sc 4, (CC1) sc 7, (CC2) sc 4, (CC1) sc 15, turn.
Row 10. Ch 1, (CC1) sc 13, (CC2) sc 2, (CC1) sc 13, (CC2) sc 2, (CC1) sc 14, turn.
Row 11. Ch 1, (CC1) sc 12, (CC2) sc 2, (CC1) sc 5, (CC2) sc 1, (CC1) sc 3, (CC2) sc 1, (CC1) sc 5, (CC2) sc 2, (CC1) sc 13, turn.
Row 12. Ch 1, (CC1) sc 12, (CC2) sc 1, (CC1) sc 4, (CC2) sc 3, (CC1) sc 3, (CC2) sc 3, (CC1) sc 4, (CC2) sc 1, (CC1) sc 13, turn.

Row 13. Ch 1, (CC1) sc 1, (CC2) sc 1, (CC1) sc 10, (CC2) sc 1, (CC1) sc 4, (CC2) sc 2, (CC1) sc 5, (CC2) sc 2, (CC1) sc 4, (CC2) sc 1, (CC1) sc 10, (CC2) sc 1, (CC1) sc 2, turn.
Row 14. Ch 1, (CC1) sc 12, (CC2) sc 2, (CC1) sc 15, (CC2) sc 2, (CC1) sc 13, turn.
Row 15. Ch 1, (CC1) sc 13, (CC2) sc 2, (CC1) sc 13, (CC2) sc 2, (CC1) sc 14, turn.
Row 16. Ch 1, (CC1) sc 14, (CC2) sc 2, (CC1) sc 11, (CC2) sc 2, (CC1) sc 15, turn.
Row 17. Ch 1, (CC1) sc 14, (CC2) sc 4, (CC1) sc 7, (CC2) sc 4, (CC1) sc 15, turn.
Row 18. Ch 1, (CC1) sc 1, (CC2) sc 1, (CC1) sc 12, (CC2) sc 15, (CC1) sc 12, (CC2) sc 1, (CC1) sc 2, turn.
Row 19. Ch 1, (CC1) sc 14, (CC2) sc 6, (CC1) sc 3, (CC2) sc 6, (CC1) sc 15, turn.
Row 20-22. Ch 1, (CC1) sc 14, (CC2) sc 7, (CC1) sc 1, (CC2) sc 7, (CC1) sc 15, turn.
Row 23. Ch 1, (CC1) sc 1, (CC2) sc 1, (CC1) sc 11, (CC2) sc 8, (CC1) sc 1, (CC2) sc 8, (CC1) sc 11, (CC2) sc 1, (CC1) sc 2, turn.
Row 24-25. Ch 1, (CC1) sc 13, (CC2) sc 8, (CC1) sc 1, (CC2) sc 8, (CC1) sc 14, turn.
Row 26. Ch 1, (CC1) sc 12, (CC2) sc 3, (CC1) sc 1, (CC2) sc 5, (CC1) sc 1, (CC2) sc 5, (CC1) sc 1, (CC2) sc 3, (CC1) sc 13, turn.
Row 27. Ch 1, (CC1) sc 7, (CC2) sc 8, (CC1) sc 2, (CC2) sc 3, (CC1) sc 3, (CC2) sc 3, (CC1) sc 2, (CC2) sc 8, (CC1) sc 8, turn.
Row 28. Ch 1, (CC1) sc 1, (CC2) sc 1, (CC1) sc 4, (CC2) sc 14, (CC1) sc 3, (CC2) sc 14, (CC1) sc 4, (CC2) sc 1, (CC1) sc 2, turn.
Row 29. Ch 1, (CC1) sc 5, (CC2) sc 3, (CC1) sc 3, (CC2) sc 8, (CC1) sc 5, (CC2) sc 8, (CC1) sc 3, (CC2) sc 3, (CC1) sc 6, turn.
Row 30. Ch 1, (CC1) sc 5, (CC2) sc 2, (CC1) sc 3, (CC2) sc 9, (CC1) sc 5, (CC2) sc 9, (CC1) sc 3, (CC2) sc 2, (CC1) sc 6, turn.
Row 31. Ch 1, (CC1) sc 4, (CC2) sc 8, (CC1) sc 1, (CC2) sc 5, (CC1) sc 7, (CC2) sc 5, (CC1) sc 1, (CC2) sc 8, (CC1) sc 5, turn.
Row 32. Ch 1, (CC1) sc 4, (CC2) sc 6, (CC1) sc 3, (CC2) sc 4, (CC1) sc 4, (CC2) sc 1, (CC1) sc 4, (CC2) sc 4, (CC1) sc 3, (CC2) sc 6, (CC1) sc 5, turn.
Row 33. Ch 1, (CC1) sc 1, (CC2) sc 1, (CC1) sc 10, (CC2) sc 5, (CC1) sc 3, (CC2) sc 3, (CC1) sc 3, (CC2) sc 5, (CC1) sc 10, (CC2) sc 1, (CC1) sc 2, turn.
Row 34. Ch 1, (CC1) sc 11, (CC2) sc 21, (CC1) sc 12, turn.
Row 35. Ch 1, (CC1) sc 11, (CC2) sc 3, (CC1) sc 3, (CC2) sc 9, (CC1) sc 3, (CC2) sc 3, (CC1) sc 12, turn.
Row 36. Ch 1, (CC1) sc 10, (CC2) sc 3, (CC1) sc 17, (CC2) sc 3, (CC1) sc 11, turn.
Row 37. Ch 1, (CC1) sc 10, (CC2) sc 2, (CC1) sc 19, (CC2) sc 2, (CC1) sc 11, turn.
Row 38. Ch 1, (CC1) sc 1, (CC2) sc 1, (CC1) sc 8, (CC2) sc 1, (CC1) sc 21, (CC2) sc 1, (CC1) sc 8, (CC2) sc 1, (CC1) sc 2, turn.
Row 39. Ch 1, (CC1) sc 11, (CC2) sc 1, (CC1) sc 19, (CC2) sc 1, (CC1) sc 12, turn.
Row 40-42. Ch 1, (CC1) sc 44, turn.
Row 43. Ch 1, (CC1) sc 1, [(CC2) sc 1, (CC1) sc 4] eight times, (CC1) sc 2, turn.
Row 44-45. Ch 1, (CC1) sc 44, turn.
Do not tie off.
Crochet Cow Potholder Border
After row 45, both CC1 and CC2 are at the left, top corner of your potholder.
Hanging Loop. With CC1, ch 20 and sl st into the last st of row 45. Turn your work and make 25 sc inside the loop.
Tie off CC1.
Turn your work to the wrong. I chose to crochet the border on the wrong side because I like the picot border better this way than when worked on the right side.
Round 1 (WS). With CC2, work the picot border on the left side of your potholder as follow: (Sc 2, [sc 1, picot 1, sc 1] all in the same st) 14 times, sc 2.
At the corner, [sc 1, ch 1, sc 1] all in the ch-1.
On the bottom side, sc 45.
At the corner, [sc 1, ch 1, sc 1] in the ch-1 space.
Repeat the picot border on the right side, and sc 45 on the top side. Join the round with a sl st into the first sl st.
Tie off. Weave in ends.
Your Tapestry Crochet Cow Potholder is ready to use!
I hope you enjoyed crocheting this pattern. Please, do not hesitate to contact me if you need any help or support. I am looking forward to seeing all your beautiful makes on Facebook and Instagram!
If you liked this pattern, you might also be interested in these other potholders on the blog!
I love this pattern, can’t wait to make one. Thank you so much for the pattern.
Ann
Thank you so much, so glad you like it! 🙂
Hi! I love these and am trying to get started. Do you carry the other color with you the whole time? Even on rows 4-7 where its solid blue? Also, if starting sc ch is 45, then i ch 1 and turn, how am I only doing 44 in row 2? Do i skip one on the end? Its throwing off my next row count or leaving me with piece sticking out. Does that make sense? TIA!!
Hi Amanda,
Thank you for your comment. I am so excited that you’re getting started at tapestry with my Farmhouse potholders!
So, with tapestry crochet, it is always better to carry the second strand of yarn even in rows where you’re only using one color. This will avoid distortions and uneven tension in your finished piece.
Also, when turning your work at the end of one row/beginning of the next row, make sure to pass your unused color on the back of your work when you are crocheting on the right side, and on the front of your work when you are crocheting on the wrong side. Otherwise, you’d see the second color peeking through at the beginning of some rows on the right side, which is what you’re seeing right now if I understood correctly.
Also, to avoid seeing the carried yarn in between stitches, pull it gently every now and then, but don’t pull too hard otherwise you’ll shrink your work. And make sure to crochet quite tight so that the second color is well hidden inside your stitches!
For the stitch count, yes, you have to skip the very first st because the initial ch-1 counts as your first st. So, make sure not to skip that one ch/st at the end of the next row otherwise your rows will start getting shorter and shorter.
I hope this was clear enough… If you have other questions or doubts, don’t hesitate to leave me a message or e-mail, I’ll be happy to help!
Have a nice Sunday,
Raffaella
Hi Raffaella,
Question on hanging loop, you have chain 20 and sc 25. Am I putting 2 sc in some of the chains? Love the horse. Making it for mother-in-law who loves horses.
Hi Gayle,
Sorry that the pattern is not so clear on the hanging loop, I’ll try to improve it asap.
In the meantime, here’s how to do it.
After chaining 20 and slip stitching into the last st of row 45, you should have a loop formed by those 20 ch. Then, all you do is crocheting inside that loop. So, not into the single chains but into the loop itself. You basically fill the loop up with single crochet stitches.
I am not sure if this helped. If it didn’t, don’t hesitate to let me know and I’ll try to add some pics!
Looking forward to seeing your potholders 🙂
Best wishes,
Raffaella
Hi Raffaella,
That definitely helped but I just did it through the chains for now. I thought you could have meant that but it all worked out. My mother-in-law is going to cry over this gift at Christmas. Thank you so much for sharing your pattern and time. It is much appreciated.
Thank you,
Gayle
Madam no doubt it is very nice but can you pl send the graph l would like to do this by knitting pl
Hi, thank you so much 🙂
The graph is available in the paid, PDF version of the pattern. You can purchase it in both my Ravelry and LoveCrafts stores (the links are in the post)