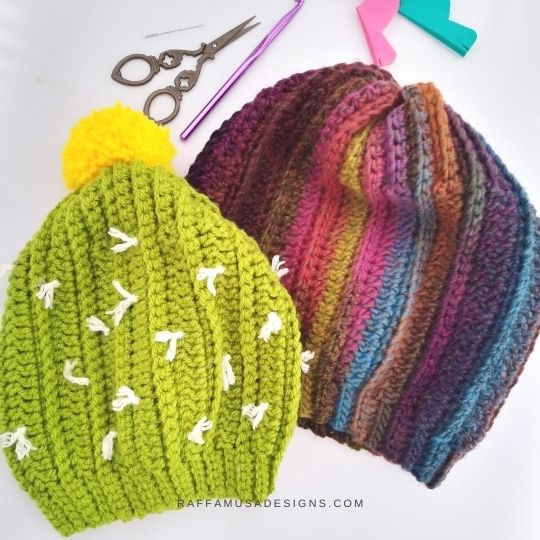
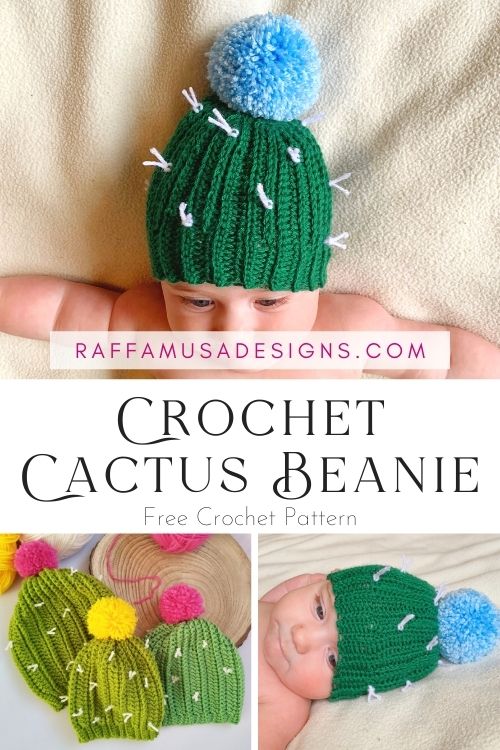
The crochet Cactus Beanie is a super fun pattern for babies and toddlers.
The first “cactus beanie prototype” has been an abandoned work-in-progress sitting somewhere in my craft room for a very long time. But as new babies and toddlers are appearing in my family and circle of friends, I thought it was time to finally finish it, plus grade it a little!
And here we are, the Cactus Beanie pattern is finally ready for you.
Don’t worry, those spines won’t prick you. This will be the softest cactus you’ll ever squish!
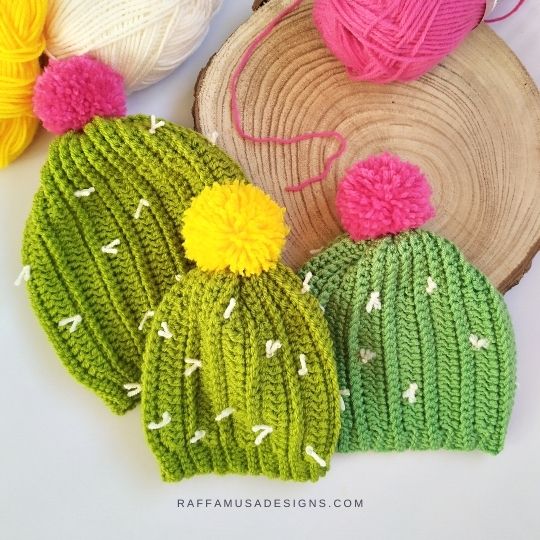
And if you would like to make a matching Cactus Beanie for older children and adults, check the adaptation of the pattern for larger sizes (toddler to adult) HERE!
Construction
To obtain a cactus/succulent look, I crocheted this beanie from side to side. This way, it is easier to create a vertical ribbed texture.
The trick is to combine stitches worked in the back loop only (BLO) with stitches made in the third loop. If you are not familiar with working in the BLO or in the third loop, then I suggest you go and take a look at this posts first:
To complete the beanie, the finished flat piece is then seamed along the short sides and closed at the top.
SIZE & YARDAGE
The pattern is written for sizes 0-3 Months (3-6 Months, 6-9 Months, Toddler). Make sure to check your gauge before starting crocheting your beanie!
| Size | Head Circumference | Yardage |
| 0-3 Months | 13″-14.2″ (33-36 cm) | 90 yds, 83 m |
| 3-6 Months | 14.6″-16″ (37-40 cm) | 109 yds, 100 m |
| 6-9 Months | 16″-17″ (40-43 cm) | 129 yds, 118 m |
| Toddler | 16.5″-18″ (43-46 cm) | 148 yds, 135 m |
A special Thank you to my Testers
Since all my baby models live far away from me, I couldn’t try the beanie on any of them. So, I really want to thank my testers for their help with making sure that this pattern actually works!
And also, big thanks to their babies for being the cutest models!
The cute baby that you see in the Pinterest pin below is Emily’s daughter. You can find Emily on Etsy at CrowchetCreations and Instagram!
Note: this post contains affiliate links. This means that if you purchase something through the links on my blog, I might earn a commission. This will not have any effect on the price you pay. For more info, please, see my Privacy Policy.
AD-FREE DOWNLOADABLE PATTERN
Grab the ad-free, printable PDF pattern of the Cactus Beanie in my Ravelry, LoveCrafts, and Etsy stores!
MATERIALS
- 5.0-mm (H-8 USA, 6 UK) Crochet Hook
- DK, #3 Light Yarn in green (see Sizes & Yardage), and white (2 yds/2m)
- Tapestry Needle
- One Pompom
Yarn Suggestions
I used both Paintbox Yarns Simply DK (color Lime Green, 128) and Schachenmayr Soft&Easy (color Apple, 72).
Feel free to use any equivalent DK weight yarn.
Abbreviations (US Terms)
BLO – Back Loop Only
Ch – Chain
FSC – Foundation Single Crochet
Hdc – Half Double Crochet
RS – Right Side
Sc – Single Crochet
Sl St – Slip Stitch
St – Stitch
WS – Wrong Side
Yo – Yarn Over
Special Stitches
Back Loop Only Stitches
Learn how to crochet Back Loop Only (BLO) stitches in this blog post, and read further down for a special note about BLO sl sts!
Foundation Single Crochet
Check my step-by-step tutorial on how to foundation single crochet.
Third Loop Half Double Crochet
For a detailed explanation, see this post on how to crochet in the third loop.
BLO Slip Stitches
In this pattern, you will have to BLO sl st in order to create the brim of the beanie.
Slip stitches always require a little bit of extra attention because it is very easy to miss them!
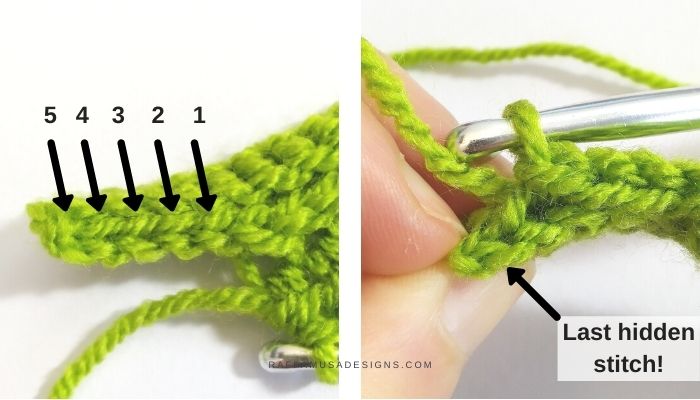
Especially the first slip stitch of a row tends to hide very well, and you risk missing it at the end of the following row. So, make sure to count your stitches in order not to lose any.
In the example shown in the picture, you can see the 5 slip stitches at the beginning of row 2. You see that when working on row 3, you need to pay extra attention to that last hidden slip stitch.
Since it is very difficult to actually see the BLO of that st, what I do is simply “fishing” the loop out with my hook. I know the loop is there, so I just stab my hook in the work and find the loop!
Gauge
Make a gauge swatch as follow:
Ch 19.
Row 1. Sc in the second ch from your hook and in each ch across. (18 sts)
Row 2. Ch 1 (does not count as a st), turn. BLO hdc across.
Row 3. Ch 1, turn, third loop hdc across.
Row 4-5. Ch 1, turn. BLO sc across.
Repeat Rows 2-5, then rows 2-3 once more.
18 sts for 11 rows in 4″ (10 cm)
Cactus Beanie – Free Crochet Pattern
Ch 29 (32, 35, 38).
Row 1. Sc in each back bump. (28 (31, 34, 37) sts)
Alternatively, FSC 28 (31, 34, 37).
Row 2 (WS). Ch 1 (does not count as a st here and in the rest of the pattern), turn. BLO sl st 5 (5, 6, 6), BLO hdc 17 (18, 20, 22), BLO sc 6 (8, 8, 9). (28 (31, 34, 37) sts)
Row 3 (RS). Ch 1, turn. BLO sc 6 (8, 8, 9), third loop hdc 17 (18, 20, 22), BLO sl st 5 (5, 6, 6). (28 (31, 34, 37) sts)
Row 4. Ch 1, turn. BLO sc 28 (31, 34, 37). (28 (31, 34, 37) sts)
Row 5. Ch 1, turn. BLO sc 23 (26, 28, 31), BLO sl st 5 (5, 6, 6). (28 (31, 34, 37) sts)
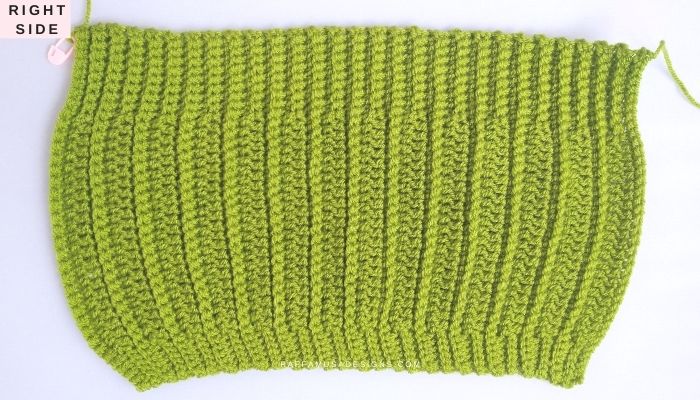
Keep repeating rows 2-5 until you reach row 45 (49, 53, 57) (or until you reach your desired width. The width should be slightly smaller than the head circumference).
Fasten off leaving a tail of approximately 30″ (75 cm) for seaming.
Assembly
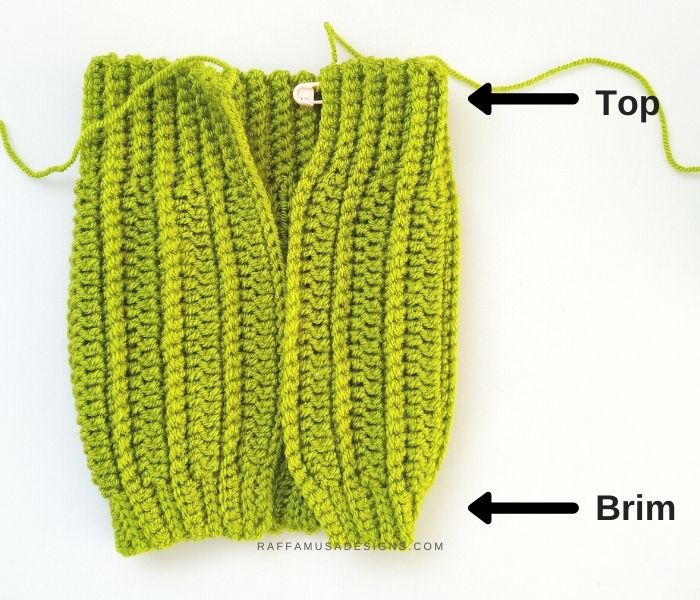
Using the mattress stitch or your favorite method, seam the first and last rows together.
For a neater result, I suggest you work your seam with the wrong side out.
Pass a length of yarn through the top of the beanie and cinch it closed.
Fasten off and weave in your ends.
Finishing
Attach a pompom on top of the beanie.
For the spines, cut short lengths of white yarn (approximately 4″, 10 cm) and knot them around some of the stitches on the right side of the beanie. After knotting, cut the yarn so that you have spines about half an inch long (1 cm).
Your crochet Cactus Beanie is ready!
I hope you liked this pattern and I’d love to see your version of it! Please, share your projects on Facebook or Instagram using the hashtag #raffamusadesigns
If you liked the Crochet Cactus Beanie, you might also be interested in these blog posts!



I LOVE THIS! : )
Thank you.
Now just how cute is this!?!?!?! I love it!!
Linda H.
Thank you so much 🙂
Love this!!! and perfect for my desert-dwelling self. Thanks!
Hoi Raffaella,
Ben jij Nederlands? Woon jij in Hoorn? ik kom uit Zeeland (Goes), maar woon in ‘t buitenland al 60 jaar. Bedankt voor de leuke patronen!!
Groetjes,
Jo
Hi Joann,
Nice to meet you 🙂
Yes, I live in Hoorn. Moved here a bit more than a year ago but I’ve been in the Netherlands for more than 7 years already! Where do you live now?
These are adorable! How fun for littles to “wear a cactus!“
These are fantastic! I’d love to be able to make one for myself too! Do you have any suggestions on how I might do that please?
Thank you so much 😍
Hi Mel, I am in the process of updating the pattern for bigger sizes. I’ll send out an e-mail as soon as I’m done with it 🙂
I love this hat. How would i make it this in other sizes?
Hi Rachel, I am currently working on bigger sizes, and I hope to update the pattern soon. I’ll send out an e-mail as soon as I have it done 🙂
Thank you so much! I can’t wait
i would love the adult size pattern too!
I’m working on it and it’s coming soon 🙂